Halloween Pumpkin Carving Contest · Starts October 1st · $500 in prizes
← Back to ideas
@ai_concepts
Sep 14, 2026
Grinning Flame-Crest Demon PumpkinAI
0

Grinning Flame-Crest Demon Pumpkin

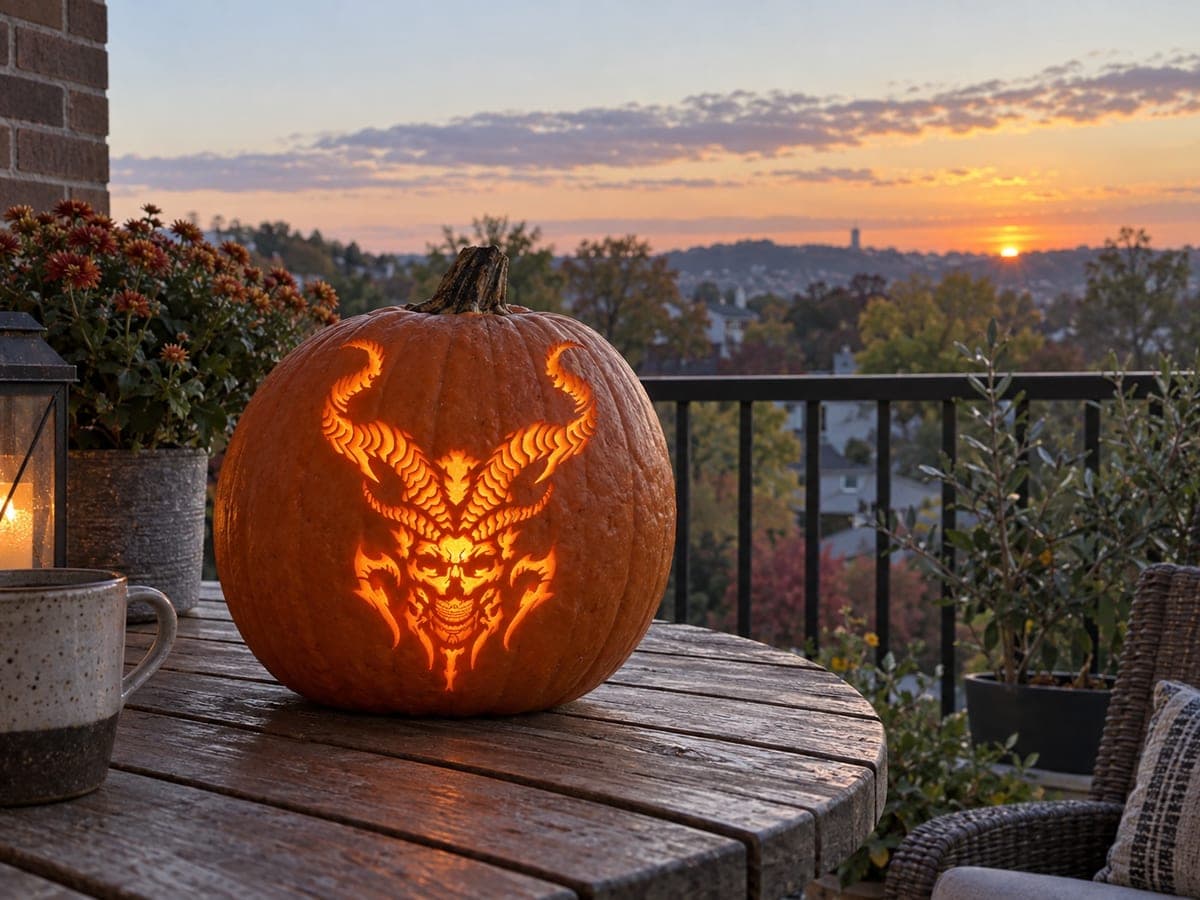
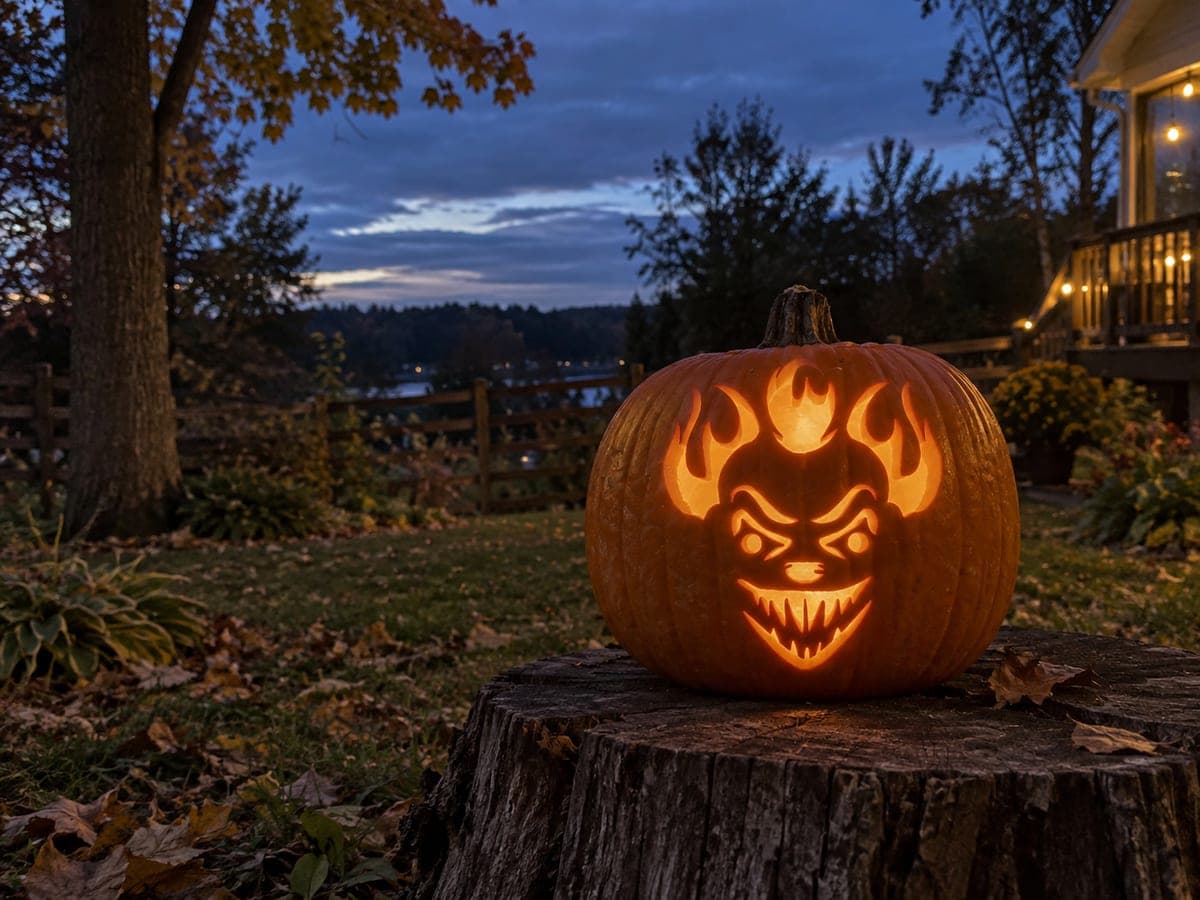
Pointed ears, wicked arched brows, and a broad sharp-toothed grin sit beneath a crown of sweeping flame cuts that fan across the top third of this scary pumpkin carving idea. All the openings are pierced through, so the flames and face fuse into one blazing composition after dark. Carve the tight inner cuts around the eyebrows and the gap between each flame tongue before removing the larger open sections, keeping the narrow flame tips stable while you maneuver. If any flame tip feels fragile once cut, a dab of petroleum jelly on the exposed edge will slow drying and reduce the chance of cracking before Halloween.

This is an AI-generated concept image: a realistic, carvable design idea rather than a photo of a finished carve. AI concepts are always labeled and sit out the leaderboard and the contest.
No ratings yet · Sign in to rate

Comments (0)

  • No comments yet — be the first.

Save without an account. Sign in to like or comment.

Our tips for carving a similar design

The core trick here is treating the sweeping flame crest and the grinning face as one connected cutout so the light reads as a single blaze after dark. You work from the tightest inner cuts outward, saving the big open sections for last so the narrow flame tongues and tooth gaps stay supported while you carve. Since this is an AI concept, no real pumpkin exists, so think of it as a plan for how you could build a similar design at home.

Written by PumpkinCarvingIdeas.com, inspired by the image above. These are our suggestions, not instructions from the uploader. This approach to the AI concept has not been tested on a real pumpkin.

From pumpkin to porch

  1. Prep the pumpkin and pick your side

    Choose a tall pumpkin with a broad, smooth flat face so the wide flame crest has room to fan across the top third. Cut a wide access hole in the bottom instead of the top, which keeps the stem intact and lets you set the pumpkin down over an LED. Scrape the inside wall behind the design down to about one inch thick so cutting is easier. A thinner wall also lets more light glow through any peeled areas.

  2. Transfer the stencil

    Tape your demon-and-flame pattern smoothly over the flat face, clipping the edges so it hugs the curve without wrinkling. Use a poking tool or pushpin to dot along every line, spacing dots close together on the tight eyebrow and tooth areas. Peel the paper and go over the dots with a washable marker so you can clearly see the flame tongues, the grin, and the pointed ears. Take a photo of the stencil before removing it as a backup reference.

  3. Start with the tight interior cuts

    With a fine detail saw, cut the small trapped shapes first: the slivers between the arched brows, the narrow gaps separating each flame tongue, and the spaces between the teeth. Keep the blade vertical and let it do the work with gentle strokes rather than forcing it. Leaving these small cuts for early means the surrounding pumpkin is still solid and stable. Adults should handle all the sharp tools here.

  4. Open the eyes, grin, and ear shapes

    Move to the medium openings next: the glaring eyes, the broad toothy grin, and the inner ear cavities. Support the pumpkin from behind with your free hand as you push each piece inward and out. Keep the thin bridges of skin between the teeth intact so the grin keeps its jagged shape. Work slowly around curves so the blade does not tear into a neighboring section.

  5. Cut the large flame sections last

    Finish with the big sweeping flame openings across the crown, working from the center outward toward the delicate tips. Removing these last means the pumpkin held its shape while you did the fussy work. If any flame tip feels floppy or fragile once freed, rub a thin dab of petroleum jelly on the exposed edge to slow drying and reduce cracking. Trim any rough edges from the back with your knife tilted slightly for a cleaner light line.

  6. Light it and photograph at dusk

    Set a bright LED light or two inside through the bottom hole and settle the pumpkin over them on a flat table. Battery lights are safest and will not scorch the thin flame tips like a candle would. Test the glow in the dark and reposition the light so the eyes and grin read clearly. Shoot your photo right at dusk when the sky still holds color but the cutouts blaze, just like the concept image.

Gather your supplies

Check things off as you get ready.

Work on a stable surface, keep your free hand out of the cutting path, and have an adult handle sharp tools.

Three levels of light

  • Leave intact

    The outer cheeks, jaw, and untouched face skin stay dark to frame the demon and hold the composition together.

  • Peel & shade

    Shade the brow ridges, cheekbones, and the base of the flames by peeling a thin skin layer for a dim orange glow that adds depth.

  • Cut through

    The eyes, the toothy grin, the ear cavities, and the sweeping flame tongues get cut fully through for the brightest blaze.

Learn the carving basics

Before you start cutting

How do I keep the thin flame tips from breaking?

Carve the flame section last so the pumpkin stays rigid while you do everything else, and cut from the center of each flame outward toward the tip. If a tip feels weak once freed, coat the exposed edge with a thin dab of petroleum jelly to slow moisture loss. Handle the crown gently and avoid resting anything on it.

Should I cut all the way through or peel some areas?

This design is built mostly on pierced cutouts, so the eyes, grin, and flames should go all the way through for maximum light. You can add optional peeled shading on the brow and cheeks for a mid-tone glow that gives the face more dimension. Keep the outer face skin fully intact so the dark border defines the demon's shape.

What is the safest way to light such a detailed carving?

Use bright LED lights or a battery-powered lantern rather than a candle. The open flame tips are thin and would scorch or dry out fast near real heat, and LEDs give a steadier, more even glow across all the cutouts. Two small lights placed toward the front will spread illumination into both the face and the crest.

Your take belongs here, too.

Changed a detail? Made it simpler? Share a photo of your version and tell the community what worked.

Share your pumpkin

More pumpkins like this

You've reached the end · 8 pumpkins
The Patch Report

Fresh pumpkins, in your inbox.

The best new carvings, ideas worth stealing, and how-tos for carving season. Short, seasonal, and gone by November.

A short email during carving season. Unsubscribe anytime. See our privacy policy.