Halloween Pumpkin Carving Contest · Starts October 1st · $500 in prizes
← Back to ideas
@ai_concepts
Sep 13, 2026
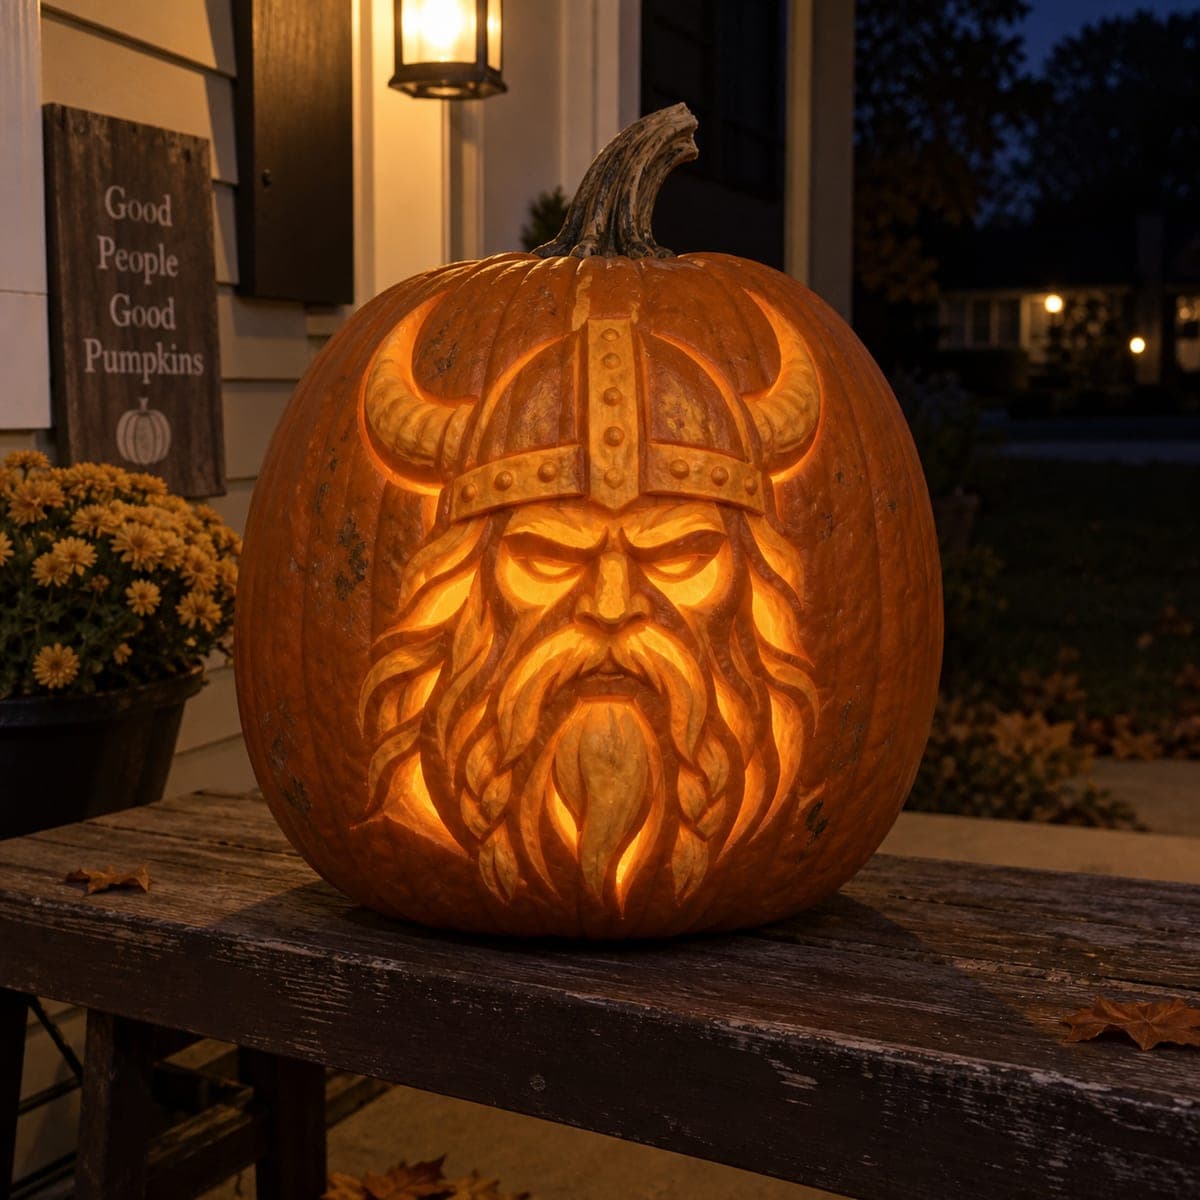
Fierce Viking Warrior Pumpkin With Horned HelmetAI
0

Fierce Viking Warrior Pumpkin With Horned Helmet

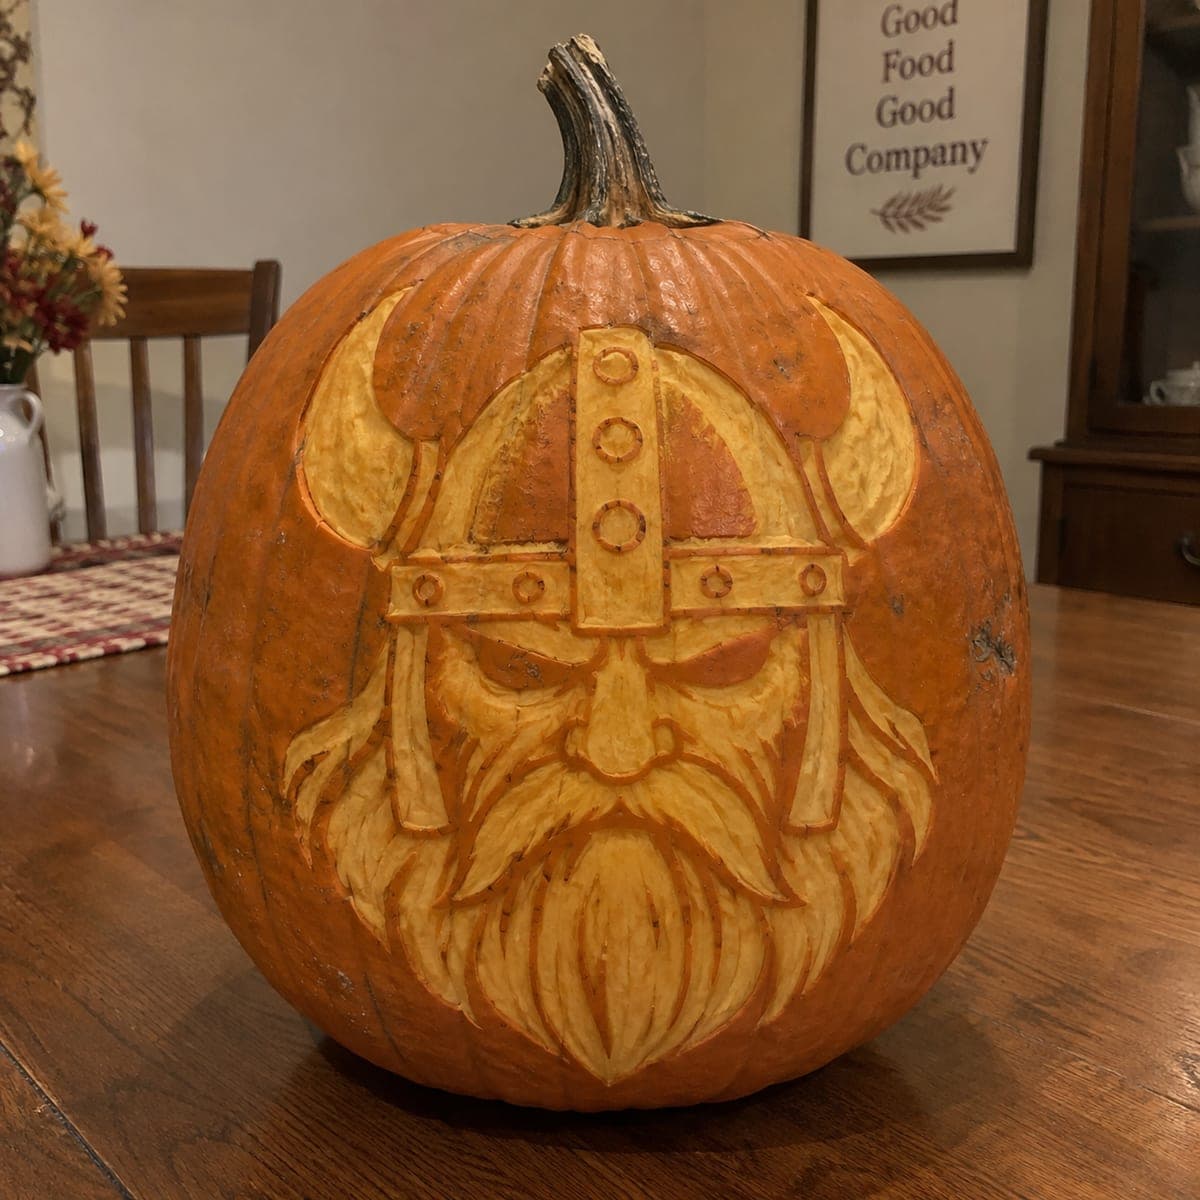
A glowering Viking warrior in a riveted horned helmet emerges from this pumpkin in deep sculpted relief, his braided beard flowing nearly to the base. Varying carve depths do the shading, so backlighting from a strong LED makes the helmet and cheekbones glow while the recesses stay dark. Rough out the helmet and face planes first, then detail the beard strands last, and display it at eye level on a bench or wall.

This is an AI-generated concept image: a realistic, carvable design idea rather than a photo of a finished carve. AI concepts are always labeled and sit out the leaderboard and the contest.

No ratings yet · Sign in to rate
Comments (0)

  • No comments yet — be the first.

Save without an account. Sign in to like or comment.

Our tips for carving a similar design

The whole face is built from shading rather than cut-through holes, so you sculpt the surface at different depths instead of making windows for the light. Peel the skin thin over the helmet and cheekbones so they glow bright, and leave the eye hollows and beard shadows nearly untouched so they stay dark. Rough out the big planes first, then save the fine braided beard strands for last.

Written by PumpkinCarvingIdeas.com, inspired by the image above. These are our suggestions, not instructions from the uploader. This approach to the AI concept has not been tested on a real pumpkin.

From pumpkin to porch

  1. Pick a tall pumpkin and transfer the design

    Choose a large, evenly shaped pumpkin with a smooth front face and firm walls, since deep relief needs thick flesh to carve into. Tape your printed pattern flat to the front and poke the main outlines with a pin or transfer tool, marking the helmet edge, horns, eyes, nose, and beard boundaries. Keep your dot lines close together so the shape reads clearly once the paper comes off. An adult should handle all the sharp tools throughout.

  2. Open the back and hollow it out

    Cut a wide access hole in the back of the pumpkin, not the top, so nothing blocks the light behind the face. Scrape the inside wall behind the face down to about one inch thick using a sturdy loop tool. A thinner front wall lets more glow pass through when you shade later. Take your time and check the thickness by pressing gently as you work.

  3. Rough out the helmet and face planes

    With a small gouge, shave away the top skin layer to define the big shapes first: the domed helmet, the two horns curving out to the sides, and the flat brow and cheek areas. Do not cut all the way through anywhere yet, since this design relies on surface depth. Work in shallow passes and step back often to check that the helmet sits above the face and the horns read as separate pieces. Leave the rivet dots on the helmet band raised by carving around them.

  4. Shade the face with varied depth

    Now peel the skin thin over the high points like the cheekbones, nose bridge, and helmet dome so they will glow brightest. Carve the eye sockets, the sides of the nose, and the mouth deeper but still not through, letting those recesses stay darker. This depth contrast is what gives the warrior his glowering, three-dimensional look. Keep a light behind the pumpkin as you go so you can preview the glow and adjust.

  5. Detail the braided beard last

    Save the flowing beard and mustache strands for the end, since they are the most delicate part. Use a small V-tool or detail knife to carve each braid as a raised rope with a shadowed groove beside it, keeping the strands connected to each other so nothing snaps off. Vary how deep you carve between strands to suggest the braid weaving down toward the base. Bridges of uncut flesh between locks keep the beard strong and readable.

  6. Light it and display at eye level

    Set a bright LED puck or a cluster of LEDs inside, not a candle, so the shaded planes glow evenly and safely. Aim the light toward the front wall and test in a dark room, deepening any recess that looks too washed out. Place the finished pumpkin on a bench or shelf at about eye level so the face meets viewers head on. Snap your photo at dusk when the porch light and the pumpkin glow balance nicely.

Gather your supplies

Check things off as you get ready.

Work on a stable surface, keep your free hand out of the cutting path, and have an adult handle sharp tools.

Three levels of light

  • Leave intact

    The eye hollows, deep beard grooves, and shadowed sides of the nose and mouth stay as untouched or barely cut skin for dark definition.

  • Peel & shade

    The helmet dome, cheekbones, nose bridge, and raised beard braids get skin-peeled thin for a warm mid glow.

  • Cut through

    Reserve full cutouts for a few narrow gaps between beard strands or under the helmet edge if you want a couple of bright accents, done last.

Learn the carving basics

Before you start cutting

Do I need to cut all the way through for the face to light up?

No, and that is the key to this design. Almost the entire warrior is made by shading, meaning you peel or thin the skin to different depths instead of making holes. A strong LED behind a one-inch wall will glow through the thinned areas, so save true cutouts for just a few small accents.

How do I keep the braided beard from breaking off?

Carve the beard as raised relief rather than separate free-floating pieces, and leave uncut flesh bridging each braid to its neighbors. Keep the grooves between strands shallow enough that the whole beard stays one connected mass. Working slowly with a small V-tool gives you control over each strand without gouging too deep.

Why open the back instead of the top?

A back opening lets you place the light directly behind the face with nothing in the way, so the shaded planes glow evenly. It also keeps the stem and the top of the helmet intact for a cleaner silhouette. Cut the access hole wide enough to fit your hand and an LED comfortably.

Your take belongs here, too.

Changed a detail? Made it simpler? Share a photo of your version and tell the community what worked.

Share your pumpkin

More pumpkins like this

You've reached the end · 8 pumpkins
The Patch Report

Fresh pumpkins, in your inbox.

The best new carvings, ideas worth stealing, and how-tos for carving season. Short, seasonal, and gone by November.

A short email during carving season. Unsubscribe anytime. See our privacy policy.