Halloween Pumpkin Carving Contest · Starts October 1st · $500 in prizes
← Back to ideas
@ai_concepts
Sep 10, 2026
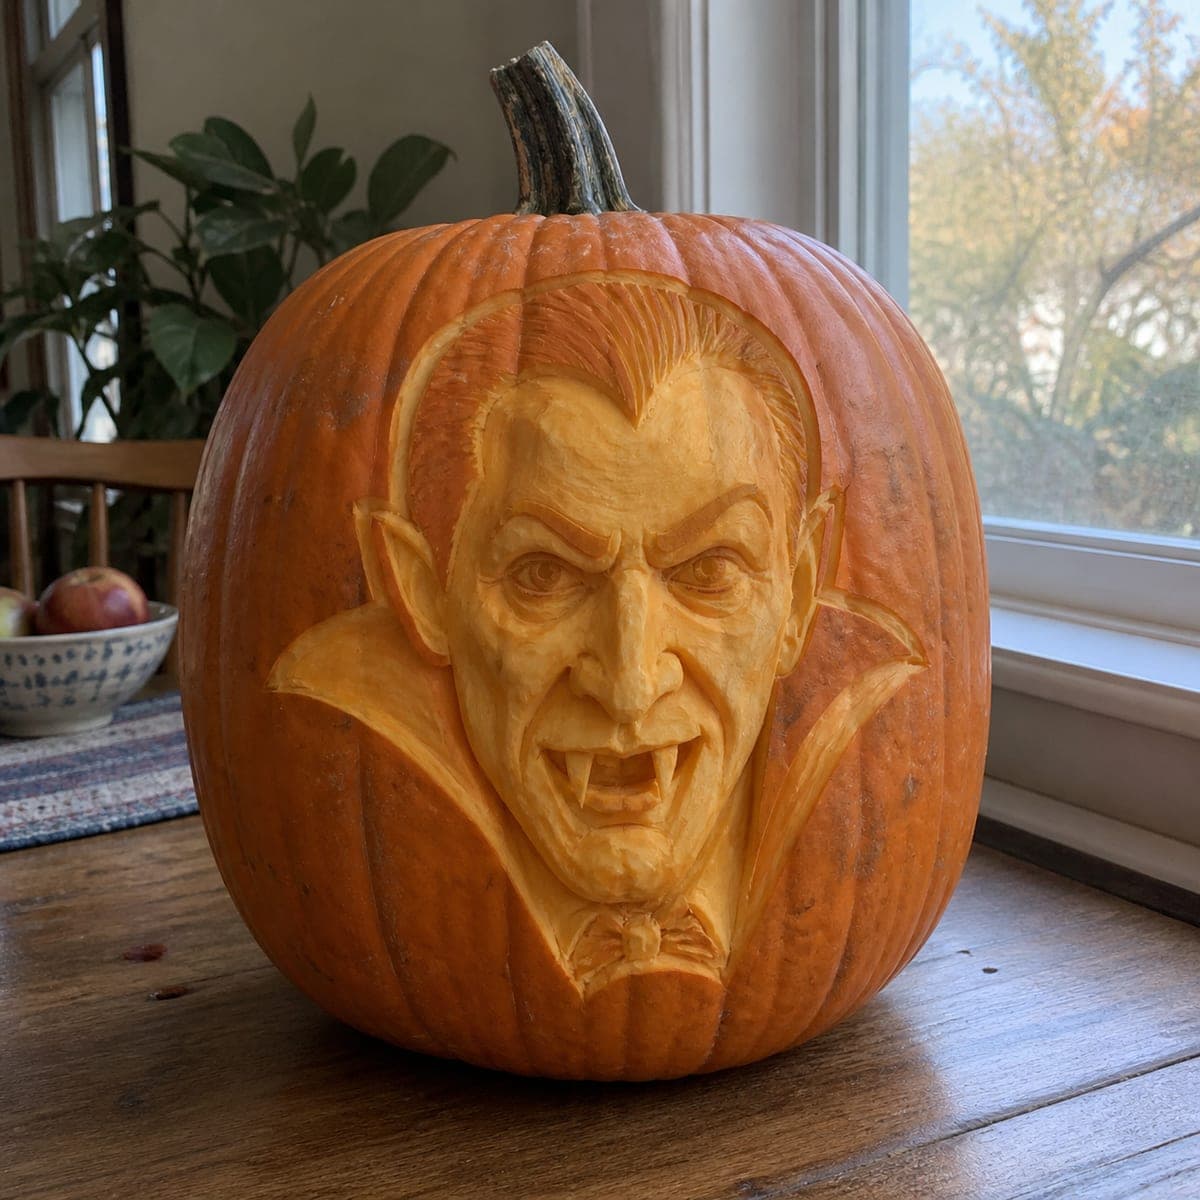
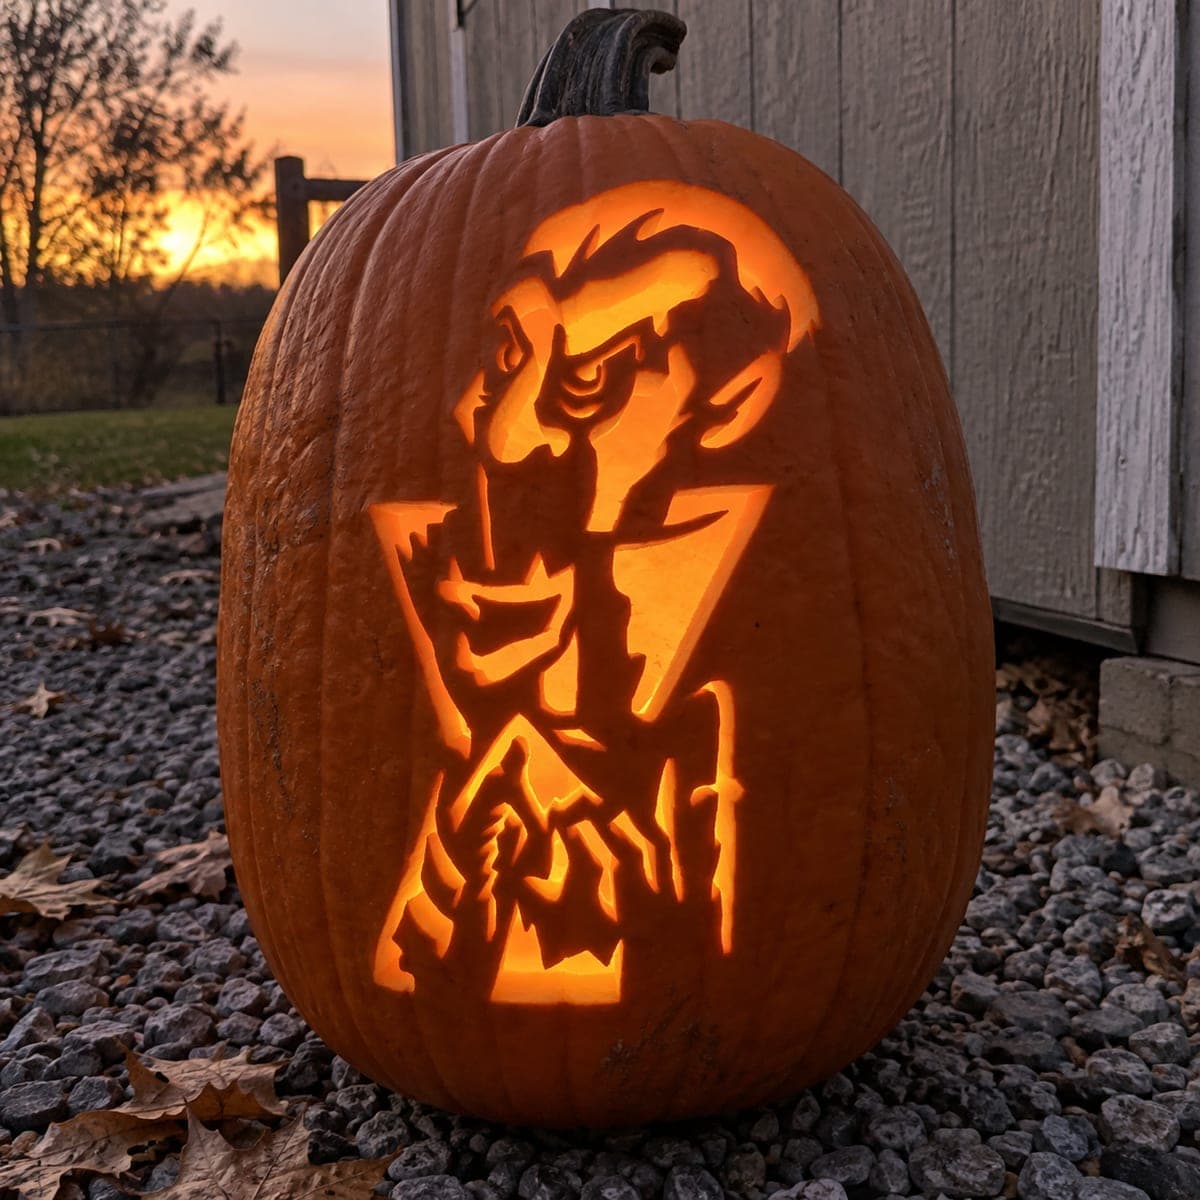
Classic Dracula Vampire Portrait Pumpkin CarvingAI
0

Classic Dracula Vampire Portrait Pumpkin Carving

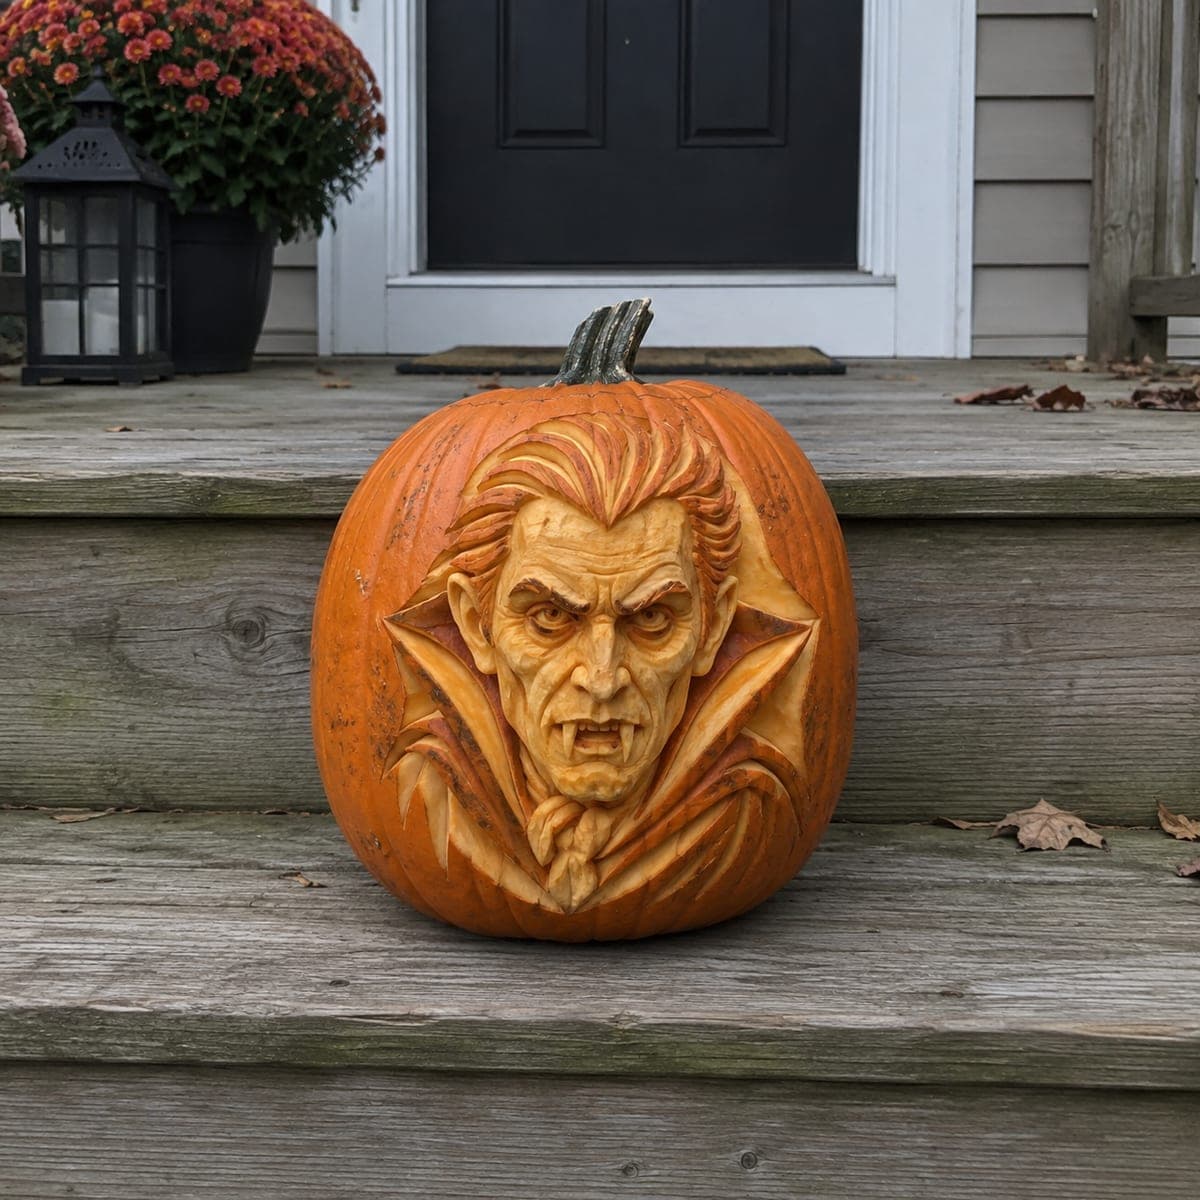
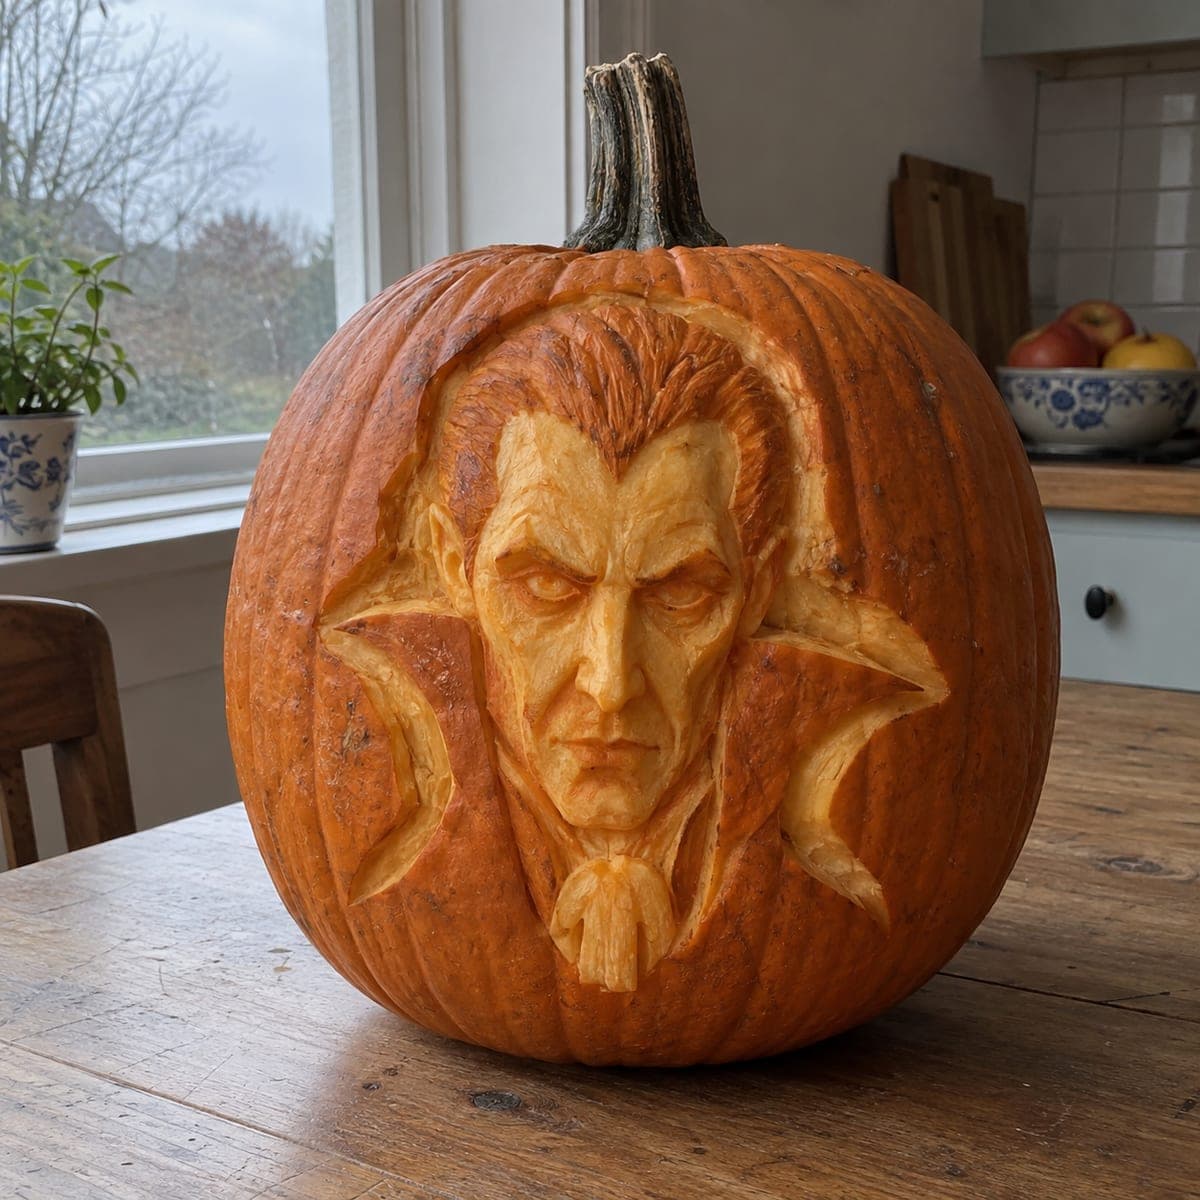
Complete with widow's peak, high collar, and bared fangs, this Dracula portrait is sculpted into the pumpkin in deep classic-horror relief. The face is shaved smooth for pale skin while the collar and hair are cut in bold planes for drama. Work under a single side lamp as you carve so the shadows you see match the ones your porch light will cast.

This is an AI-generated concept image: a realistic, carvable design idea rather than a photo of a finished carve. AI concepts are always labeled and sit out the leaderboard and the contest.

No ratings yet · Sign in to rate
Comments (0)

  • No comments yet — be the first.

Save without an account. Sign in to like or comment.

Our tips for carving a similar design

This is a relief portrait, so the whole face is shaped by shaving skin to different depths rather than cutting all the way through. The core trick is contrast: the pale face is scraped smooth and shallow while the hair and high collar are carved in bold, deep planes to throw shadow. Plan to work slowly from a printed guide, sculpting shape before you ever think about full cutouts.

Written by PumpkinCarvingIdeas.com, inspired by the image above. These are our suggestions, not instructions from the uploader. This approach to the AI concept has not been tested on a real pumpkin.

From pumpkin to porch

  1. Pick a tall pumpkin and set your light

    Choose a large pumpkin with a broad, flat front face and few deep ribs so the portrait sits cleanly. Clean the front with a dry cloth and dry it well. Set up a single LED lamp off to one side, the way a porch light would sit, so the shadows you carve match what viewers will see. An adult should handle all sharp tools throughout.

  2. Transfer the Dracula outline

    Tape a printed stencil over the front and poke the main lines with a pin or a corn holder: the widow's peak, brows, cheeks, jaw, fangs, and the tall pointed collar. Keep the dots close together on curves so the shape reads clearly. Peel the paper and lightly connect the dots with a washable marker. Double check the face is centered before any cutting starts.

  3. Rough out the deep planes first

    With a loop tool, remove skin and a shallow layer of flesh from the background around the head and inside the collar shapes. This drops the face forward so it reads as a raised portrait. Keep the collar tips and hair ridges standing tall as the highest points. Work in thin passes and stop often to check depth against your side light.

  4. Sculpt the face and features

    Switch to a smaller ribbon or detail loop to shape the brow, nose, cheekbones, and sunken eyes. Scrape the face down to smooth, pale flesh so it glows softly and looks like skin. Round the fangs gently and leave a thick base under each one so they stay attached and do not snap. Carve the hair as combed-back grooves rather than deep gouges.

  5. Refine shadows and add fine lines

    Deepen the eye sockets, the line beside the nose, and the corners of the mouth to give the face its menace. Use a V-gouge for the hair strands and the folds of the collar. Keep checking under the side lamp and darken any area that needs a stronger shadow by scraping a touch deeper. Leave narrow ridges of skin as bridges wherever thin details meet.

  6. Light it and photograph

    Drop in a battery LED puck or two so the light rakes across the relief from inside and from your side lamp. Warm white LEDs flatter the pale face best. Mist the carved surface with water if it starts to dry and curl, and store it cool between showings. Shoot photos in dim light so the shadows carry the drama.

Gather your supplies

Check things off as you get ready.

Work on a stable surface, keep your free hand out of the cutting path, and have an adult handle sharp tools.

Three levels of light

  • Leave intact

    The dark background around the head and the deepest eye sockets stay as untouched skin for shadow.

  • Peel & shade

    The pale face, hair, and collar are scraped to a thin layer so they glow a soft dim orange.

  • Cut through

    Optional narrow slits at the pupils or mouth can be cut through for a few bright accents, saved for last.

Learn the carving basics

Before you start cutting

Do I cut all the way through anywhere on this design?

Mostly no. This is a relief portrait, so nearly everything is shading done by scraping skin and flesh to different depths. If you want a spark of brightness, you can cut one or two tiny slits at the pupils or between the fangs, but do those last so the face stays strong while you sculpt.

How do I keep the fangs from breaking off?

Carve them as rounded bumps rather than free-standing spikes, and leave a wide, thick base where each fang joins the lip. Since they are part of the relief and not cut out, they stay supported by the flesh behind them. Go slow with a small tool and resist over-thinning them.

This is an AI concept, so can a real pumpkin look like this?

Yes, a skilled carver can reach this look with patient relief shading, though it takes hours and an advanced hand. The key is choosing a big pumpkin with thick walls so you have room to sculpt depth. Keep collar tips and hair ridges as raised planes rather than delicate spikes and it will hold up.

Your take belongs here, too.

Changed a detail? Made it simpler? Share a photo of your version and tell the community what worked.

Share your pumpkin

More pumpkins like this

You've reached the end · 8 pumpkins
The Patch Report

Fresh pumpkins, in your inbox.

The best new carvings, ideas worth stealing, and how-tos for carving season. Short, seasonal, and gone by November.

A short email during carving season. Unsubscribe anytime. See our privacy policy.