Halloween Pumpkin Carving Contest · Starts October 1st · $500 in prizes
← Back to ideas
@ai_concepts
Jul 23, 2026
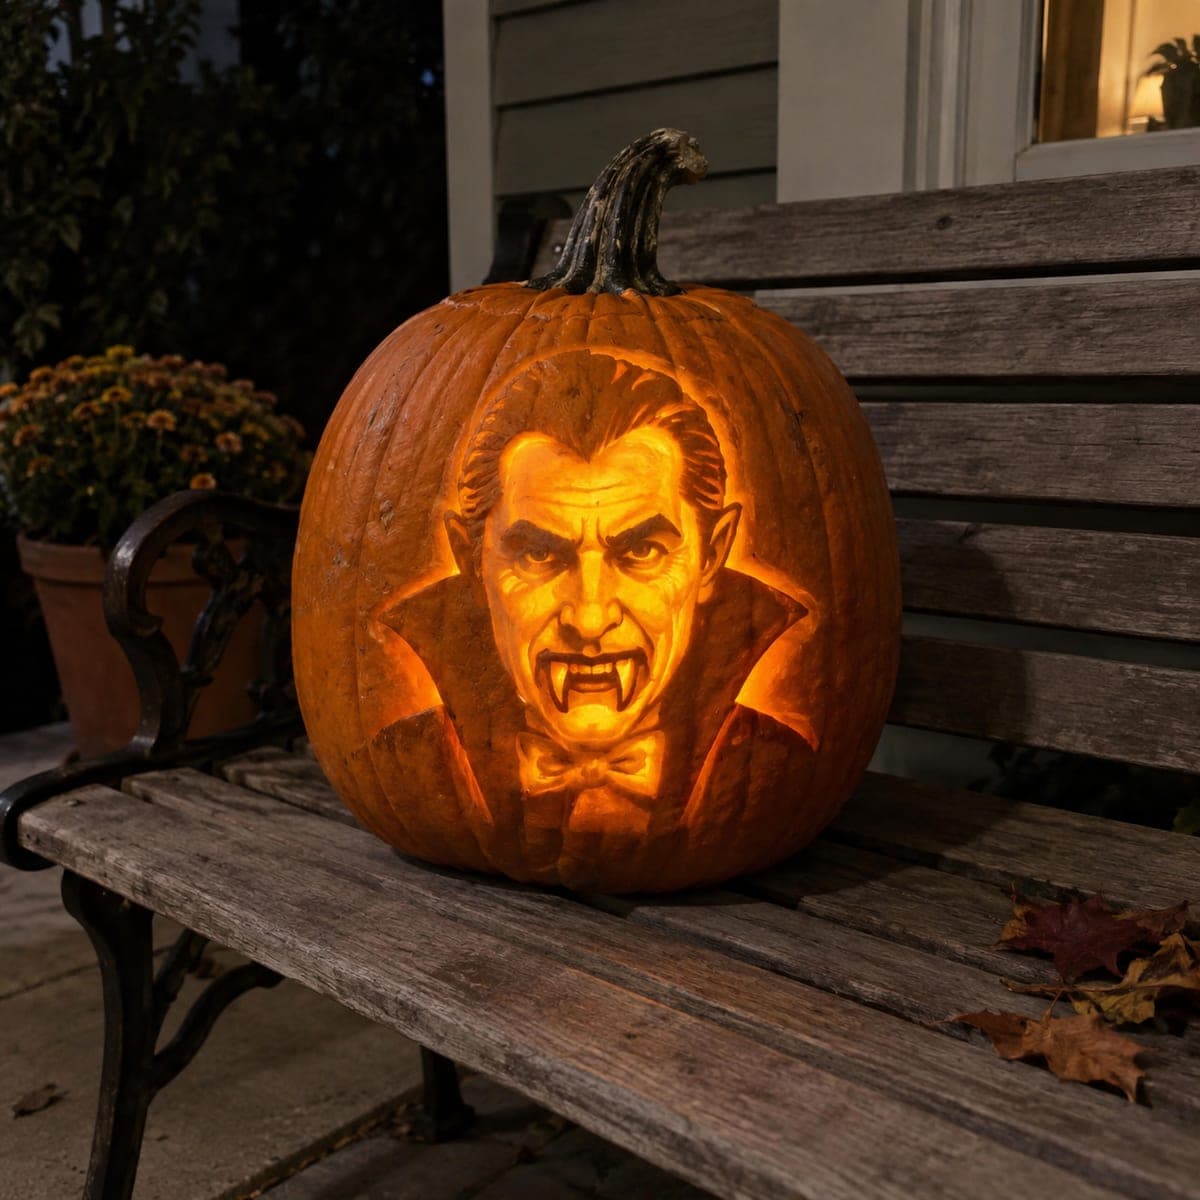
Classic Dracula Vampire Jack-O-Lantern PortraitAI
0

Classic Dracula Vampire Jack-O-Lantern Portrait

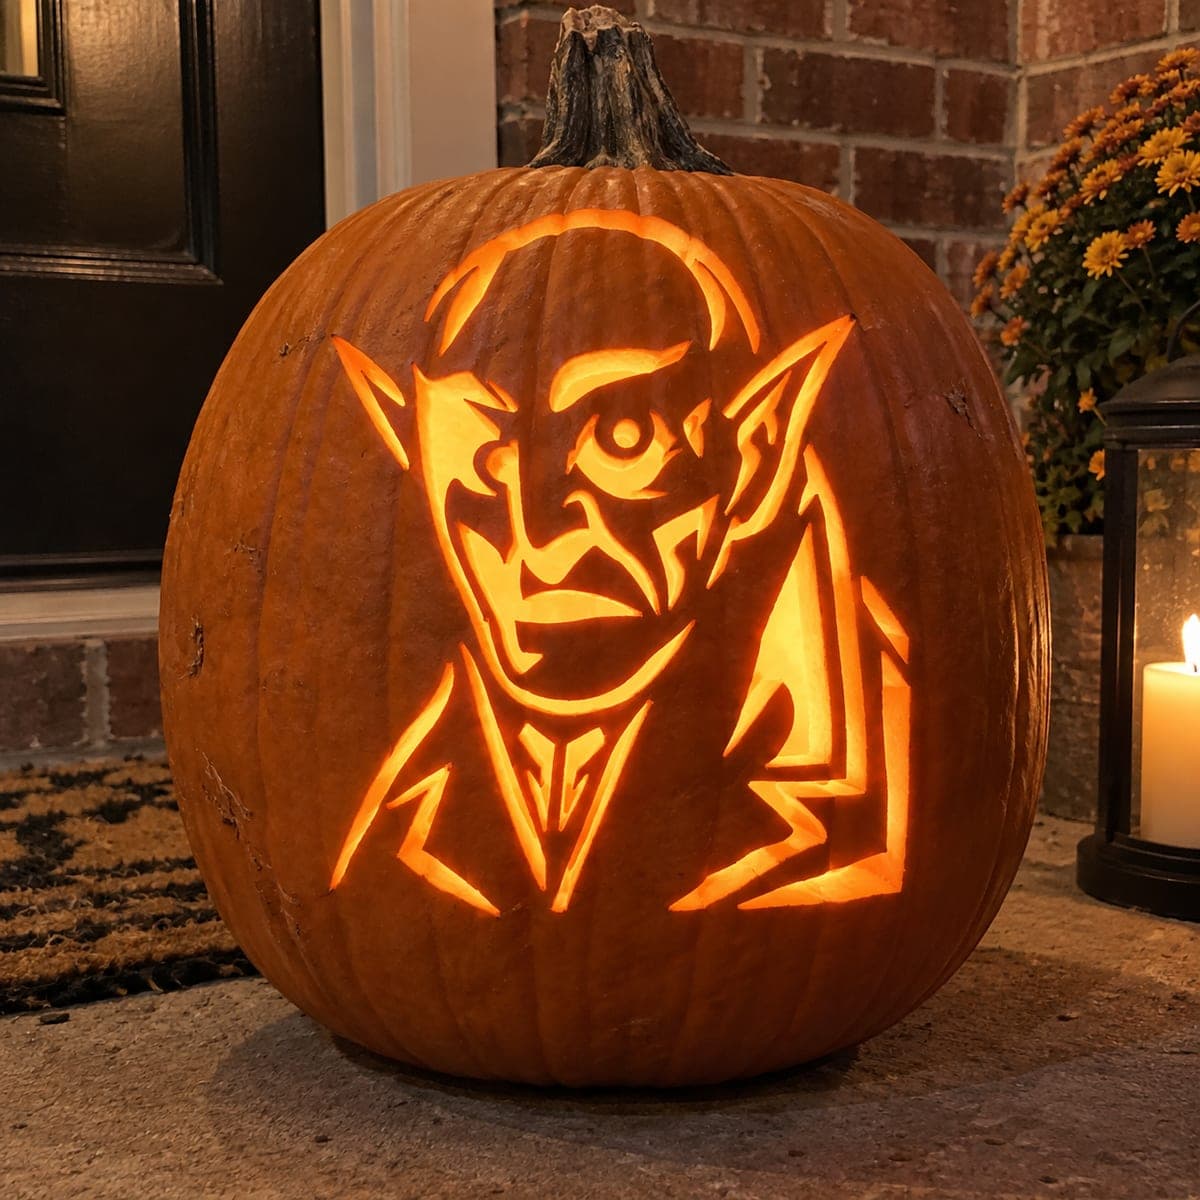
Slicked-back hair, arched brows, a high collar, and bared fangs give this Dracula jack-o-lantern the full classic-movie vampire treatment. The portrait uses three clear values: cut-through highlights on the face, mid-depth etching for the collar and bow tie, and untouched skin for the hair and cape. Carve the delicate fangs and eyes last with a fine blade, and use a flickering LED candle so the count seems to snarl in the dark.

This is an AI-generated concept image: a realistic, carvable design idea rather than a photo of a finished carve. AI concepts are always labeled and sit out the leaderboard and the contest.

No ratings yet · Sign in to rate
Comments (0)

  • No comments yet — be the first.

Save without an account. Sign in to like or comment.

Our tips for carving a similar design

This design leans on three clear light values to sell a face: bright cutouts light the skin, mid-depth peeling shapes the collar and bow tie, and untouched skin keeps the hair and cape dark. The trick is treating the pumpkin like a relief carving rather than a simple cutout, so you shave away skin to different depths instead of just punching holes. Plan your values before you touch a blade, because the contrast between glow and shadow is what makes the vampire snarl.

Written by PumpkinCarvingIdeas.com, inspired by the image above. These are our suggestions, not instructions from the uploader. This approach to the AI concept has not been tested on a real pumpkin.

From pumpkin to porch

  1. Transfer the portrait and pick a smooth panel

    Choose a large, evenly rounded pumpkin with a wide flat area for the face. Tape your stencil over the smoothest spot and poke the outlines with a needle tool or transfer with a dull pencil. Mark which zones are cutouts, which are peeled, and which stay untouched so you never lose track. Take a photo of the marked pumpkin for reference before the lines rub off.

  2. Open the lid and clean out the wall

    An adult should cut a lid from the bottom or the back rather than the top, which keeps the stem intact for looks. Scoop the pulp and scrape the inside wall behind the face down to about one inch thick. A thinner wall makes the shading steps much easier and lets more light through. Save some scraped shell in case you want to patch a slip later.

  3. Shade the collar and bow tie first

    Use a loop or ribbon tool to peel just the top skin off the collar and bow tie, leaving the orange flesh exposed for a dim mid glow. Work slowly and keep the depth even so these areas read as one soft value. Do not cut all the way through here, since these shapes only need to hint at light. Leave the hair, brows, and cape as untouched skin so they stay dark and frame the face.

  4. Carve the bright face last

    Now cut fully through the skin and flesh on the cheeks, forehead, and jaw so the face becomes the brightest part. Leave thin bridges of skin for the nose ridge, brow lines, and the creases that give the face its scowl. These bridges are what turn a bright blob into a recognizable snarling vampire, so keep them attached. Cut the large openings after the fine lines so the panel stays strong while you work.

  5. Detail the fangs and eyes with a fine blade

    Switch to a small detail saw or a craft knife for the fangs, keeping each one as a solid attached point rather than a fragile island. Carve the eyes as narrow slits or partial cutouts so they glare rather than glow wide open. Take your time here and make light passes, since these tiny shapes break easily. If a fang feels wobbly, leave a little extra flesh at its base for support.

  6. Light it and photograph in the dark

    Drop in a flickering LED candle or a warm LED puck, never a real flame, so the face glows steadily and safely. Set the pumpkin on a porch bench or step and dim the surrounding light to let the contrast pop. Rotate the light inside until the fangs and eyes catch the brightest glow. Snap your photo at dusk for that classic old-movie mood.

Gather your supplies

Check things off as you get ready.

Work on a stable surface, keep your free hand out of the cutting path, and have an adult handle sharp tools.

Three levels of light

  • Leave intact

    The slicked-back hair, arched brows, and the tall dark cape stay as untouched skin.

  • Peel & shade

    The high collar and bow tie get skin-peeled for a soft mid glow.

  • Cut through

    The cheeks, forehead, jaw, eyes, and fangs cut through for the brightest light.

Learn the carving basics

Before you start cutting

How do I keep the fangs from snapping off?

Carve them last and keep each fang as a solid point attached along its full base, not a thin floating sliver. Leave a little extra flesh where the fang meets the mouth for support. Make light passes with a fine blade rather than forcing a big cut.

This is shown as a concept image, so can a real pumpkin look like this?

Yes, but you will lean harder on relief shading than on cutouts to get the smooth face. Real pumpkin flesh can hold peeled mid-tones and attached bridges well if you keep the wall about one inch thick. Just expect the fine facial creases to look a bit more rustic than a rendered image.

How do I get the three values to actually read as a face?

Commit to the plan before carving and keep each zone at a consistent depth so it reads as one value. The dark untouched hair and cape need to stay fully skinned to frame the bright face. Test with your light inside partway through so you can adjust before cutting the big openings.

Your take belongs here, too.

Changed a detail? Made it simpler? Share a photo of your version and tell the community what worked.

Share your pumpkin

More pumpkins like this

You've reached the end · 8 pumpkins
The Patch Report

Fresh pumpkins, in your inbox.

The best new carvings, ideas worth stealing, and how-tos for carving season. Short, seasonal, and gone by November.

A short email during carving season. Unsubscribe anytime. See our privacy policy.