Halloween Pumpkin Carving Contest · Starts October 1st · $500 in prizes
← Back to ideas
@ai_concepts
Aug 6, 2026
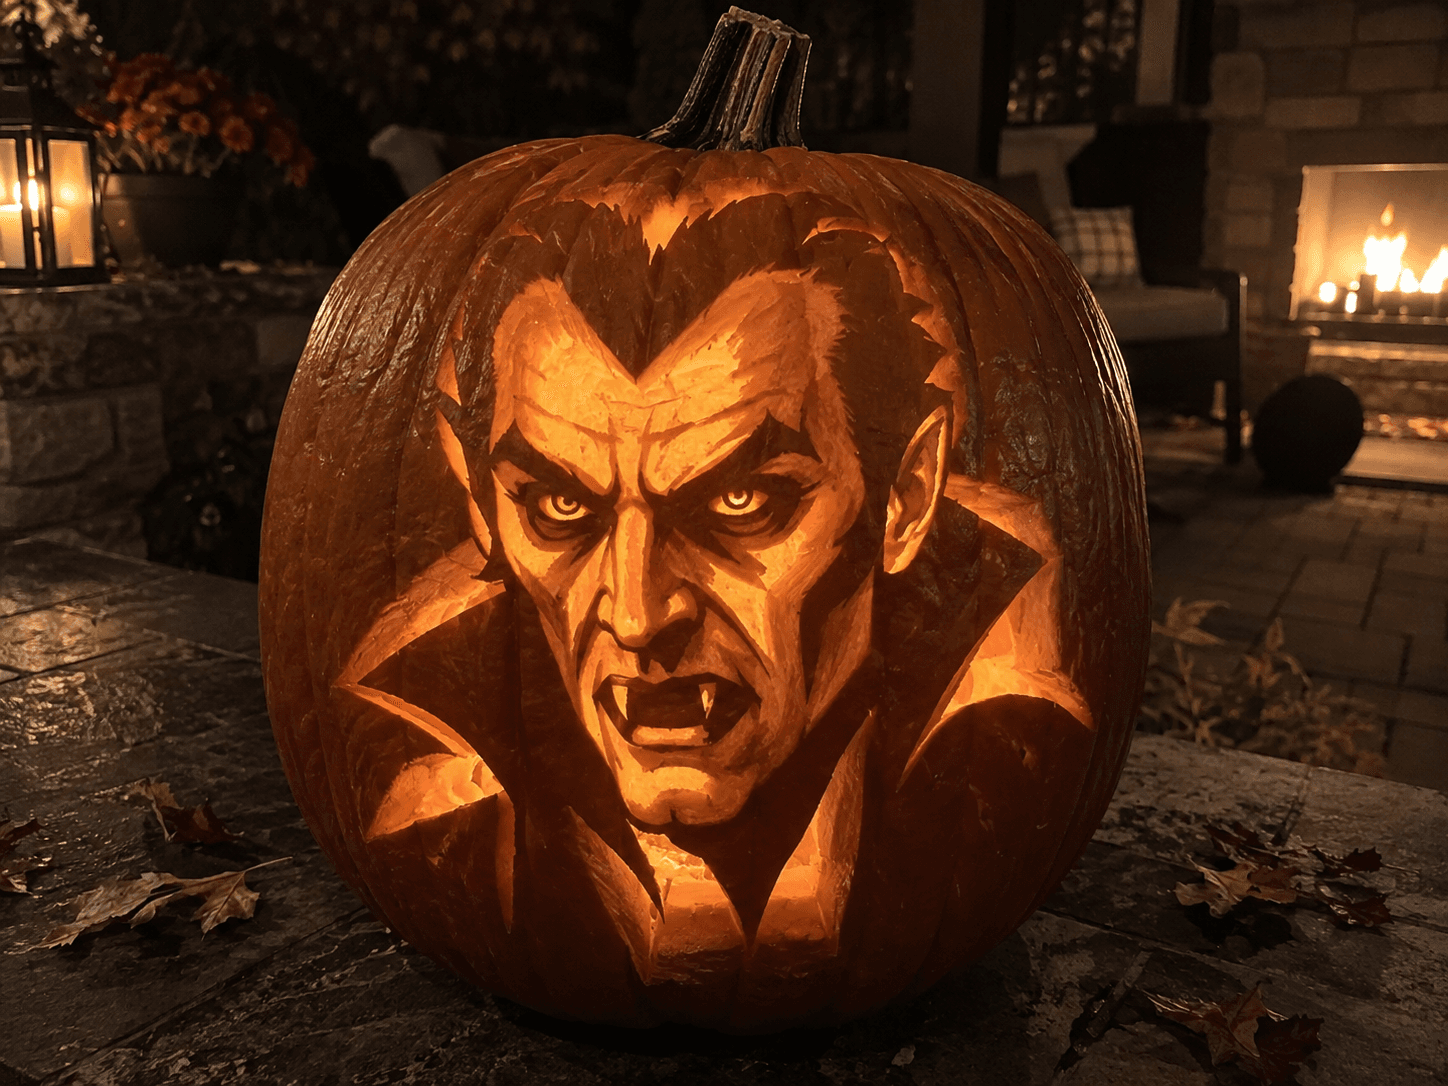
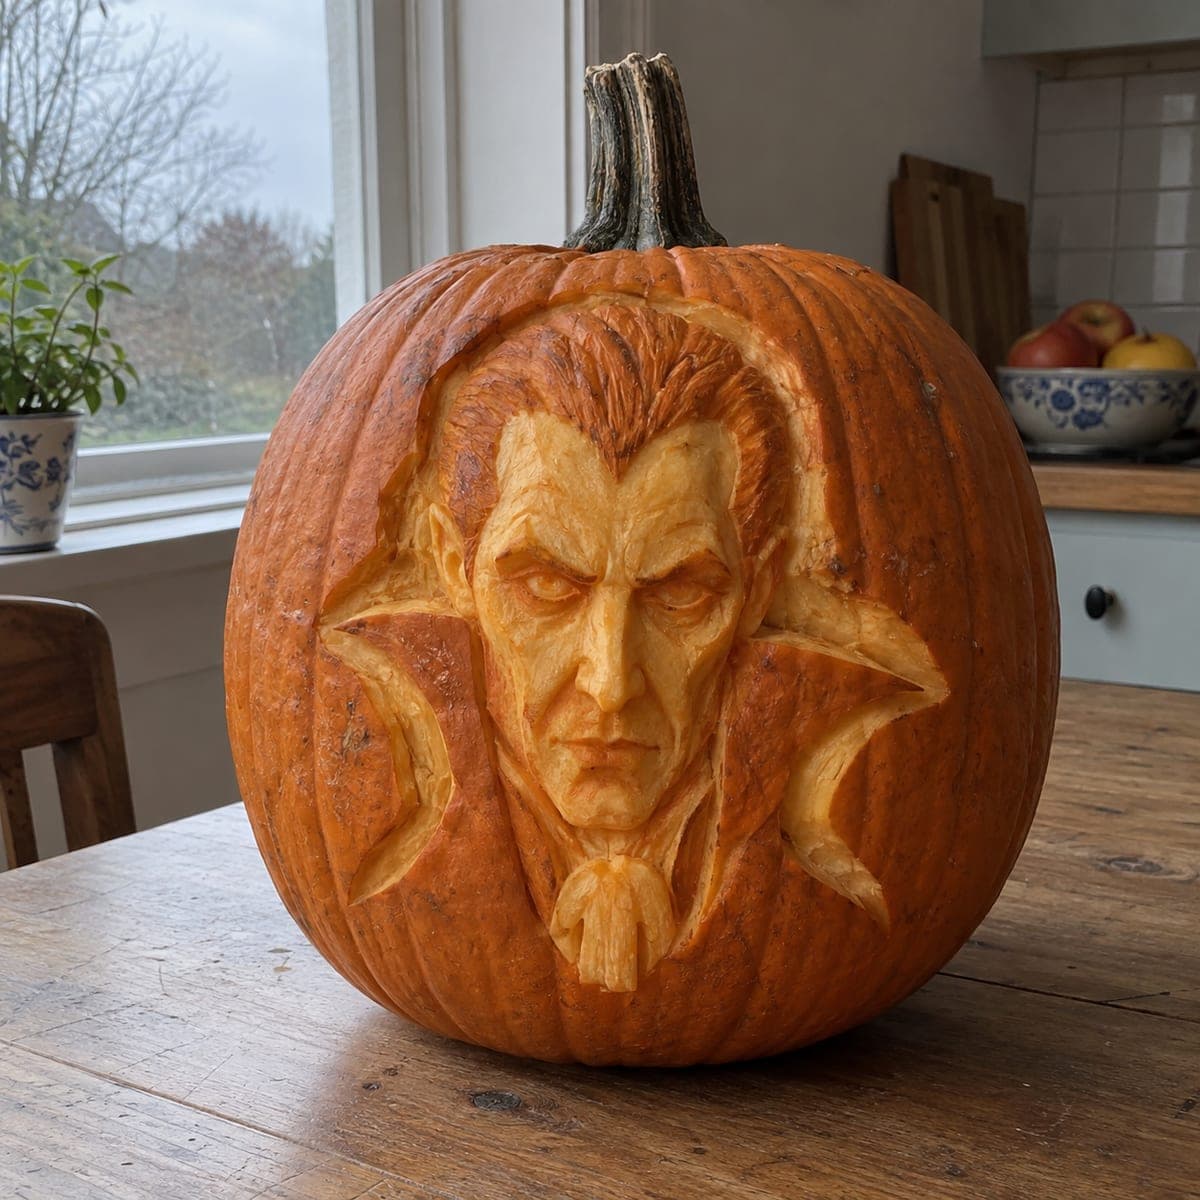
Brooding Vampire Count Portrait Pumpkin EtchingAI
0

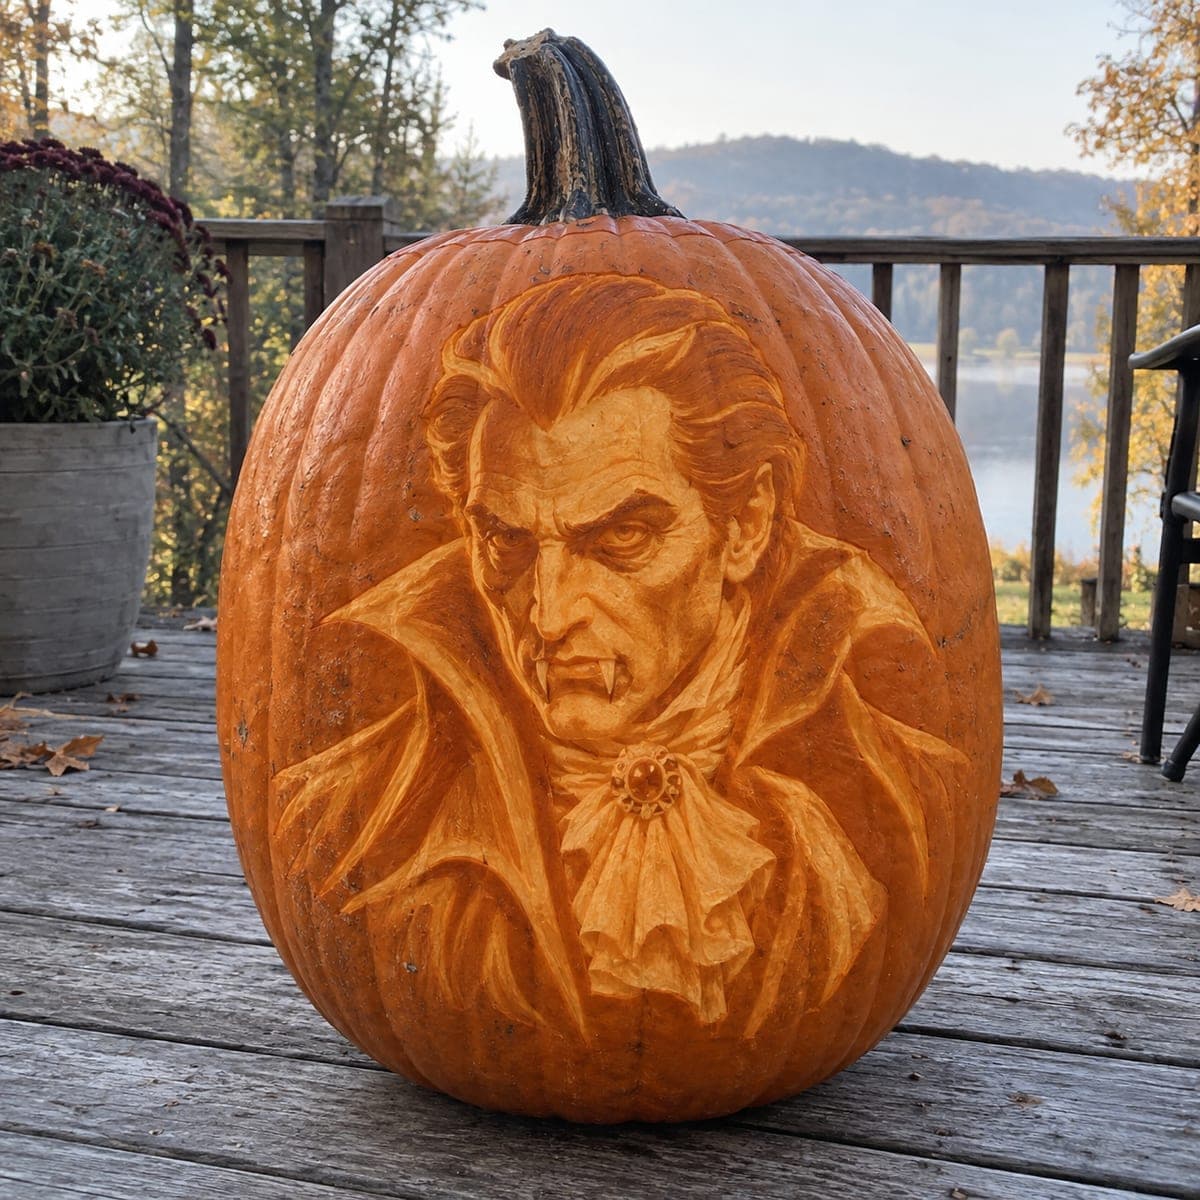
Brooding Vampire Count Portrait Pumpkin Etching

Every shadow in this vampire portrait comes from etching, with the count's slicked widow's peak, arched brows, and high collar shaded into the skin at hair-thin depths. Bared fangs and a jeweled cravat complete the classic horror-movie look. Transfer a printed pattern with pinpricks, then work from the lightest tones to the darkest so you can stop before over-cutting the face.

This is an AI-generated concept image: a realistic, carvable design idea rather than a photo of a finished carve. AI concepts are always labeled and sit out the leaderboard and the contest.

No ratings yet · Sign in to rate
Comments (0)

  • No comments yet — be the first.

Save without an account. Sign in to like or comment.

Our tips for carving a similar design

This design is built entirely from etching, so no light shines through at all. The whole effect comes from removing skin at different depths, leaving the darkest features untouched and scraping the brightest areas thin. Think of it as sculpting a relief portrait rather than making a lantern.

Written by PumpkinCarvingIdeas.com, inspired by the image above. These are our suggestions, not instructions from the uploader. This approach to the AI concept has not been tested on a real pumpkin.

From pumpkin to porch

  1. Pick a tall pumpkin and clean the skin

    Choose a large, smooth, long pumpkin so the count's face and collar have room to spread out. You do not need to gut it fully since this is a surface etch, but wipe the skin clean and dry. Avoid soft spots or deep ribs across the face area. A flat working panel makes the shading far easier to read.

  2. Transfer the pattern with pinpricks

    Print the vampire portrait to fit your pumpkin and tape it snugly over the face zone. Poke closely spaced pinholes along every major line: the widow's peak, brows, cheekbones, fangs, and collar edges. Pull the paper and connect the dots lightly with a marker so you can see the full map before any cutting. Take your time here since the whole portrait depends on accurate placement.

  3. Scrape the brightest highlights first

    Using a fine loop or ribbon tool, gently remove the outer skin on the lightest areas: the swept-back hair, the ridge of the nose, the collar folds, and the pale cravat. Work shallow, taking off only the top layer for a soft glow. Removing more flesh makes an area lighter, so build up brightness in thin passes. It is easy to go too deep, so stop often and step back.

  4. Build the midtones and shadows

    Move to the medium areas like the cheeks, jaw, and lapels, scraping less deeply than the highlights. Leave the deepest shadows, the eye sockets, the hollow beside the nose, and the recesses of the collar, as untouched dark skin. This contrast between scraped and unscraped surfaces is what gives the face its brooding depth. Keep referring to your printout so the light falls consistently from one side.

  5. Refine the fangs, eyes, and jewel last

    Detail work goes at the end when you have a feel for the surface. Leave the bared fangs as raised, lightly scraped skin so they stay structurally solid rather than cut through. Define the sharp brow and the hard stare with careful shallow lines, and give the cravat jewel a small ring of highlight to suggest a facet. Small tools and a light touch matter most here.

  6. Light it and photograph

    Since this is an etched portrait, side lighting reveals it best. Place a small LED spotlight or two off to one side so the raised highlights catch the light and the untouched shadows stay dark. Never use a candle, as the heat and flame add nothing to a surface etch. Shoot in the evening on a porch or deck to capture the moody, classic-horror feel.

Gather your supplies

Check things off as you get ready.

Work on a stable surface, keep your free hand out of the cutting path, and have an adult handle sharp tools.

Three levels of light

  • Leave intact

    Deep eye sockets, the hollow beside the nose, and the recesses inside the high collar stay as dark untouched skin.

  • Peel & shade

    Cheeks, jaw, lapels, and the slicked hair get shallow scraping for a soft mid glow.

  • Cut through

    Nothing is cut fully through on this etched portrait; the brightest tones come from thin, deep scraping on the cravat and highlights, not open holes.

Learn the carving basics

Before you start cutting

Do I cut any holes all the way through?

No, this is a surface etch, so light does not pass through. Every tone comes from how deeply you scrape the skin. Cutting through would break the portrait and weaken the fangs, so keep even the brightest spots as thin flesh rather than open cutouts.

How do I keep the fangs from breaking off?

Leave the fangs as slightly raised, lightly scraped skin rather than carving around them as free-standing points. Because nothing is cut through, they stay backed by the pumpkin wall and cannot snap. Detail them last with a small knife and a gentle hand.

Why work from lightest to darkest tones?

Scraping removes material you cannot put back, so it is safest to remove the least first. Start with shallow highlights, then deepen midtones, and leave the darkest shadows untouched. Stopping while you can still add depth keeps you from over-cutting the face.

Your take belongs here, too.

Changed a detail? Made it simpler? Share a photo of your version and tell the community what worked.

Share your pumpkin

More pumpkins like this

You've reached the end · 8 pumpkins
The Patch Report

Fresh pumpkins, in your inbox.

The best new carvings, ideas worth stealing, and how-tos for carving season. Short, seasonal, and gone by November.

A short email during carving season. Unsubscribe anytime. See our privacy policy.