Halloween Pumpkin Carving Contest · Starts October 1st · $500 in prizes
← Back to ideas
@ai_concepts
Sep 14, 2026
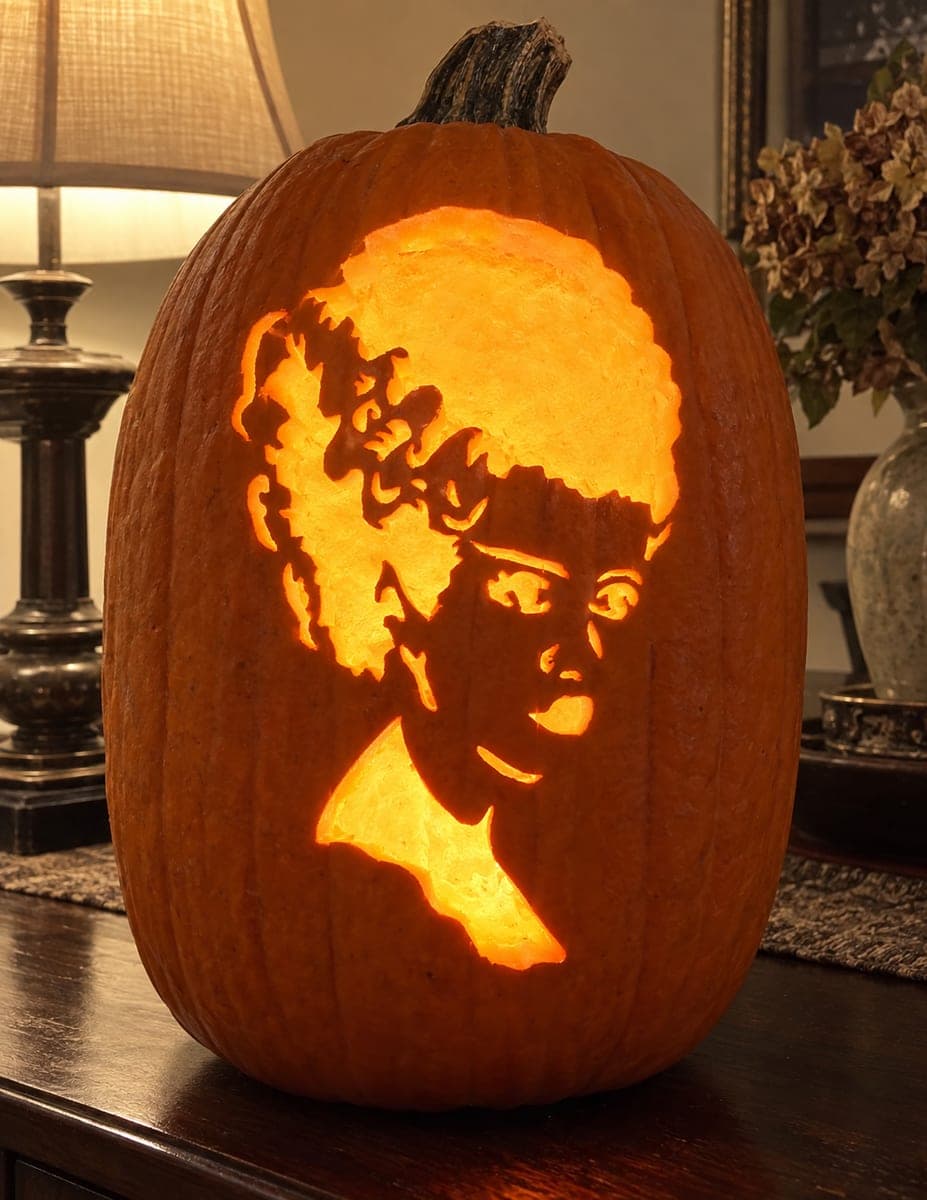
Bride of Frankenstein Etched Portrait PumpkinAI
0

Bride of Frankenstein Etched Portrait Pumpkin

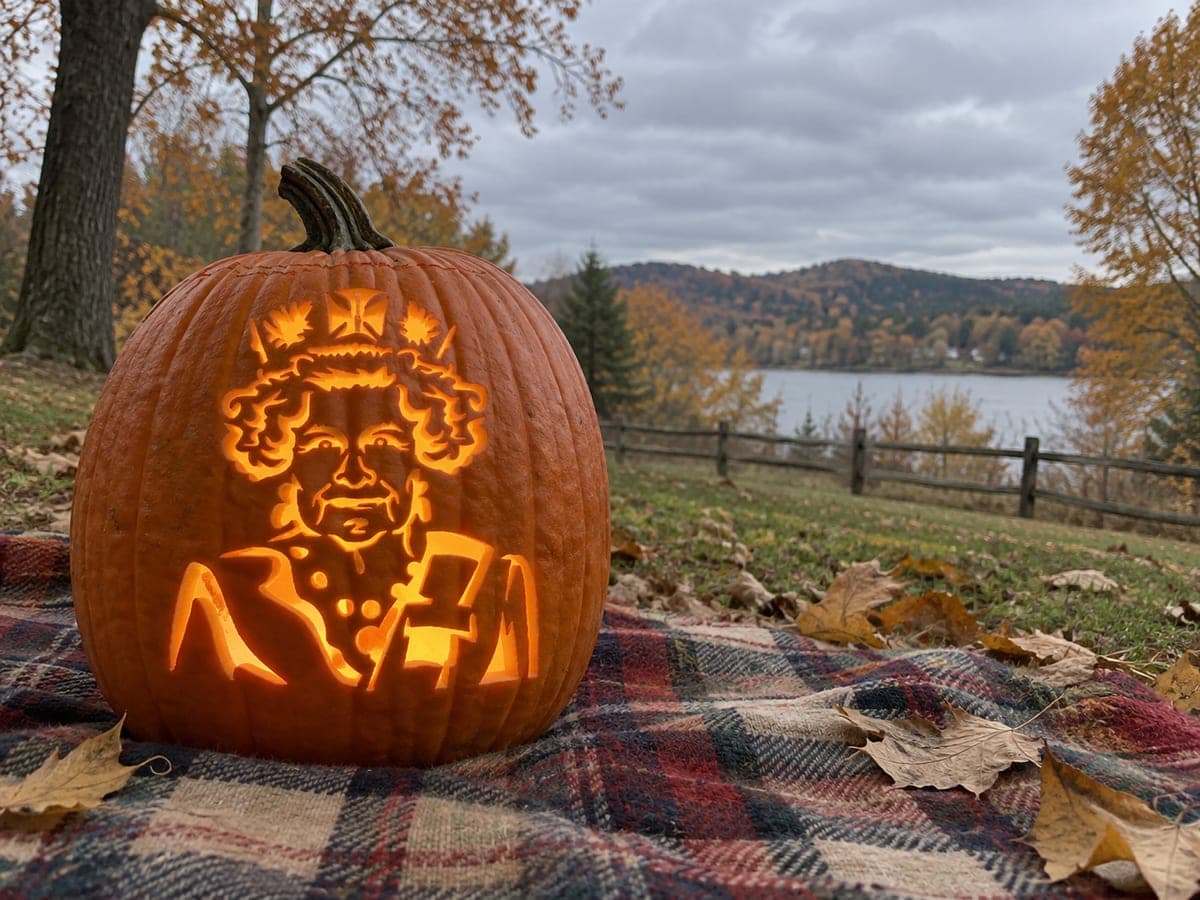
A dramatic portrait of the Bride of Frankenstein shows a wide, boldly streaked upswept hair silhouette framing a delicately lit face with high cheekbones and narrow shoulders. The shading pumpkin carving technique creates luminous skin tones by peeling the outer rind from the face while leaving the hair mass entirely unpeeled and dark. Scrape the face in broad strokes first to establish the glow, then refine the eye sockets and lips with a narrow loop tool so the face detail is visible from a few feet away.

This is an AI-generated concept image: a realistic, carvable design idea rather than a photo of a finished carve. AI concepts are always labeled and sit out the leaderboard and the contest.

No ratings yet · Sign in to rate
Comments (0)

  • No comments yet — be the first.

Save without an account. Sign in to like or comment.

Our tips for carving a similar design

This design leans almost entirely on the shading technique, where the whole face is peeled to a thin, glowing rind while the tall streaked hair stays as untouched dark skin. The core trick is contrast: a bright, softly lit face read against a bold black silhouette of upswept hair. Plan to scrape broad areas first for the glow, then cut only the small brightest accents last so the pumpkin wall stays strong.

Written by PumpkinCarvingIdeas.com, inspired by the image above. These are our suggestions, not instructions from the uploader. This approach to the AI concept has not been tested on a real pumpkin.

From pumpkin to porch

  1. Prep the pumpkin and pick a tall, flat face

    Choose a tall pumpkin with a wide, relatively flat front panel so the portrait has room to stretch upward like the reference. Cut a lid or, better, a back door so you can hollow without weakening the carving face. Scoop the inside and thin the front wall to about one inch so light passes through peeled areas evenly. A consistent wall thickness is what makes shading glow smoothly later.

  2. Transfer the stencil and map your three tones

    Tape your Bride of Frankenstein stencil tight against the front and poke the outlines with a transfer tool or push pin. Before cutting anything, mark which zones stay dark (the hair mass), which get peeled (the face and neck), and which get cut through (the brightest highlights). Marking tones now prevents you from scraping into an area meant to stay black. Take your time here, since the whole effect depends on this map.

  3. Peel the face for the base glow

    With a ribbon or loop tool, peel the outer rind off the entire face and neck in broad, even strokes to expose the pale flesh underneath. Keep the depth uniform so the skin lights up as one soft plane rather than a patchwork. Peel right up to the hairline but stop cleanly where the dark hair begins. This broad glow is the foundation, so aim for smooth, consistent coverage before any detail.

  4. Refine features by varying depth

    Switch to a narrow loop tool to deepen the eye sockets, the shadow under the cheekbones, the nostrils, and the line of the lips. Scrape thinnest where you want the brightest skin and leave more rind for softer shadows. Work in small passes and step back every minute or two, since portrait detail reads best from a few feet away. Resist over-carving; subtle depth changes are what create the lifelike face.

  5. Leave the hair dark and cut only the brightest accents last

    Keep the tall streaked hair as untouched skin so it reads as a solid black frame around the glowing face. Where the stencil shows the brightest streaks or the open neck highlight, make a few careful full cutouts, saving these openings for the very end so the wall stays rigid while you work. Keep any thin streaks connected to the surrounding skin with small bridges so nothing snaps. Cutting big openings last protects all the delicate scraping you just finished.

  6. Light it and photograph

    Drop in a battery LED light rather than a candle, since steady cool light shows shading far better and is safer for a thin-walled carving. Warm-white LEDs give the skin that luminous orange tone seen in the reference. Set the pumpkin in a dim room and shoot from slightly to the side so the peeled face reads bright against the dark hair. A light mist of water or a wipe of petroleum jelly on cut edges keeps it fresh for photos.

Gather your supplies

Check things off as you get ready.

Work on a stable surface, keep your free hand out of the cutting path, and have an adult handle sharp tools.

Three levels of light

  • Leave intact

    The tall upswept hair mass and its bold streaks stay as untouched skin for a solid dark frame

  • Peel & shade

    The entire face, cheekbones, and narrow shoulders are peeled to a thin rind for soft luminous skin

  • Cut through

    Only the brightest highlights, such as the open neck accent and a few hair streaks, are cut fully through

Learn the carving basics

Before you start cutting

How do I keep the peeled face glowing evenly instead of blotchy?

Thin the front wall to a uniform thickness before you start scraping, since uneven walls create bright and dim patches. Peel in broad, overlapping strokes at a consistent depth rather than digging random spots. Hold the pumpkin up to a light as you go to spot thick areas that need another pass.

Should the hair be any actual cutouts or all left dark?

For this look the hair works best left almost entirely as untouched dark skin, which gives the strong silhouette that frames the face. You can cut just a few of the brightest streak accents if the stencil calls for them. Keep those cuts small and bridged so the large dark mass stays intact.

This is shown as a concept image, so how do I make it hold up on a real pumpkin?

The picture is an AI concept, so treat it as a target look rather than a proven carve. Keep any thin hair streaks connected with small bridges of skin, and rely on peeling rather than cutting for the face so the wall stays strong. Save the few full cutouts for last and the portrait will support itself just fine.

Your take belongs here, too.

Changed a detail? Made it simpler? Share a photo of your version and tell the community what worked.

Share your pumpkin

More pumpkins like this

You've reached the end · 8 pumpkins
The Patch Report

Fresh pumpkins, in your inbox.

The best new carvings, ideas worth stealing, and how-tos for carving season. Short, seasonal, and gone by November.

A short email during carving season. Unsubscribe anytime. See our privacy policy.