Halloween Pumpkin Carving Contest · Starts October 1st · $500 in prizes
← Back to ideas
@ai_concepts
Aug 26, 2026
Sculpted Dracula Bust Pumpkin CarvingAI
0

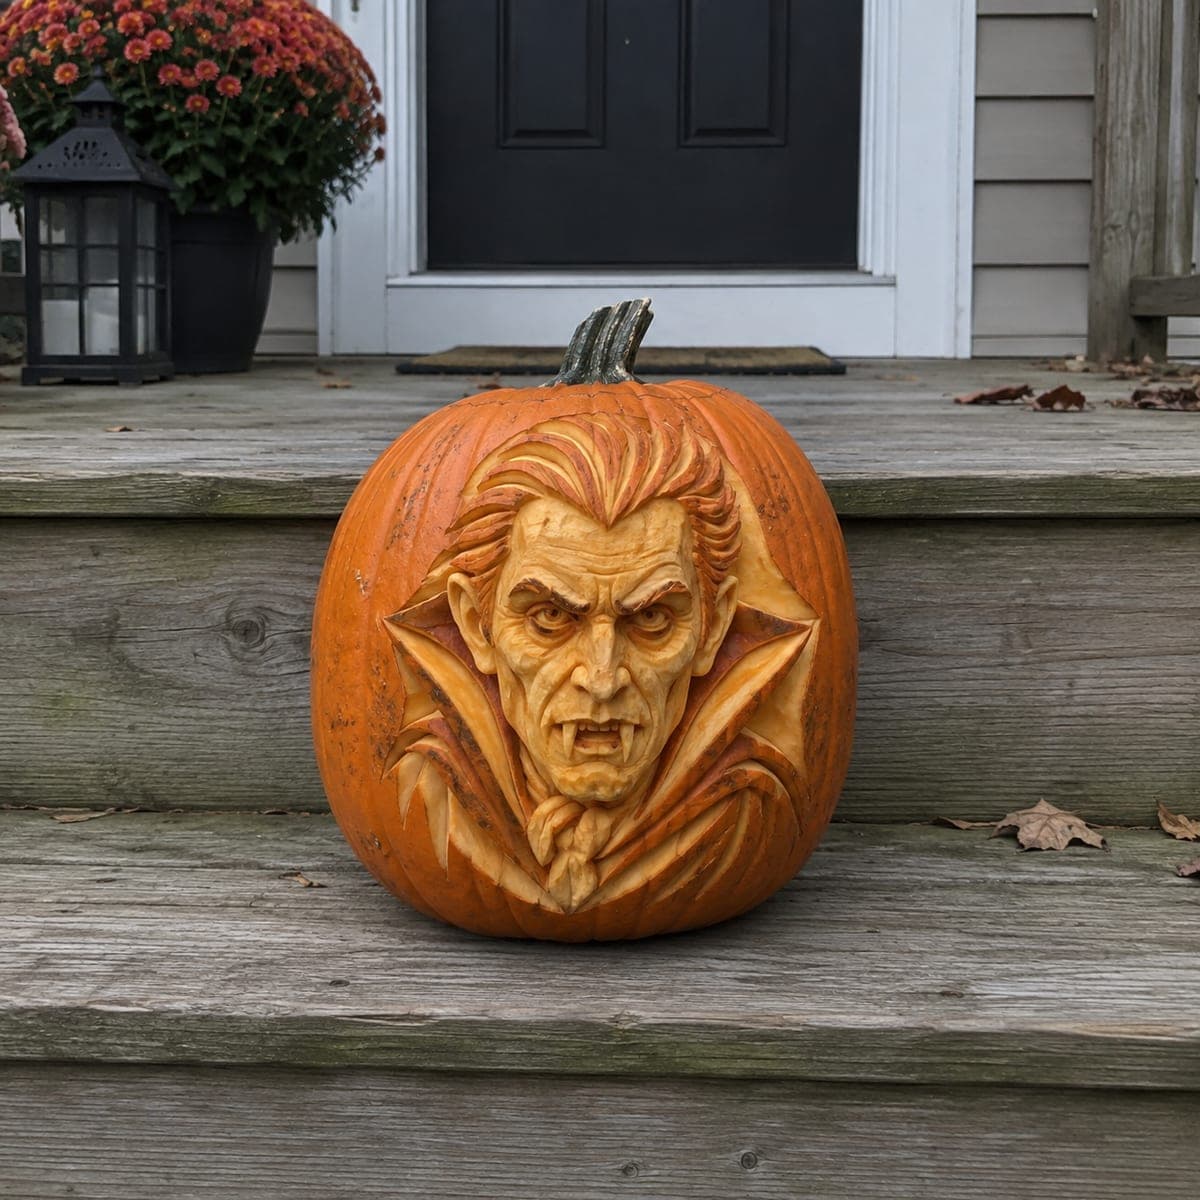
Sculpted Dracula Bust Pumpkin Carving

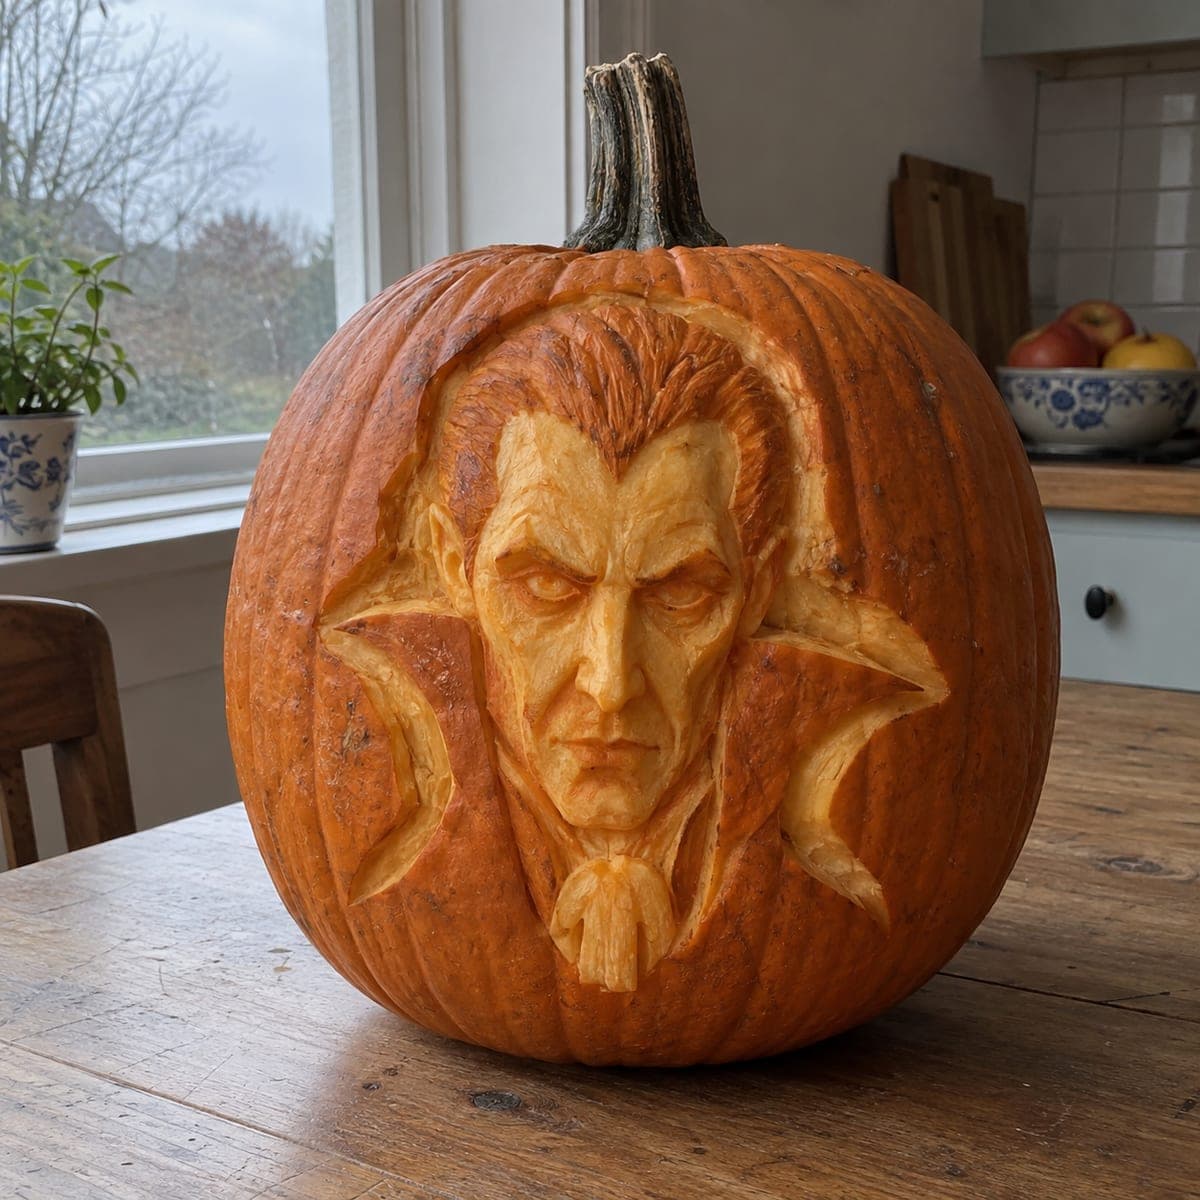
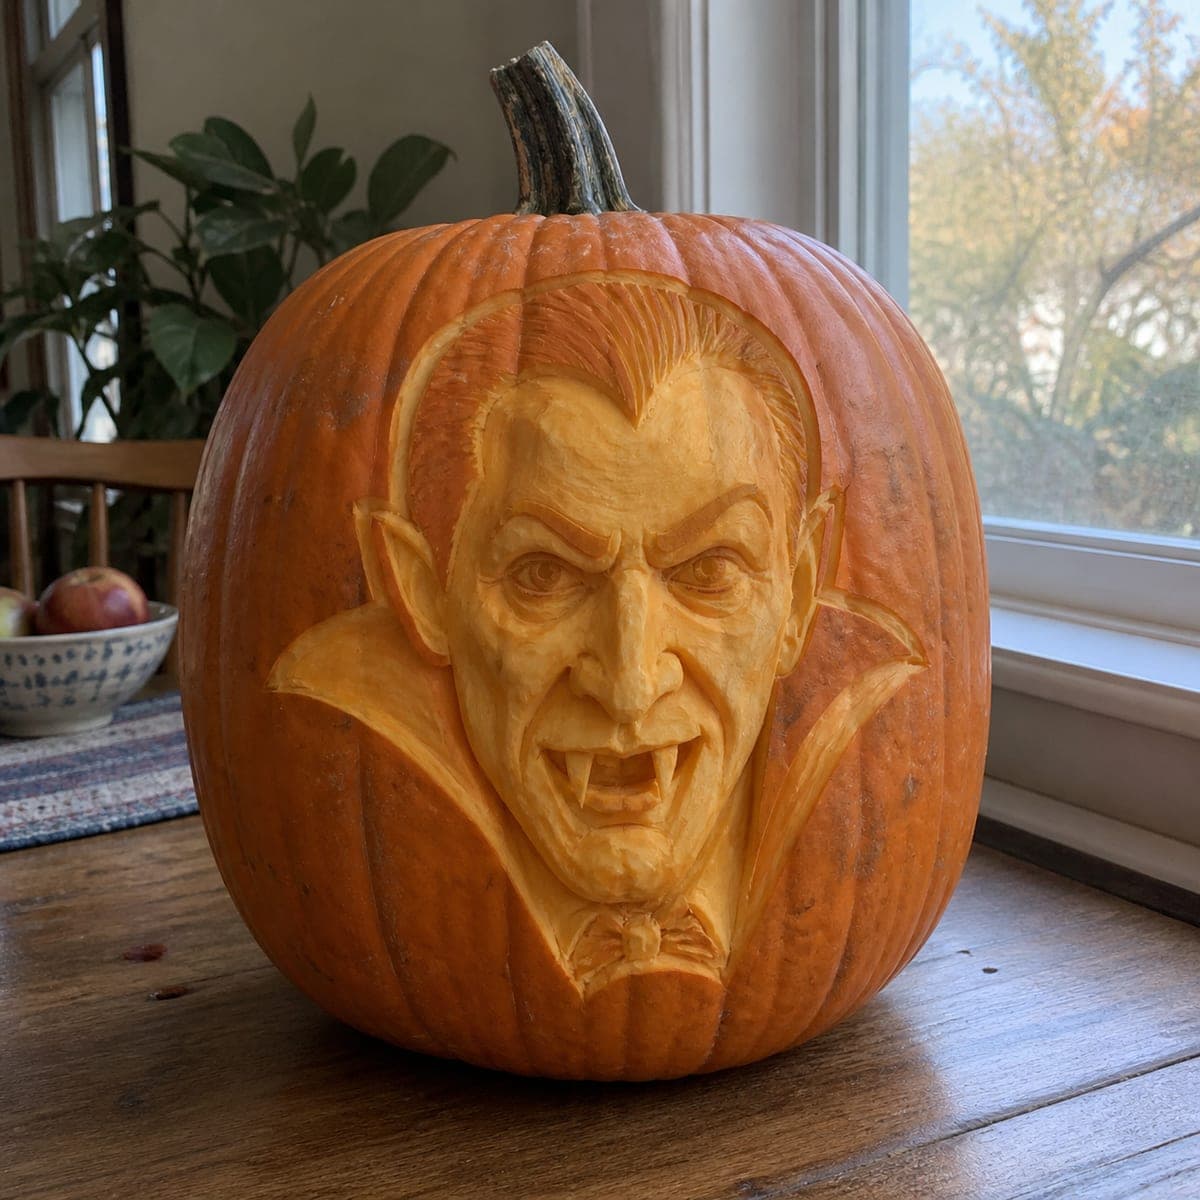
This vampire bust rises out of the rind in full relief, from the slicked-back widow's peak to the high collar and bared fangs. The sculptor worked with loop and ribbon tools, shaving progressively deeper around the face so the features stand proud of the surface. Because nothing is cut through, this one displays unlit on daytime steps and lasts longer than a pierced carving. Mist it with diluted lemon juice to slow browning on the exposed flesh.

This is an AI-generated concept image: a realistic, carvable design idea rather than a photo of a finished carve. AI concepts are always labeled and sit out the leaderboard and the contest.

No ratings yet · Sign in to rate
Comments (0)

  • No comments yet — be the first.

Save without an account. Sign in to like or comment.

Our tips for carving a similar design

The core trick here is relief sculpting rather than piercing: you shave the pumpkin flesh to different depths so the face, hair, and collar stand proud of the surface. Nothing gets cut all the way through, so the whole design reads by shadow and shape instead of backlight. Plan to remove the most material around the face to make it push forward, then leave the raised collar and widow's peak as high points.

Written by PumpkinCarvingIdeas.com, inspired by the image above. These are our suggestions, not instructions from the uploader. This approach to the AI concept has not been tested on a real pumpkin.

From pumpkin to porch

  1. Pick a big wall and transfer the outline

    Choose a wide, tall pumpkin with a smooth, blemish-free front face so you have depth to carve into. Tape your Dracula pattern flat against the front and poke the main outlines with a stylus, marking the widow's peak, brow, cheekbones, and collar points. Since this is a sculpted relief and not a cutout, keep your dots light and focus on the boundaries between raised and recessed areas. Scrub and dry the surface first so your reference lines stay put.

  2. Rough out the background depth

    Use a large loop tool to shave away the area around the whole bust, dropping it back so the figure will sit forward. Work evenly and stop well short of the inner wall, leaving a couple inches of flesh so the pumpkin stays firm. Keep the face zone untouched at this stage since it is your highest point. Rake the debris out often so you can read the emerging shape.

  3. Establish the big planes of the face

    Switch to a medium loop and carve the recesses that define the face: the eye sockets, the sides of the nose, the hollows under the cheekbones, and the gap between the collar and jaw. Think in broad planes first, pushing the brow and nose forward by cutting down around them. Check your progress from the side to confirm the features actually project. Go shallow at first because you can always remove more, but you cannot put flesh back.

  4. Refine features with ribbon tools

    Move to smaller ribbon and detail tools for the furrowed brow, the narrowed eyes, the sneering mouth, and the strands of slicked-back hair. Carve the hair as flowing grooves that all sweep from the widow's peak, and keep each collar point as a crisp raised edge. For the fangs, leave them as small raised nubs of flesh rather than thin fragile spikes so they do not snap. Vary your depth to build the shading that gives the face its scowl.

  5. Polish, seal, and slow the browning

    Smooth the broad cheeks and forehead with the back of a loop tool or a clean rag so light rolls across them evenly. Clean up stray tool marks and sharpen the shadow lines around the eyes and mouth. Because exposed flesh browns fast, mist the carved surface with diluted lemon juice and wipe off excess. Store it somewhere cool between showings to buy extra days.

  6. Stage and photograph in daylight

    This design has no openings, so it shows best in bright, angled daylight that casts shadows into the recesses and pops the face forward. Set it on a step or ledge with the light coming from one side. A small clip light works after dark, aimed across the surface rather than from inside. Snap photos in the morning or late afternoon when shadows are longest.

Gather your supplies

Check things off as you get ready.

Work on a stable surface, keep your free hand out of the cutting path, and have an adult handle sharp tools.

Three levels of light

  • Leave intact

    The deep background around the bust stays as the darkest, shadowed zone that sets off the figure.

  • Peel & shade

    The broad raised cheeks, forehead, and collar carry a soft glow when side light rolls across the shaved flesh.

  • Cut through

    Nothing is cut through on this design, so there are no full-brightness openings; all contrast comes from carving depth.

Learn the carving basics

Before you start cutting

Do I really carve this without cutting any holes?

Yes, this is a relief sculpture, so you only shave the flesh to different depths and never pierce the wall. That keeps the pumpkin strong and lets it display in daylight. The face reads through shadow and shape instead of backlight.

How do I keep the fangs from breaking off?

Carve them as short, thick raised nubs of flesh that stay connected to the lower lip and jaw rather than long thin spikes. On a real pumpkin, thin unsupported points snap or wilt quickly. Keeping them stubby and attached makes the sneer read while staying sturdy.

Since it isn't lit from inside, how do I make it stand out?

Lean on side lighting. Bright angled daylight or a clip light aimed across the surface fills the recesses with shadow and pushes the face forward. Straight-on light flattens the relief, so avoid lighting it head-on.

Your take belongs here, too.

Changed a detail? Made it simpler? Share a photo of your version and tell the community what worked.

Share your pumpkin

More pumpkins like this

You've reached the end · 8 pumpkins
The Patch Report

Fresh pumpkins, in your inbox.

The best new carvings, ideas worth stealing, and how-tos for carving season. Short, seasonal, and gone by November.

A short email during carving season. Unsubscribe anytime. See our privacy policy.