Halloween Pumpkin Carving Contest Β· Starts October 1st Β· $500 in prizes
← Back to ideas
@ai_concepts
Aug 20, 2026
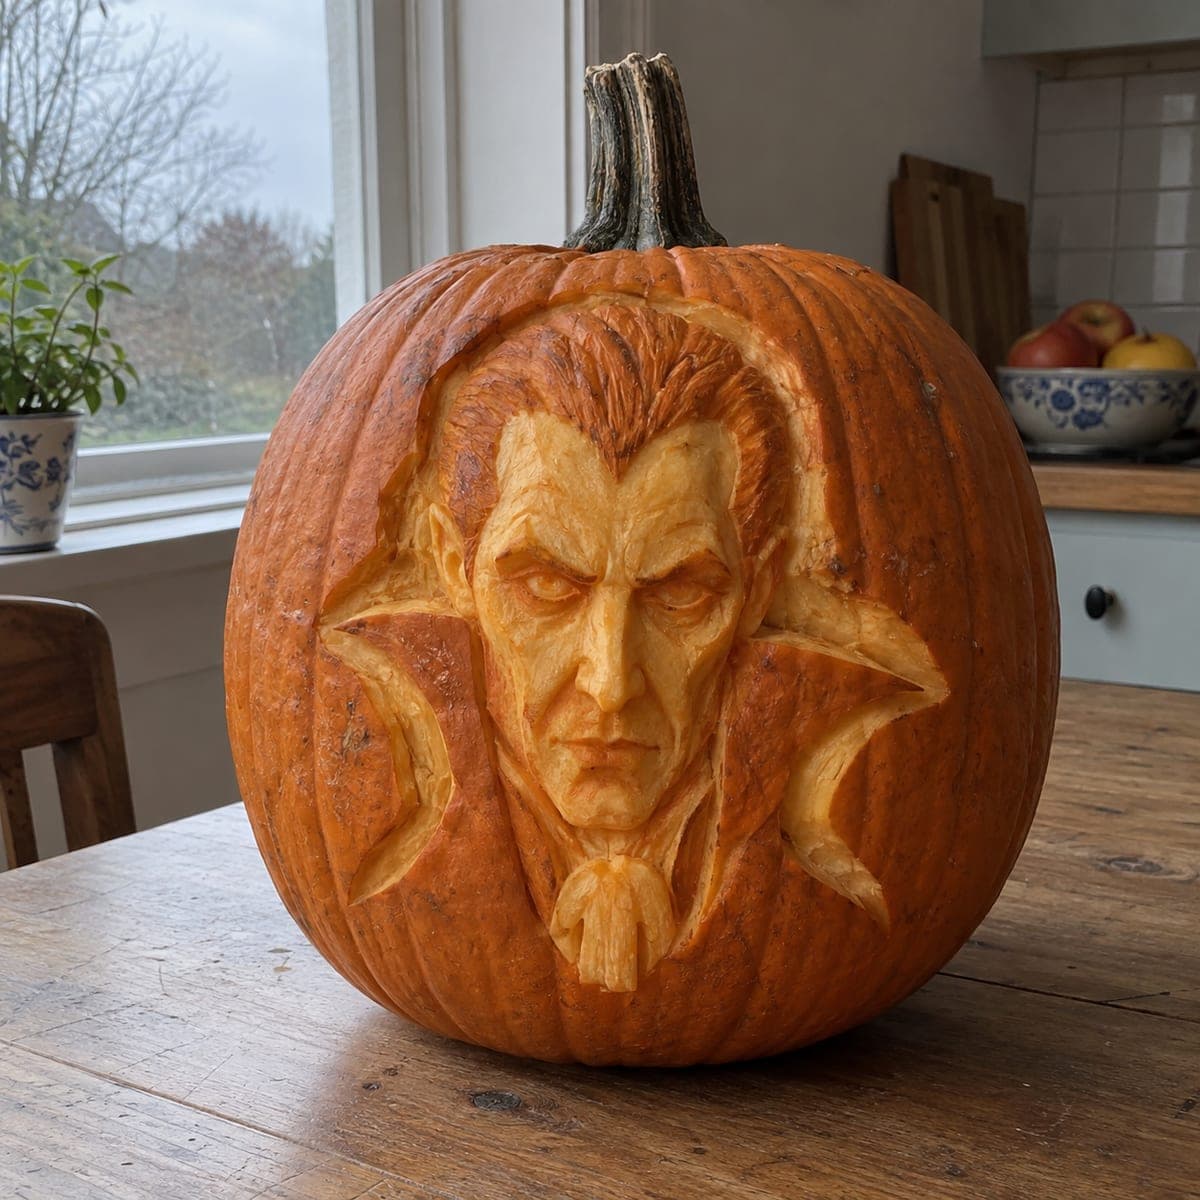
Dracula Vampire Portrait Carved PumpkinAI
0

Dracula Vampire Portrait Carved Pumpkin

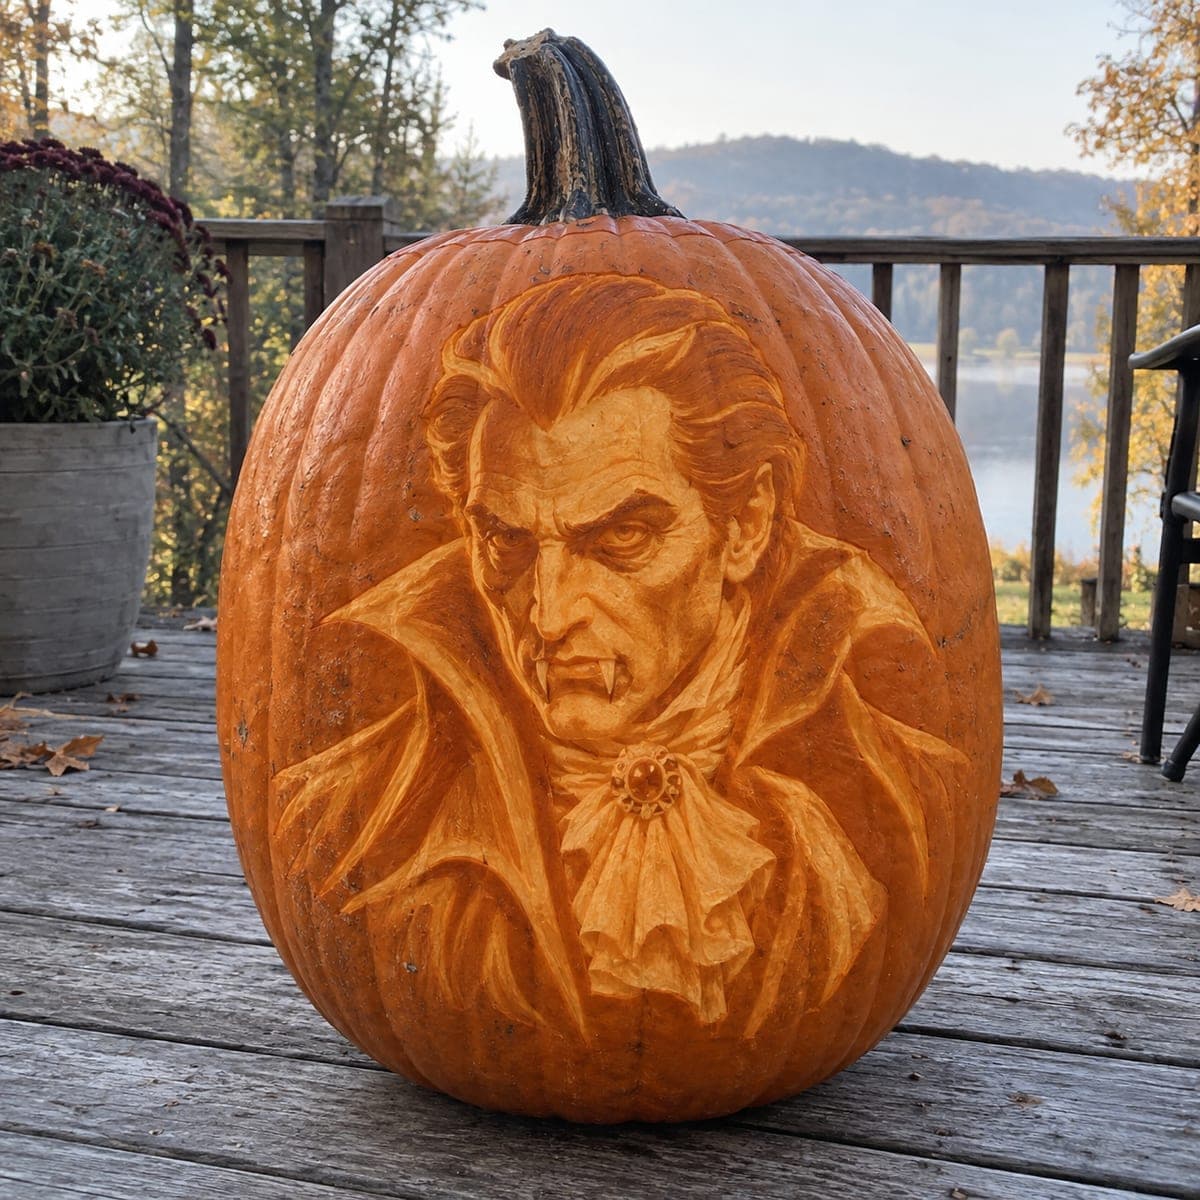
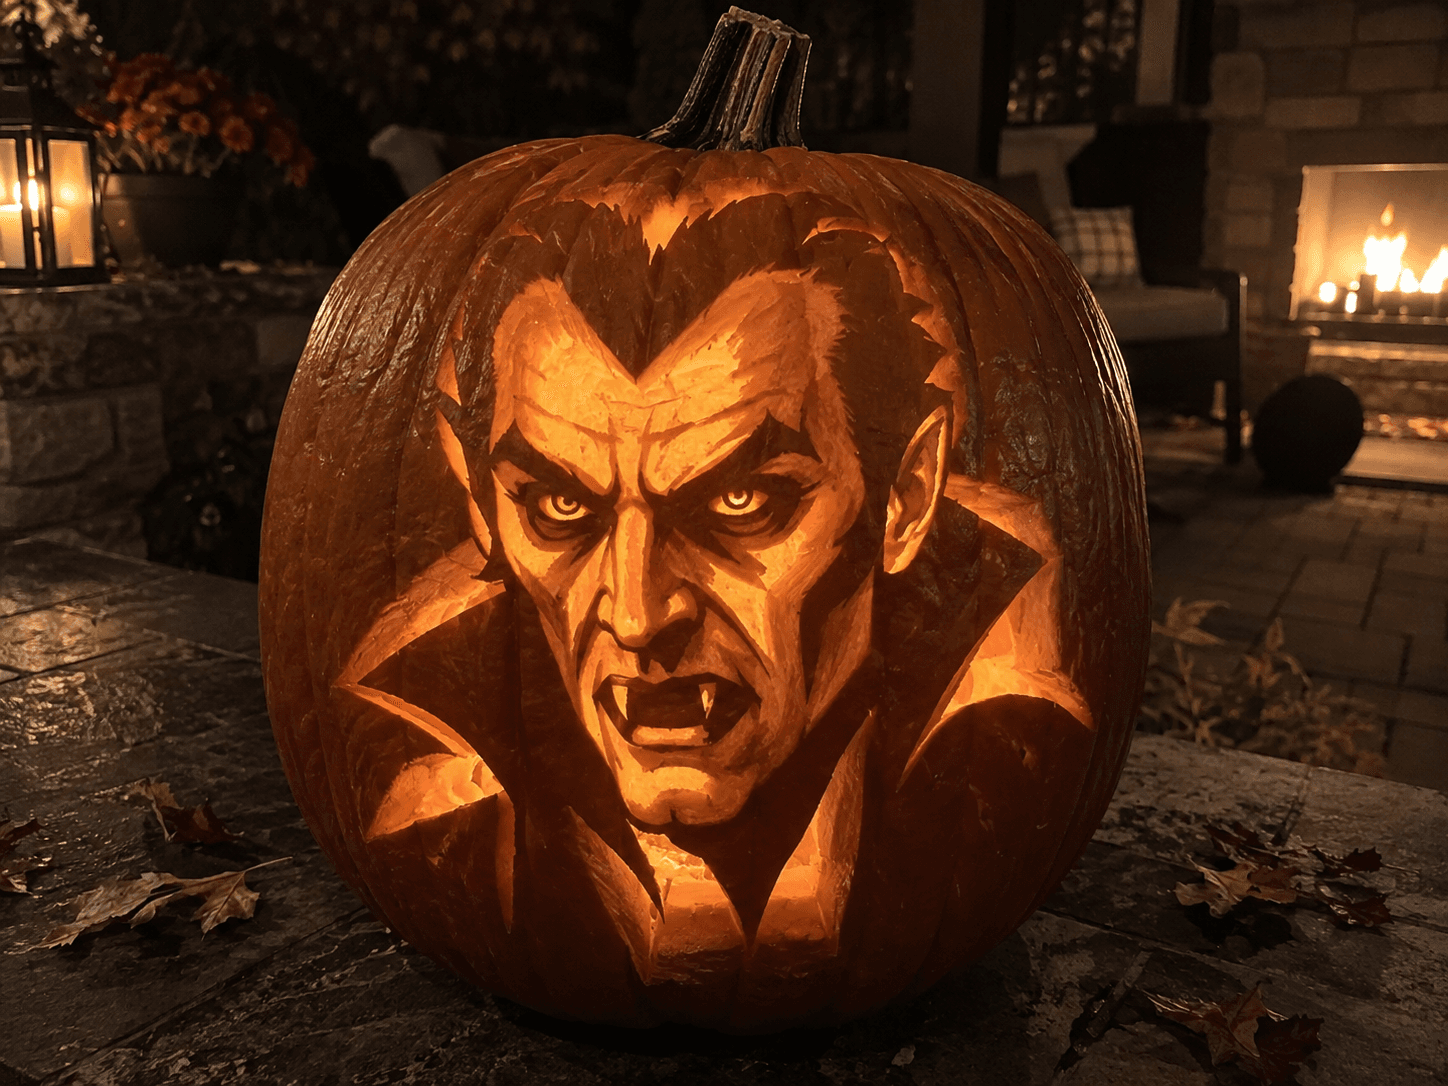
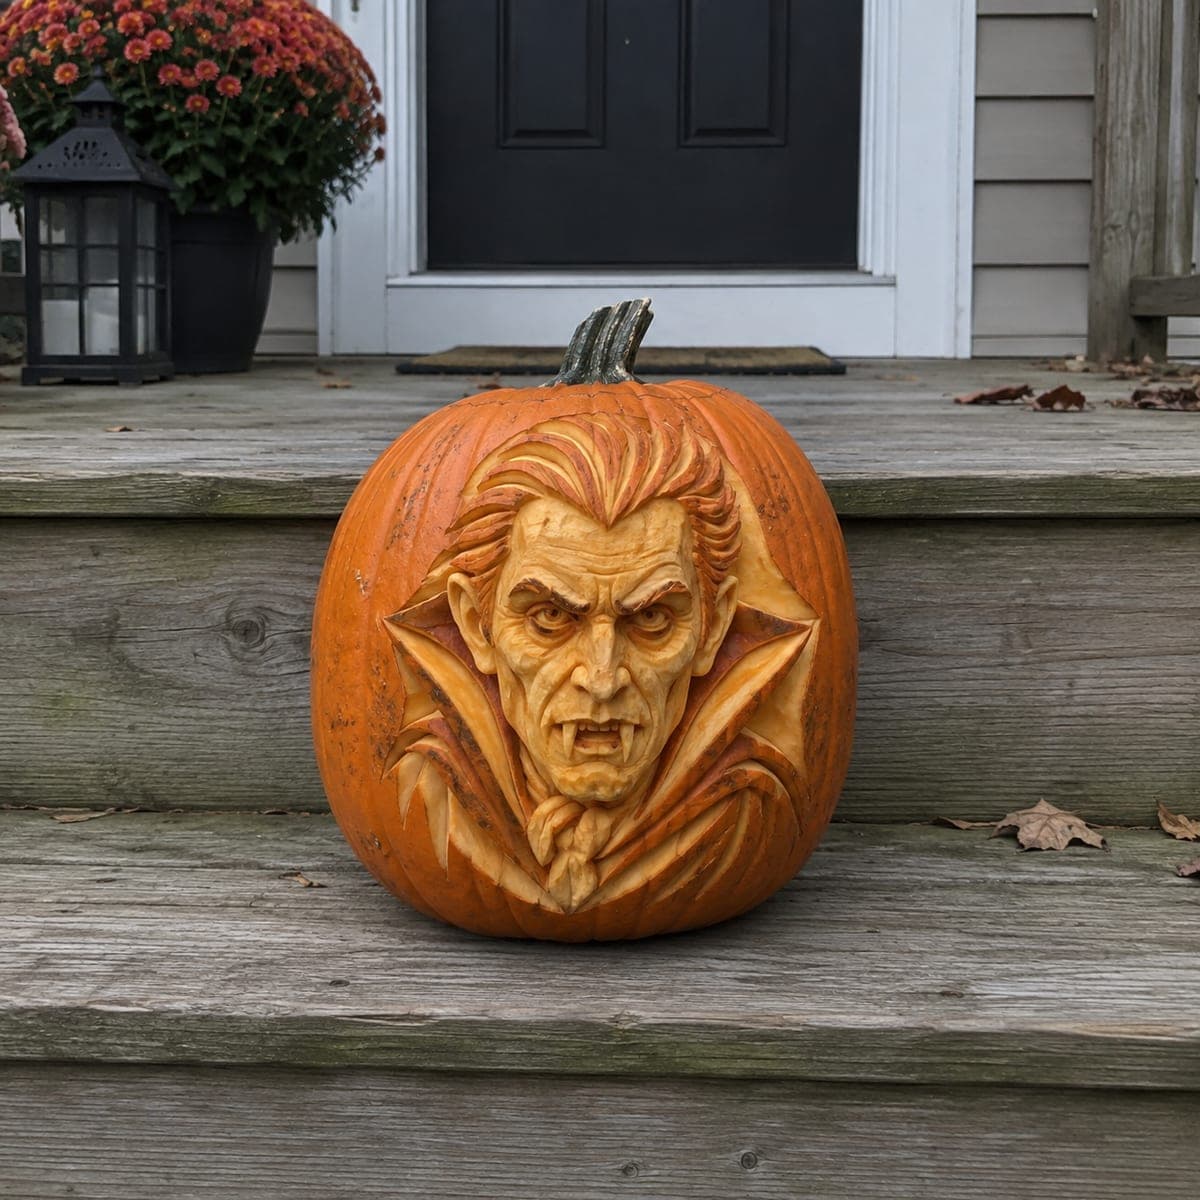
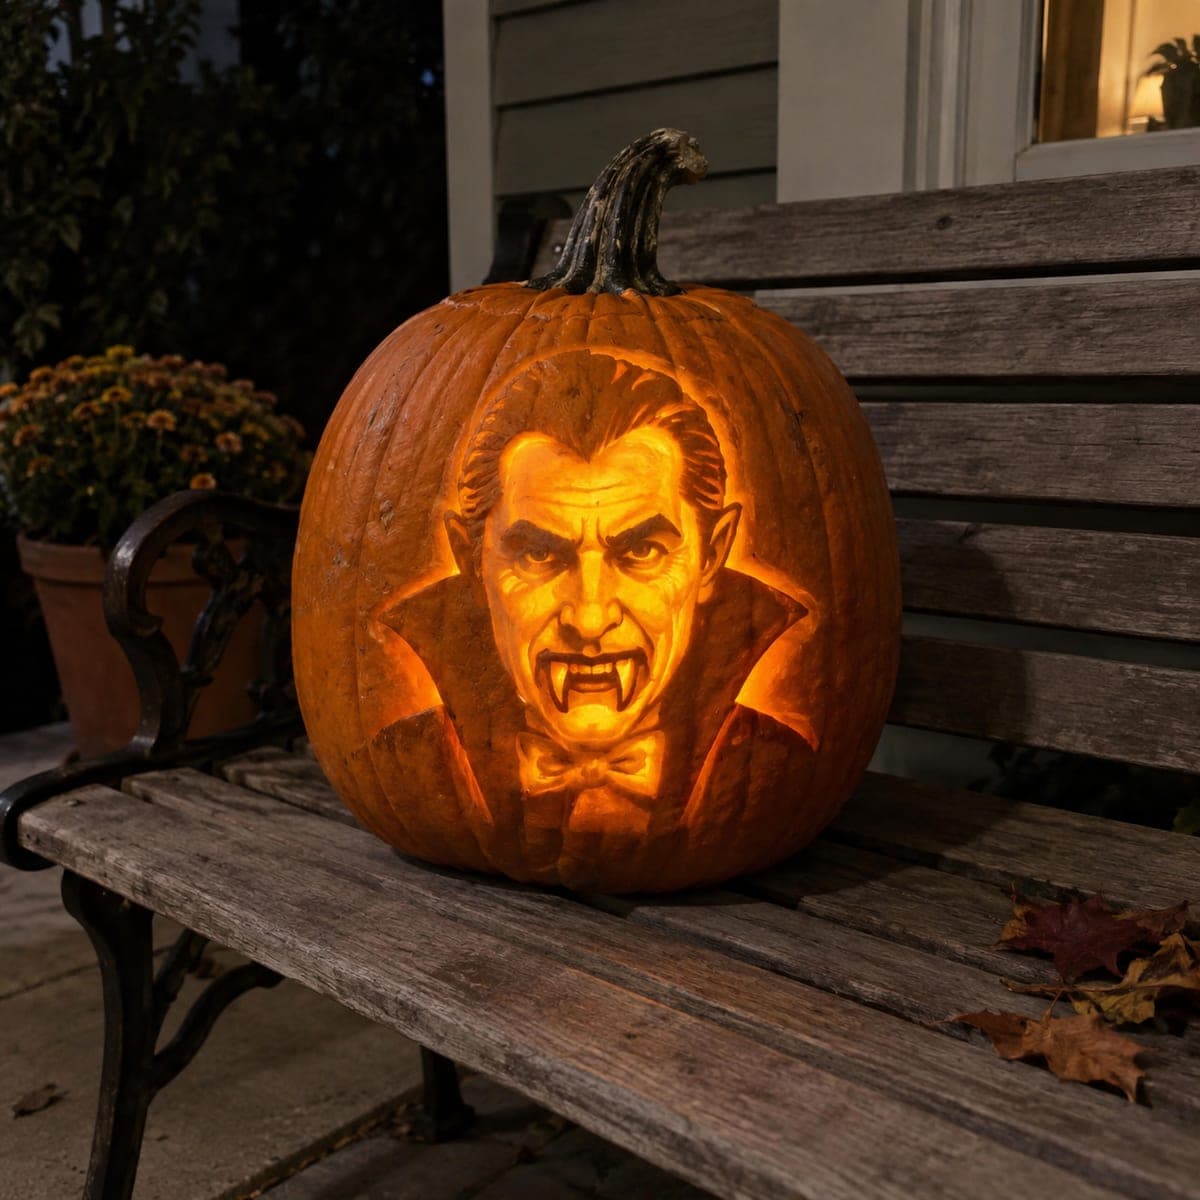
A widow-peaked vampire glares from this pumpkin in full sculpted relief, his high collar flaring on both sides and a medallion hanging at his throat. The portrait is built by peeling the rind and shaving the flesh to different depths, so the palest areas sit deepest. Work from a reference photo taped beside you and rough in the big planes of the face before touching any fine detail like the hair strands.

This is an AI-generated concept image: a realistic, carvable design idea rather than a photo of a finished carve. AI concepts are always labeled and sit out the leaderboard and the contest.

No ratings yet Β· Sign in to rate

Comments (0)

  • No comments yet β€” be the first.

Save without an account. Sign in to like or comment.

Our tips for carving a similar design

The whole illusion here comes from depth, not cutting through the shell. You build the face as a shallow relief by peeling the rind and shaving the flesh to different thicknesses, so the palest areas sit deepest where the most light passes through. Rough in the big planes of the brow, cheeks, and collar first, then carve the fine hair strands and medallion last.

Written by PumpkinCarvingIdeas.com, inspired by the image above. These are our suggestions, not instructions from the uploader. This approach to the AI concept has not been tested on a real pumpkin.

From pumpkin to porch

  1. Prep the pumpkin and your reference

    Pick a large pumpkin with a smooth, flat front face and a thick wall, since relief work needs plenty of flesh to shave into. Cut a lid from the bottom or back rather than the top so the front stays uninterrupted, then scrape the inside wall behind the face down to about an inch. Tape a printed vampire reference beside your work area and transfer the main shapes with a poker or washable marker. Mark the widow's peak, the eyes, the two flaring collar points, and the medallion at the throat before you cut anything.

  2. Establish the outer edges

    Use a small detail saw or a sharp gouge to define the outline where the collar meets the raw pumpkin skin. Keep these as shallow trenches, not full cutouts, so the whole portrait stays one solid sculpted panel. Set the collar apart from the neck and shoulders so those planes read clearly later. Work slowly and let an adult handle the sharpest tools.

  3. Peel the rind to set the mid tones

    Remove the orange skin across the face, hair, and collar to expose the pale flesh underneath, leaving the surrounding pumpkin skin intact as the dark background. This single move is what makes the portrait glow warm against the untouched shell. Keep the peeled surface even at first so you have a clean canvas to carve depth into. Take your time around the ears and collar tips where the shape is narrow.

  4. Shave the planes of the face

    Now sculpt depth with ribbon and loop tools, shaving deeper where you want more light and leaving flesh thicker where you want shadow. Push the eye sockets, the sides of the nose, and the hollows of the cheeks deeper so they turn bright, and keep the brow ridge, nose bridge, and cheekbones higher and dimmer. Constantly check against your reference and hold the pumpkin up to a light to test how the tones read. Go gradually, because you can remove flesh but you cannot add it back.

  5. Carve the fine detail

    Once the big planes are right, add the hair strands, the frown lines, the eyes, and the ridges of the flaring collar with a fine detail knife. Keep the medallion at the throat as a small raised bump surrounded by deeper shaved flesh so it catches light. Leave thin bridges of flesh between hair strands so nothing snaps off. Save any true cutouts, like a sharp glint in the eyes, for the very end.

  6. Light it and photograph

    Set a bright LED puck or a string of LEDs inside, never a candle, since the thin shaved areas can scorch and the relief needs steady even light. Rotate the light until the deepest shaved zones glow and the untouched skin stays dark and moody. Rub a little petroleum jelly on the exposed flesh to slow drying and keep the pale tones crisp. Shoot your photo in a dim room at dusk for the strongest contrast.

Gather your supplies

Check things off as you get ready.

Work on a stable surface, keep your free hand out of the cutting path, and have an adult handle sharp tools.

Three levels of light

  • Leave intact

    The pumpkin skin surrounding the portrait stays untouched and dark as the background.

  • Peel & shade

    The face, hair, and collar are peeled to bare flesh for an overall warm mid glow.

  • Cut through

    Only tiny accents, like a glint in the eyes, are cut through for the brightest points.

Learn the carving basics

Before you start cutting

Do I need to cut all the way through the pumpkin for this?

No, and that is the key to the whole look. This is a relief carving, so almost everything is peeling rind and shaving flesh to varying depths rather than making openings. Full cutouts are reserved for a couple of tiny highlights at most.

How do I keep the pale areas the brightest?

Brightness comes from how thin the flesh is, not from how much you peel. Shave the areas you want lightest, such as the eye sockets and cheek hollows, down thinner so more light passes through. Leave the brow and nose bridge thicker so they stay dimmer and read as shadow.

The hair strands look fragile. How do I keep them from breaking?

Carve them as shallow grooves in the flesh rather than free-standing pieces, and leave bridges of flesh connecting each strand to the ones beside it. Keep the light source inside rather than any heat, since heat is what actually softens thin details. A little petroleum jelly on the exposed surface also slows drying and cracking.

Your take belongs here, too.

Changed a detail? Made it simpler? Share a photo of your version and tell the community what worked.

Share your pumpkin

More pumpkins like this

You've reached the end Β· 8 pumpkins
The Patch Report

Fresh pumpkins, in your inbox.

The best new carvings, ideas worth stealing, and how-tos for carving season. Short, seasonal, and gone by November.

A short email during carving season. Unsubscribe anytime. See our privacy policy.