Halloween Pumpkin Carving Contest · Starts October 1st · $500 in prizes
← Back to ideas
@ai_concepts
Sep 14, 2026
Angular High-Collar Dracula PumpkinAI
0

Angular High-Collar Dracula Pumpkin

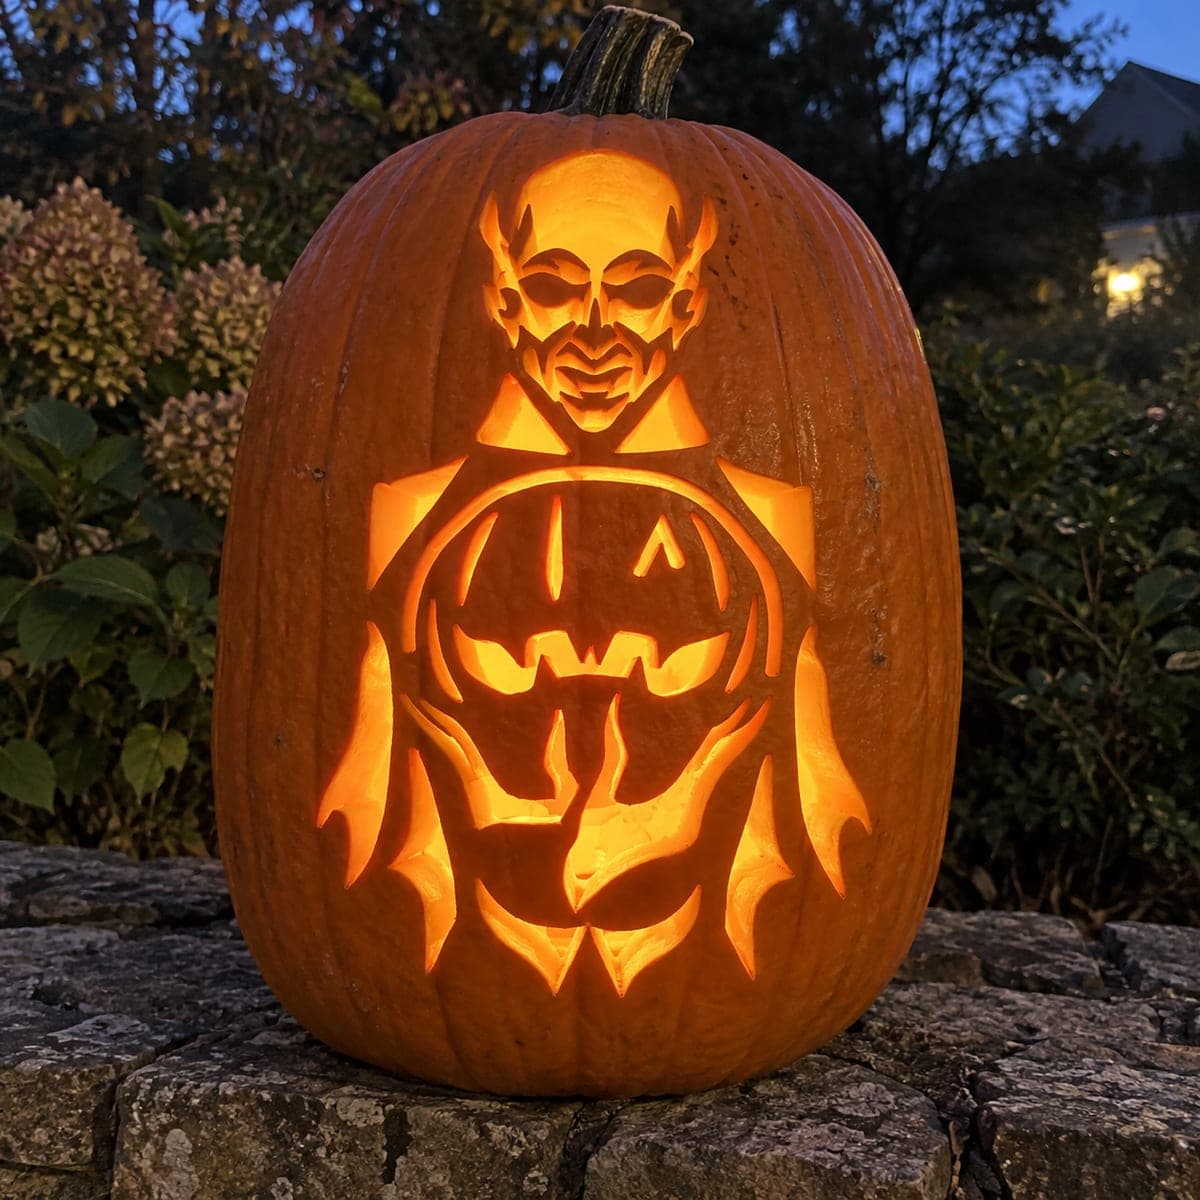
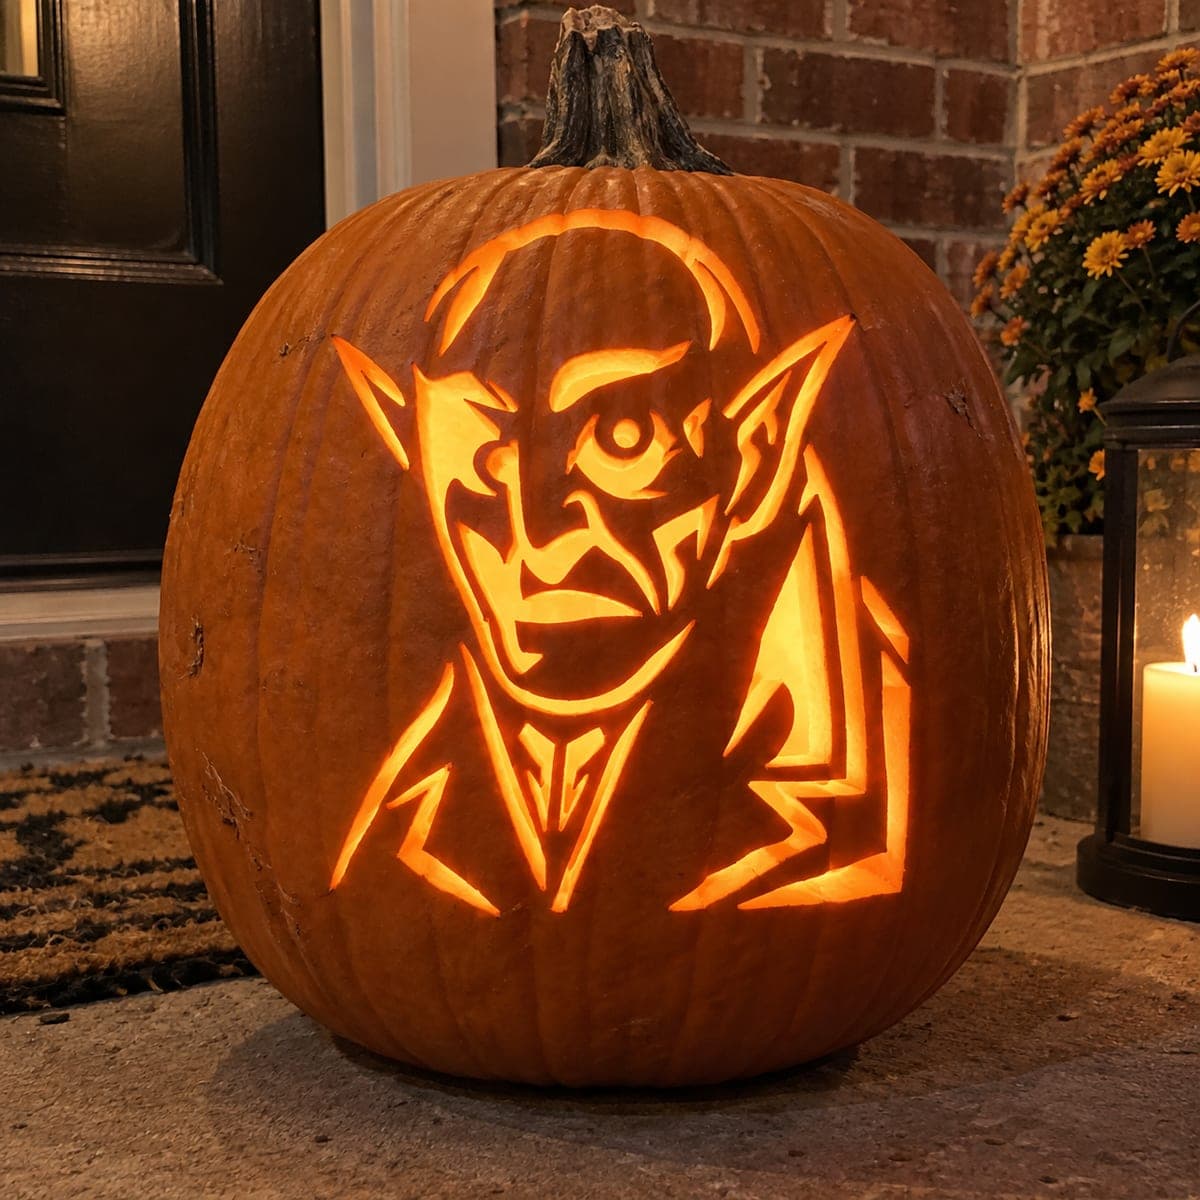
A Nosferatu-style vampire with enormous pointed ears, a bald elongated head, and a wide lapeled collar stares forward in this unsettling scary pumpkin carving idea. The cutout method opens the large glowing collar and face sections fully through, with dark rind forming the deep-set eyes, hooked nose, and sharp ear edges. The tall pointed ear tips are long narrow peninsulas of rind, so score both sides of each ear carefully before cutting the adjacent collar to prevent snapping them off. Displayed on a dark porch with only the candle glow, this Dracula jack-o-lantern reads as pure silhouette from the street.

This is an AI-generated concept image: a realistic, carvable design idea rather than a photo of a finished carve. AI concepts are always labeled and sit out the leaderboard and the contest.
No ratings yet · Sign in to rate

Comments (0)

  • No comments yet — be the first.

Save without an account. Sign in to like or comment.

Our tips for carving a similar design

The core trick here is letting big open cutouts carry the light while the dark rind draws the whole face: the deep-set eyes, hooked nose, and sharp ear edges are all untouched skin. You could plan the large collar and cheek areas as full cutouts, then leave narrow ridges of rind as the outline and features. The tall pointed ears are the fragile part, so treat them as delicate peninsulas and cut around them last.

Written by PumpkinCarvingIdeas.com, inspired by the image above. These are our suggestions, not instructions from the uploader. This approach to the AI concept has not been tested on a real pumpkin.

From pumpkin to porch

  1. Prep the pumpkin and pick a flat face

    Choose a tall pumpkin with a broad, even front so the elongated head and collar have room to spread out. Cut a lid or, better for a design this tall, open a hole in the back so the front face stays uninterrupted. Scoop the inside until the front wall is about one inch thick, which makes clean cutouts easier. A thinner wall also helps the peeled areas glow evenly.

  2. Transfer the stencil

    Tape the printed pattern smoothly over the front, clipping the edges so it hugs the curve without wrinkling. Poke the outline with a pin or transfer tool, following every point of the ears, the lapels, and the eye shapes. Pay special attention to marking both edges of each ear tip so you know exactly how narrow those rind bridges need to stay. Peel the paper and connect any faint dotted lines with a washable marker.

  3. Score the fragile ear tips first

    Before removing any material, lightly score down both sides of each tall pointed ear so the outline is locked in. This keeps the long narrow peninsulas of rind from tearing when you work the areas beside them. Do not cut all the way through yet, just define the edges. Working the ears early means the surrounding pumpkin is still solid and supportive.

  4. Cut the interior openings before the big ones

    Start with the smaller shapes, the eye slivers, the mouth line, and the collar seams, using a fine saw and steady pressure. Save the large collar panels and open cheek areas for last so the face stays rigid while you carve detail. When you finally free the ear tips, cut the adjacent collar sections after the ears are fully defined, not before, so nothing snaps. Push each piece gently inward or outward with a finger rather than yanking.

  5. Peel for the mid tones

    Where the design wants a dimmer glow rather than full light, shave off just the skin with a loop tool and leave the flesh beneath. This gives you a middle brightness that separates shapes without another full cutout. Keep the eyes, nose ridge, and ear edges as untouched dark rind so the sinister features stay in shadow. Step back often to check the balance of dark, dim, and bright.

  6. Light it and photograph

    Drop in one or two bright LED lights, never a candle, since the tall shape and narrow bridges do not need added heat or open flame. Set it on a dark porch so the face reads as a stark silhouette from the street, just like the concept intends. Rub a little petroleum jelly on cut edges to slow drying. Shoot your photo at dusk with the surrounding lights low for the strongest contrast.

Gather your supplies

Check things off as you get ready.

Work on a stable surface, keep your free hand out of the cutting path, and have an adult handle sharp tools.

Three levels of light

  • Leave intact

    The deep-set eyes, hooked nose, sharp ear edges, and outline ridges stay as untouched dark rind.

  • Peel & shade

    Shallow shading along the cheeks and collar folds gets skin-peeled for a dim orange separation.

  • Cut through

    The large collar panels, open face sections, and the bright eye slivers are cut fully through.

Learn the carving basics

Before you start cutting

How do I keep the tall pointed ear tips from breaking off?

Score both edges of each ear before you carve anything near them, so the outline is set while the pumpkin is still solid. Cut the collar sections that sit beside the ears last, only after the ears are fully defined. Push freed pieces out gently instead of pulling on the narrow rind.

The face has a lot of open cutout area. Will it stay strong?

Yes, if you leave the outline ridges and feature lines as connected bridges of rind. Cut the small interior shapes first and save the biggest collar and cheek openings for last, so the wall stays rigid while you work. A one inch wall thickness also adds stability.

Since this is a concept image, can a real pumpkin match it?

It can, with a few realistic adjustments. Keep the ear tips a touch wider than a drawing might show so the rind does not snap, and make sure every dark feature stays connected to the surrounding wall. Plan the biggest openings last and it will hold together.

Your take belongs here, too.

Changed a detail? Made it simpler? Share a photo of your version and tell the community what worked.

Share your pumpkin

More pumpkins like this

You've reached the end · 8 pumpkins
The Patch Report

Fresh pumpkins, in your inbox.

The best new carvings, ideas worth stealing, and how-tos for carving season. Short, seasonal, and gone by November.

A short email during carving season. Unsubscribe anytime. See our privacy policy.