Halloween Pumpkin Carving Contest · Starts October 1st · $500 in prizes
← Back to ideas
@ai_concepts
Sep 14, 2026
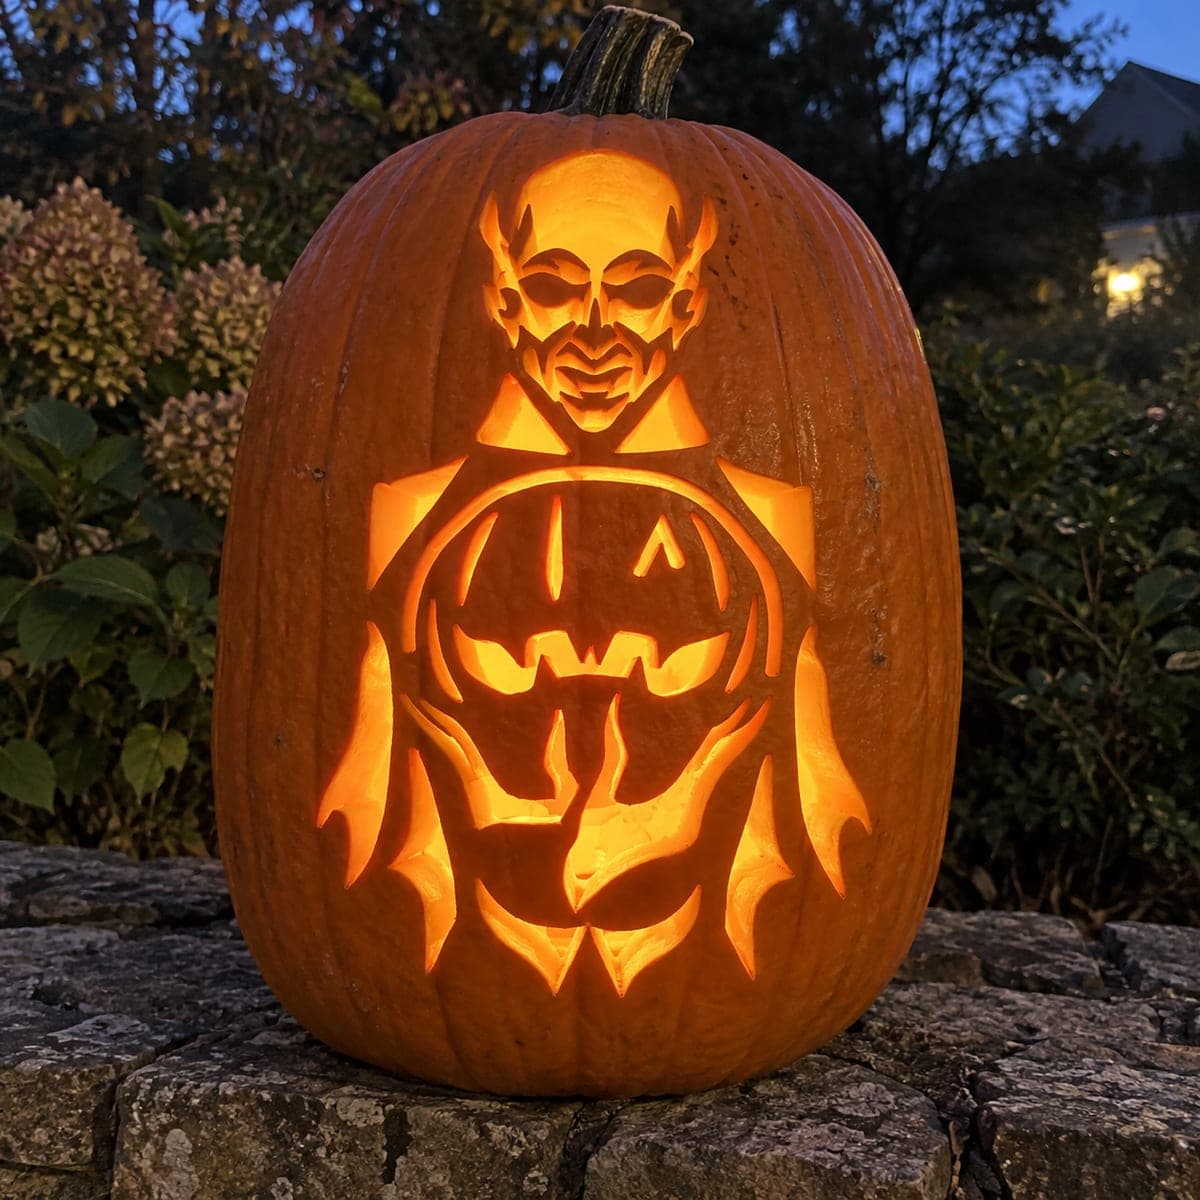
Small Vampire Bust With Fangs PumpkinAI
0

Small Vampire Bust With Fangs Pumpkin

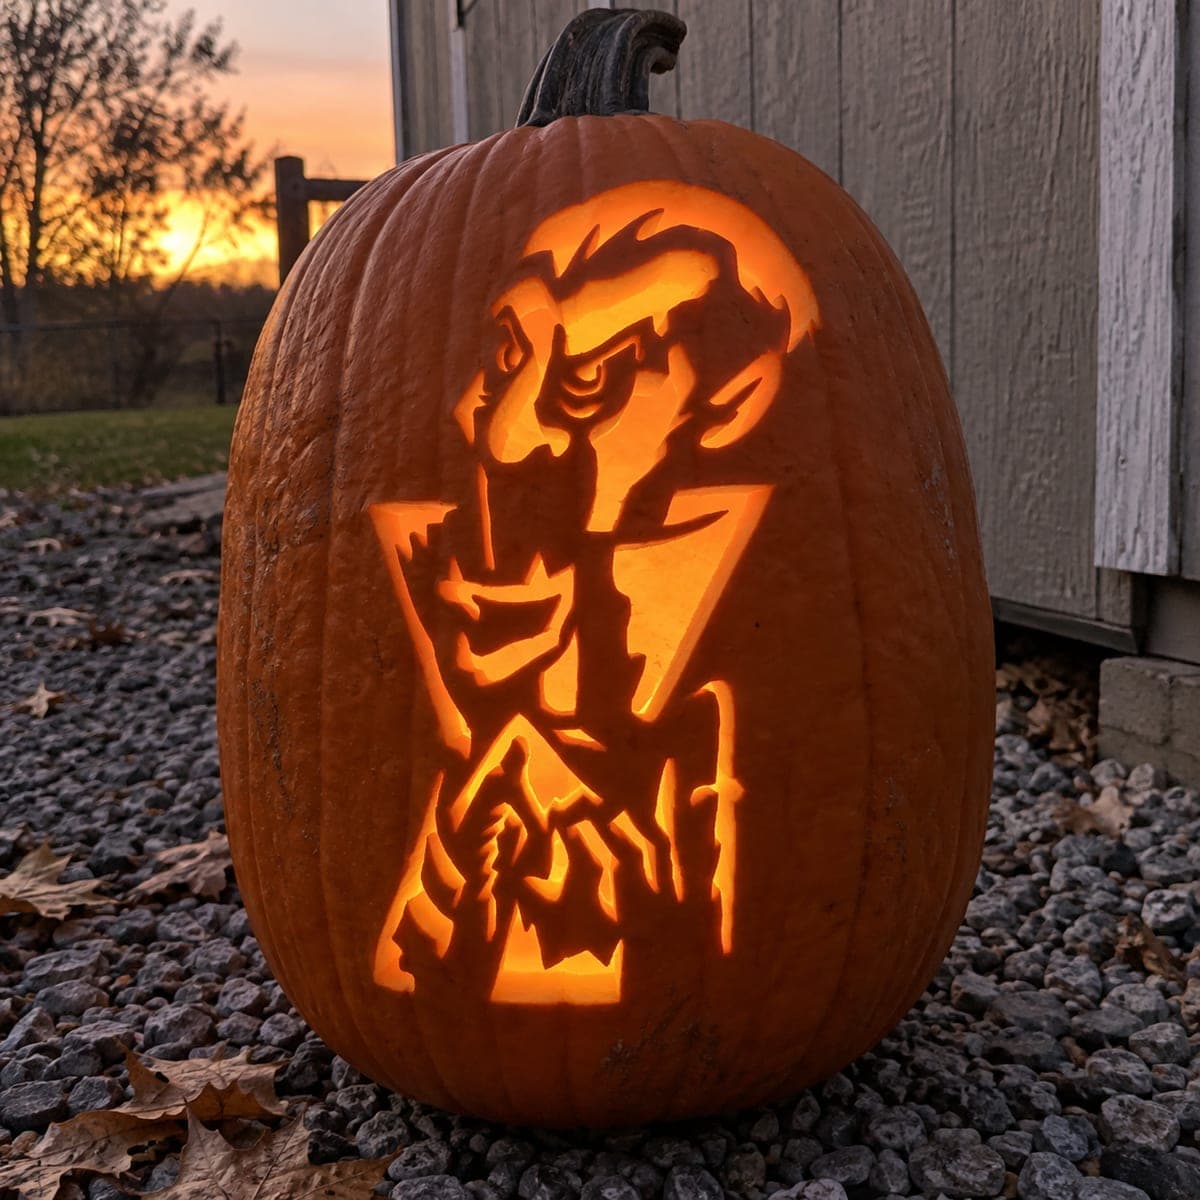
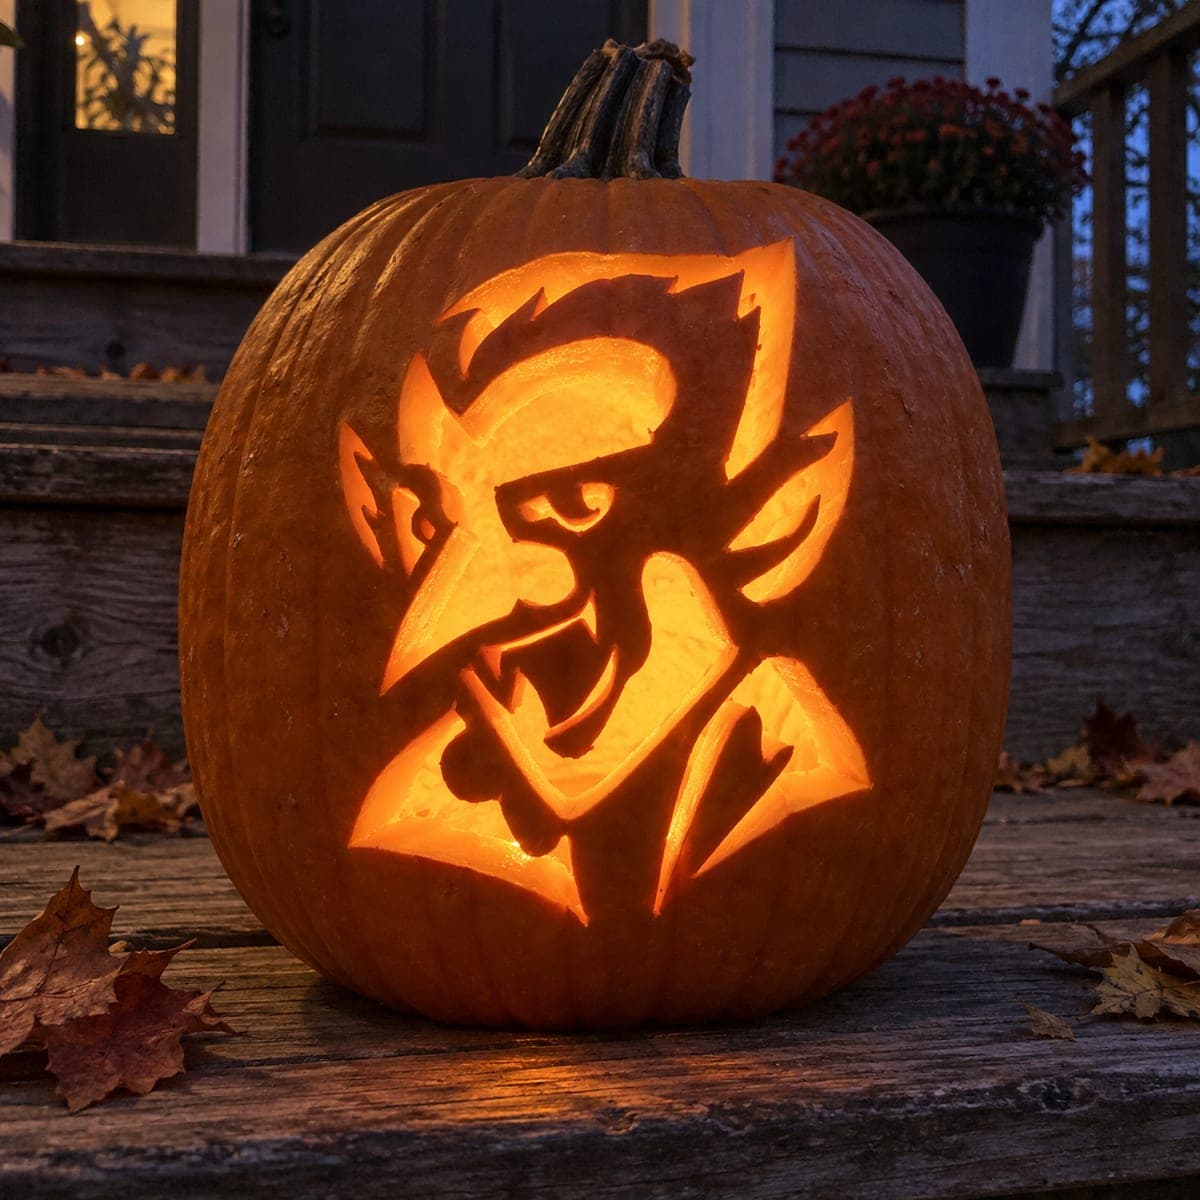
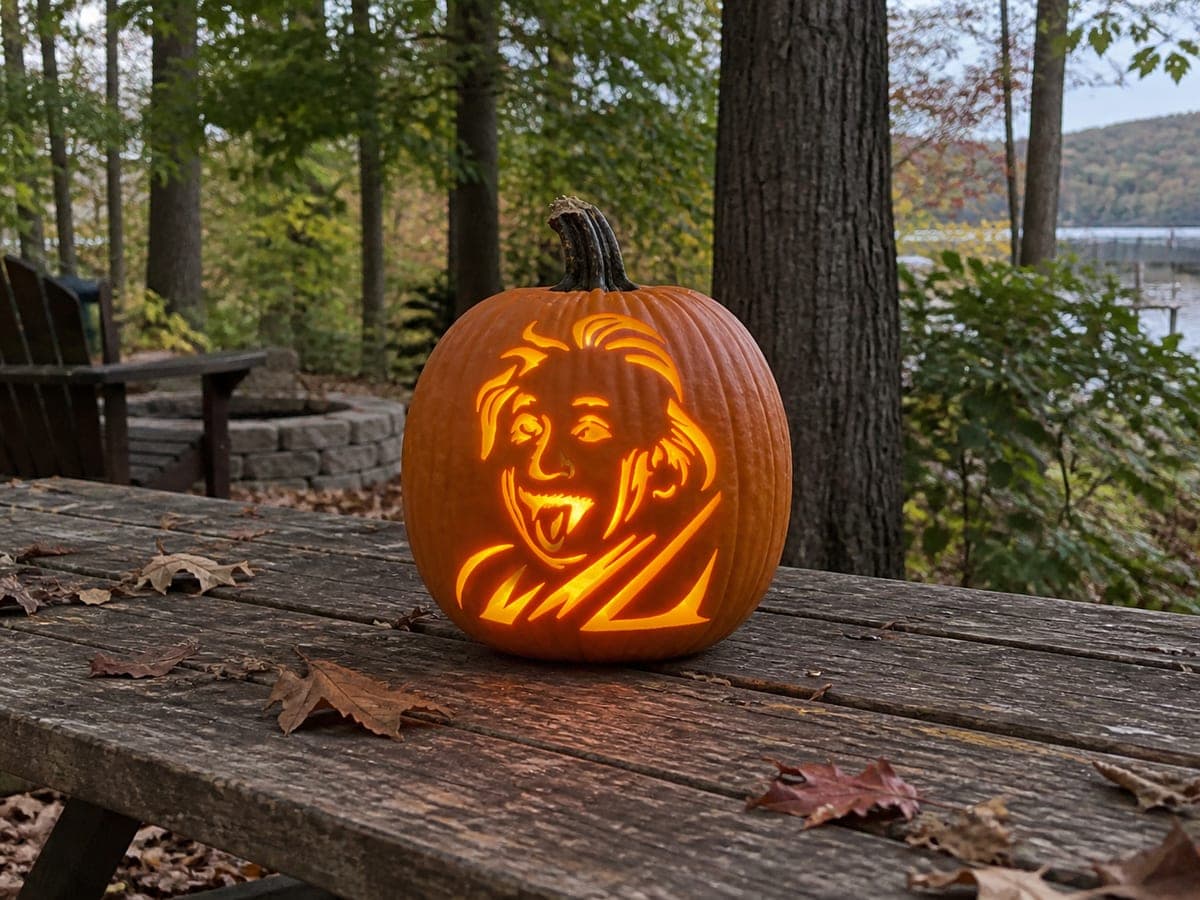
A small vampire figure with swept hair, round eyes, and two visible fangs stands in a three-quarter bust pose with a high folded collar, all glowing as a cutout against the dark rind of this jack-o-lantern. Because the design is compact and centered, use a pumpkin with a flat face so the figure does not bend around the curvature. Carve the tiny fang gaps and the thin collar edges last, when the surrounding pieces are already removed and you can see exactly how much material remains.

This is an AI-generated concept image: a realistic, carvable design idea rather than a photo of a finished carve. AI concepts are always labeled and sit out the leaderboard and the contest.

No ratings yet · Sign in to rate
Comments (0)

  • No comments yet — be the first.

Save without an account. Sign in to like or comment.

Our tips for carving a similar design

The core trick here is treating the whole figure as one bright silhouette, so the light reads the character from across the yard. You plan the outline first, then save the tiny fang gaps and thin collar edges for last so you can judge exactly how much rind is left before you cut them. Because this design was rendered as a concept, no real pumpkin was carved, but the plan below reproduces the same look safely on an actual gourd.

Written by PumpkinCarvingIdeas.com, inspired by the image above. These are our suggestions, not instructions from the uploader. This approach to the AI concept has not been tested on a real pumpkin.

From pumpkin to porch

  1. Pick a flat-faced pumpkin and prep it

    Choose a pumpkin with a broad, flat front so the compact figure does not warp around the curve. Cut a hatch in the bottom or back rather than the top, which keeps the stem intact and gives you a stable base. Scrape the inside wall behind the face down to about one inch thick so light passes evenly. A thinner wall makes the small fang cuts much easier to control later.

  2. Transfer the stencil cleanly

    Tape your vampire bust stencil tight to the flat face and poke the outline with a transfer tool or a pin along every line. Keep dots close together on the small features like the eyes, fangs, and collar folds so nothing gets lost. Peel the paper and connect the dots lightly with a marker if it helps you see the shapes. Double check that the fang gaps and collar edges have tiny bridges of rind planned to hold the pieces together.

  3. Cut the large silhouette openings first

    Start with the biggest bright areas, the hair sweep and the open background shapes around the bust. Use a fine saw tool and let it do the work with gentle strokes rather than force. Removing these first opens the design and shows you how the light will fall. Cut big openings before small ones so the panel stays strong while you work the detail.

  4. Shape the face features

    Work the round eyes, the nose line, and the mouth next, keeping each opening a hair inside your marked line. Angle the blade slightly so you can widen a cut later if needed, since it is easy to remove more but impossible to add rind back. Test the glow with an LED as you go to check that features read clearly. Keep the collar and fangs untouched for now.

  5. Save the fangs and thin collar edges for last

    Now that the surrounding pieces are gone, you can see exactly how much material remains for the delicate cuts. Carve the two small fang gaps and the thin high-collar edges carefully with the tip of a small blade. Leave a narrow bridge of rind wherever a thin piece would otherwise fall away, so the collar and fangs stay supported. Go slow here, since these are the details that sell the vampire.

  6. Light it and take the photo

    Drop in a battery LED puck or string, never a candle, so the thin bridges do not scorch. Set the pumpkin outdoors at dusk on a flat surface like a picnic table or step. Shoot slightly to one side so the glow shows depth on the carved face. A little petroleum jelly on the cut edges slows drying and keeps the fangs crisp for a few extra days.

Gather your supplies

Check things off as you get ready.

Work on a stable surface, keep your free hand out of the cutting path, and have an adult handle sharp tools.

Three levels of light

  • Leave intact

    The dark rind background and the outer edge of the face, which frame the glowing bust

  • Peel & shade

    Optional shallow-scraped shading on the hair or cheek to give a dim orange midtone

  • Cut through

    The hair sweep, eyes, mouth, fang gaps, and collar openings for the brightest glow

Learn the carving basics

Before you start cutting

How do I keep the two fangs from breaking off?

Keep the fang gaps small and cut them last, once the mouth opening around them is already done. Leave the fangs as narrow points of solid rind with a little extra width at the base for strength. Thin the interior wall first so you are not forcing the blade, which is what usually snaps a delicate point.

My pumpkin is round, not flat. Can I still carve this?

You can, but the compact figure may stretch or bend around the curve and distort the face. If a flat pumpkin is not available, choose the flattest panel you have and keep the design a bit smaller so it sits within the flatter zone. You can also press the stencil in place with small relief snips at the paper edges to help it lie flat.

How thin should the high collar edges be?

Aim for edges no thinner than about a quarter inch, and leave a small bridge connecting the collar to the neck or shoulder so it does not sag. Because the collar is folded and tall, it carries the vampire silhouette, so support it well. Cut it after the surrounding pieces are gone so you can see exactly what is holding it.

Your take belongs here, too.

Changed a detail? Made it simpler? Share a photo of your version and tell the community what worked.

Share your pumpkin

More pumpkins like this

You've reached the end · 8 pumpkins
The Patch Report

Fresh pumpkins, in your inbox.

The best new carvings, ideas worth stealing, and how-tos for carving season. Short, seasonal, and gone by November.

A short email during carving season. Unsubscribe anytime. See our privacy policy.