Halloween Pumpkin Carving Contest · Starts October 1st · $500 in prizes
← Back to ideas
@ai_concepts
Sep 14, 2026
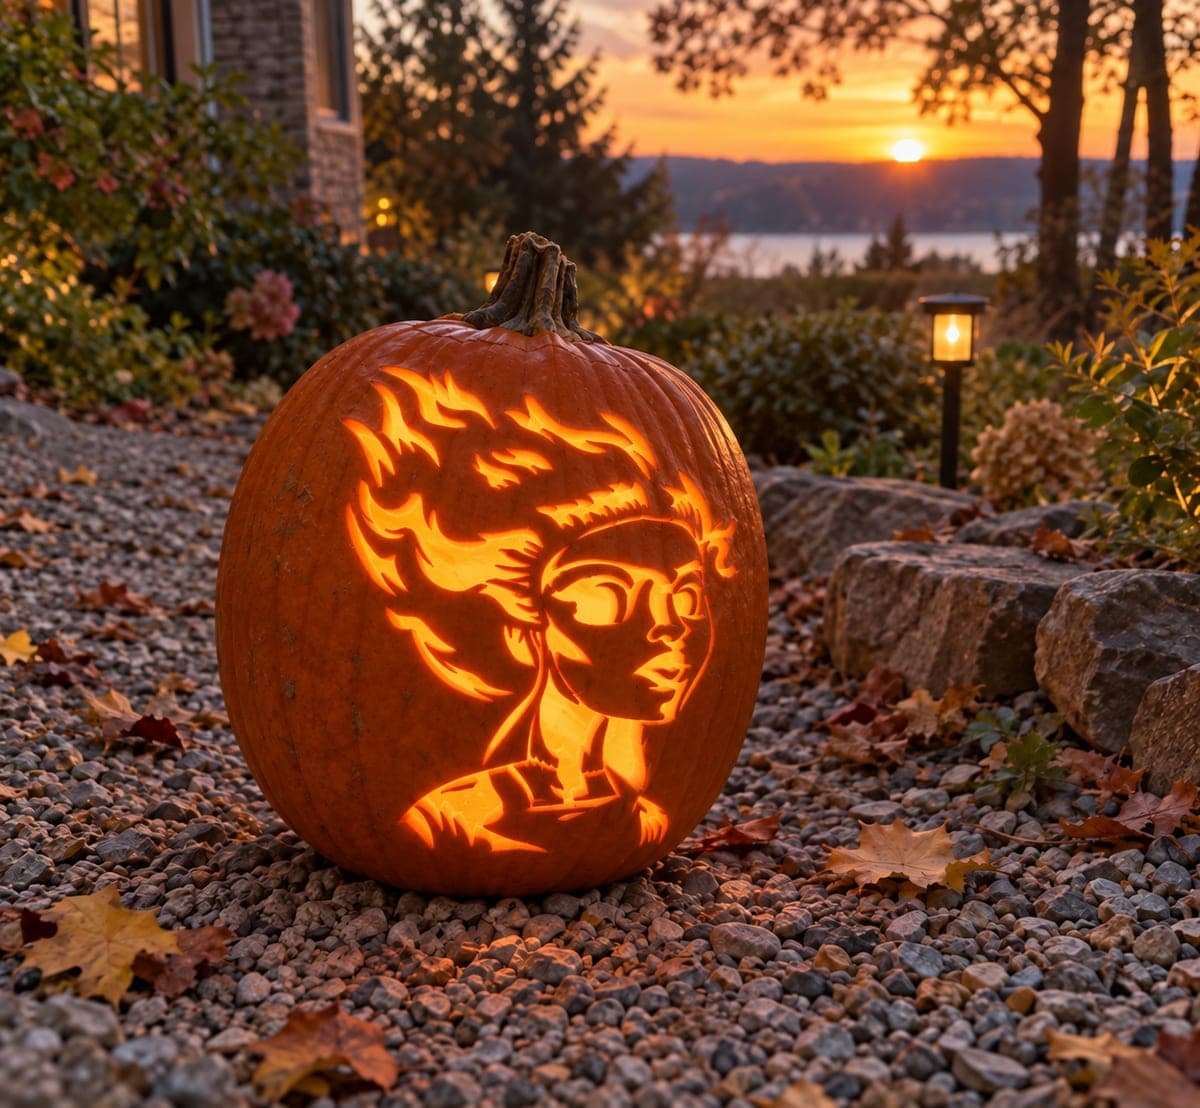
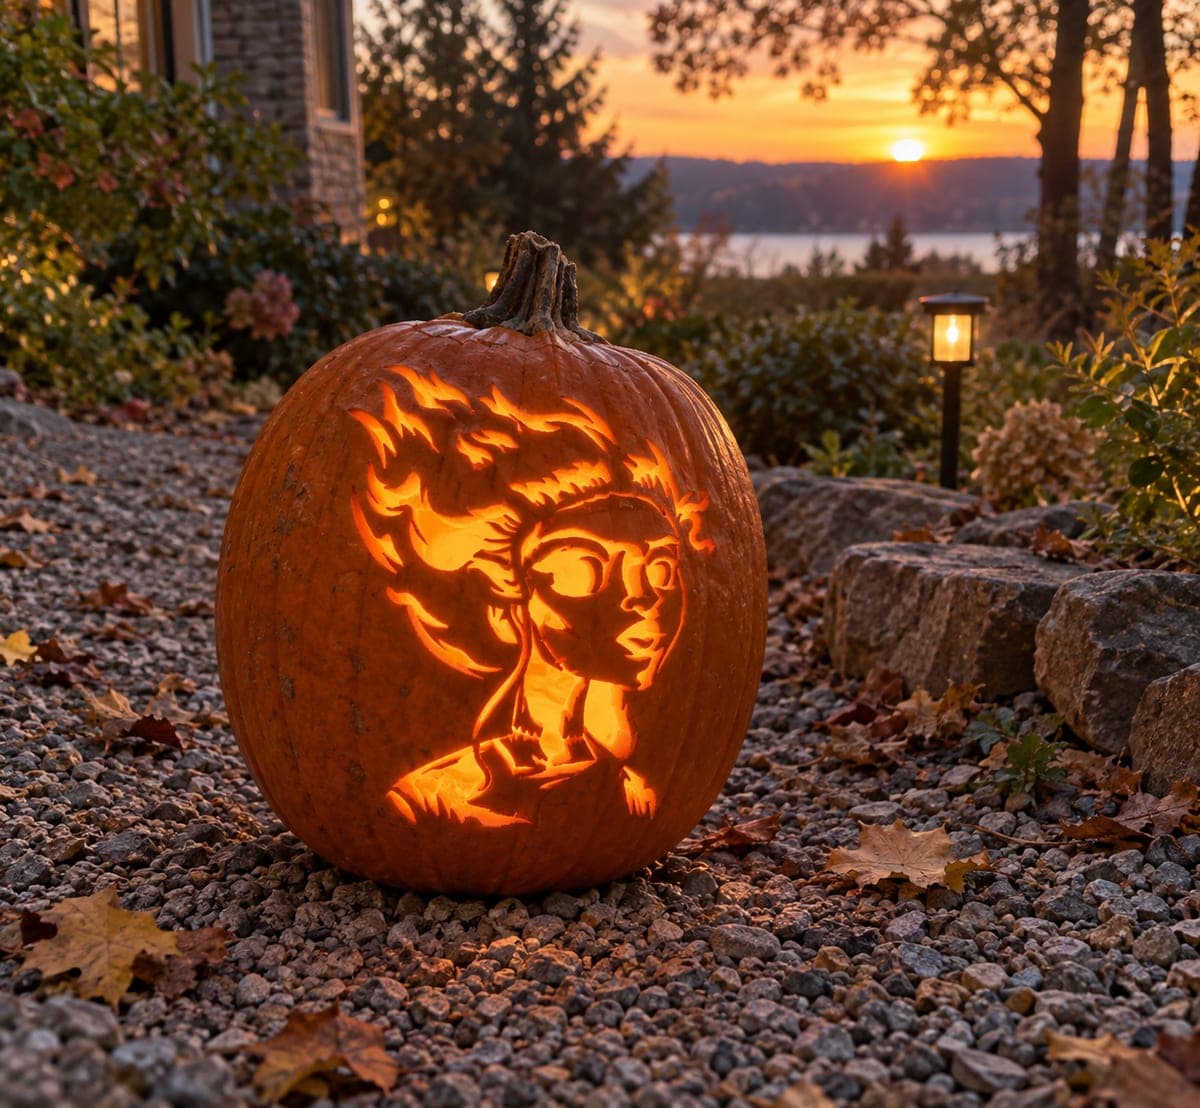
Swept-Hair Bride of Frankenstein Pumpkin
1/2
AI
0

Swept-Hair Bride of Frankenstein Pumpkin

A stylized Bride of Frankenstein bust shows wild flame-shaped hair streaming upward and to the right, with large round eyes and a simplified face rendered as a bright cutout jack-o-lantern carving. The hair mass is fully pierced and glows, creating a bold spiky silhouette that dominates the upper half of the pumpkin. Cut the outer hair flames first to define the boundary of the design, then remove the face and neck interior while leaving a thin dark bridge for the glasses frame across the eyes.

This is an AI-generated concept image: a realistic, carvable design idea rather than a photo of a finished carve. AI concepts are always labeled and sit out the leaderboard and the contest.

No ratings yet · Sign in to rate
Comments (0)

  • No comments yet — be the first.

Save without an account. Sign in to like or comment.

Our tips for carving a similar design

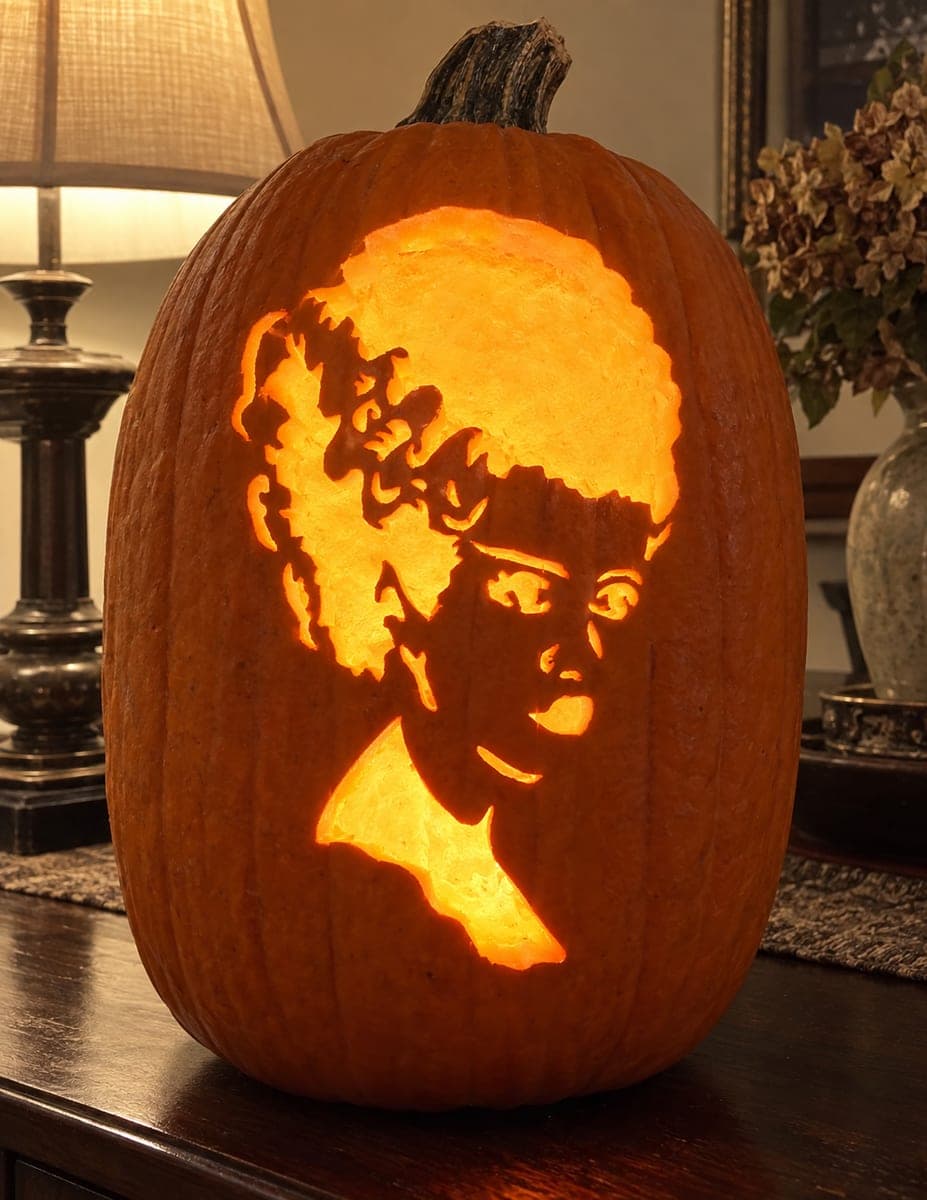
The core trick here is turning the wild, flame-shaped hair into one big glowing cutout that frames a simplified face. You define the spiky hair boundary first, then open the face and neck so light pours through, keeping a thin dark bridge across the eyes to suggest the classic frame. Since this is a concept image, plan your bridges before you cut so the spikes and face features stay attached and structurally sound.

Written by PumpkinCarvingIdeas.com, inspired by the image above. These are our suggestions, not instructions from the uploader. This approach to the AI concept has not been tested on a real pumpkin.

From pumpkin to porch

  1. Prep the pumpkin and pick your face

    Choose a tall, smooth pumpkin with a broad front panel so the hair has room to sweep up and to the right. Cut a hole in the bottom rather than the top so you can set the pumpkin down over an LED light later. Scrape the inside wall of the carving area down to about one inch thick so your blade moves easily. A thinner wall also lets the peeled sections glow more evenly.

  2. Transfer the stencil

    Tape your printed stencil flat against the front and poke through the outline with a pin or transfer tool. Mark the outer edge of the hair flames, the face and neck shapes, and the thin bar that will become the eye frame. Step back and check that the design sits high on the upper half where the pumpkin curves gently. Redraw any dotted lines with a marker so they are easy to follow.

  3. Outline the hair flames first

    Start by carving the outer edges of the spiky hair to lock in the silhouette. Use a fine saw and make slow, controlled cuts, letting each flame tip stay narrow but not razor thin so it does not snap. Keep the individual flame strands connected to the main hair mass and to each other with small bridges of skin. Cutting the boundary first gives you a clear map for the interior work.

  4. Open the face and neck

    Remove the interior of the hair, face, and neck so these become bright cutouts. Work from the center outward and save the largest openings for last so the wall stays strong while you carve. Leave a thin dark bridge running across the eyes to read as the frame, and keep a slim bar between the neck and collar so nothing collapses. Take breaks to check the wall is holding.

  5. Peel the shading accents

    For softer glow around the cheek, jaw, and a few inner hair strands, peel just the skin and leave a thin layer of flesh. This mid tone separates the face from the fully open hair and adds depth. Use a lino or ribbon tool and shave gradually, checking the color against a light. Stop while the peeled areas still hold a dim orange rather than punching all the way through.

  6. Light it and photograph

    Set a battery LED puck or string inside and never use a candle near these thin bridges. Warm white light brings out the orange best and makes the hair flames read as fire. Take your photo at dusk so the glow stands out against the fading sky. If any spike looks weak, dab a little petroleum jelly on cut edges to slow drying and keep the shape crisp overnight.

Gather your supplies

Check things off as you get ready.

Work on a stable surface, keep your free hand out of the cutting path, and have an adult handle sharp tools.

Three levels of light

  • Leave intact

    The untouched skin around the pumpkin and the thin bridge across the eyes stay dark to define the frame.

  • Peel & shade

    The cheek, jaw, and a few inner hair strands get skin-peeled for a dim orange mid tone.

  • Cut through

    The flame-shaped hair mass, the face interior, and the neck are cut through for the brightest glow.

Learn the carving basics

Before you start cutting

How do I keep the flame-shaped hair spikes from breaking?

Keep each spike a little wider than feels necessary and leave small skin bridges linking the tips back to the main hair mass. Carve the outer boundary first, then remove interior chunks so the wall stays supported as long as possible. If a tip feels fragile, shorten it slightly rather than thinning it further.

What is the eye frame bridge and why leave it?

The thin dark bar across the eyes stays as uncut skin so it reads as a glasses or frame line against the bright cutouts. Cutting all the way through would erase that detail and weaken the wall between the two eye openings. Mark it clearly before carving and cut around it, not through it.

Should the hair be a full cutout or shaded?

On this design the main hair mass is a full cutout so it glows brightest and forms a bold silhouette. You can peel just a few inner strands to a mid tone to add depth near the face. Save the biggest hair openings for last so the pumpkin wall holds its shape while you work.

Your take belongs here, too.

Changed a detail? Made it simpler? Share a photo of your version and tell the community what worked.

Share your pumpkin

More pumpkins like this

You've reached the end · 8 pumpkins
The Patch Report

Fresh pumpkins, in your inbox.

The best new carvings, ideas worth stealing, and how-tos for carving season. Short, seasonal, and gone by November.

A short email during carving season. Unsubscribe anytime. See our privacy policy.