Halloween Pumpkin Carving Contest · Starts October 1st · $500 in prizes
← Back to ideas
@ai_concepts
Aug 3, 2026
Fierce Ninja Mask Jack-O-Lantern CarvingAI
0

Fierce Ninja Mask Jack-O-Lantern Carving

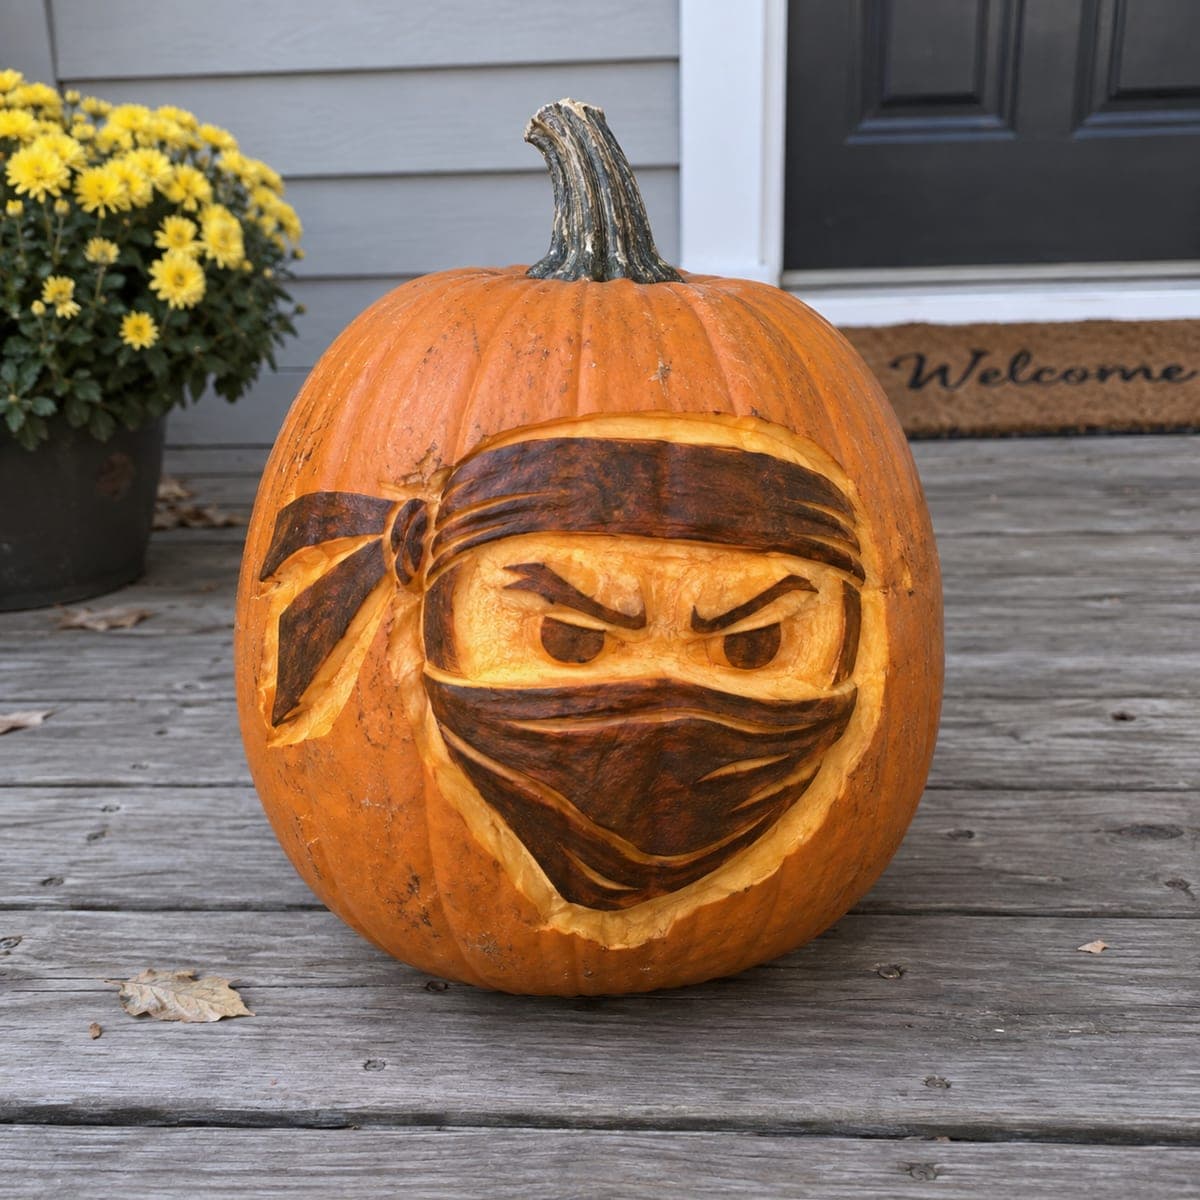
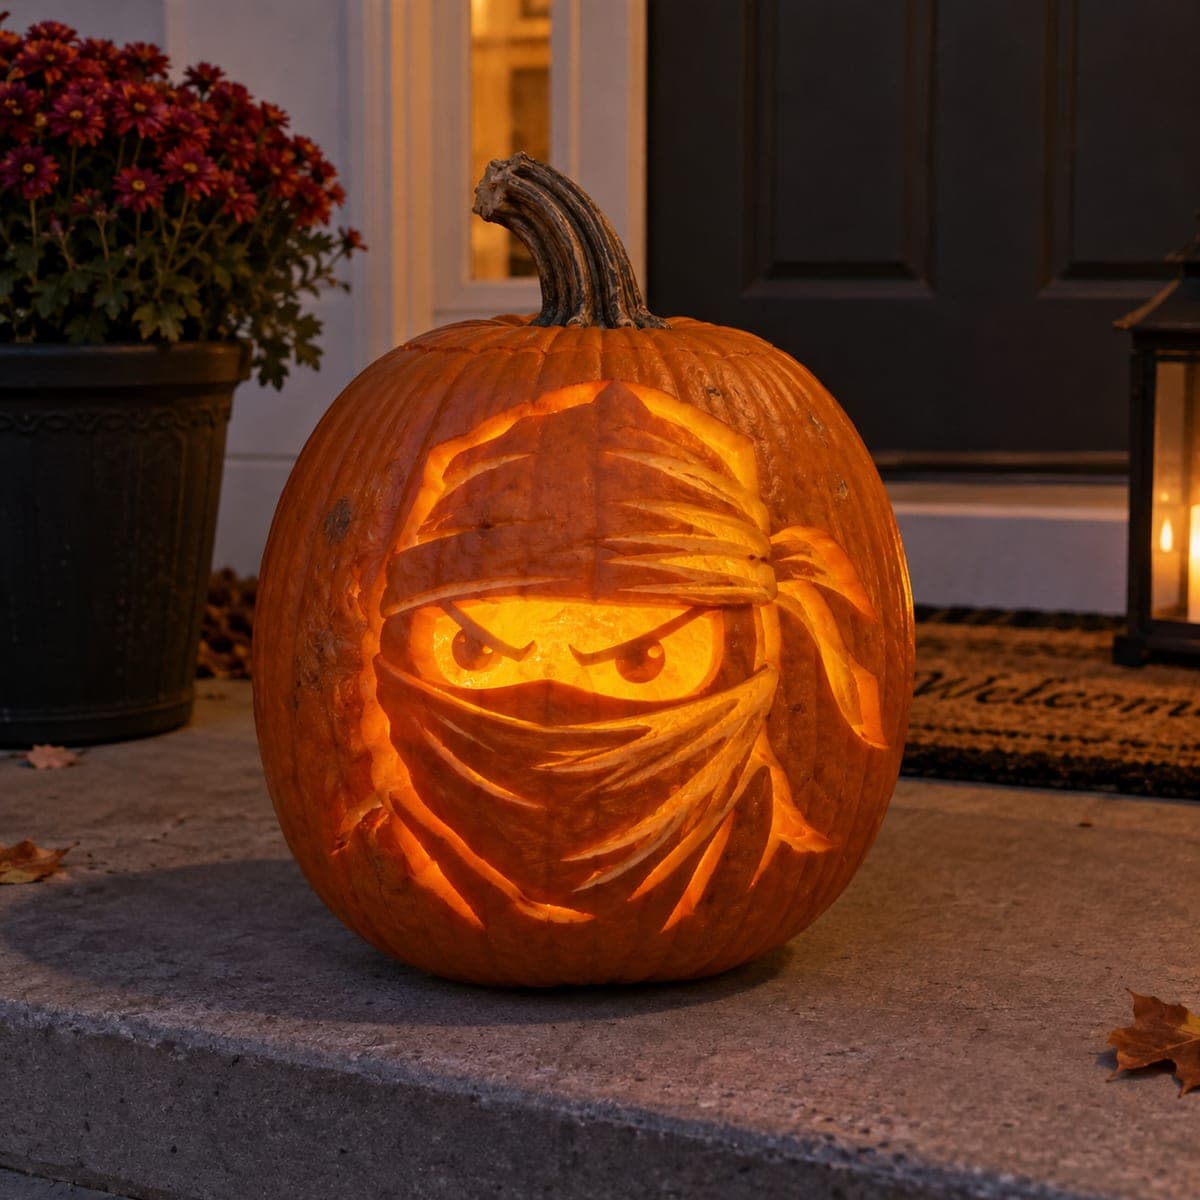
Narrowed eyes glare from behind a wrapped ninja mask on this pumpkin carving idea, with flowing head-wrap tails that trail off to the side. The mask folds are surface-etched so they glow softly, while the eye slot is carved deeper to blaze bright. Carve the eyes first since they carry the expression, then peel the wrap sections in long strokes to mimic fabric. Great for a martial-arts-obsessed kid's porch pumpkin.

This is an AI-generated concept image: a realistic, carvable design idea rather than a photo of a finished carve. AI concepts are always labeled and sit out the leaderboard and the contest.

No ratings yet · Sign in to rate
Comments (0)

  • No comments yet — be the first.

Save without an account. Sign in to like or comment.

Our tips for carving a similar design

The whole effect rests on a contrast trick: keep the wrapped mask folds as shallow skin peels so they glow dim, then cut the narrowed eyes all the way through so they blaze. Plan the face in three depths before you start, mapping the dark stem area, the peeled fabric bands, and the two bright eye slots. Work from the eyes outward so the expression stays centered.

Written by PumpkinCarvingIdeas.com, inspired by the image above. These are our suggestions, not instructions from the uploader. This approach to the AI concept has not been tested on a real pumpkin.

From pumpkin to porch

  1. Transfer the design and plan your depths

    Pick a smooth, tall pumpkin so the wrap tails have room to trail off to one side. Tape your stencil on and poke the outlines with a pin or transfer tool, marking which zones are eyes, which are peeled folds, and which stay untouched. Step back and check the face reads clearly before any blade touches the shell. A quick pencil shade of the peel areas keeps you from cutting through by mistake.

  2. Open the pumpkin and thin the wall

    Have an adult cut a lid from the bottom or back rather than around the stem, so the stem stays intact as shown. Scoop out the seeds and pulp, then scrape the inside of the face area until the wall is about one inch thick. A thinner wall makes the peeled folds glow through far more easily. Keep the rim clean so the pumpkin sits flat.

  3. Cut the eyes first

    The narrowed, angry eyes carry the entire expression, so carve them before anything else. Use a small serrated saw to cut two thin, angled slots that tilt down toward the nose for that fierce glare. Cut slowly and keep the top edge of each eye sharp, since that line does most of the work. If a slot ends up too small, you can always widen it, but you cannot add pumpkin back.

  4. Peel the mask folds in long strokes

    Switch to a lino or ribbon gouge and shave away only the skin on the wrap bands, leaving the orange flesh exposed but not cut through. Pull each stroke in one long, curving motion to mimic the flow of fabric across the face and down the tails. Vary how deep you peel: slightly deeper peels glow brighter, giving the folds dimension. Leave thin ridges of untouched skin between bands so the folds stay crisp and separated.

  5. Shape the head-wrap tails

    Carry the peeled strokes off to the side where the wrap trails away, tapering each tail to a point. Keep these as surface peels rather than cutouts so the shape holds together and does not sag. Leave the very top of the head and the deepest shadow lines as untouched skin so the mask has a dark frame. This contrast is what makes the eyes pop.

  6. Light it and photograph

    Drop in a battery LED, warm white or amber, never a candle, and set it low inside so light rakes up through the peels. Test in a dark room and adjust: if the folds look flat, peel a touch deeper in spots. Rub cut edges with a little petroleum jelly to slow drying. Shoot your photo at dusk on a step so the glow reads against the shadows.

Gather your supplies

Check things off as you get ready.

Work on a stable surface, keep your free hand out of the cutting path, and have an adult handle sharp tools.

Three levels of light

  • Leave intact

    The top of the head, the deep shadow lines between folds, and the outer background stay as untouched skin for a dark frame.

  • Peel & shade

    The wrapped mask bands and the trailing head-wrap tails are skin-peeled so they glow soft orange like fabric.

  • Cut through

    The two narrowed eye slots are cut all the way through for the brightest, fiercest blaze.

Learn the carving basics

Before you start cutting

How do I keep the eyes looking angry instead of surprised?

Angle both eye slots so they slope downward toward the center of the face, and keep them thin. The sharp top edge is what sells the glare, so cut that line cleanly and avoid rounding it. Cut them first while you have the most pumpkin to work with.

Will the peeled fabric folds actually glow, or just look scratched?

They glow as long as you thin the inside wall to about an inch and peel down to the moist flesh, not just scuff the surface. The thinner the remaining wall under a peel, the brighter it reads. Test with your LED in a dark room and go a little deeper on any fold that stays dull.

The head-wrap tails look delicate. How do I keep them from breaking?

Keep the tails as surface peels rather than full cutouts, so there are no fragile floating pieces. If you do want a cut edge on a tail, leave small uncut bridges of skin to anchor it. Since this is a concept image, plan the tails as shaded shapes and your pumpkin will hold together far better.

Your take belongs here, too.

Changed a detail? Made it simpler? Share a photo of your version and tell the community what worked.

Share your pumpkin

More pumpkins like this

You've reached the end · 8 pumpkins
The Patch Report

Fresh pumpkins, in your inbox.

The best new carvings, ideas worth stealing, and how-tos for carving season. Short, seasonal, and gone by November.

A short email during carving season. Unsubscribe anytime. See our privacy policy.