Halloween Pumpkin Carving Contest · Starts October 1st · $500 in prizes
← Back to ideas
@ai_concepts
Sep 14, 2026
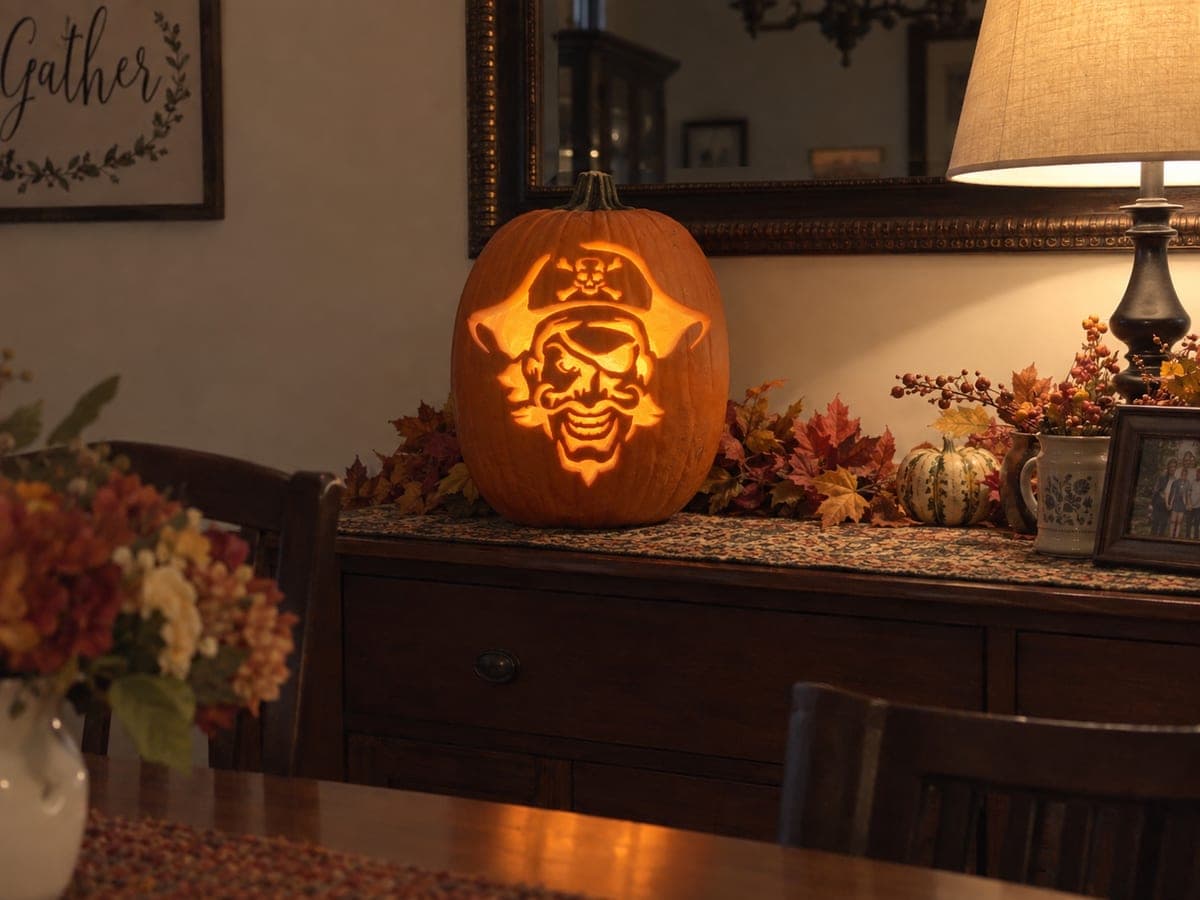
Ornate Pirate Captain Skull PumpkinAI
0

Ornate Pirate Captain Skull Pumpkin

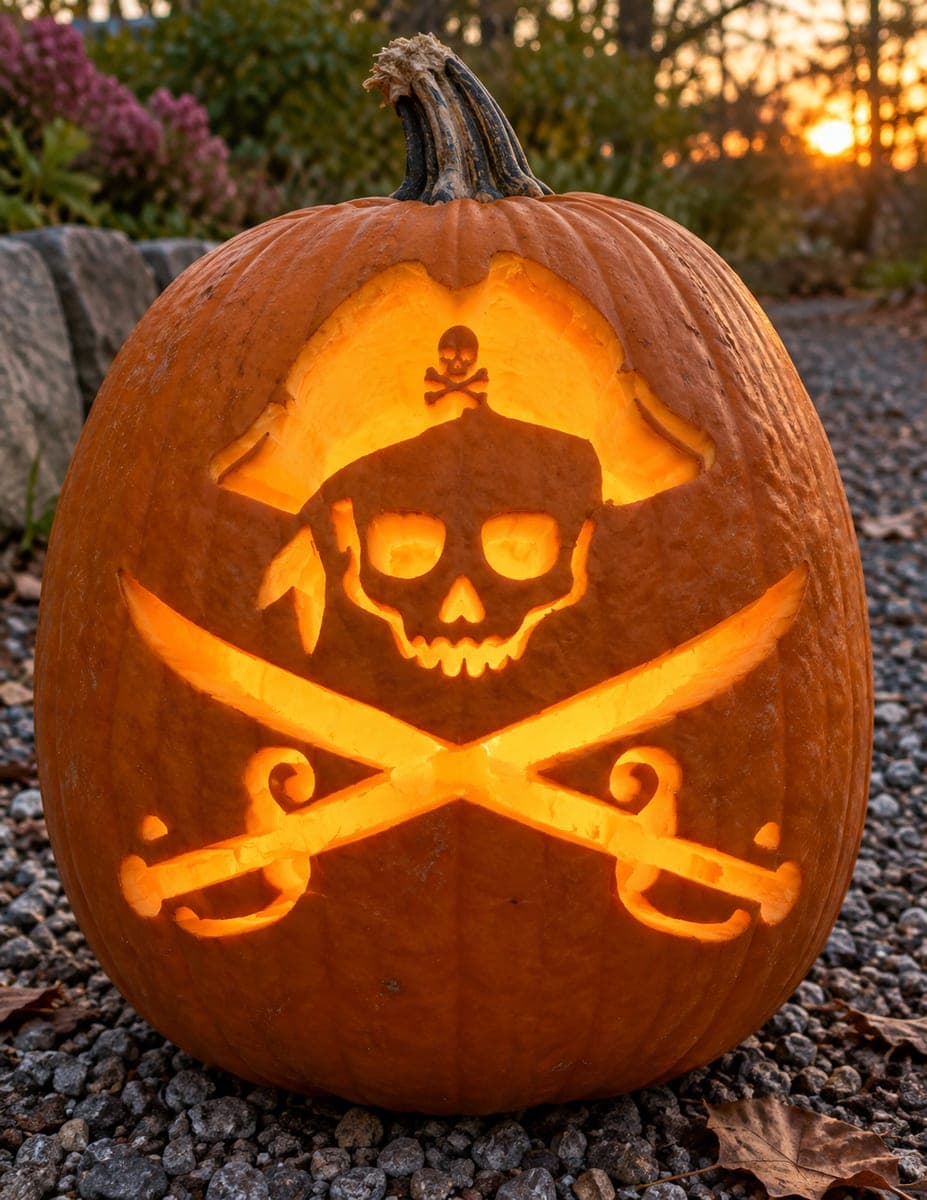
A detailed pirate captain's skull wears a wide tricorn hat with a small Jolly Roger badge, rendered with fine hatching and decorative detail in this shaded pumpkin carving. The scraping technique builds tonal depth, with the skull face scraped bright against a mid-toned hat and the dark hat brim left fully unpeeled for contrast. Work the hat's decorative badge details with a narrow loop tool before scraping the broad skull face so those fine lines do not smear across freshly peeled flesh.

This is an AI-generated concept image: a realistic, carvable design idea rather than a photo of a finished carve. AI concepts are always labeled and sit out the leaderboard and the contest.

No ratings yet · Sign in to rate

Comments (0)

  • No comments yet — be the first.

Save without an account. Sign in to like or comment.

Our tips for carving a similar design

The core trick here is tonal scraping rather than open cutting, where the skull face is peeled bright against a mid-toned hat and a dark, untouched brim. You could build this look by mapping three depths first, then peeling from lightest to darkest so fine hat details stay crisp. A small badge with a tiny Jolly Roger reads best when carved before the broad face is scraped smooth.

Written by PumpkinCarvingIdeas.com, inspired by the image above. These are our suggestions, not instructions from the uploader. This approach to the AI concept has not been tested on a real pumpkin.

From pumpkin to porch

  1. Transfer the pattern and plan your tones

    Print the pirate captain stencil sized to your pumpkin and tape it flat, snipping the edges so it hugs the curve. Poke the outlines with a pin or transfer tool, marking which zones will be dark skin, mid peel, and full cutout. Marking these before you cut keeps the shading logic clear. Take a photo of your plan so you can check it as you go.

  2. Open a lid and hollow the pumpkin

    An adult should cut a lid from the bottom or back at an angle so it sits like a plug. Scoop the pulp and thin the carving wall to about one inch so scraping shows light evenly. A flatter interior wall on the front face gives you more consistent glow. Blot the flesh dry before you start detail work.

  3. Carve the fine badge and hat details first

    Use a narrow loop tool to work the small Jolly Roger badge and the decorative hatching on the tricorn hat. Doing these tight lines first means you will not drag scraped pulp across finished areas. Keep cuts shallow and leave thin bridges of skin between lines so nothing tears loose. Wipe your tool often to keep edges sharp.

  4. Scrape the skull face bright

    With the details set, peel the broad skull face down to a thin, glowing layer using a wider loop tool. Aim for even pressure so the face reads as your brightest tone. Scrape a little at a time and hold the pumpkin to a light to check how bright it is getting. Leave the eye patch and shadow areas thicker for contrast.

  5. Peel the hat to a mid tone and leave the brim dark

    Take the main body of the hat down only partway so it glows dimmer than the face. Leave the outer brim fully unpeeled so it stays dark and frames the whole design. This three-level contrast is what sells the pirate look. Cut fully through only the smallest accent openings, and save those for last so the wall stays strong.

  6. Light it and photograph

    Drop in an LED tea light or a small battery puck, never a flame, since the thin scraped areas can scorch. Set the pumpkin in a dim room and let the face glow brightest against the dark brim. Mist the cut edges with water and refrigerate between showings to keep it fresh. Snap your photo straight on so all three tones show.

Gather your supplies

Check things off as you get ready.

Work on a stable surface, keep your free hand out of the cutting path, and have an adult handle sharp tools.

Three levels of light

  • Leave intact

    The outer tricorn hat brim stays fully unpeeled and dark to frame the face.

  • Peel & shade

    The main hat body and badge are scraped to a mid orange glow.

  • Cut through

    Only the smallest accent openings are cut fully through for the brightest spots.

Learn the carving basics

Before you start cutting

How do I keep the fine hat hatching from smearing?

Carve all the narrow badge and hat lines before you scrape the large skull face. Fresh peeled pulp is wet and drags easily across nearby detail. Wipe your loop tool between cuts and work from detailed areas outward.

This is a shaded design, so how much do I actually cut through?

Very little. Most of the effect comes from scraping the flesh to different thicknesses rather than opening holes. Reserve full cutouts for tiny accents and do them last so the wall stays strong.

What pumpkin shape works best for a tall captain portrait?

Pick a tall pumpkin with a smooth, slightly flat front so the hat and face fit without wrapping around the curve. Thin the inside wall evenly to about an inch so the scraped tones glow consistently. Avoid deep ribs across the face area.

Your take belongs here, too.

Changed a detail? Made it simpler? Share a photo of your version and tell the community what worked.

Share your pumpkin

More pumpkins like this

You've reached the end · 8 pumpkins
The Patch Report

Fresh pumpkins, in your inbox.

The best new carvings, ideas worth stealing, and how-tos for carving season. Short, seasonal, and gone by November.

A short email during carving season. Unsubscribe anytime. See our privacy policy.