Halloween Pumpkin Carving Contest · Starts October 1st · $500 in prizes
← Back to ideas
@ai_concepts
Sep 25, 2026
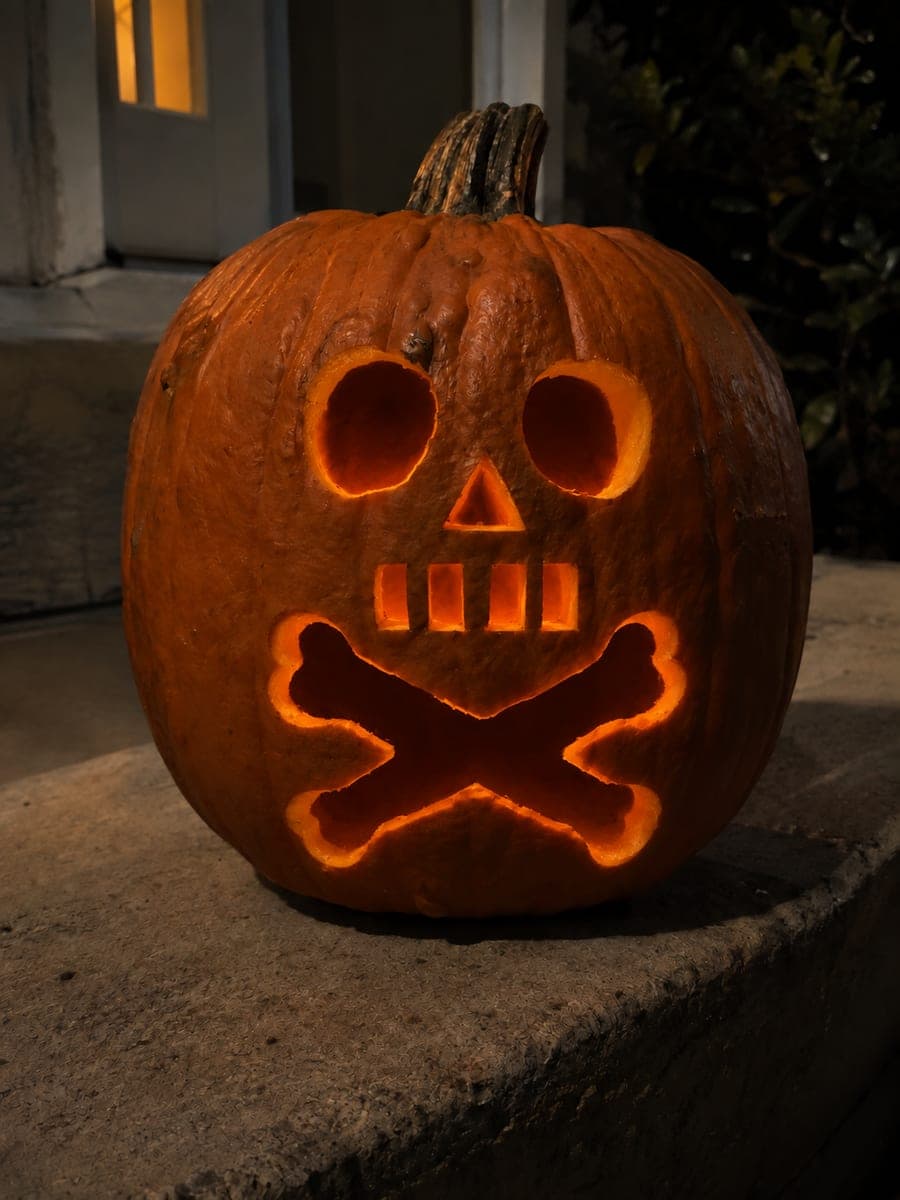
Detailed Skull and Crossbones Silhouette Pumpkin on BrickAI
0

Report this carving

Tell us what is wrong. Reports are private.

Detailed Skull and Crossbones Silhouette Pumpkin on Brick

Anchored eye bars, facial cutouts, and a bold empty crossbones silhouette make this hard skull and crossbones pumpkin carving a step up from simpler versions, displayed on brick at night. Each eye bar must be anchored at both ends before any surrounding rind is removed, so transfer the template carefully and check the anchor points first. Cut the facial holes and crossbones silhouette as separate passes once the eye bars are confirmed solid. Brick behind the pumpkin reflects warm light upward for a moody effect.

No ratings yet · Sign in to rate

Comments (0)

  • No comments yet — be the first.

Save without an account. Sign in to like or comment.

Our tips for carving a similar design

The silhouette technique keeps most of the pumpkin face dark, with the skull's features defined by how light escapes through the carefully placed facial holes. The eye bars are the critical structural element: each bar must anchor at both ends into solid rind before any surrounding material is removed. The bold crossbones silhouette below is cut as a single connected X, keeping the design structurally simple despite its detailed appearance.

From pumpkin to porch

  1. Prep and plan anchor points

    Hollow the pumpkin from the back and scoop to a consistent one-inch wall. Before transferring the design, mark on the template exactly where each eye bar anchors into solid rind at both its left and right ends. These anchor points are non-negotiable and should never be cut into.

  2. Transfer the silhouette design

    Tape the template to the pumpkin face and perforate the outline of every shape. Pay particular attention to the eye bar anchors; perforate right up to the anchor boundary but not across it. Connect all perforations with chalk marker.

  3. Cut the eye bars first

    Begin each eye opening by cutting the openings on either side of the bar, leaving the bar itself fully intact between cuts. Check that both anchor points feel firmly embedded in the surrounding rind. If a bar feels loose, stop and assess the anchor before cutting any more surrounding material.

  4. Complete the facial cutouts

    With the eye bars confirmed solid, cut the remaining facial holes: nose, mouth, and any small accent holes within the skull face. Work from largest to smallest so the shell is at maximum remaining strength during the bigger cuts.

  5. Cut the crossbones silhouette

    Remove the crossbones as a single connected X below the skull face. Follow the four arms in sequence: tip to center, pivot, tip to center for the second pair. The X shape should sit comfortably below the skull with at least an inch of rind between the skull base and the top of the crossbones.

  6. Light and display on brick

    Place a bright warm LED inside. The silhouette technique creates high contrast; the skull outlines glow while the surrounding rind stays dark. Brick behind the pumpkin reflects warm light upward, adding a moody ambient glow beneath the display.

Written with AI to match this design

Gather your supplies

Check things off as you get ready.

Work on a stable surface, keep your free hand out of the cutting path, and have an adult handle sharp tools.

Three levels of light

  • Leave intact

    The outer skull silhouette area stays dark; the skull shape is defined by surrounding rind that is not cut.

  • Peel & shade

    None; this is a full-cut silhouette technique.

  • Cut through

    The eye openings flanking the bars, facial holes, and the full X crossbones aperture are cut through; light escapes only through these openings.

Learn the carving basics

Before you start cutting

What happens if an eye bar anchor breaks during cutting?

Stop immediately. Press the broken bar back into position and insert a toothpick through it into the adjacent rind, then dab craft glue on both sides of the break. Allow an hour to set before continuing any cuts near that area. Rushing repairs leads to a second break.

How do I get the silhouette effect to read clearly? The whole face looks dark when I view it from outside.

The silhouette effect is intentional: the skull reads as a lighter shape against the dark outer rind only when the pumpkin is lit from inside. From outside in daylight the design looks flat; it fully reveals itself after dark.

The eye bar is too narrow and I am nervous about cutting around it. Can I make it wider?

Yes, as long as you have not yet cut the openings flanking it. Redraw the outline of the eye openings so they are slightly smaller, which effectively widens the bar. A wider bar is structurally safer and will still read as a skull eye detail from a viewing distance.

Your take belongs here, too.

Changed a detail? Made it simpler? Share a photo of your version and tell the community what worked.

Share your pumpkin

More pumpkins like this

You've reached the end · 8 pumpkins
The Patch Report

Fresh pumpkins, in your inbox.

The best new carvings, ideas worth stealing, and how-tos for carving season. Short, seasonal, and gone by November.

A short email during carving season. Unsubscribe anytime. See our privacy policy.