Halloween Pumpkin Carving Contest · Starts October 1st · $500 in prizes
← Back to ideas
@ai_concepts
Sep 25, 2026
Painted Cream Skull and Crossbones Pumpkin with Teal DotsAI
0

Report this carving

Tell us what is wrong. Reports are private.

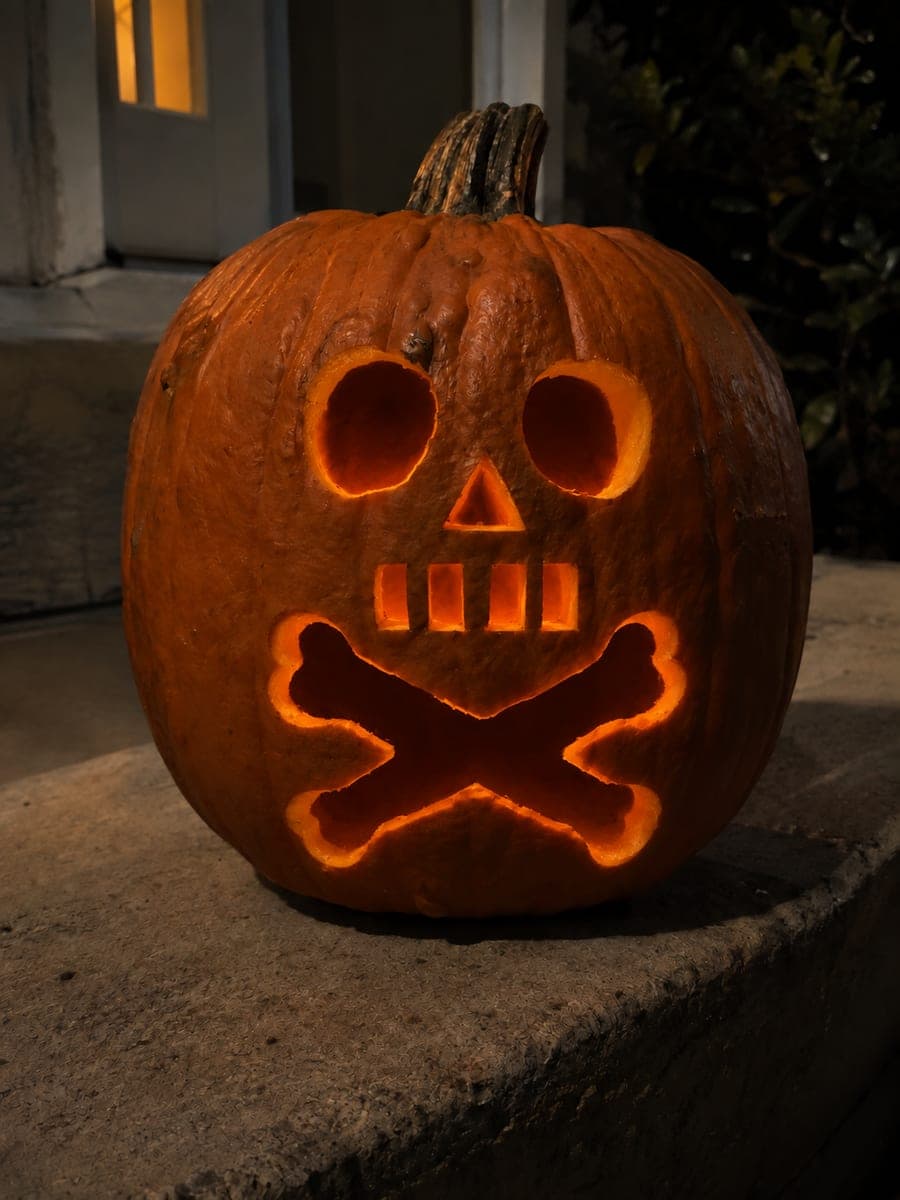
Painted Cream Skull and Crossbones Pumpkin with Teal Dots

A cream skull and crossbones motif with teal dot accents painted on an orange pumpkin makes this no-carve skull and crossbones pumpkin carving friendly for all ages. Sketch the skull lightly in pencil first so proportions look right, then fill with cream acrylic using a medium flat brush. Add the face markings with a fine liner once the base coat is dry, and finish with scattered teal dots for color contrast. Sealing with a clear matte spray ensures the design survives a full October outdoors.

No ratings yet · Sign in to rate
Comments (0)

  • No comments yet — be the first.

Save without an account. Sign in to like or comment.

Our tips for carving a similar design

All the visual impact here comes from painting a cream skull shape and simplified crossbones directly on the orange rind. Sketching proportions in pencil first ensures the skull does not end up too small or off-center before any paint is committed. Teal dot accents provide a color contrast that keeps the design lively without requiring fine brush control. A clear matte sealer protects the finished piece through a full October outdoors.

From pumpkin to porch

  1. Clean and prep the pumpkin

    Wipe the pumpkin with a damp cloth and dry it thoroughly. Choose a pumpkin with a smooth, gently curved front face so brush strokes flow without catching on ridges. Allow twenty minutes of drying time before sketching.

  2. Sketch proportions in pencil

    Lightly sketch the skull oval in the upper half of the face and the crossed bone shapes below. Keep the skull head larger than feels natural; painted skull designs always look smaller on the finished pumpkin than they do in the sketch stage. Erase and redraw until the composition is balanced.

  3. Base coat the skull shape

    Fill the skull oval with cream or off-white acrylic using a medium flat brush. Apply two coats for full opacity over the orange rind, drying between coats. Keep the edges clean by pulling the bristle tips along the outline rather than stroking across it.

  4. Paint the crossbones and face markings

    Once the skull base is dry, paint the crossed bones with the same cream paint extended below the skull. Add black eye circles, a small nose mark, and a simplified grinning mouth with a fine liner brush. Build face markings with confident single strokes rather than multiple tentative lines.

  5. Add teal dot accents

    Dip the rounded end of a toothpick into teal acrylic and press dots across the open areas of the composition: on the skull, near the bone ends, and in the background rind. Space them so they create rhythm without overwhelming the skull motif. Replace the toothpick tip when it flattens.

  6. Seal and display

    When all layers are completely dry, apply two light coats of clear matte outdoor spray sealer. Display where ambient light from a porch lamp or spotlight illuminates the painted face; this design does not need internal lighting.

Written with AI to match this design

Gather your supplies

Check things off as you get ready.

Work on a stable surface, keep your free hand out of the cutting path, and have an adult handle sharp tools.

Three levels of light

  • Leave intact

    All bare orange rind around the painted skull and bones remains visible.

  • Peel & shade

    None; the shell is fully intact.

  • Cut through

    None; an external porch light or spotlight illuminates the painted design.

Learn the carving basics

Before you start cutting

How do I keep the skull face markings from looking smudged?

Let the cream base coat dry completely for at least thirty minutes before adding black detail lines. Wet black on wet cream blends immediately and cannot be lifted cleanly. If a line is not crisp, allow it to dry, paint cream back over the mistake, dry again, and retry.

The teal dots look too scattered. How do I get a balanced layout?

Plan dot clusters rather than random dots. Place a loose cluster of three to five dots in each open area between the skull and the rind edges. Clusters read as intentional; single scattered dots often look accidental.

Can kids help with this project?

Absolutely. Kids can handle the pencil sketch, the base coat fill, and the toothpick dot stage with minimal guidance. Supervise the fine liner work if they are very young, and handle the spray sealer yourself since aerosol fumes require adult handling in a ventilated area.

Your take belongs here, too.

Changed a detail? Made it simpler? Share a photo of your version and tell the community what worked.

Share your pumpkin

More pumpkins like this

You've reached the end · 8 pumpkins
The Patch Report

Fresh pumpkins, in your inbox.

The best new carvings, ideas worth stealing, and how-tos for carving season. Short, seasonal, and gone by November.

A short email during carving season. Unsubscribe anytime. See our privacy policy.

