@lanternlane
Sep 7, 2026

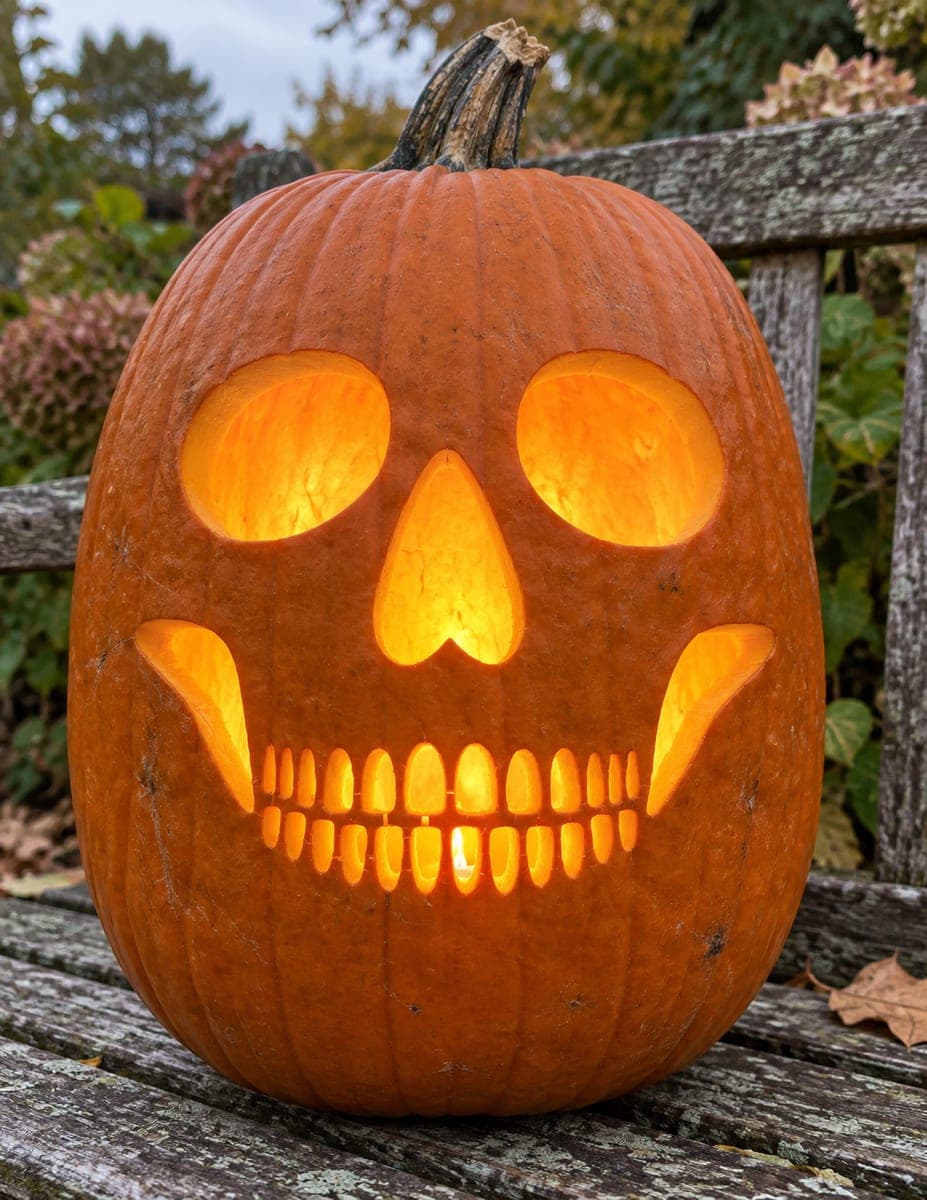
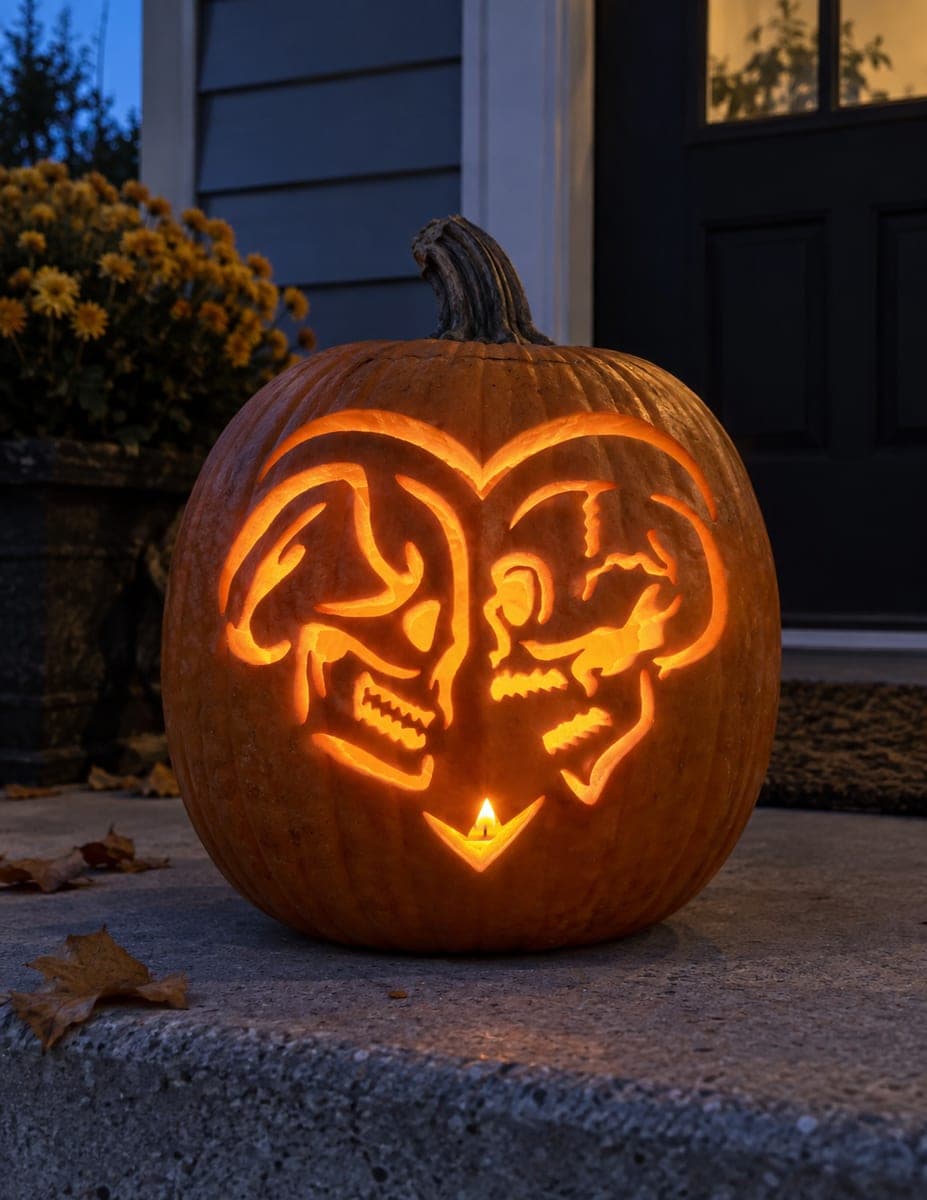
The core trick here is contrast: a crisp skull that reads clearly against a plain background. Plan to peel the bone surfaces for a warm mid glow, then cut through only the sockets, nose, and tooth gaps so the brightest light frames the face. Keep the outline simple and let the light levels do the work.
Written by PumpkinCarvingIdeas.com, inspired by @lanternlane's photo above. These are our suggestions, not instructions from the uploader, and this approach hasn't been tested on their exact carve.
Choose a smooth, fairly round pumpkin so the skull sits centered on the face. Tape your printed skull stencil in place and poke the outlines with a pin or transfer tool. Focus on the eye sockets, nose, and the top and bottom edges of the tooth row. Step back and check the dots read as a skull before you cut anything.
Cut a lid from the back or bottom rather than the top so the stem area stays intact for the design. Scoop the insides and thin the carving wall to about one inch where the skull sits. A thinner wall makes shading and cutouts much easier to control. Dry the inside rim before you start detail work.
Using a lino or peeling tool, remove only the outer skin across the main dome of the skull, the cheekbones, and the jaw. This skin-peeled layer will glow a soft orange when lit. Keep your strokes shallow and even so the bone reads as one smooth surface. Leave the outline and background skin fully intact so the shape stays sharp.
Now cut all the way through the two eye sockets and the triangular nose for the brightest light. Cut the narrow slots between the teeth, but leave thin skin bridges between each tooth so the row stays strong and does not collapse. Save these full cutouts for last since they weaken the wall. Work slowly with a small saw blade and let the tool do the cutting.
For the curling wisp above the skull, lightly peel a thin ribbon of skin so it glows faintly rather than cutting through. Deepen the shadows under the brow and inside the cheeks with a second, deeper peel to add dimension. Brush away crumbs and check the glow with your light before calling it done. Small touch-ups now save a muddy look later.
Drop in a battery LED tealight or puck light, never a candle, so the thin tooth bridges stay safe. Set the pumpkin against a plain dark backdrop so the skull pops the way it does in the reference photo. Shoot in a dim room with the light as your main source. Rub a little petroleum jelly on cut edges to slow browning between photos.
Check things off as you get ready.
Work on a stable surface, keep your free hand out of the cutting path, and have an adult handle sharp tools.
The background around the skull and the crisp outline edges stay as untouched skin, holding the dark frame.
The rounded skull dome, cheekbones, jaw, and the thin smoke wisp get skin-peeled for a soft orange glow.
The eye sockets, the triangular nose, and the slots between the teeth are cut through for the brightest light.
Cut only the narrow slots between teeth and leave a thin skin bridge connecting each one to the jaw below. Do this step last so the wall stays firm while you work everything else. If a bridge feels fragile, keep it a touch wider rather than cutting it clean through.
You can, but the face will read as one big bright blob instead of a bone shape. The peeled mid glow is what gives the skull its rounded, dimensional look. If you want a faster version, peel the whole skull and cut only the sockets and nose.
Yes. This guide translates that flat black-on-white look into carved light levels, so the skull reads by contrast instead of paint. Peeling the bone and cutting the openings gives you the same crisp skull shape with a warm glow behind it.
Changed a detail? Made it simpler? Share a photo of your version and tell the community what worked.
The best new carvings, ideas worth stealing, and how-tos for carving season. Short, seasonal, and gone by November.



Comments (0)