Halloween Pumpkin Carving Contest · Starts October 1st · $500 in prizes
← Back to ideas
@ai_concepts
Aug 14, 2026
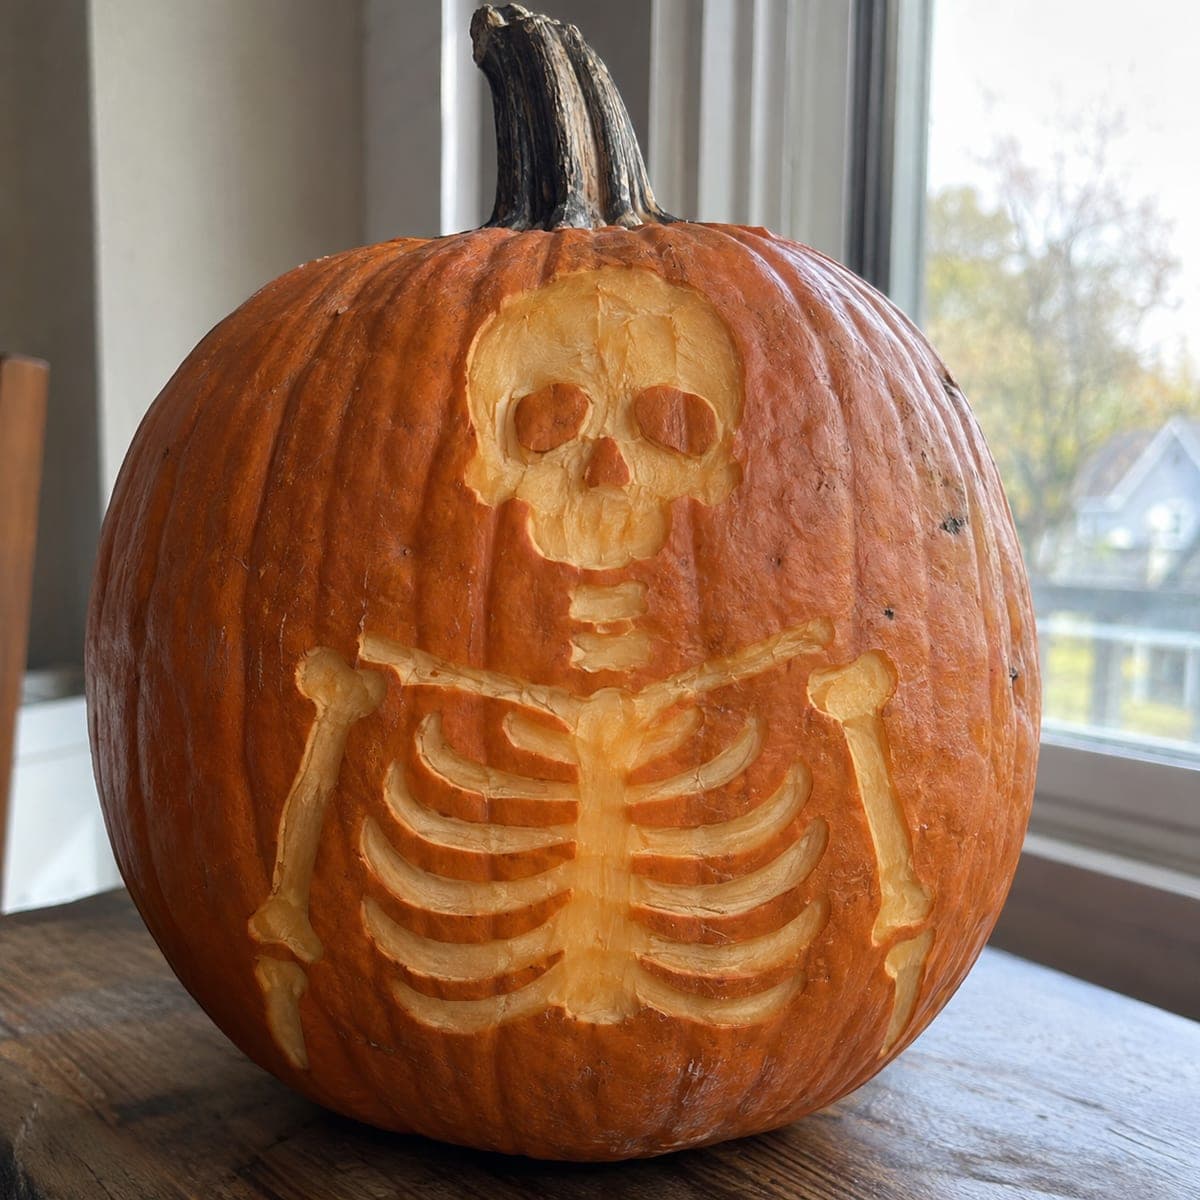
Full Skeleton Body Shading Carved PumpkinAI
0

Full Skeleton Body Shading Carved Pumpkin

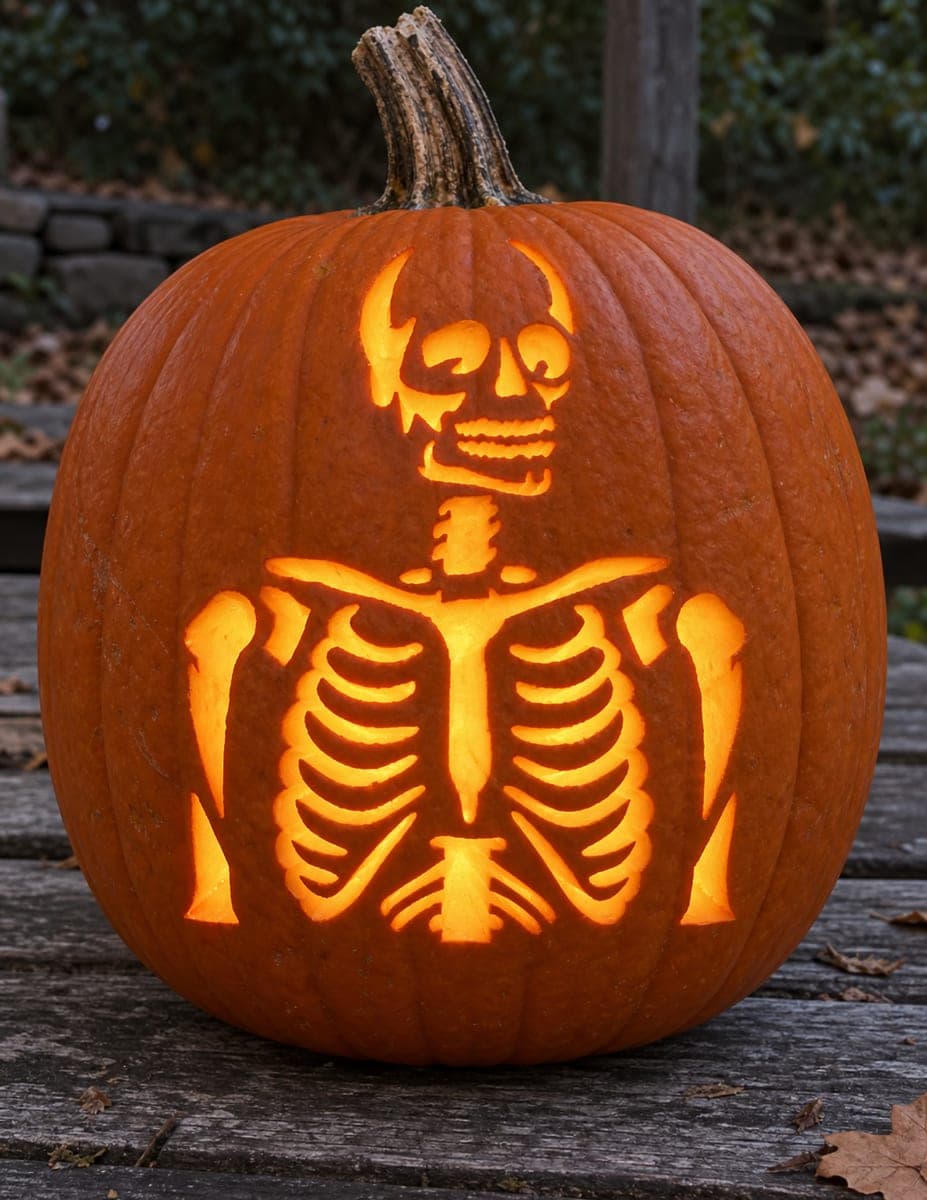
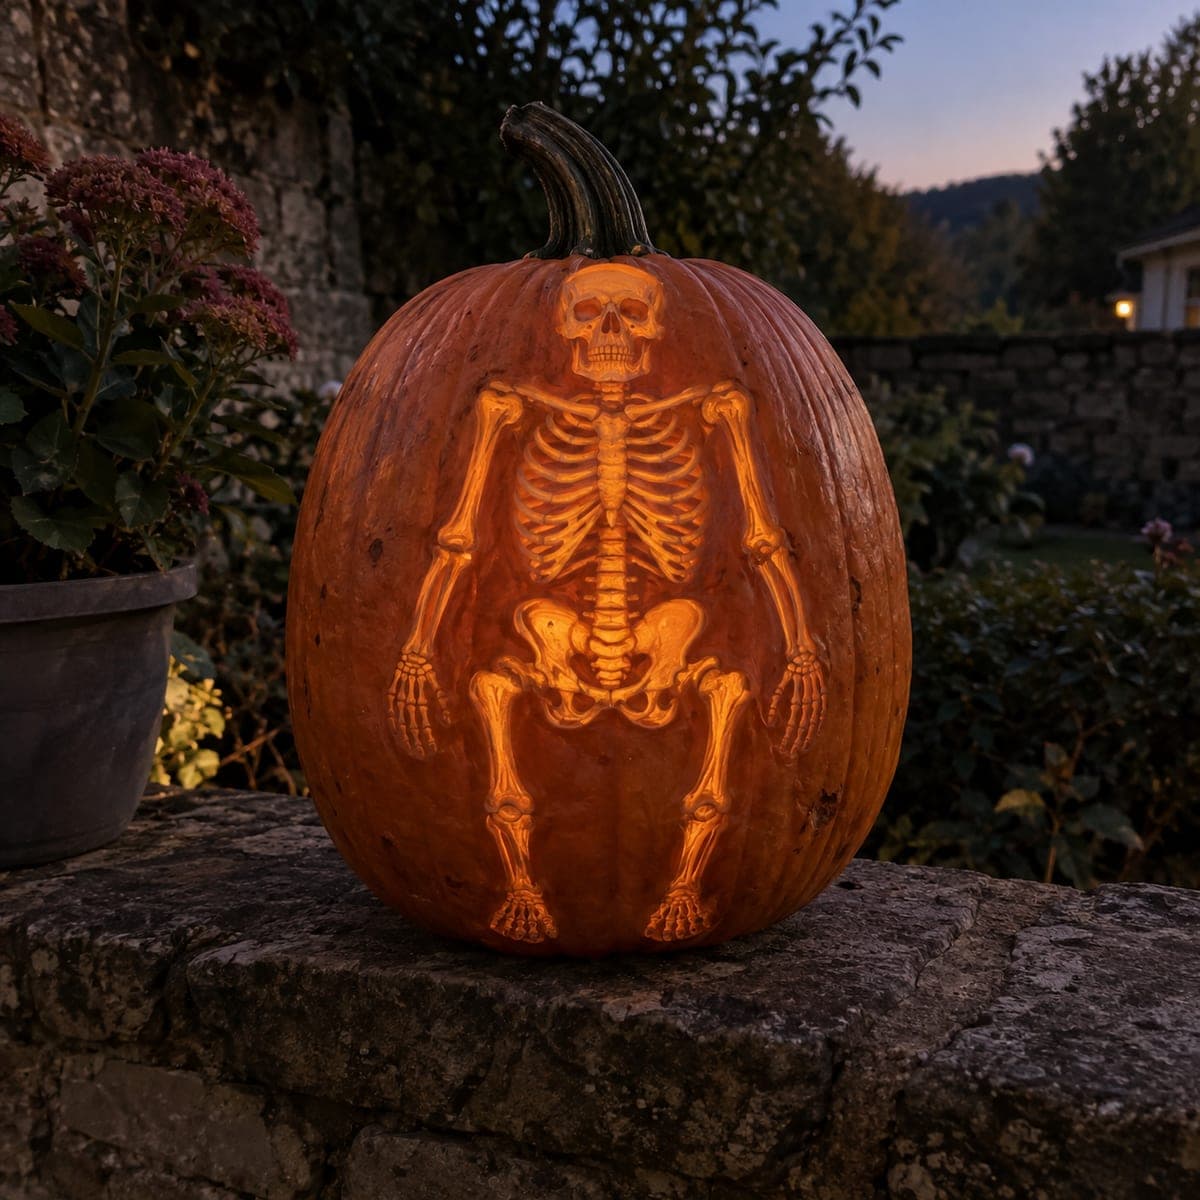
A complete human skeleton crouches on a pumpkin, each bone from skull to pelvis rendered in meticulous shaded relief that catches the fading outdoor light in the early evening. The skull's empty eye sockets and detailed ribcage make this one of the most technically ambitious pumpkin carving ideas in the monsters category. An LED candle inside throws warm light through any thinned sections to add an eerie glow effect. Work from the skull downward to keep your reference points aligned as you carve the spine and limbs.

This is an AI-generated concept image: a realistic, carvable design idea rather than a photo of a finished carve. AI concepts are always labeled and sit out the leaderboard and the contest.

No ratings yet · Sign in to rate
Comments (0)

  • No comments yet — be the first.

Save without an account. Sign in to like or comment.

Our tips for carving a similar design

The core trick here is relief shading, where you scrape away only the outer skin at different depths so the whole skeleton glows without cutting all the way through. You build the bones as raised, lit shapes against dark untouched skin, and reserve true cutouts for just the deepest shadows like the eye sockets and the gaps between ribs. Working top down from the skull keeps every reference point aligned as you move to the spine, pelvis, and legs.

Written by PumpkinCarvingIdeas.com, inspired by the image above. These are our suggestions, not instructions from the uploader. This approach to the AI concept has not been tested on a real pumpkin.

From pumpkin to porch

  1. Prep the pumpkin and transfer the design

    Pick a tall, smooth-shouldered pumpkin with an even wall so the long skeleton fits front and center. Cut a lid from the bottom instead of the top so the stem stays intact, then hollow the front wall down to about one inch thick for easier shading. Tape your skeleton stencil flat and poke the outlines with a pin or transfer tool, spacing dots closely on the fine bones. Start your dot pattern at the skull so the spine and limbs line up beneath it.

  2. Outline every bone before removing anything

    With a fine detail knife or a linoleum-style gouge, lightly score around the skull, ribs, spine, pelvis, and each limb bone. These score lines are your guardrails and stop shading from bleeding between bones. Keep the cuts shallow at this stage, just through the skin. Double-check that the ribcage curves and leg joints match your reference before you carve deeper.

  3. Shade the bones with a peeling tool

    Use a ribbon or loop tool to scrape the skin off each bone shape so it glows a soft dim orange. Vary the depth: scrape thinner where a bone should catch the most light, like the brow of the skull and the front of the ribs, and leave a little more flesh in the recessed areas. Peel the spine as a stacked column and give each rib a rounded, slightly raised look. Take your time here, since this shading is what carries the whole design.

  4. Deepen the darkest shadows

    Leave the skin between the ribs, around the bones, and in the joint gaps untouched so those areas stay dark and define the skeleton by contrast. Thin these negative spaces only slightly if you want a faint separation glow. The interplay of dark background and glowing bone is what makes the figure read from a distance. Step back often with the room dimmed to check your balance.

  5. Cut through only the deepest features last

    Save true openings for the very end so the wall stays strong while you work. Cut all the way through only for the eye sockets, the nasal cavity, and a few of the darkest gaps that need the brightest punch. Keep every thin bone attached to solid flesh on both ends so nothing snaps, and cut small openings rather than large ones. Clean the edges with a fresh blade for a crisp finish.

  6. Light it and photograph at dusk

    Drop a battery LED light inside, never a real candle, since the thin shaded wall can scorch. Warm white LEDs push a nice glow through the peeled bones while the untouched skin holds shadow. Set the pumpkin on a wall or step at early evening so the fading sky frames it like the reference. Rub a little petroleum jelly on cut edges to slow drying and keep the detail sharp for a few days.

Gather your supplies

Check things off as you get ready.

Work on a stable surface, keep your free hand out of the cutting path, and have an adult handle sharp tools.

Three levels of light

  • Leave intact

    The skin between the ribs, around each bone, and in the joint gaps stays untouched and dark to outline the skeleton.

  • Peel & shade

    The skull, ribs, spine, pelvis, arm, and leg bones are skin-peeled at varying depths for a dim bone-colored glow.

  • Cut through

    Only the eye sockets, nasal cavity, and the deepest shadow gaps are cut through for the brightest accents.

Learn the carving basics

Before you start cutting

This is an AI concept image, so can a real pumpkin actually look like this?

You can get very close with patient relief shading, though a real pumpkin will read a bit softer than a rendered image. The key is treating almost the entire figure as scraped shading rather than cutouts. Keep every thin bone connected to solid flesh so nothing breaks, and accept that hand-carved bones will have a slightly organic look.

How do I keep the thin bones and ribs from breaking?

Carve them as shaded relief, not as separate floating pieces, so each bone stays anchored to the pumpkin wall on both ends. Leave the dark skin between ribs intact to act as bridges that hold everything together. Cut through only the smallest, deepest shadows, and do that step last.

Why work from the skull downward?

The skull sets the scale and the centerline for everything below it. Once it is placed, the spine drops straight from it and the ribcage, pelvis, and limbs align naturally. Starting at the top keeps your proportions honest so the figure does not drift off-center as you go.

Your take belongs here, too.

Changed a detail? Made it simpler? Share a photo of your version and tell the community what worked.

Share your pumpkin

More pumpkins like this

You've reached the end · 8 pumpkins
The Patch Report

Fresh pumpkins, in your inbox.

The best new carvings, ideas worth stealing, and how-tos for carving season. Short, seasonal, and gone by November.

A short email during carving season. Unsubscribe anytime. See our privacy policy.