Halloween Pumpkin Carving Contest · Starts October 1st · $500 in prizes
← Back to ideas
@ai_concepts
Jul 11, 2026
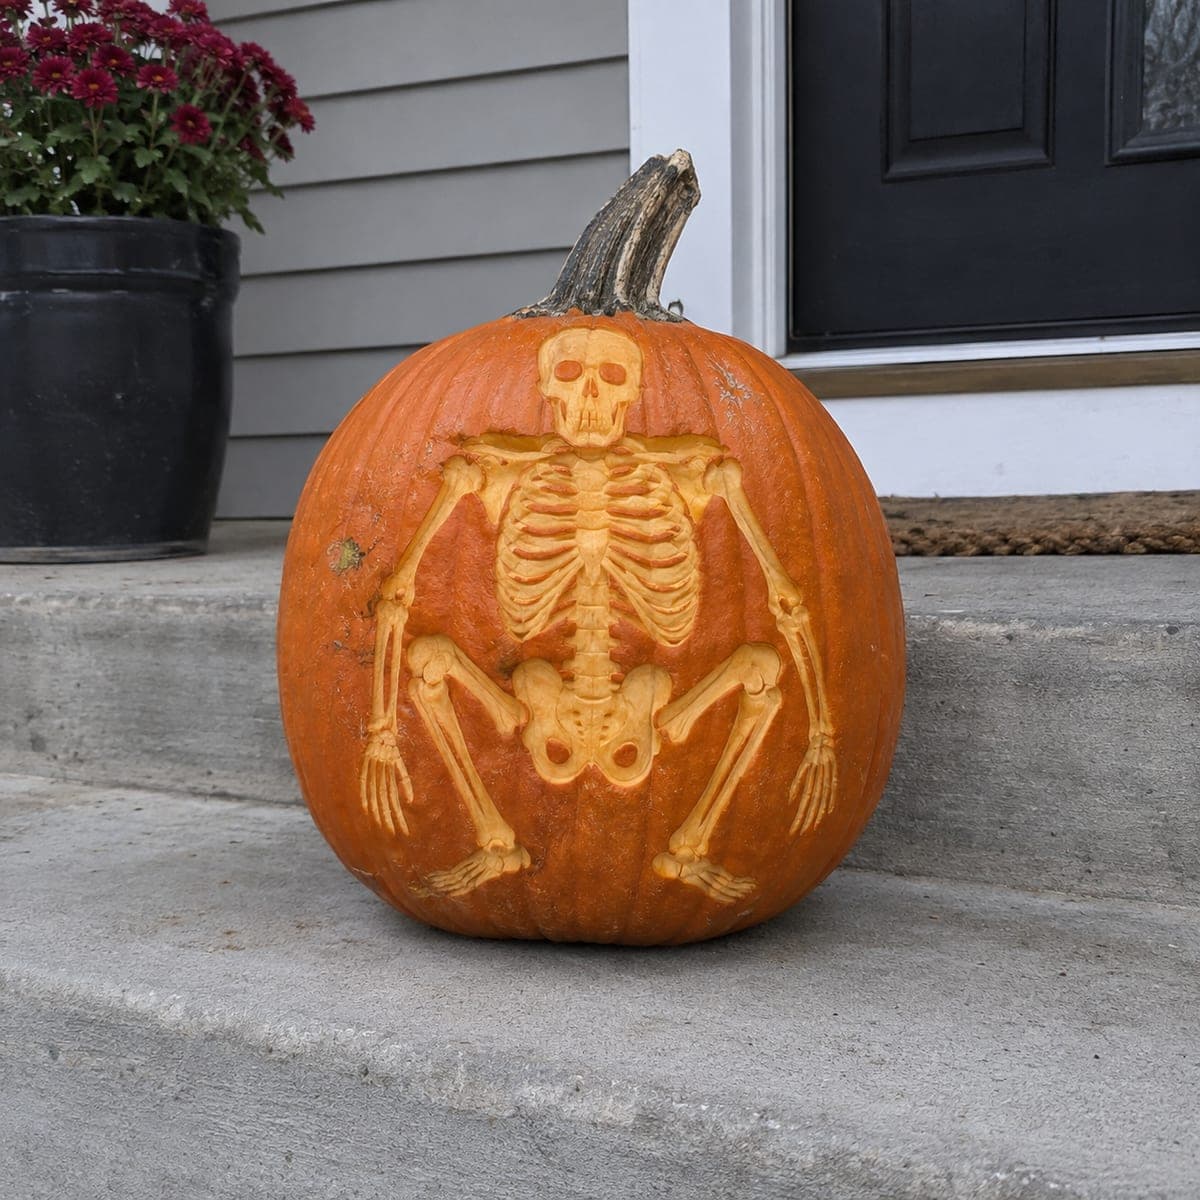
Full Body Skeleton Relief Carved PumpkinAI
0

Full Body Skeleton Relief Carved Pumpkin

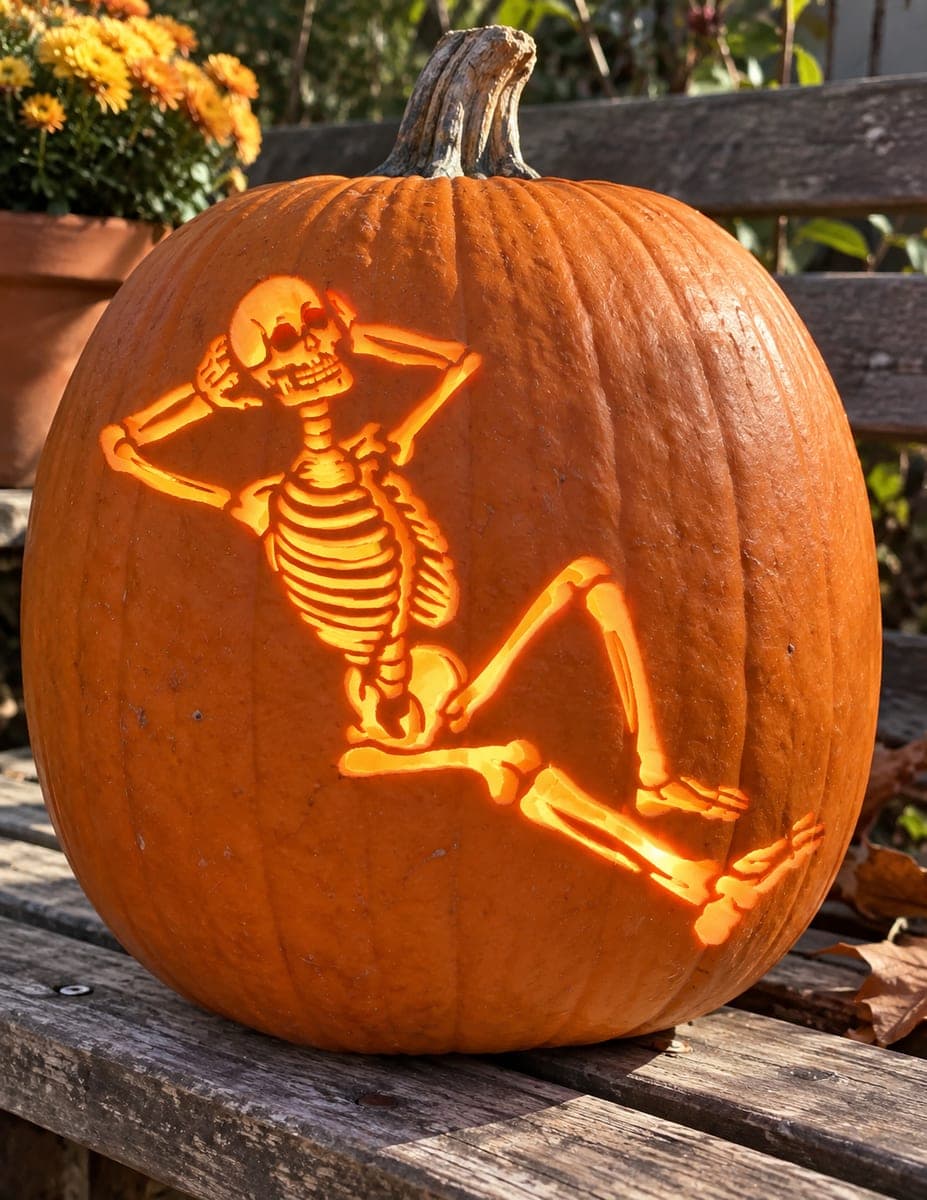
A seated skeleton sprawls across the front of this pumpkin in raised relief, with the skull, ribcage, pelvis, and limbs all peeled from the surface rather than cut through. Because nothing pierces the wall, this one photographs great in daylight on a porch step. Skin the background down a quarter inch with a loop tool, leaving the bones proud, then refine the rib gaps with a small gouge.

This is an AI-generated concept image: a realistic, carvable design idea rather than a photo of a finished carve. AI concepts are always labeled and sit out the leaderboard and the contest.

No ratings yet · Sign in to rate
Comments (0)

  • No comments yet — be the first.

Save without an account. Sign in to like or comment.

Our tips for carving a similar design

The whole trick here is relief carving, where nothing pierces the pumpkin wall and the bones are left standing proud while the background is skinned down around them. You lower the surface a quarter inch so the skull, ribcage, pelvis, and limbs catch light and cast tiny shadows. Because it reads through shading rather than cutouts, it photographs beautifully on a porch step in plain daylight.

Written by PumpkinCarvingIdeas.com, inspired by the image above. These are our suggestions, not instructions from the uploader. This approach to the AI concept has not been tested on a real pumpkin.

From pumpkin to porch

  1. Transfer the seated skeleton

    Pick a firm, tall pumpkin with a smooth flat front face. Tape your printed skeleton pattern over the front and poke through the outlines with a pushpin, spacing the dots close so the shape stays readable. Mark the skull, ribcage, spine, pelvis, and each limb so you know exactly what stays raised. Connect the dots lightly with a washable marker before you touch a blade.

  2. Score the bone outlines

    With a small detail knife, make a shallow vertical cut just outside every bone edge, following your marker lines. Keep the blade about an eighth inch deep so you define the border without undercutting the bones. Take the arms and legs slowly since they are the thinnest shapes and you want their outlines crisp. This scored line is the wall that keeps the raised bones sharp when you scoop the background.

  3. Skin the background down

    Switch to a loop or ribbon tool and remove the skin and a quarter inch of flesh in every area that is not a bone. Work from the center of each empty space toward your scored outlines so you do not chip the bone edges. Keep the depth even so the whole background sits at one level and the skeleton reads as one raised layer. The peeled surface will glow a dim orange, which is what makes the pale bones pop.

  4. Round and refine the bones

    Go back over each raised bone and gently bevel its top edges so it looks rounded rather than flat and stamped. Use a small gouge to carve the shadow gaps between individual ribs and to hint at the eye sockets and joints. Do not thin the bones so much that they crumble; leave plenty of flesh under each one for strength. This shading step is what turns a flat silhouette into a body that looks three dimensional.

  5. Deepen the darkest accents

    For the eye sockets, nasal opening, and the hollows between rib pairs, carve a touch deeper so those spots stay in shadow. You are not cutting through the wall, just creating pockets that read almost black next to the bright bone surface. Step back often and check the contrast from a few feet away. Adjust any bone that looks muddy by cleaning its edge again with the detail knife.

  6. Seal, light, and photograph

    Wipe the carved face dry and brush the exposed flesh with a thin coat of petroleum jelly to slow drying and browning. Since nothing is cut through, this design shines best in daylight on a step, so shoot it during the day. For evening, tuck a small LED puck or string behind or beside the pumpkin to rake light across the relief, never a candle. Keep it out of direct sun and refrigerate it overnight to stretch its display life.

Gather your supplies

Check things off as you get ready.

Work on a stable surface, keep your free hand out of the cutting path, and have an adult handle sharp tools.

Three levels of light

  • Leave intact

    The untouched outer skin all around the edges of the pumpkin stays dark and frames the scene.

  • Peel & shade

    The whole background behind and between the bones is skinned a quarter inch for a soft dim glow.

  • Cut through

    Nothing is cut fully through on this relief design, so there are no bright open cutouts.

Learn the carving basics

Before you start cutting

Do I ever cut all the way through the pumpkin?

No, this is a pure relief carving, so the wall stays intact everywhere. All the depth comes from skinning the background and shaping the raised bones. That is exactly why it holds up in daylight and does not need an interior candle.

How do I keep the thin arm and leg bones from breaking?

Leave a solid layer of flesh under every bone and only bevel the top edges, never thin them to a sliver. Carve the background around them rather than digging into them. If a limb feels fragile, keep it slightly wider than the stencil and let its rounded shading sell the shape.

Since it is a daylight piece, can I still light it at night?

Yes, just light it from outside rather than inside. A small LED placed to one side will rake across the raised bones and deepen the shadows in the rib gaps. Avoid candles entirely because an unpierced pumpkin traps heat and there is no vent.

Your take belongs here, too.

Changed a detail? Made it simpler? Share a photo of your version and tell the community what worked.

Share your pumpkin

More pumpkins like this

You've reached the end · 8 pumpkins
The Patch Report

Fresh pumpkins, in your inbox.

The best new carvings, ideas worth stealing, and how-tos for carving season. Short, seasonal, and gone by November.

A short email during carving season. Unsubscribe anytime. See our privacy policy.