Halloween Pumpkin Carving Contest · Starts October 1st · $500 in prizes
← Back to ideas
@ai_concepts
Sep 25, 2026
Mortar Pestle and Capsule Pharmacy Pumpkin CarvingAI
0

Report this carving

Tell us what is wrong. Reports are private.

Mortar Pestle and Capsule Pharmacy Pumpkin Carving

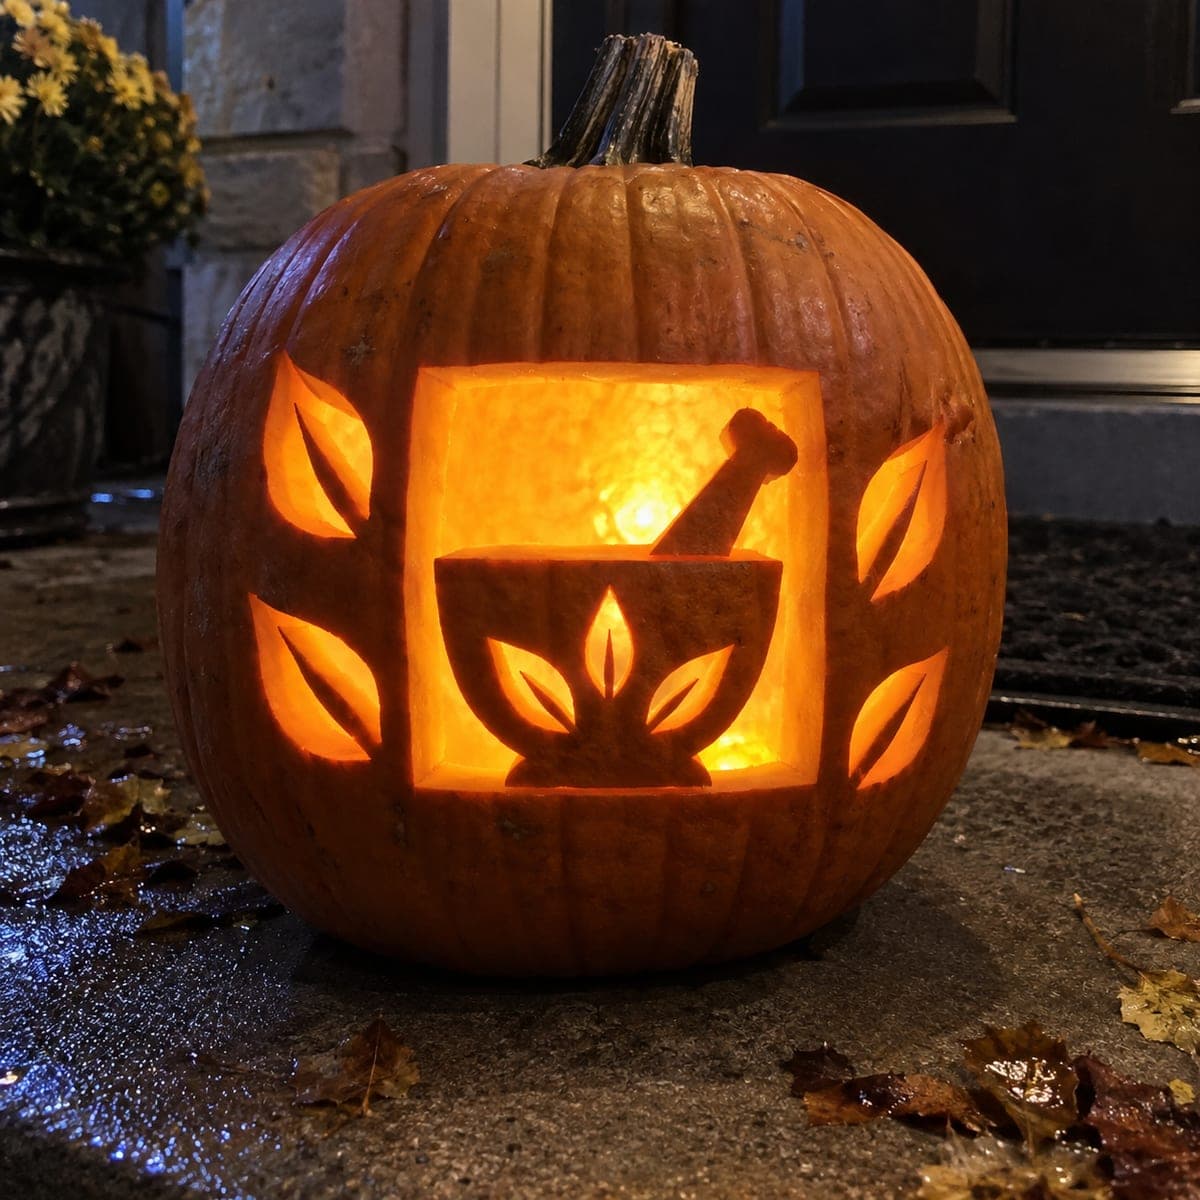
A hollow mortar body paired with two capsule halves separated by broad shell bars creates a recognizable pharmacy pumpkin carving idea at the intermediate skill level. Cut the main mortar aperture first as a single empty shape, then position the two capsule cutouts above or beside it with a thick rind bar dividing each half. The dividing bars must stay connected to both the surrounding shell and each other so the capsule halves do not become loose. Lit from inside, the distinct shapes read clearly from across a waiting room.

No ratings yet · Sign in to rate

Comments (0)

  • No comments yet — be the first.

Save without an account. Sign in to like or comment.

Our tips for carving a similar design

This intermediate design combines a hollow mortar body with two capsule apertures, where a thick rind bar divides each capsule half to keep the shape from becoming one undifferentiated opening. The mortar is cut first as a clean empty shape, then the capsule cutouts are positioned so their dividing bars remain connected to both the surrounding shell and each other. When lit, the two distinct shapes read clearly from across a waiting room.

From pumpkin to porch

  1. Plan the composition layout

    Sketch the mortar shape in the lower center of the pumpkin face and the two capsule shapes above or beside it in chalk. Confirm the dividing bar between each capsule half is at least three-quarters of an inch wide in your sketch before transferring to the pumpkin. The bar must connect to both the surrounding shell and the opposite half of the capsule to stay secure.

  2. Gut and prep

    Cut the back lid and scoop to an even one-inch wall depth. Double-check the outer surface for any soft spots or blemishes in the planned carving area before committing to the design placement. A firm, even surface is especially important for the narrow bar elements in this design.

  3. Transfer and mark dividing bars

    Pin-tool the mortar outline first, then the capsule shapes with their dividing bars. After removing the paper, circle every dividing bar with a marker to ensure they are clearly visible as no-cut zones throughout the carving session.

  4. Cut the mortar aperture

    Carve the mortar body as a single continuous aperture, following the curved bowl bottom and straight sides. Keep the cut smooth and unhurried for clean, professional edges. Confirm the outer rind border around the mortar is solid before pushing the piece free.

  5. Cut the capsule halves

    For each capsule, cut the first half as a standalone aperture stopping clearly at the dividing bar. Then cut the second half on the opposite side of the bar. Confirm the bar remains solid and connected after both cuts before proceeding to the second capsule. A craft knife can refine the narrow corners where the bar meets the capsule edges.

  6. Light and display

    Insert a warm LED inside and check the design in a dark room. The mortar bowl and two divided capsules should each read as distinct shapes. If the dividing bars look too dark compared to the surrounding rind, a single shallow gouge pass along their face can lighten them subtly without breaking through.

Written with AI to match this design

Gather your supplies

Check things off as you get ready.

Work on a stable surface, keep your free hand out of the cutting path, and have an adult handle sharp tools.

Three levels of light

  • Leave intact

    Outer rind border and the capsule dividing bars remain fully dark, clearly defining the individual pharmacy shapes.

  • Peel & shade

    Optional shallow gouge passes along the dividing bar faces create a soft mid-glow between each capsule half.

  • Cut through

    Mortar aperture and each capsule half cut fully through produce direct, bright illumination.

Learn the carving basics

Before you start cutting

What is the minimum width for a capsule dividing bar to survive the full display period?

Three-quarters of an inch is the practical minimum for a dividing bar at this skill level. The bar not only divides the capsule visually but also provides structural support to the two cut apertures on either side, so think of it as a bridge bearing load from both directions. Narrower bars work in the short term but often crack by day three as the rind dries.

How should the capsule halves be colored for maximum visual interest?

The cut halves on either side of the bar both glow the same bright orange from the LED, but you can create a color effect by painting one half of each capsule with a colored film of acrylic applied to the inside of the rind before inserting the light. Red and white are the most recognizable capsule colors. The paint creates a tinted glow that reads through the cut opening when the LED is on.

Can I position the capsules above the mortar on the same pumpkin?

Yes, positioning the capsules above the mortar creates a natural vertical composition that reads like a pharmacy display shelf. Make sure the rind between the top edge of the mortar opening and the bottom edge of the capsules is at least three-quarters of an inch to act as a visual and structural separator. If spacing is tight, scale the capsule shapes down slightly to create the needed gap.

Your take belongs here, too.

Changed a detail? Made it simpler? Share a photo of your version and tell the community what worked.

Share your pumpkin

More pumpkins like this

You've reached the end · 8 pumpkins
The Patch Report

Fresh pumpkins, in your inbox.

The best new carvings, ideas worth stealing, and how-tos for carving season. Short, seasonal, and gone by November.

A short email during carving season. Unsubscribe anytime. See our privacy policy.