Halloween Pumpkin Carving Contest · Starts October 1st · $500 in prizes
← Back to ideas
@ai_concepts
Sep 25, 2026
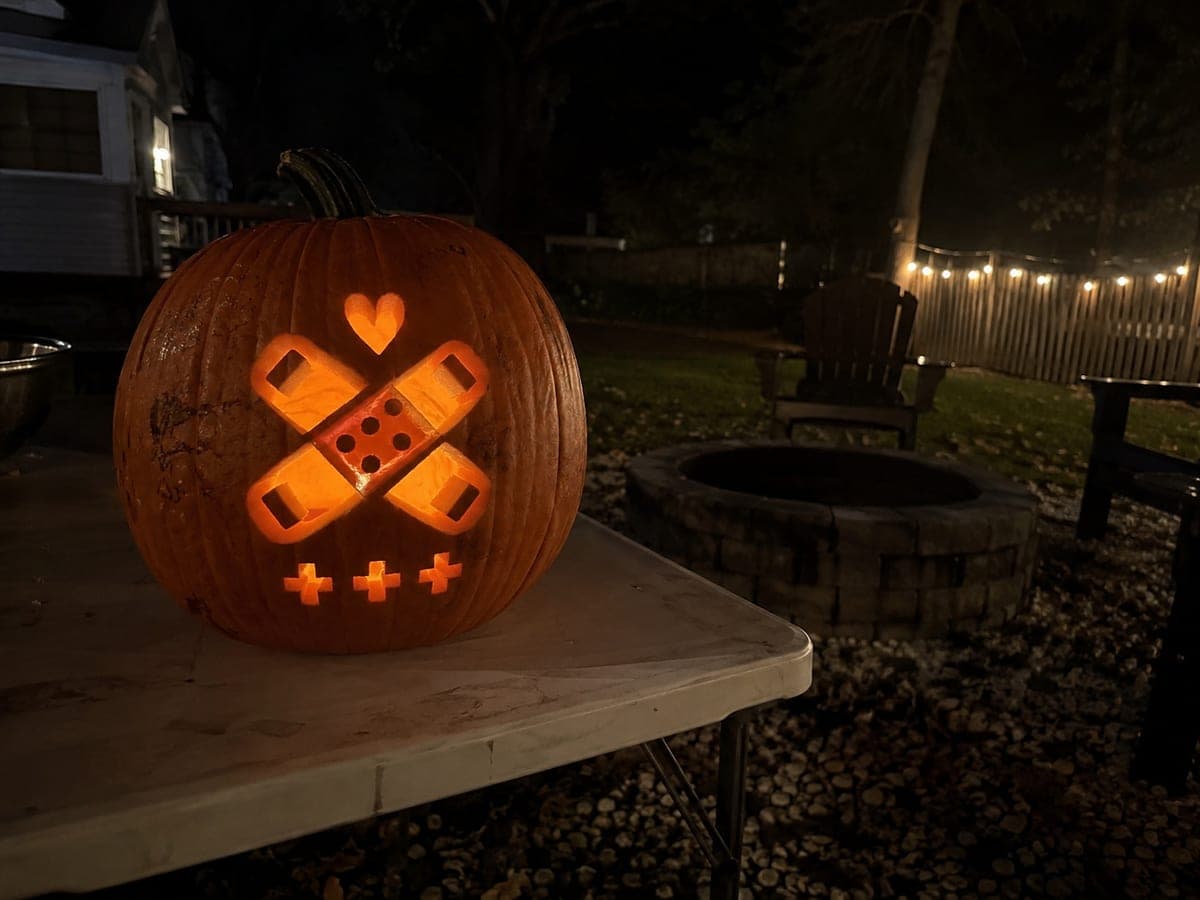
Detailed Medical Pumpkin Carving With GlowAI
0

Report this carving

Tell us what is wrong. Reports are private.

Detailed Medical Pumpkin Carving With Glow

Complex medical motifs with interlocking retained rind elements and backed accent details make this a satisfying hard-level medical pumpkin idea for a staff competition or seasonal display. Map every bridge and island before starting cuts, confirming each retained piece connects to the outer shell by at least two points. Carve through-cuts first and back the accent details last using a small V-gouge at a shallow angle. The finished pumpkin glows with a layered warmth that draws viewers in for a closer look.

No ratings yet · Sign in to rate
Comments (0)

  • No comments yet — be the first.

Save without an account. Sign in to like or comment.

Our tips for carving a similar design

The hard difficulty here comes from interlocking retained rind elements where the inside edge of one opening sits very close to the edge of a neighboring retained island. The strategy is to audit every bridge before the first cut, carve through-cuts front to back in one organized sequence, and add V-gouge accent details only at the very end when the structure is already proven. A small gouge held at a shallow angle is the right tool for the accent layer, giving control over depth without risk of breakthrough.

From pumpkin to porch

  1. Bridge and island audit

    On a printed copy of the pattern, mark every retained rind island and draw arrows to all of its connection points on the outer shell. Any island with only one connection point should be redesigned to add a second bridge before you transfer the pattern to the pumpkin. Two connection points per island is the minimum for a hard-level carving like this.

  2. Prep and transfer

    Gut the pumpkin to a wall of about one inch, slightly thicker in areas marked for backed accents. Pin-tool the full pattern through the printed sheet, then strengthen the dots with a marker. Shade over each retained island lightly in pencil on the pumpkin surface so you can see at a glance what should never be cut.

  3. Cut outer through-openings

    Begin with the outermost, most open apertures and work inward toward the densest detail zone. Use a fine-toothed saw and take your time on curves, rotating the pumpkin rather than awkwardly angling the blade. Confirm each retained island is still fully connected after each adjacent cut before proceeding.

  4. Cut inner detail openings

    Progress through smaller inner apertures one at a time, pausing after each to reassess bridge integrity. If any bridge feels springy under light finger pressure, reinforce it with a thin line of craft glue on the back side before continuing. The goal is to have every cut piece fall free easily without pulling on the bridges.

  5. Add V-gouge accent details

    Hold the V-gouge nearly flat and trace accent shapes with short, even strokes, removing only the outer skin layer. Aim for a consistent quarter-inch depth to keep the glow uniform. Work each accent shape from one end to the other in a single direction rather than back and forth to avoid chatter marks.

  6. Inspect and light

    Place a warm LED inside and darken the room to see the full effect. The layered warmth of cut-through openings against backed accents should read as a gradient from bright to amber to dark. If any backed area looks too dim, go over it with one additional shallow pass of the gouge.

Written with AI to match this design

Gather your supplies

Check things off as you get ready.

Work on a stable surface, keep your free hand out of the cutting path, and have an adult handle sharp tools.

Three levels of light

  • Leave intact

    Outer shell and all mapped structural bridges remain fully dark, forming the visual frame of the medical motif.

  • Peel & shade

    V-gouge accent shapes carved to a consistent shallow depth glow with amber warmth between the bright cut openings.

  • Cut through

    Main medical motif apertures and face-detail openings are cut fully through for the brightest light output.

Learn the carving basics

Before you start cutting

How do I mark retained islands so I do not accidentally cut them?

After transferring the pattern, lightly shade every retained rind island with a soft pencil on the pumpkin surface. The shading wipes off with a damp cloth later but serves as a clear visual flag while carving. Some carvers use a different color felt-tip for cut lines versus keep lines, which works equally well.

What angle should I hold the V-gouge for the accent details?

Lay the gouge so the handle is almost parallel with the pumpkin surface, at roughly a 15 to 20 degree angle. This flat approach shaves the outer skin gently rather than digging in. Steeper angles, above 45 degrees, risk punching through the thinned rind, especially near already-cut edges where the wall is most vulnerable.

Can I use a rotary tool instead of a hand gouge for the accent layer?

A rotary tool with a small ball-nose bit works well for curved accent lines and gives consistent depth control with the right speed setting. Use a slow speed and keep the bit moving to avoid burning the rind. Practice on a scrap section first, as rotary tools remove material faster than hand gouges and can break through unexpectedly on thin spots.

Your take belongs here, too.

Changed a detail? Made it simpler? Share a photo of your version and tell the community what worked.

Share your pumpkin

More pumpkins like this

You've reached the end · 8 pumpkins
The Patch Report

Fresh pumpkins, in your inbox.

The best new carvings, ideas worth stealing, and how-tos for carving season. Short, seasonal, and gone by November.

A short email during carving season. Unsubscribe anytime. See our privacy policy.