Halloween Pumpkin Carving Contest · Starts October 1st · $500 in prizes
← Back to ideas
@ai_concepts
Sep 25, 2026
Mid-Level Hospital Pumpkin Carving With SymbolsAI
0

Report this carving

Tell us what is wrong. Reports are private.

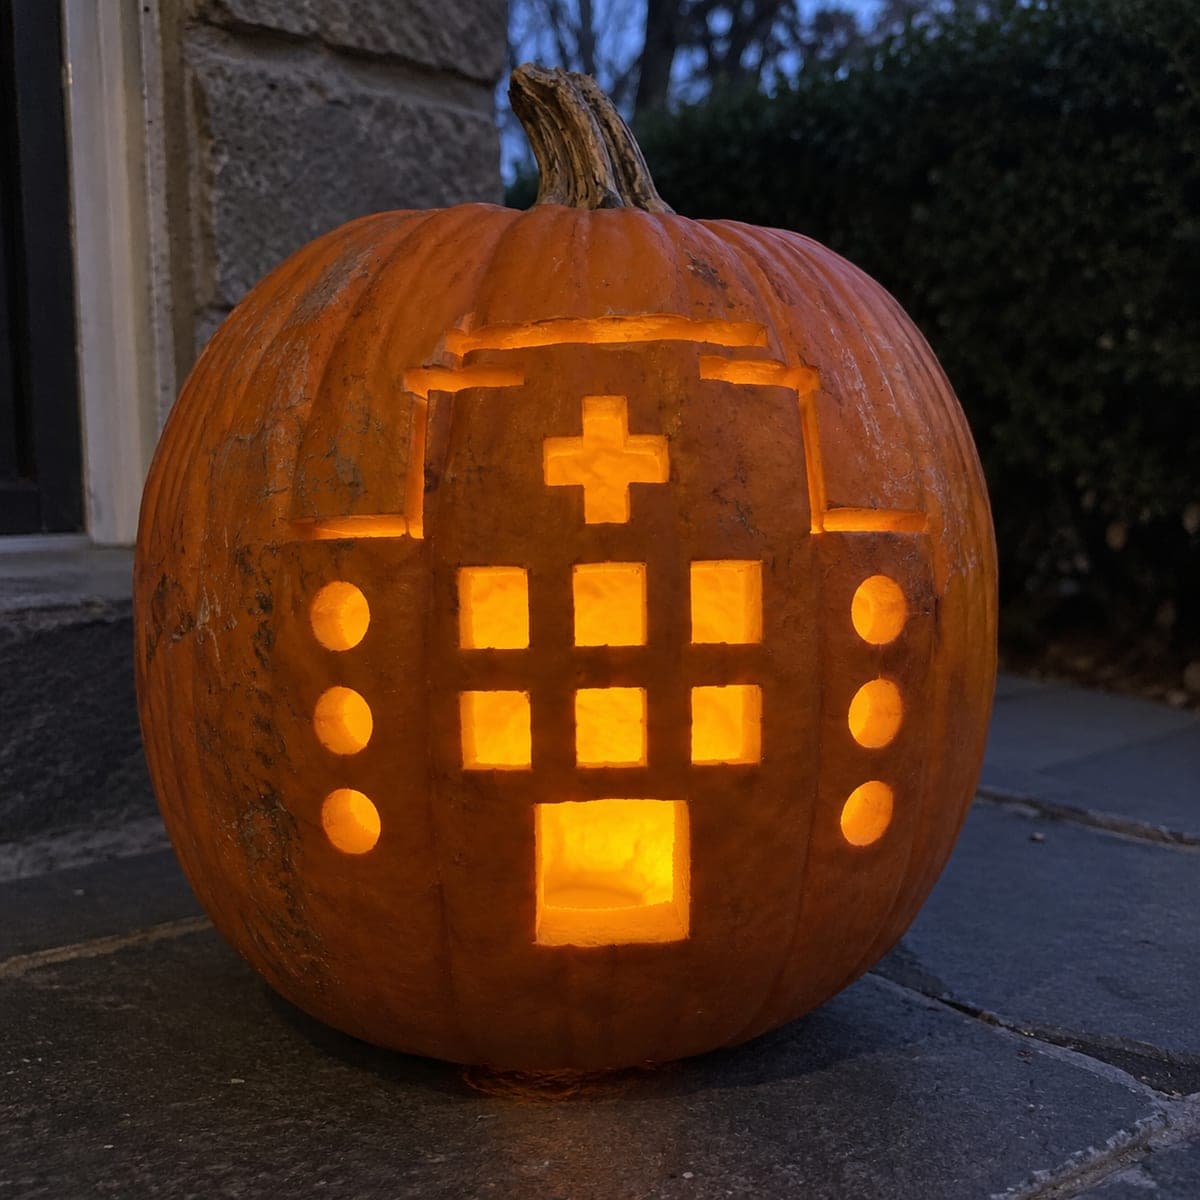
Mid-Level Hospital Pumpkin Carving With Symbols

Multiple hospital-themed cutouts carved with generous rind bridges make this intermediate hospital pumpkin idea a satisfying group project for a unit holiday party. Plan which symbols go where before cutting anything, since spacing them evenly across the curved surface takes a few test sketches. Shallow backed details behind the main apertures soften the glow and add dimension without requiring advanced tool skills. Displaying the finished jack-o-lantern on a nursing station counter during evening rounds creates a welcoming atmosphere.

No ratings yet · Sign in to rate

Comments (0)

  • No comments yet — be the first.

Save without an account. Sign in to like or comment.

Our tips for carving a similar design

Spacing multiple hospital symbols evenly across the curved pumpkin face requires a few test sketches before any cutting begins, because a balanced layout on paper can look crowded once it wraps around the curve. Each symbol is cut fully through with generous rind bridges between it and its neighbors, and shallow backed details behind the openings add dimension and warmth without adding structural risk. This design makes an inviting welcoming atmosphere piece for a nursing station or unit holiday party.

From pumpkin to porch

  1. Sketch the layout in chalk

    Before gutting, draw rough oval guides on the pumpkin face in chalk to map each symbol's position. Space them so at least three-quarters of an inch of rind separates each opening from its neighbor. Check from directly in front that the arrangement looks balanced, and adjust before committing to gutting.

  2. Gut to consistent wall depth

    Cut the back lid and scoop to a consistent one-inch wall depth across the whole front face. Consistent wall depth means the backed accents you add later will glow at matching intensities. Use a depth-marked spoon or dowel to confirm evenness as you scoop.

  3. Transfer all patterns at once

    Pin-tool each symbol pattern in its planned position, then remove all the paper at once and strengthen every dot line with a marker. Having all outlines visible at the same time lets you do a final check on spacing and bridge widths before cutting begins.

  4. Cut symbols top to bottom

    Begin with the topmost symbol and work downward, completing each opening fully before moving to the next. This sequence keeps the pumpkin weight balanced while you cut and prevents the piece from wobbling on the work surface. Confirm all bridges on a completed symbol are intact before starting the next one.

  5. Add shallow backed details

    With all through-cuts done, use a small gouge to scrape shallow accent marks directly behind the cut openings or in the rind sections between symbols. A consistent quarter-inch depth produces a warm amber haze that softens the transition from bright openings to dark rind. Work in small sections and test the glow frequently.

  6. Light and position on display

    Place a warm LED puck inside and orient the pumpkin so all symbols face the primary viewing direction. On a nursing station counter, angling the pumpkin very slightly toward walking staff ensures the design is seen at its best as people pass. Replace batteries at the start of each evening shift.

Written with AI to match this design

Gather your supplies

Check things off as you get ready.

Work on a stable surface, keep your free hand out of the cutting path, and have an adult handle sharp tools.

Three levels of light

  • Leave intact

    The rind borders between symbols and the outer shell stay fully dark, creating clear visual separation between each motif.

  • Peel & shade

    Shallow backed sections scraped to a quarter inch emit a warm amber glow, adding depth between the brighter cut-through openings.

  • Cut through

    Each hospital symbol cut fully through produces direct, bright light output.

Learn the carving basics

Before you start cutting

How do I prevent two adjacent symbol openings from merging into one big irregular hole?

Maintain at least three-quarters of an inch of solid rind between any two openings, measured at the closest point between their outlines. If two symbols come closer than that after transfer, scale one of them down or move it sideways before cutting. Once the cuts are made, a too-narrow bridge is impossible to restore.

What is the best way to involve multiple people in this group project?

Assign the gutting step to one person, the pattern transfer to another, and let the most experienced carver handle all the saw work. Younger participants or beginners can do the chalk layout and hold patterns in place for pin-tooling. Reserve the backed accent step for the most confident participant, since it requires consistent angle control.

Will this pumpkin hold up for the full unit party week?

A multi-symbol pumpkin with generous bridges and consistent wall depth should hold up well for seven to ten days in an air-conditioned indoor environment. Rubbing petroleum jelly along all cut edges immediately after carving slows moisture loss significantly. Store the pumpkin in a cool spot during daytime hours when the display is not active.

Your take belongs here, too.

Changed a detail? Made it simpler? Share a photo of your version and tell the community what worked.

Share your pumpkin

More pumpkins like this

You've reached the end · 8 pumpkins
The Patch Report

Fresh pumpkins, in your inbox.

The best new carvings, ideas worth stealing, and how-tos for carving season. Short, seasonal, and gone by November.

A short email during carving season. Unsubscribe anytime. See our privacy policy.