Halloween Pumpkin Carving Contest · Starts October 1st · $500 in prizes
← Back to ideas
@ai_concepts
Sep 25, 2026
Detailed Hospital Pumpkin Carving With Backed AccentsAI
0

Report this carving

Tell us what is wrong. Reports are private.

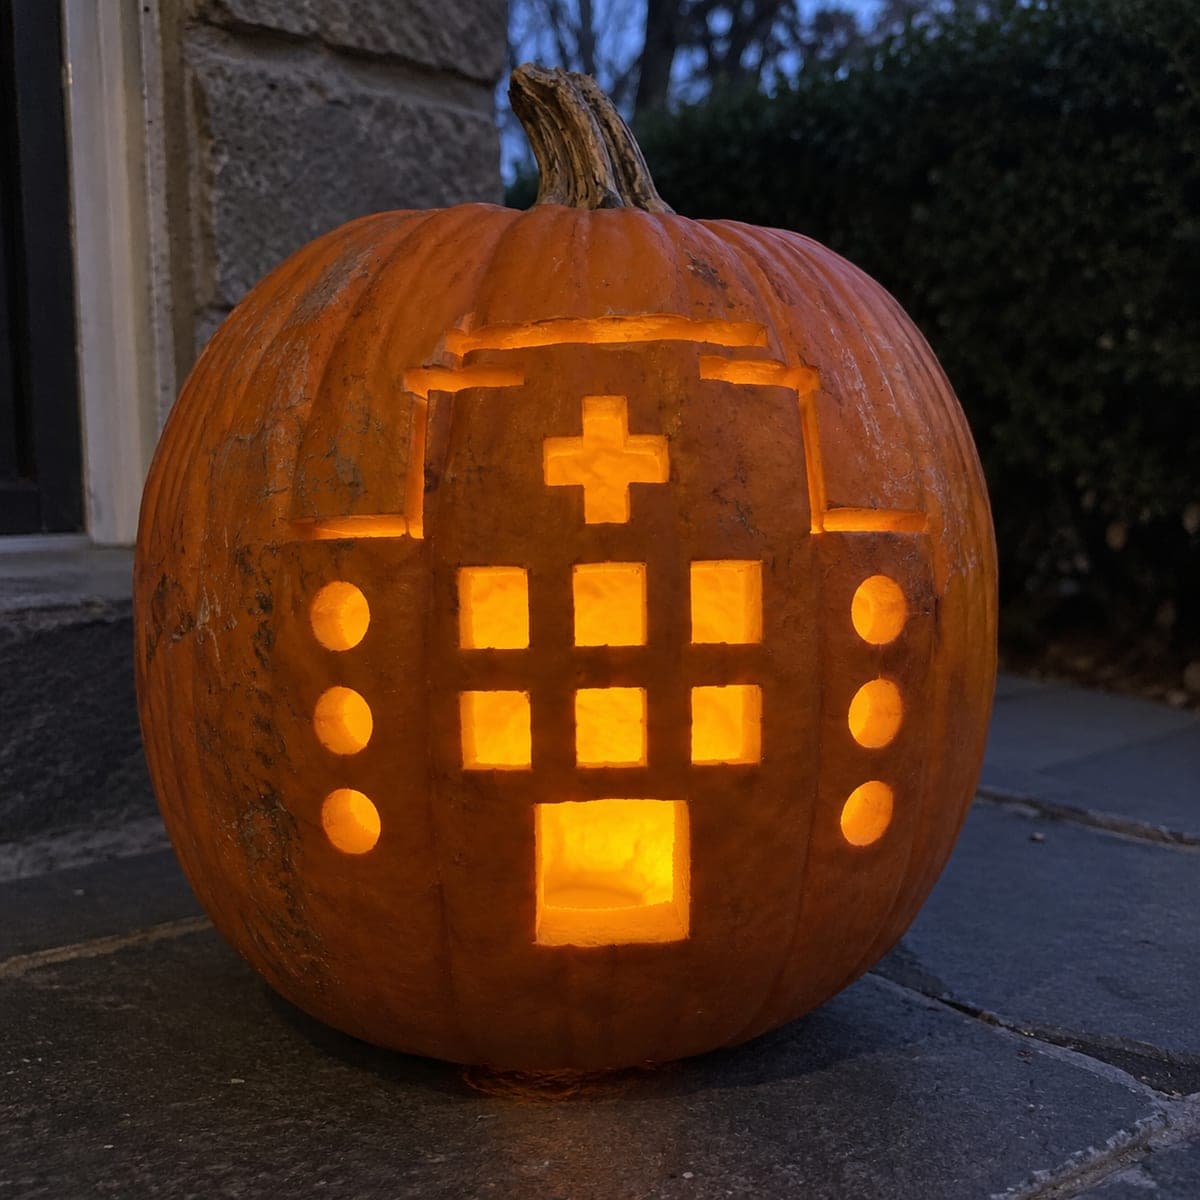
Detailed Hospital Pumpkin Carving With Backed Accents

Intricate hospital-themed motifs with connected rind islands and shallow backed accents create a glowing showpiece for a hospital staff competition or seasonal corridor display. Identify each retained piece and confirm its connection to the outer shell before removing any negative space. The backed accent shapes are carved last with a small gouge, working at a shallow angle to control depth and prevent breakthrough. A warm LED inside reveals every layer of this complex hospital pumpkin carving idea.

No ratings yet · Sign in to rate

Comments (0)

  • No comments yet — be the first.

Save without an account. Sign in to like or comment.

Our tips for carving a similar design

The hard challenge here is managing retained rind islands that sit inside larger openings while each island stays connected to the outer shell by at least two bridges. Identifying each island and its connections before any material is removed is the most important preparation step. Backed accent shapes carved after all through-cuts are complete add a final layer of warmth, revealing the full depth of the design only when the LED is on and the room is dark.

From pumpkin to porch

  1. Island identification and double-bridge rule

    On a printout of the pattern, circle every retained rind island and draw lines to both of its connection points on the outer shell. Islands with only one connection must receive a second bridge added to the pattern before you begin. No exceptions: a single-connection island will almost certainly fall free during carving or within a day of display.

  2. Prep the pumpkin

    Cut the back lid and scoop to an even one inch of wall depth. In areas that will receive backed accents, leave the wall at one and a quarter inches so you have a comfortable margin for the gouge work. Wipe the outer surface clean and dry before attaching the pattern.

  3. Transfer and shade retained areas

    Pin-tool the entire pattern, remove the paper, and shade each retained island with a light pencil mark. This visible reminder prevents accidental cuts into retained areas when you are moving quickly. Keep the printed pattern nearby as a reference throughout the carving session.

  4. Cut outer and medium apertures

    Work outward-to-inward, opening the largest frames first and progressing to medium openings. Each time you free a cut piece, run a finger around all nearby bridges to confirm nothing has cracked. If the blade feels like it is binding, it has likely entered a bridge zone; back it out and re-approach from a safer angle.

  5. Cut fine inner openings

    The innermost, smallest apertures are cut last when the structure is already fully shaped and the risk of torquing a bridge is lowest. Use a craft knife for any opening under a quarter inch. Score the line three or four times and use gentle leverage to free the piece.

  6. Carve backed accents and light

    Hold a small gouge nearly parallel to the surface and work the accent areas in smooth strokes from one end to the other. Aim for a consistent quarter-inch to three-eighths-inch depth. Test each area with a flashlight before completing the section. Place the warm LED inside and check the layered effect in a darkened corridor or room.

Written with AI to match this design

Gather your supplies

Check things off as you get ready.

Work on a stable surface, keep your free hand out of the cutting path, and have an adult handle sharp tools.

Three levels of light

  • Leave intact

    Outer shell and retained islands remain fully dark, providing structured depth in the composition.

  • Peel & shade

    Backed accent areas at a shallow quarter-inch to three-eighths-inch depth glow amber, creating the middle tone.

  • Cut through

    All apertures cut fully through emit bright direct light, creating the highest contrast areas of the design.

Learn the carving basics

Before you start cutting

What does it mean when the pumpkin saw blade starts to bind mid-cut?

Binding usually means the blade has entered thicker rind, a wet fibrous area, or is approaching a bridge section. Back the blade out slowly rather than forcing it forward, which could crack the nearby bridge. Realign your cutting angle toward the intended line and re-enter the cut from slightly further inside the opening.

How do I add a second connection bridge to an island that only has one?

On your pattern printout, draw a thin connecting bar from the island to the nearest outer shell section, running through what would otherwise be negative space. Make the bar at least half an inch wide. Transfer this additional bridge to the pumpkin pattern by redrawing that section before pin-tooling, so the saw knows to stop cutting when it reaches the new bar.

Can backed accents be added with a rotary tool for a smoother result?

Yes, a rotary tool with a ball-nose carving bit at low speed produces a very smooth backed surface and is excellent for arcing or circular accent shapes. Keep the bit moving continuously and work at low speed to avoid heat buildup in the rind. Practice on a scrap piece of rind first because rotary tools remove material quickly and depth can increase unexpectedly.

Your take belongs here, too.

Changed a detail? Made it simpler? Share a photo of your version and tell the community what worked.

Share your pumpkin

More pumpkins like this

You've reached the end · 8 pumpkins
The Patch Report

Fresh pumpkins, in your inbox.

The best new carvings, ideas worth stealing, and how-tos for carving season. Short, seasonal, and gone by November.

A short email during carving season. Unsubscribe anytime. See our privacy policy.