@flickerwick
Sep 5, 2026
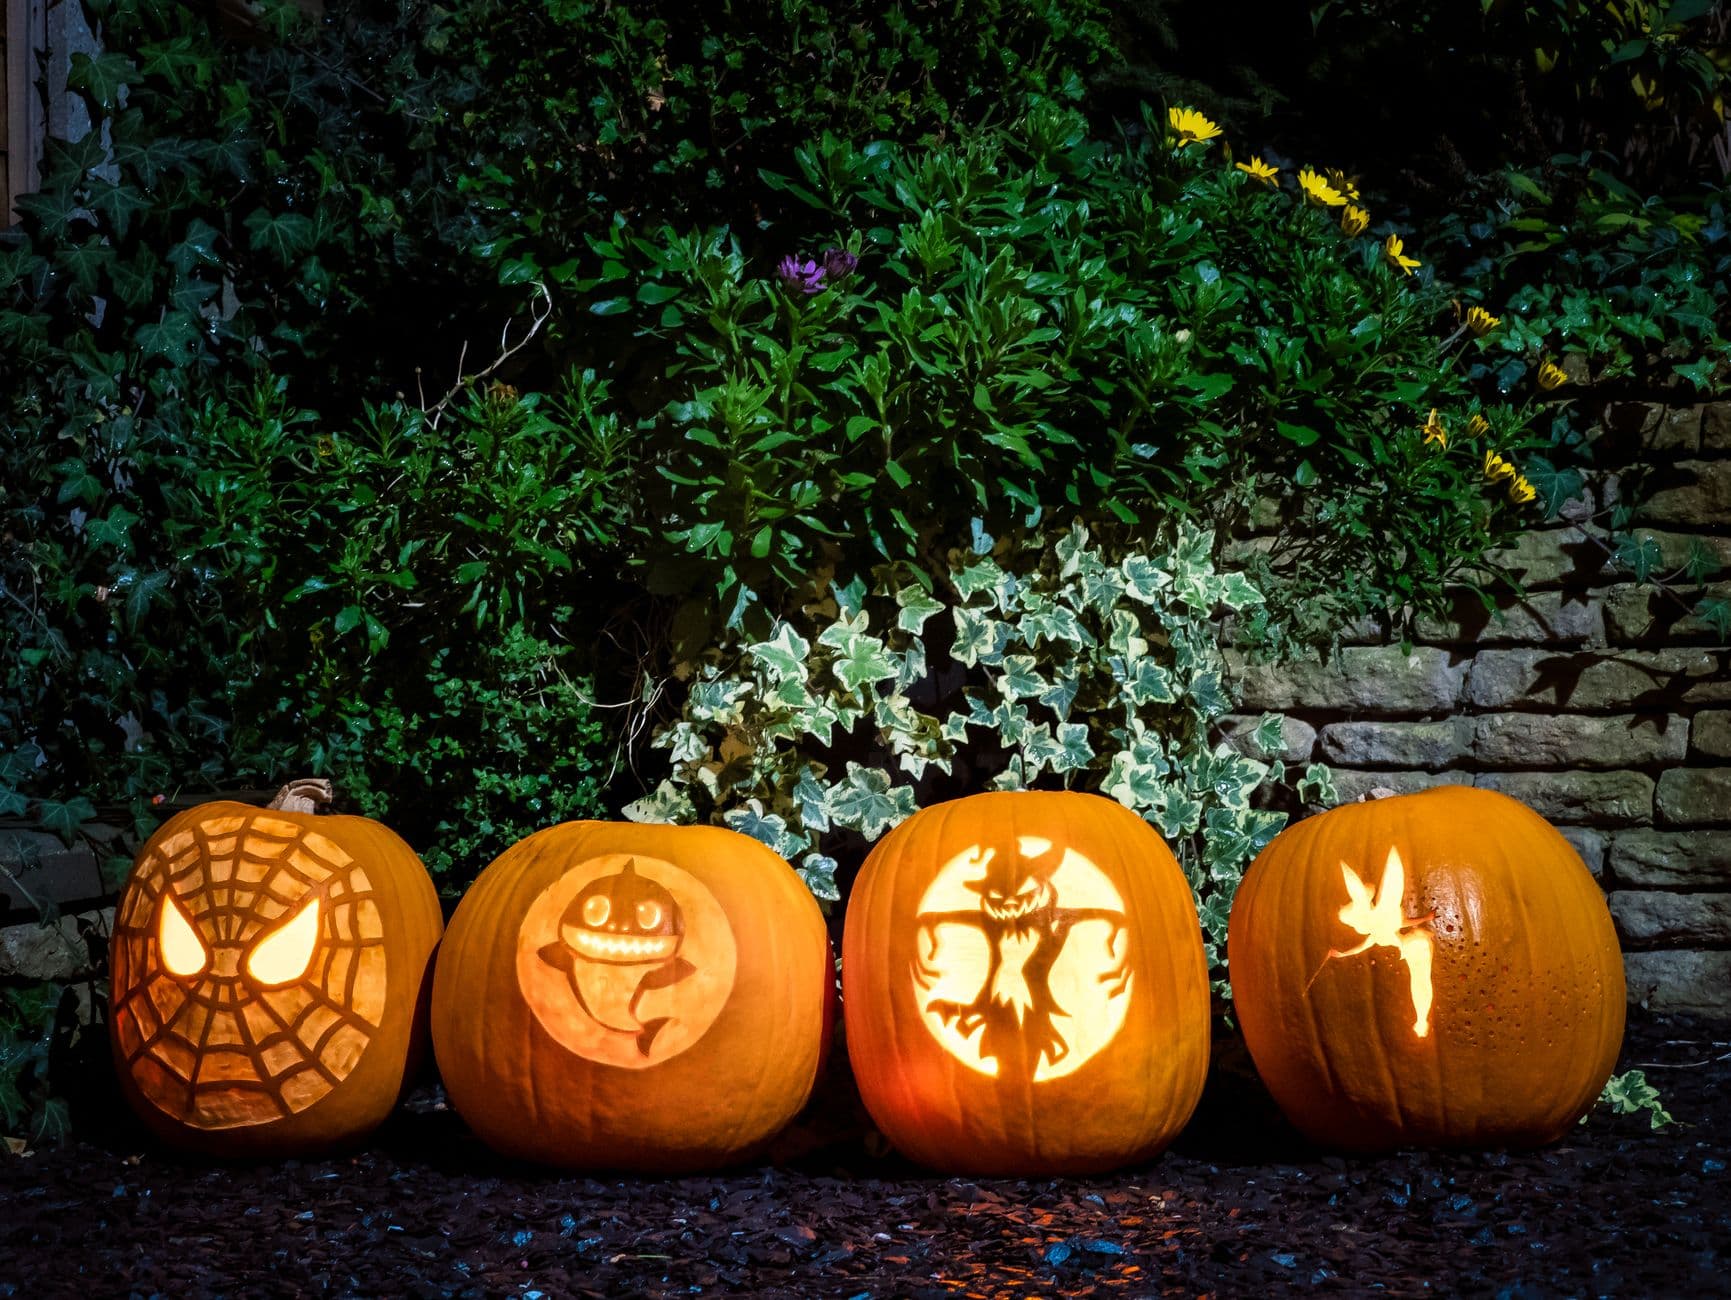
Movie night lineup
Four stencil carves glowing in the garden: a webbed mask, a baby shark, a scene straight from Halloween Town, and a fairy mid-flight.
No ratings yet · Sign in to rate
Four stencil carves glowing in the garden: a webbed mask, a baby shark, a scene straight from Halloween Town, and a fairy mid-flight.
The trick here is a coordinated set: four pumpkins that each carry one bold, high-contrast stencil so they read clearly from across the yard. Keep each design simple in silhouette, use full cutouts for the bright shapes, and stage them side by side so the group tells a story. Matching light levels across all four keeps the lineup looking intentional rather than random.
Written by PumpkinCarvingIdeas.com, inspired by @flickerwick's photo above. These are our suggestions, not instructions from the uploader, and this approach hasn't been tested on their exact carve.
Choose pumpkins with smooth, flat faces roughly the same size so the row looks even. Assign one stencil to each: a webbed mask, a baby shark, a spooky scene figure, and a fairy in flight. Decide your light plan before cutting so all four glow at a similar brightness. Wipe each face clean and dry so the stencil paper sticks well.
Cut a wide lid at an angle on each pumpkin so it rests without falling in, or open a hole in the back to hide the seam. Scoop the pulp and scrape the inside wall down to about one inch thick on the side you plan to carve. A thinner wall makes detailed shapes like the fairy wings and web lines much easier to cut. Set a flat spot inside for an LED puck light.
Tape each stencil flat to its pumpkin and poke along the lines with a pin or a transfer tool. Space the dots close together on tight curves like the shark's smile and the fairy's wings so you keep the shape. Peel the paper and connect the dots lightly with a marker if it helps you see. Double check that thin connectors, such as the web strands and the scene figure's arms, stay linked to the surrounding skin.
Start with the smallest interior cuts using a fine saw or a craft knife handled by an adult. On the web mask, cut the eye teardrops and the strand gaps but leave narrow bridges so the web does not collapse. Work the shark's teeth and eyes, the scene figure's limbs, and the fairy's wing tips slowly. Support each piece from behind with a finger as it releases so it pops out clean.
Once the fine work is done, cut the larger openings like the round scene background and the shark body. Saving these for last keeps the face rigid while you handle the delicate cuts. Gently push each piece out toward you rather than levering the blade. Trim any ragged edges from the inside for a crisp glow line.
Drop a battery LED into each pumpkin and set them in a line against a dark hedge or wall like the garden backdrop shown. Angle each face slightly toward the camera so all four read at once. Shoot at dusk or after dark with your phone braced steady for a sharp, warm image. Keep spare LEDs handy so the whole set stays evenly lit.
Check things off as you get ready.
Work on a stable surface, keep your free hand out of the cutting path, and have an adult handle sharp tools.
The uncarved pumpkin skin around each design, which stays dark and frames the shapes
Shade areas like the fairy's body or the shark's belly can be skin-shaved thin for a soft dim glow
The web gaps, shark outline, scene background circle, and fairy wings cut fully through for the brightest light
Leave small uncut bridges wherever a thin line would otherwise float free, and carve those areas before you open any large window. Thinning the wall to about one inch also lets you make shallow, controlled cuts. Support each piece with a finger from behind as it releases.
Yes, matching LED brightness keeps the lineup looking like one set instead of four separate carves. Use the same type of battery puck in each and swap in fresh batteries before a long night. If one design has more open cutouts, it may read brighter, so you can dim it slightly by facing it a touch away from the camera.
The baby shark is the friendliest, since it is one rounded shape with a few simple interior cuts. The webbed mask and the scene figure have the most delicate connectors and are best saved for once you feel confident. Practice on the easiest one first to warm up your knife control.
Changed a detail? Made it simpler? Share a photo of your version and tell the community what worked.
The best new carvings, ideas worth stealing, and how-tos for carving season. Short, seasonal, and gone by November.



Comments (0)