Halloween Pumpkin Carving Contest · Starts October 1st · $500 in prizes
← Back to ideas
@ai_concepts
Sep 25, 2026
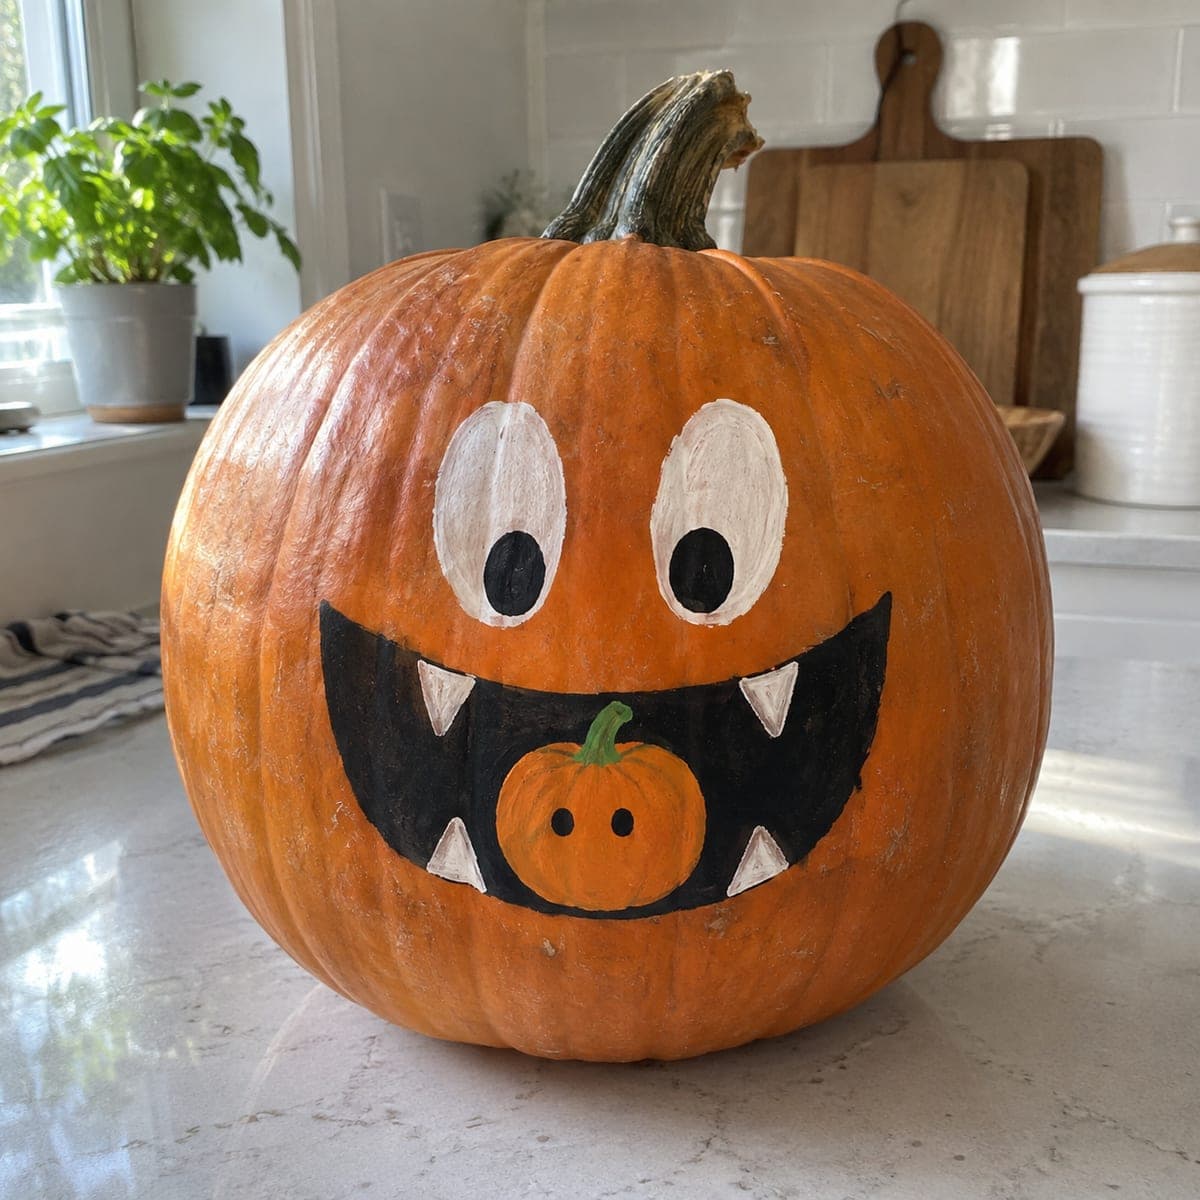
Painted Monster Pumpkin Eating a Tiny Pumpkin MotifAI
0

Report this carving

Tell us what is wrong. Reports are private.

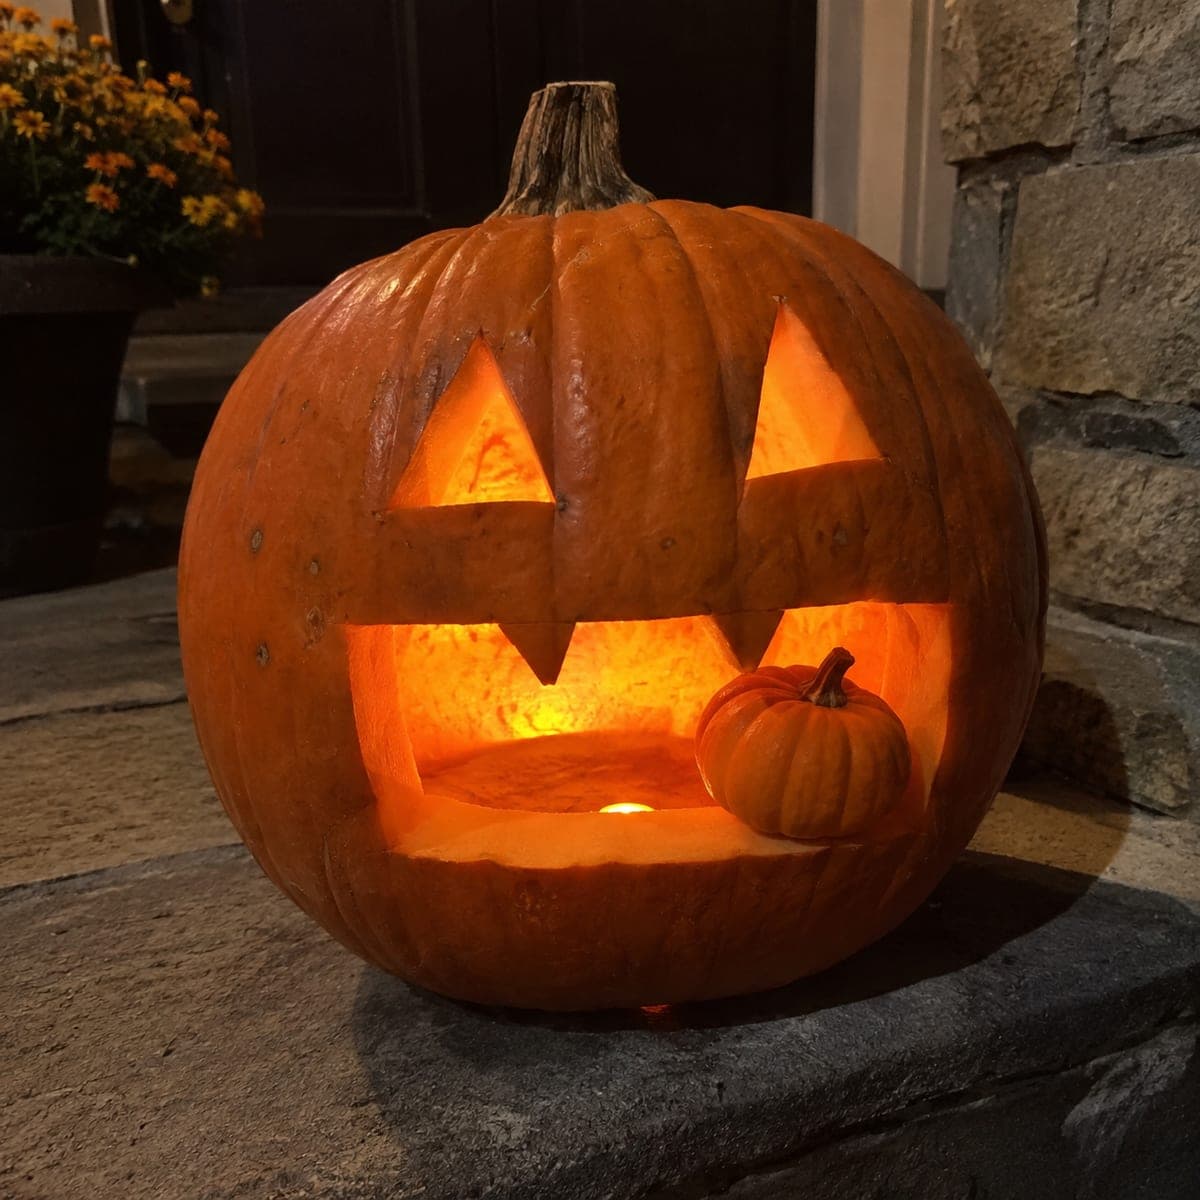
Painted Monster Pumpkin Eating a Tiny Pumpkin Motif

A flat painted monster face with a tiny pumpkin illustrated inside its open mouth makes this no-carve pumpkin eating pumpkin carving idea completely mess-free. Paint the monster face features first with a round brush and black acrylic, then add the small orange pumpkin shape nestled between the lower teeth. A green stem detail on the little pumpkin painted with a liner brush ties the two motifs together. Because the design is entirely painted, this version works well on a smooth-skinned, flat-sided pumpkin for the cleanest brushwork.

No ratings yet · Sign in to rate

Comments (0)

  • No comments yet — be the first.

Save without an account. Sign in to like or comment.

Our tips for carving a similar design

The entire design is flat acrylic paint on an intact orange rind, making it safe and approachable for all ages. The monster face features are painted first, and the small pumpkin motif is added inside the open mouth area once the face base is dry. A green stem on the tiny pumpkin detail ties the two motifs together into a single readable image. A smooth-skinned flat-sided pumpkin gives the cleanest brushwork.

From pumpkin to porch

  1. Clean and prep the pumpkin

    Wipe the surface with a damp cloth and dry thoroughly. Choose a pumpkin with a smooth, slightly flat front face for the easiest brushwork. Allow twenty minutes of drying time before sketching. A ridged pumpkin face can cause brush lines to skip and smear.

  2. Sketch the monster face and mouth

    Lightly pencil the monster eye positions in the upper face area and a wide open-mouth grin with teeth below. Inside the lower mouth area, sketch a small oval pumpkin shape sitting between the lower teeth. Keep the small pumpkin simple: a rounded oval with a short stem.

  3. Paint the monster face features

    Load a round brush with black acrylic and paint the eye shapes, eyebrow lines, and tooth outlines. Fill the teeth with white or cream paint once the black outlines are dry. Keep features bold and simple so they read clearly from a viewing distance.

  4. Paint the tiny pumpkin inside the mouth

    Once the face features are fully dry, paint the small pumpkin shape in orange acrylic nestled between the lower teeth. Add simple carved face dots on the tiny pumpkin with a liner brush to suggest that it too is a jack-o-lantern. Keep the paint thin enough not to obscure the teeth below it.

  5. Add the green stem detail

    Paint a short green stem on top of the tiny pumpkin with a fine liner brush. A small upward-curving tendril on each side of the stem adds charm with minimal extra effort. The green stem against the orange rind creates a natural focal point inside the monster's mouth.

  6. Seal and display

    Allow all layers to dry completely for at least one hour, then apply two light coats of clear matte outdoor spray sealer. Display on a smooth-skinned flat-sided pumpkin for best results; position where porch or ambient light illuminates the painted face directly.

Written with AI to match this design

Gather your supplies

Check things off as you get ready.

Work on a stable surface, keep your free hand out of the cutting path, and have an adult handle sharp tools.

Three levels of light

  • Leave intact

    All bare orange rind around the painted features stays intact and visible.

  • Peel & shade

    None; the shell is completely intact.

  • Cut through

    None; use an external porch lamp or spotlight to illuminate the painted design.

Learn the carving basics

Before you start cutting

How do I paint orange over a black-outlined mouth area without the orange looking muddy?

Paint a thin coat of white acrylic inside the mouth area first and let it dry before applying the orange for the tiny pumpkin shape. The white undercoat prevents the dark painted teeth lines around the mouth from dulling the orange paint placed on top.

The tiny pumpkin inside the mouth looks flat. How do I add dimension?

Add a slightly darker orange or brown shading line along one side of the tiny pumpkin to suggest shadow, and a lighter cream highlight stroke on the opposite side. Two extra brushstrokes give the small pumpkin a rounded three-dimensional appearance that reads well even at a small scale.

Can very young children help with this project?

Yes, this is one of the most kid-friendly pumpkin projects because there are no sharp tools involved. Children can help with the base coat fills, the simple feature strokes, and the stem detail. Supervise handling of the spray sealer, which requires adult use in a ventilated outdoor area.

Your take belongs here, too.

Changed a detail? Made it simpler? Share a photo of your version and tell the community what worked.

Share your pumpkin

More pumpkins like this

You've reached the end · 8 pumpkins
The Patch Report

Fresh pumpkins, in your inbox.

The best new carvings, ideas worth stealing, and how-tos for carving season. Short, seasonal, and gone by November.

A short email during carving season. Unsubscribe anytime. See our privacy policy.