Halloween Pumpkin Carving Contest · Starts October 1st · $500 in prizes
← Back to ideas
@ai_concepts
Sep 14, 2026
Paw Print Above a Dog Bone PumpkinAI
0

Paw Print Above a Dog Bone Pumpkin

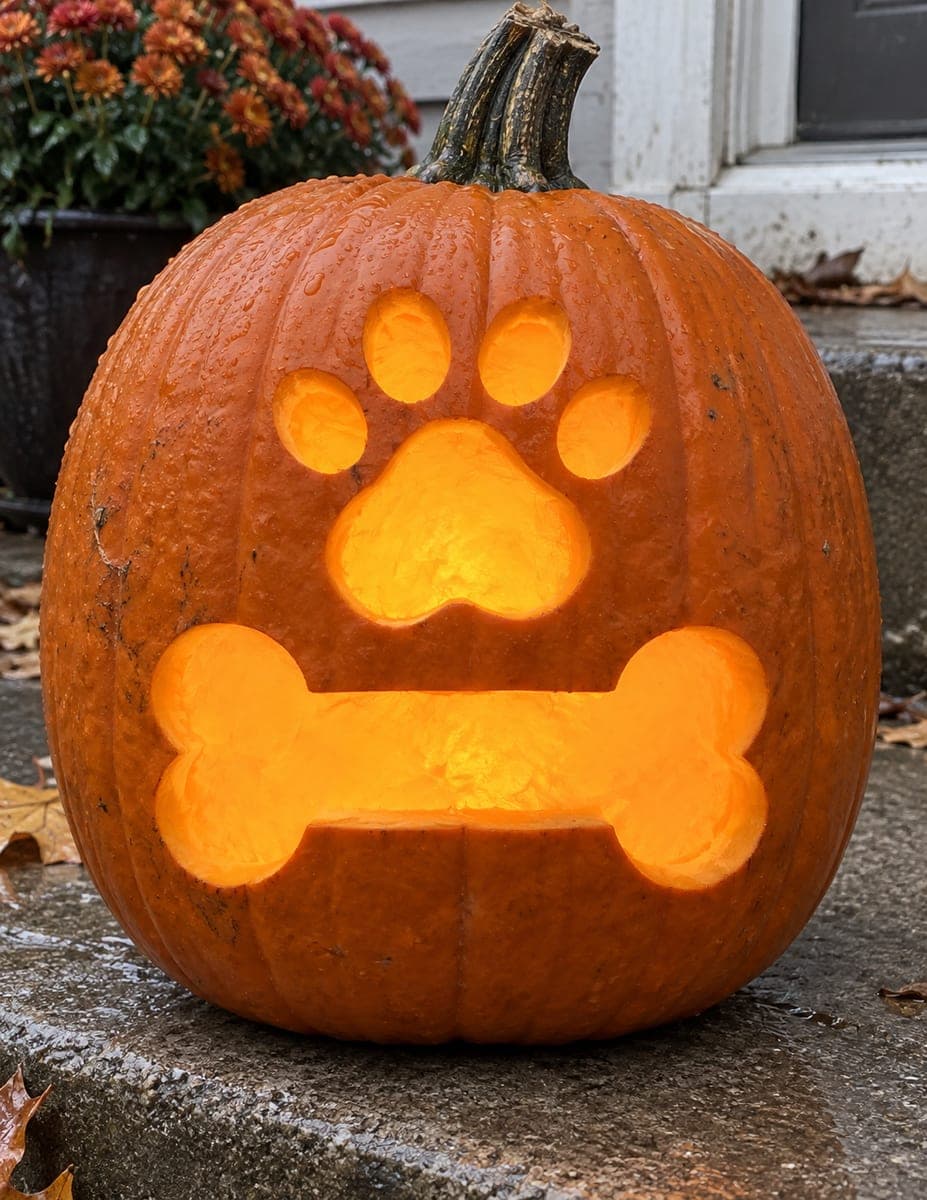
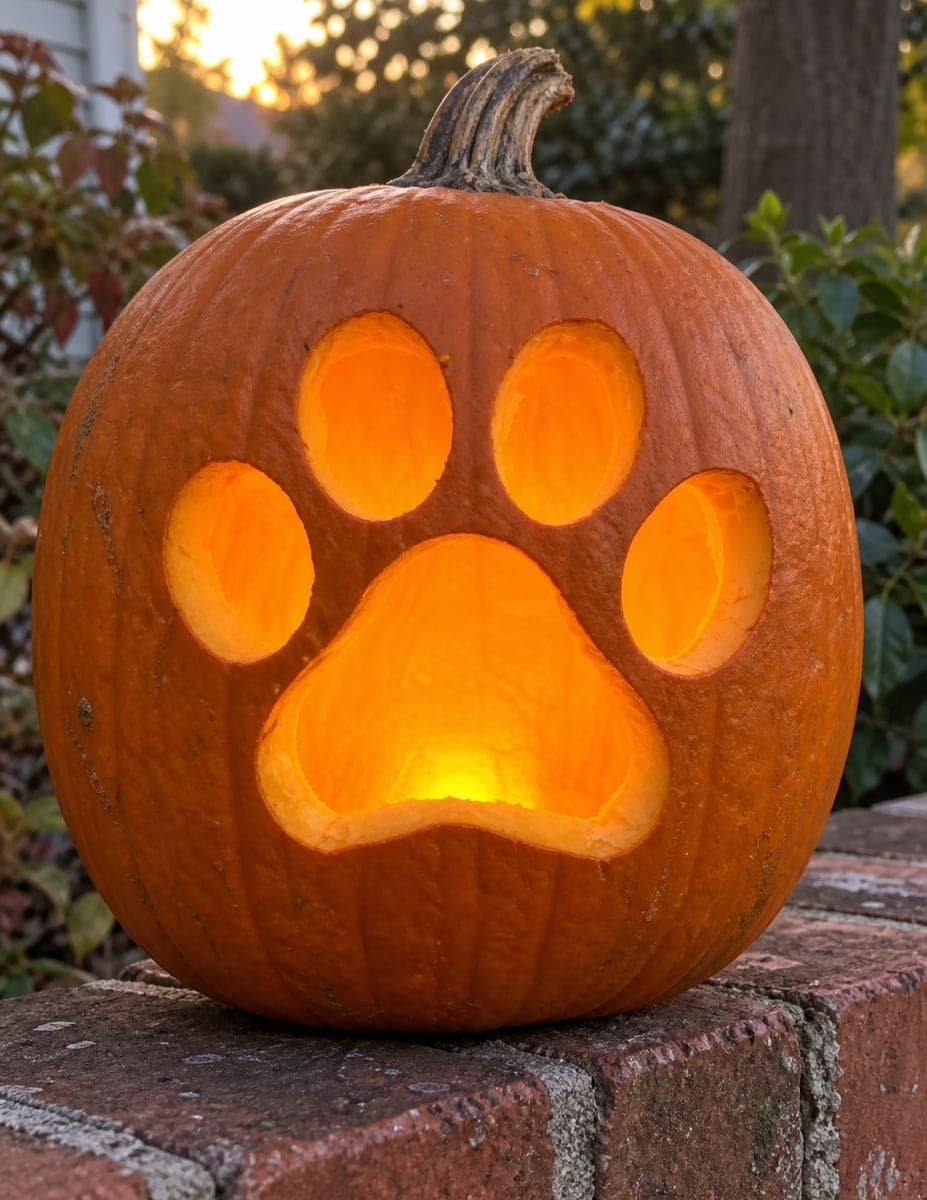
A large heart-shaped paw print with four round toe pads glows above a wide dog bone in this easy pumpkin carving idea for pet lovers. Both shapes are fully pierced through, leaving the orange rind between them as a solid visual separator. Because the bone extends nearly edge to edge, carve from the center outward and leave the rounded knob ends for last so the long middle section has wall support while you work. The paired shapes read clearly even from a front porch at street distance.

This is an AI-generated concept image: a realistic, carvable design idea rather than a photo of a finished carve. AI concepts are always labeled and sit out the leaderboard and the contest.

No ratings yet · Sign in to rate
Comments (0)

  • No comments yet — be the first.

Save without an account. Sign in to like or comment.

Our tips for carving a similar design

The whole design rests on two bold silhouettes, a heart-shaped paw print with four toe pads and a wide dog bone, both fully pierced so the light pours through. The trick is treating the strip of untouched rind between them as a deliberate divider, which keeps the two shapes from bleeding into one blob of light. Carve the bone from its center outward and save the rounded knob ends for last so the long span keeps wall support while you work.

Written by PumpkinCarvingIdeas.com, inspired by the image above. These are our suggestions, not instructions from the uploader. This approach to the AI concept has not been tested on a real pumpkin.

From pumpkin to porch

  1. Pick a pumpkin and plan the layout

    Choose a tall, fairly smooth pumpkin with a flat front face so both shapes sit clean and readable. Sketch or trace the paw print in the upper third and the dog bone across the middle, leaving a solid band of rind between them. Step back a few feet to check that the shapes are centered and large enough to read from the sidewalk. Adjust before you cut anything, since spacing is what makes this design work.

  2. Open the lid and clean out the inside

    Have an adult cut a lid from the top or, for steadier walls, cut a hatch in the back instead. Scoop out the seeds and pulp, then thin the inside wall behind the front face to about one inch. A thinner wall is easier to pierce and lets more light through. Save some pulp scraps if you want to test-fit any pieces later.

  3. Transfer the pattern

    Tape your stencil flat against the front and poke through the outlines with a pin or awl to create a dotted guide. Mark all four toe pads, the large heart pad, and the full outline of the bone including both knob ends. Remove the paper and connect the dots lightly with a marker so you can see every line clearly. Double-check the gap between paw and bone is still intact.

  4. Cut the paw print

    Start with the four small toe pads using a fine carving saw, cutting each oval fully through. Then cut the large heart-shaped pad below them. Keep your saw moving with light, steady strokes and let the tool do the work rather than forcing it. Push the freed pieces out gently from the inside so the edges stay crisp.

  5. Cut the bone from the center out

    Because the bone stretches nearly edge to edge, cut the long central bar first, working outward from the middle. Leave the two rounded knob ends attached until the very end so the long middle span keeps support while you saw. Once the center is stable, finish each knob. Clean up any ragged edges with your smallest blade.

  6. Light it and photograph

    Drop in a battery LED puck or string, never a candle, and set it low inside so the light spreads evenly across both openings. Check that the paw and bone both glow at similar brightness, adjusting the light position if one looks dim. Set the pumpkin on a porch step at dusk and shoot from straight on to capture both shapes. A little petroleum jelly on the cut edges slows drying if you want it to last a few extra days.

Gather your supplies

Check things off as you get ready.

Work on a stable surface, keep your free hand out of the cutting path, and have an adult handle sharp tools.

Three levels of light

  • Leave intact

    The full outer rind and the band of skin between the paw and the bone stay dark, holding the two shapes apart.

  • Peel & shade

    Optional: lightly skin-peel a thin halo just outside each shape for a soft glow that frames the cutouts.

  • Cut through

    The four toe pads, the heart pad, and the entire dog bone are cut through for the brightest light.

Learn the carving basics

Before you start cutting

How do I keep the long dog bone from collapsing while I cut?

Cut the central bar first and work outward, but leave both rounded knob ends attached until last. Those uncut ends anchor the long span and keep the wall from flexing. Once the middle is stable, finish the knobs one at a time.

How much space should I leave between the paw and the bone?

Leave at least a solid inch and a half of untouched rind between the two shapes. That band acts as a visual divider so the two glowing areas read as separate designs instead of merging. If the gap is too thin it can also weaken and crack.

Which shape should I carve first?

Start with the paw print at the top since its small pads are simple and let you warm up. The bone is the larger, more delicate cut, so tackle it second when you have a feel for the pumpkin wall. Working top to bottom also keeps freed pieces from crowding your workspace.

Your take belongs here, too.

Changed a detail? Made it simpler? Share a photo of your version and tell the community what worked.

Share your pumpkin

More pumpkins like this

You've reached the end · 8 pumpkins
The Patch Report

Fresh pumpkins, in your inbox.

The best new carvings, ideas worth stealing, and how-tos for carving season. Short, seasonal, and gone by November.

A short email during carving season. Unsubscribe anytime. See our privacy policy.