Halloween Pumpkin Carving Contest · Starts October 1st · $500 in prizes
← Back to ideas
@ai_concepts
Sep 12, 2026
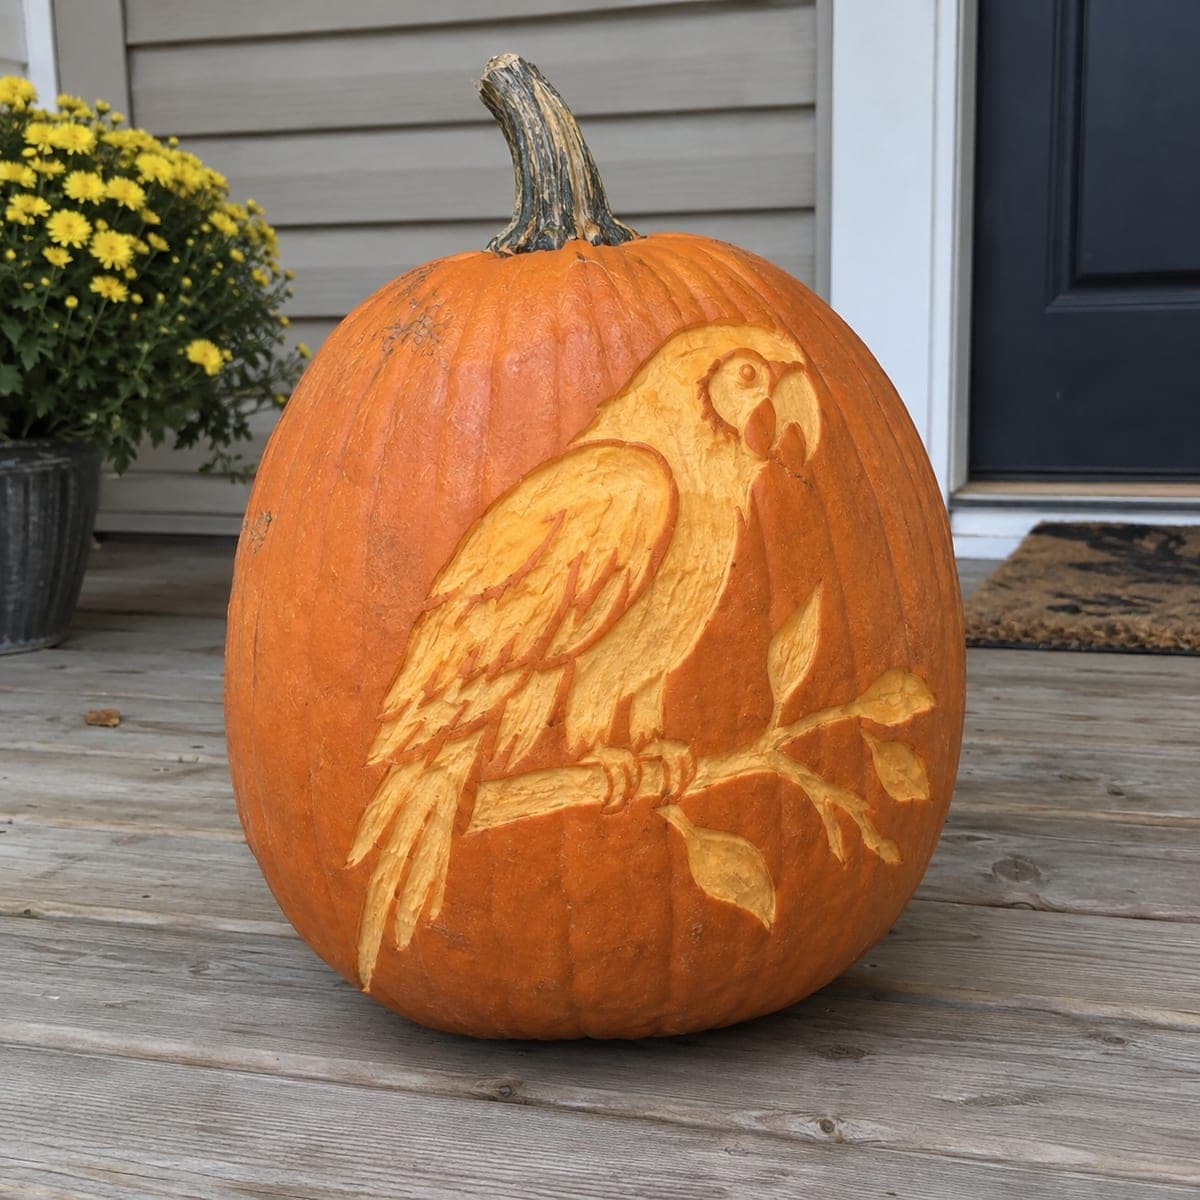
Perched Macaw Parrot Etched Jack-O-LanternAI
0

Perched Macaw Parrot Etched Jack-O-Lantern

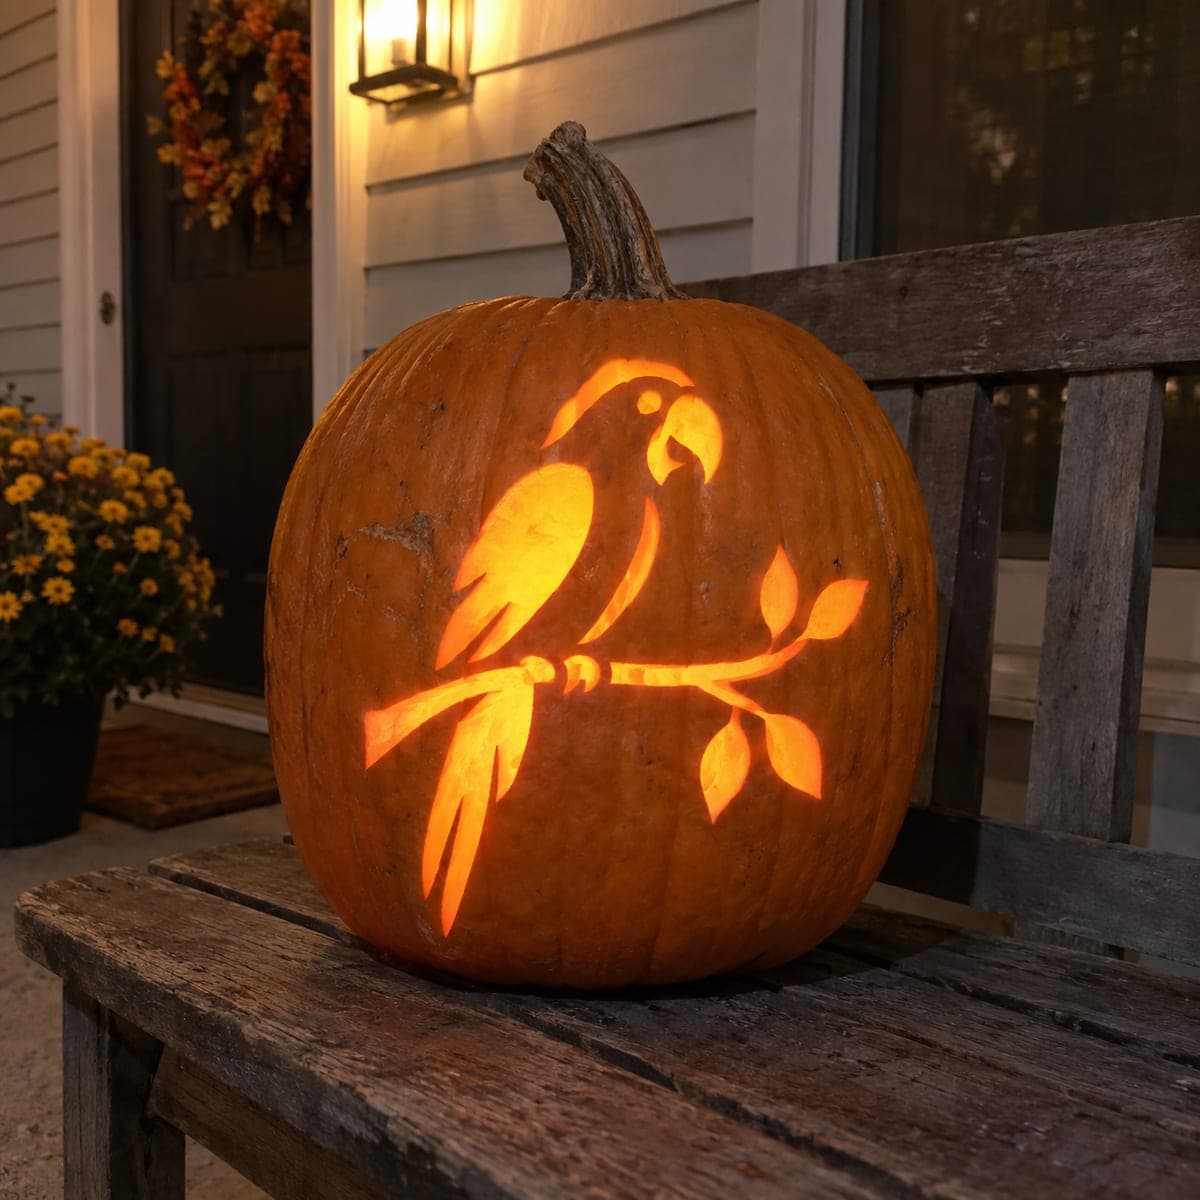
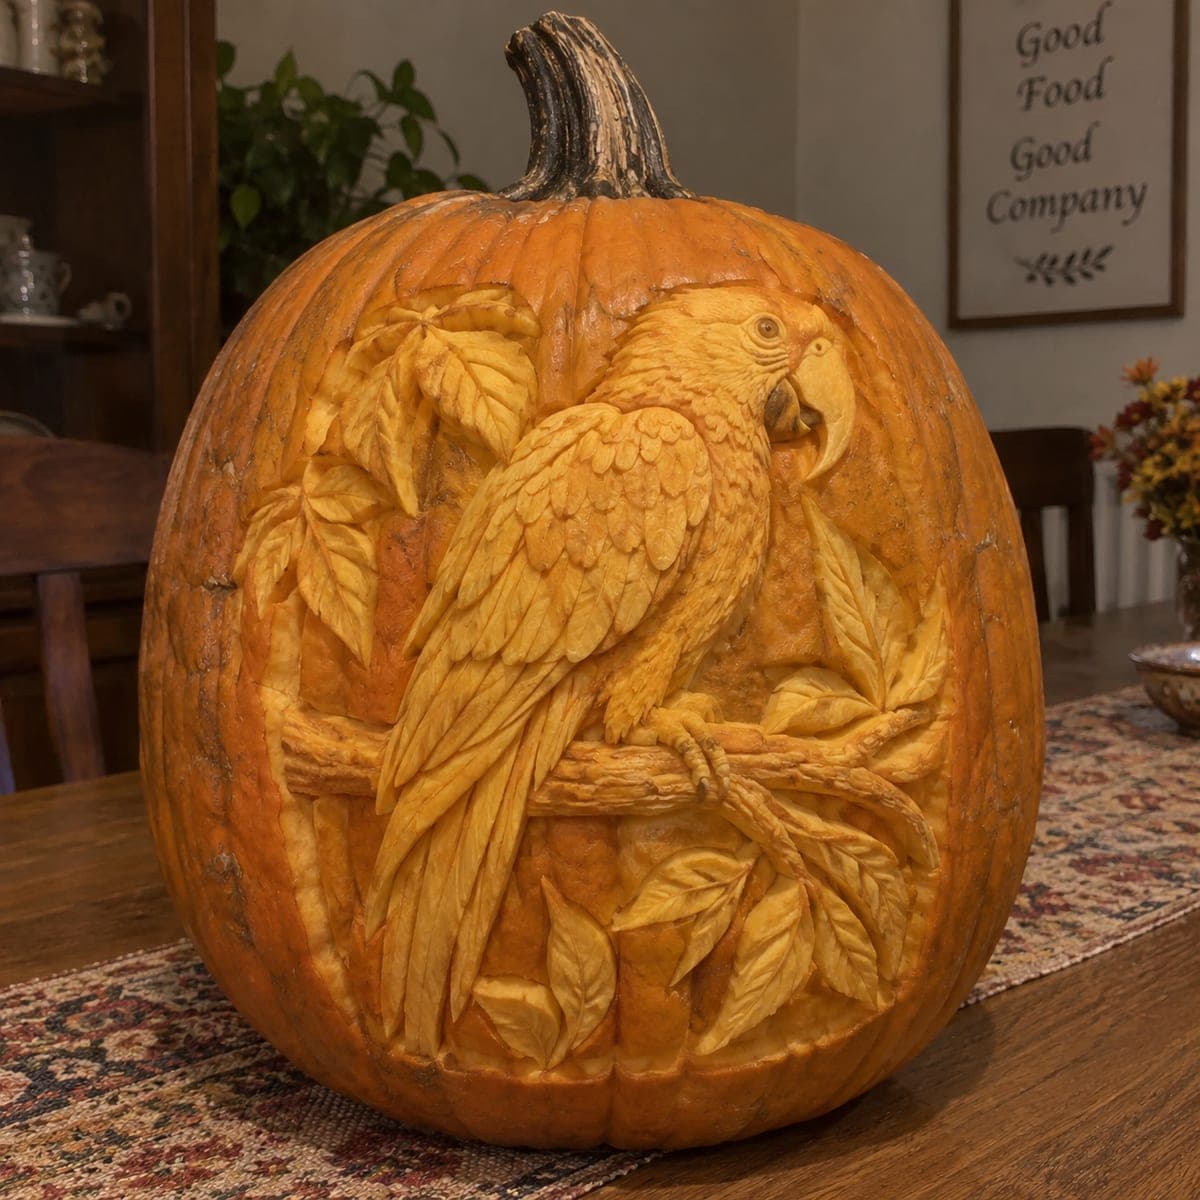
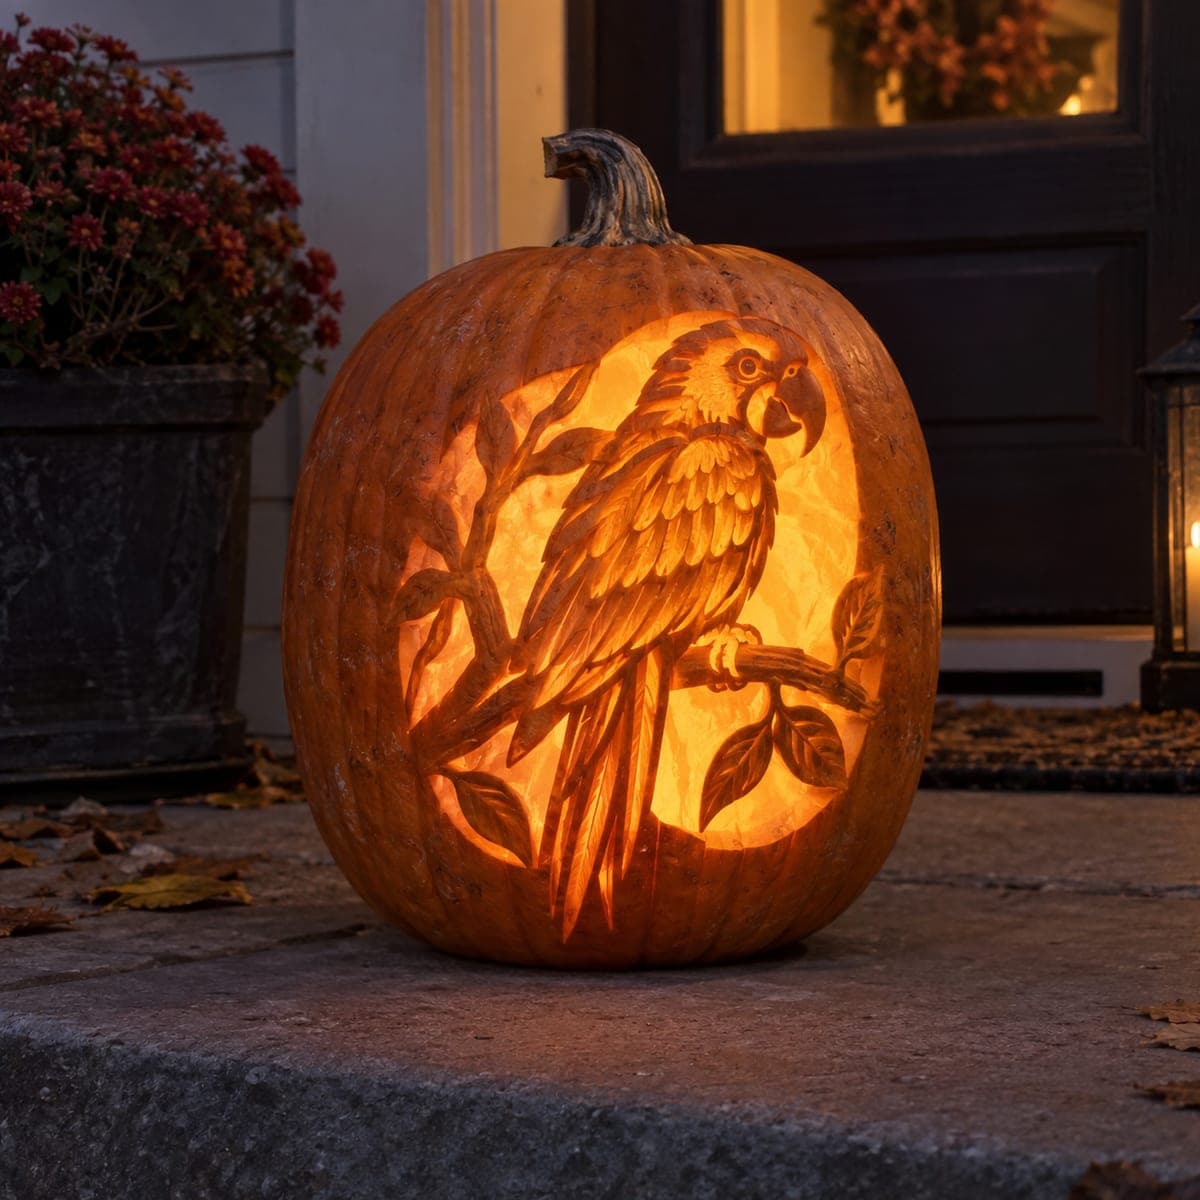
A macaw parrot perches on a leafy branch inside a glowing circle, its wing feathers built from dozens of carefully etched layers. The bird is surface carving at varying depths, while the background circle is peeled thin so light floods through behind it. Etch the fine feather lines last with a small V-gouge, and use a bright LED puck to make the layered depths read from the street.

This is an AI-generated concept image: a realistic, carvable design idea rather than a photo of a finished carve. AI concepts are always labeled and sit out the leaderboard and the contest.

No ratings yet · Sign in to rate
Comments (0)

  • No comments yet — be the first.

Save without an account. Sign in to like or comment.

Our tips for carving a similar design

The core trick here is depth layering: the parrot is built from surface carving at several depths while the round background is peeled thin so light floods through behind the bird. Plan the glowing circle first, then rough the bird's body, and save the fine feather lines for last. Treat it as a relief sculpture rather than a cutout so the layered detail reads from the street.

Written by PumpkinCarvingIdeas.com, inspired by the image above. These are our suggestions, not instructions from the uploader. This approach to the AI concept has not been tested on a real pumpkin.

From pumpkin to porch

  1. Prep the pumpkin and pick a tall canvas

    Choose a large pumpkin with a smooth, flat front panel to hold all the fine detail. Cut a wide lid from the bottom instead of the top so the design stays intact and the pumpkin sits stable. Scoop the front wall down to about one inch thick with a sturdy loop tool so light passes evenly. A thinner, consistent wall makes the peeled and etched areas glow the same.

  2. Transfer the design

    Tape a parrot-on-branch stencil flat against the front and poke through the main outlines with a pin or transfer wheel. Mark the outer circle, the bird's body edge, the branch, and the biggest leaves so you have clear zones. Keep the tiny feather lines off the transfer for now; those come freehand at the end. Peel the stencil and connect any faint dotted lines with a washable marker.

  3. Peel the background circle for the glow

    Using a shallow gouge or ribbon tool, remove only the outer skin inside the circle around the bird, leaving the flesh thin enough that light shines through as a bright halo. Work right up to the parrot's outline but do not cut all the way through, so the bird stays supported by solid flesh. Keep the depth even across the circle for a smooth wash of light. Leave the pumpkin skin outside the circle fully untouched so it frames the scene in dark orange.

  4. Rough the parrot at varying depths

    Shave the bird's body to different depths to build form: keep the head and beak higher, sink the chest and wing slightly, and drop the tail lowest. Use a rounded gouge for the smooth head and a flatter tool for the broad wing. Round every edge so the shapes look sculpted rather than stamped. Step back often to check that the depths read as a three-dimensional bird against the glowing circle.

  5. Etch the feather lines last

    With a small V-gouge, carve the fine feather layers one row at a time, starting near the head and overlapping downward like shingles. Vary the pressure so deeper strokes catch more light and shallow ones stay dim, which creates the layered shading. Add the beak highlight, eye ring, and thin leaf veins with the same tool. Save these delicate cuts for the end so the pumpkin stays firm while you work.

  6. Light it and photograph

    Set a bright LED puck inside and aim it toward the front wall so the peeled circle glows and the etched depths cast soft shadows. Warm white gives the most natural feather tones. Shoot at dusk on a step or porch with a dark backdrop so the halo pops. Mist the cut surfaces with water and cover with plastic wrap between showings to slow drying.

Gather your supplies

Check things off as you get ready.

Work on a stable surface, keep your free hand out of the cutting path, and have an adult handle sharp tools.

Three levels of light

  • Leave intact

    The skin outside the circle and the darkest feather shadows stay untouched to frame the scene.

  • Peel & shade

    The parrot's body and the shallow feather etching glow a soft mid orange from thinned flesh.

  • Cut through

    The round background behind the bird is peeled thinnest for the brightest halo of light.

Learn the carving basics

Before you start cutting

This is an AI concept, so can a real pumpkin hold this much feather detail?

Yes, if you treat it as relief carving instead of full cutouts. Keep the front wall an even inch thick and only etch shallow lines for the feathers so nothing breaks away. The parrot stays fully supported because you never cut through it, just shade at different depths.

How do I keep the bird from looking flat?

Vary your carving depth across the body: raise the head and beak, sink the chest and wing slightly, and drop the tail lowest. Then let the V-gouge feather lines catch light at different angles. The mix of depths and stroke pressure is what creates the shaded, sculpted look.

What light works best for showing the layers?

Use a bright LED puck, never a candle, since you need strong even light to push through the thin background and reveal the etched shadows. Aim it toward the front wall rather than straight up. Warm white bulbs give the feathers a natural glow while cool white can look flat.

Your take belongs here, too.

Changed a detail? Made it simpler? Share a photo of your version and tell the community what worked.

Share your pumpkin

More pumpkins like this

You've reached the end · 8 pumpkins
The Patch Report

Fresh pumpkins, in your inbox.

The best new carvings, ideas worth stealing, and how-tos for carving season. Short, seasonal, and gone by November.

A short email during carving season. Unsubscribe anytime. See our privacy policy.