Halloween Pumpkin Carving Contest · Starts October 1st · $500 in prizes
← Back to ideas
@ai_concepts
Jul 31, 2026
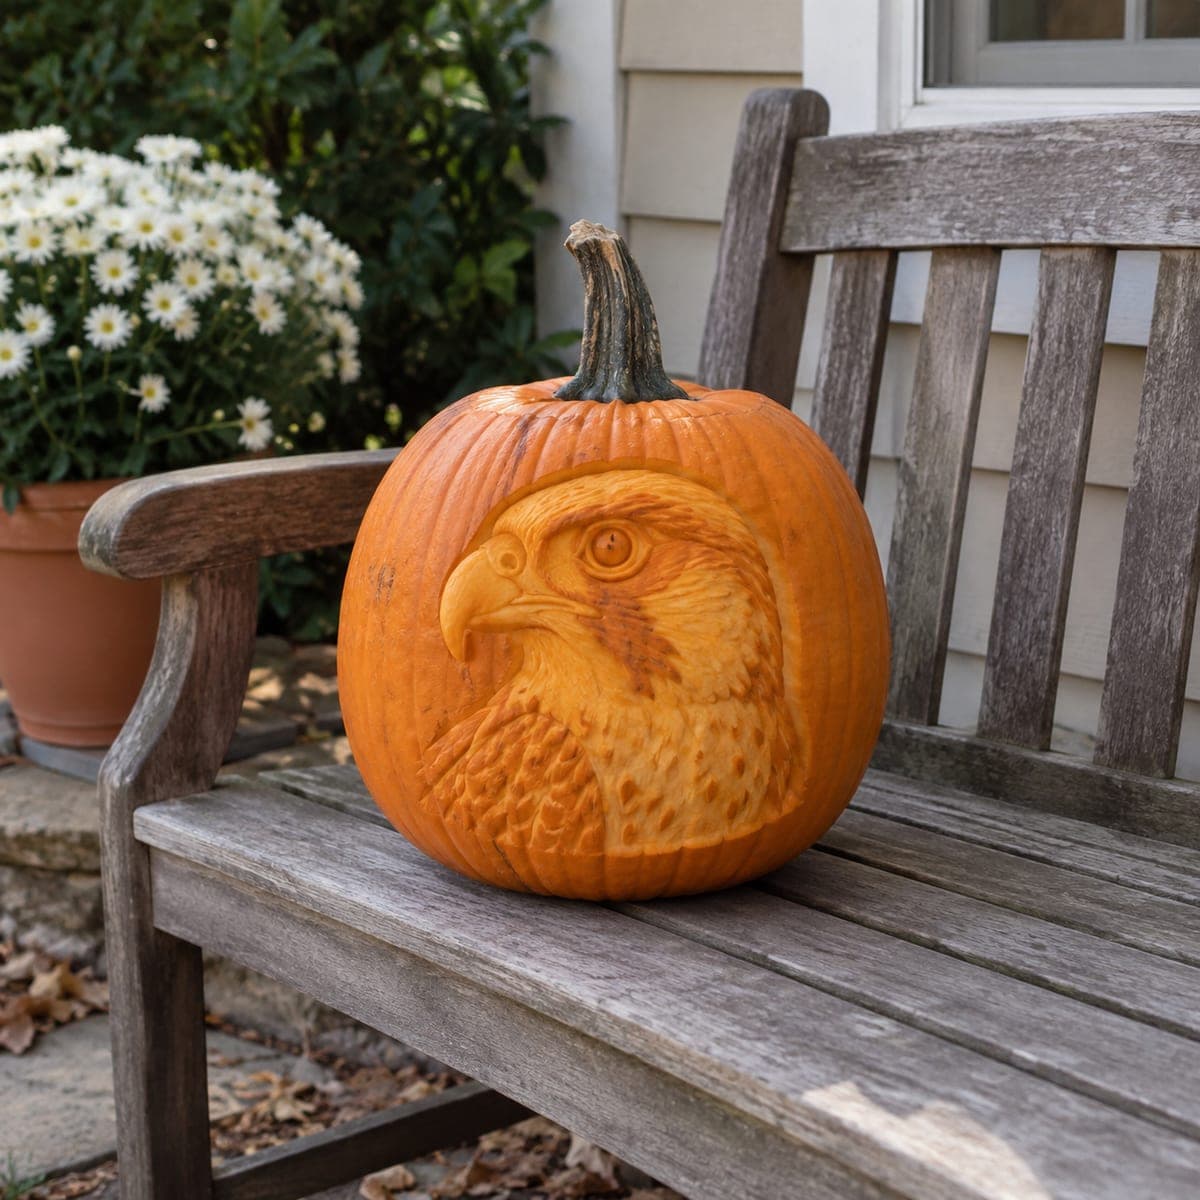
Peregrine Falcon Head Painted PumpkinAI
0

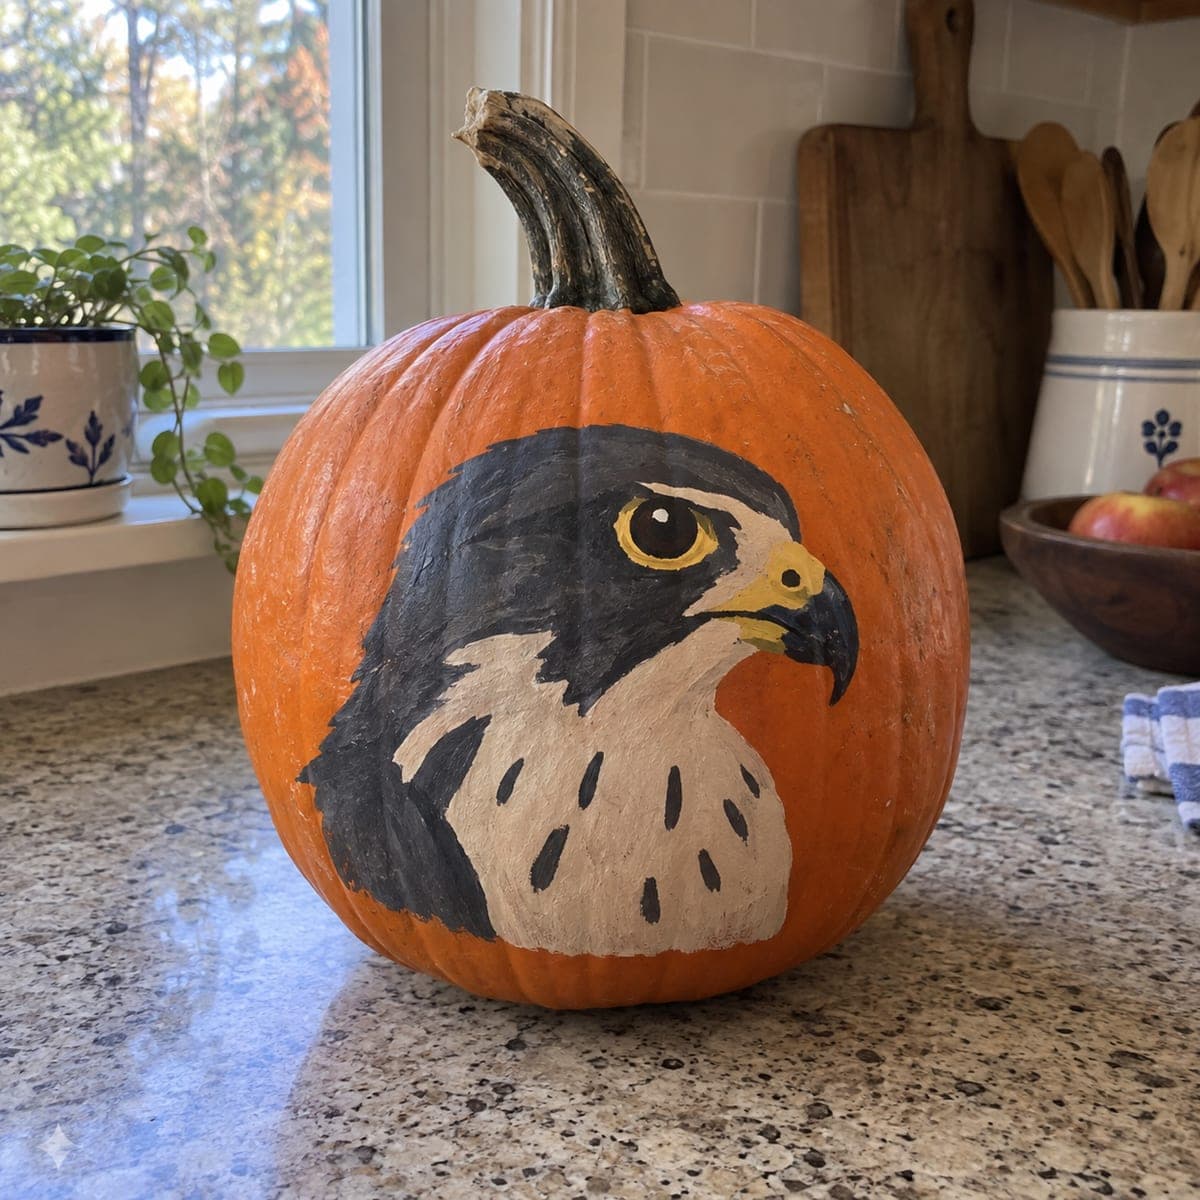
Peregrine Falcon Head Painted Pumpkin

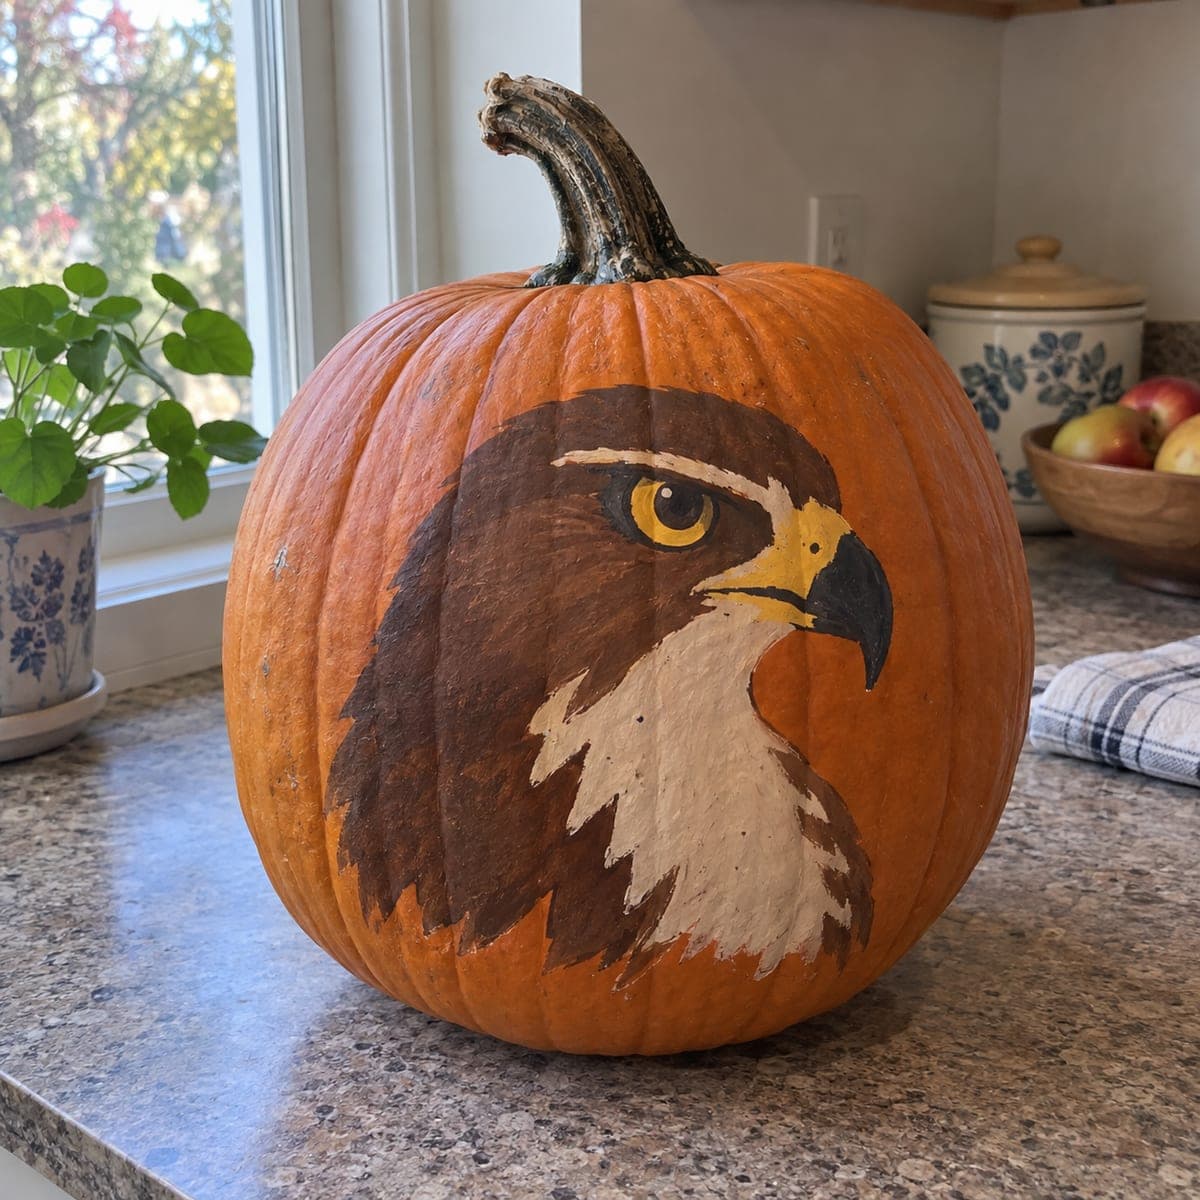
A peregrine falcon in sharp profile dominates this painted pumpkin, with its dark hood, hooked yellow-ringed beak, and speckled cream chest rendered in acrylic. Bird portraits work well as no-carve pumpkin designs because the smooth skin takes fine brushwork better than carved edges do. Base-coat the dark head and back first, let it dry, then add the chest speckles with a small round brush. Display it indoors where the detail can be admired up close.

This is an AI-generated concept image: a realistic, carvable design idea rather than a photo of a finished carve. AI concepts are always labeled and sit out the leaderboard and the contest.

No ratings yet · Sign in to rate
Comments (0)

  • No comments yet — be the first.

Save without an account. Sign in to like or comment.

Our tips for carving a similar design

The core trick here is treating the smooth pumpkin like a canvas and building the falcon in flat color layers, dark first and light details last. Because nothing is cut, the crisp yellow beak ring and cream chest speckles stay sharp and structurally safe. Plan the head in profile so the hooked beak sits on the widest, flattest part of the pumpkin where your brush can reach easily.

Written by PumpkinCarvingIdeas.com, inspired by the image above. These are our suggestions, not instructions from the uploader. This approach to the AI concept has not been tested on a real pumpkin.

From pumpkin to porch

  1. Clean and sketch the profile

    Wipe the pumpkin down with a damp cloth and let it dry fully so paint grips the skin. Turn the pumpkin so the smoothest side faces you and lightly sketch the falcon head in profile with a washable marker or soft pencil. Keep the eye roughly at the center and let the dark hood sweep back toward the stem. Step back and check the proportions before you commit to paint.

  2. Block in the dark hood and back

    Base-coat the black hood, cheek stripe, and back first using a medium flat brush and acrylic craft paint. Fill these large shapes solidly and leave clean edges where the cream chest will go. Let this layer dry completely, which usually takes fifteen to twenty minutes, before touching neighboring areas. A second coat gives you a richer, more even dark once the first is dry.

  3. Paint the cream chest and face

    Fill the throat, chest, and the pale patch below the eye with a warm cream or bone white. Feather the edge slightly where the cream meets the dark hood so the transition looks like feathers rather than a hard line. Let it dry, then add a light gray shadow along the lower chest to give it roundness. Keep your water cup handy to thin the paint for these softer blends.

  4. Add the beak and eye

    Paint the hooked beak in yellow at the base fading to a dark gray tip, then outline the eye with a yellow ring. Fill the eye dark and add a single tiny white dot for the catchlight, which is what makes the bird look alive. A small round brush gives you control on these curves. Let each color dry before adding the one next to it so they stay crisp.

  5. Speckle the chest

    Load a small round brush with dark brown or black and dab short teardrop marks down the chest, angling them to follow the body's curve. Vary the spacing so it looks natural rather than gridded. Start light and add more only if it needs it, since speckles are hard to remove. Seal the finished paint with a coat of clear matte acrylic sealer once everything is dry.

  6. Stage and photograph

    Set the pumpkin indoors on a counter or shelf where the fine detail can be seen up close. Angle a warm lamp or window light across the face to catch the eye's catchlight. Because this is a no-carve design, there is no flame to worry about and it will last for days. Snap your photo slightly above eye level to show the full profile.

Gather your supplies

Check things off as you get ready.

Work on a stable surface, keep your free hand out of the cutting path, and have an adult handle sharp tools.

Three levels of light

  • Leave intact

    The dark hood, cheek stripe, and back read as the deepest, most shadowed areas of the portrait.

  • Peel & shade

    The cream chest and pale face patch are the mid tones that catch soft room light.

  • Cut through

    This is a no-carve painted design, so the brightest accent is the tiny white eye catchlight and the yellow beak, not an actual cutout.

Learn the carving basics

Before you start cutting

Should I use a real pumpkin or a craft one?

Either works, but a smooth foam or ceramic craft pumpkin lasts for years and takes fine brushwork beautifully. If you use a real pumpkin, choose one with a flat, blemish-free side and expect it to last a week or two indoors. A base coat of white gesso or primer helps the colors pop on either surface.

How do I keep the beak and eye looking crisp?

Let each color dry fully before painting the one beside it so the edges do not bleed. Use a small round brush and steady your painting hand against the pumpkin. The single white catchlight dot in the eye does most of the work, so add it last and keep it tiny.

Can I add a light inside like a carved pumpkin?

This design is meant to be admired for its painted detail, so it does not need an internal light. If you want a glow, set a battery LED nearby or place the pumpkin on a small light pad rather than cutting into the painted face. Never use a candle near painted or sealed surfaces.

Your take belongs here, too.

Changed a detail? Made it simpler? Share a photo of your version and tell the community what worked.

Share your pumpkin

More pumpkins like this

You've reached the end · 8 pumpkins
The Patch Report

Fresh pumpkins, in your inbox.

The best new carvings, ideas worth stealing, and how-tos for carving season. Short, seasonal, and gone by November.

A short email during carving season. Unsubscribe anytime. See our privacy policy.