Halloween Pumpkin Carving Contest · Starts October 1st · $500 in prizes
← Back to ideas
@ai_concepts
Jul 25, 2026
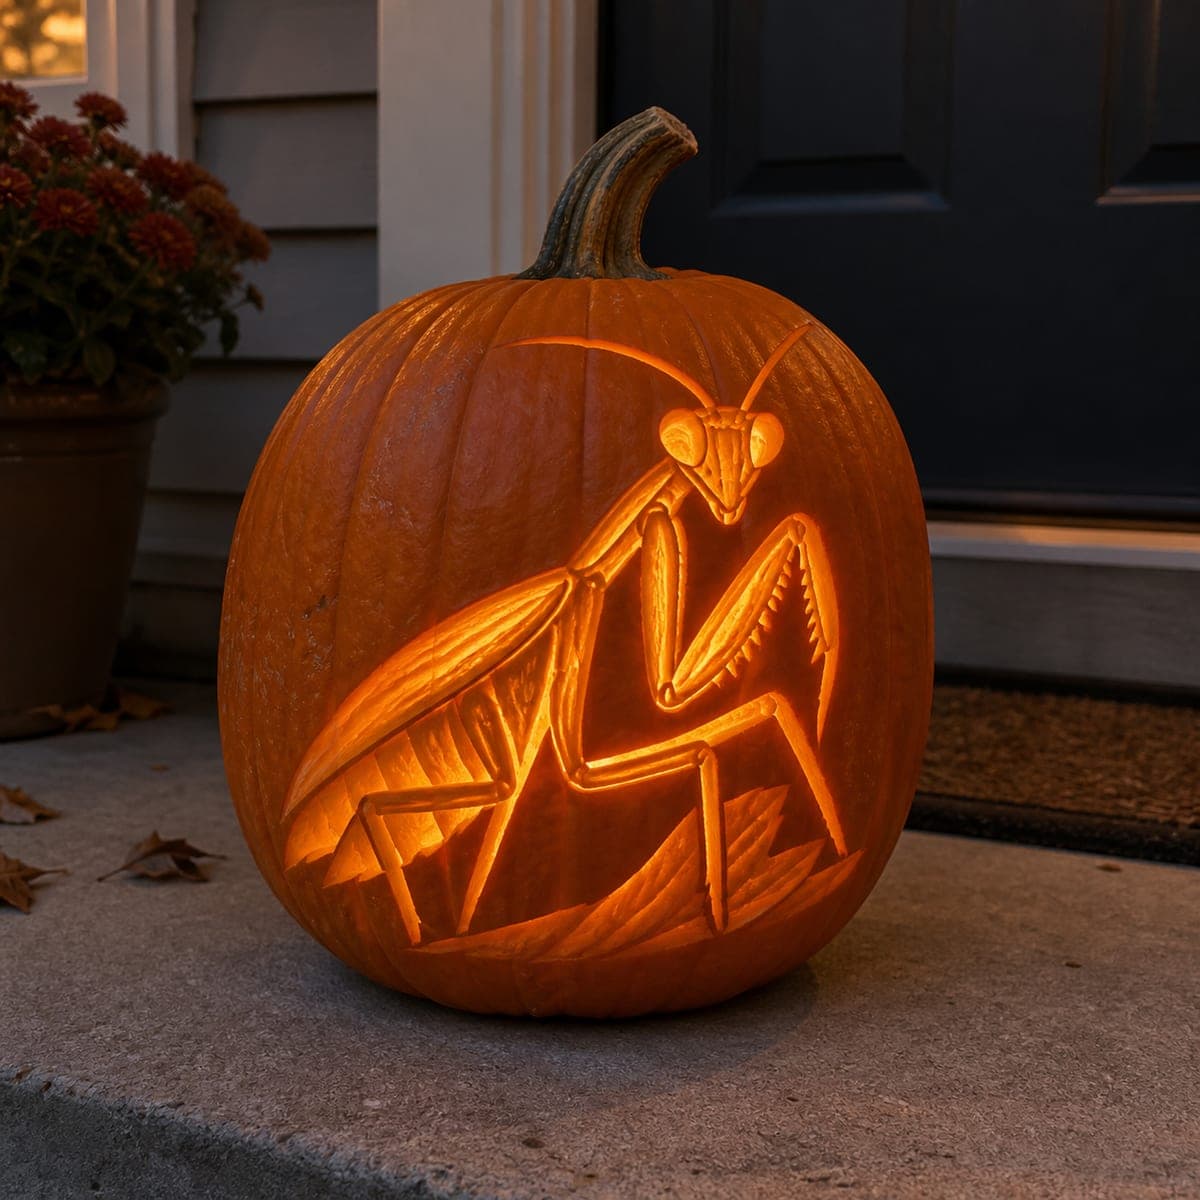
Praying Mantis Pumpkin Carving With Raised ForelegsAI
0

Praying Mantis Pumpkin Carving With Raised Forelegs

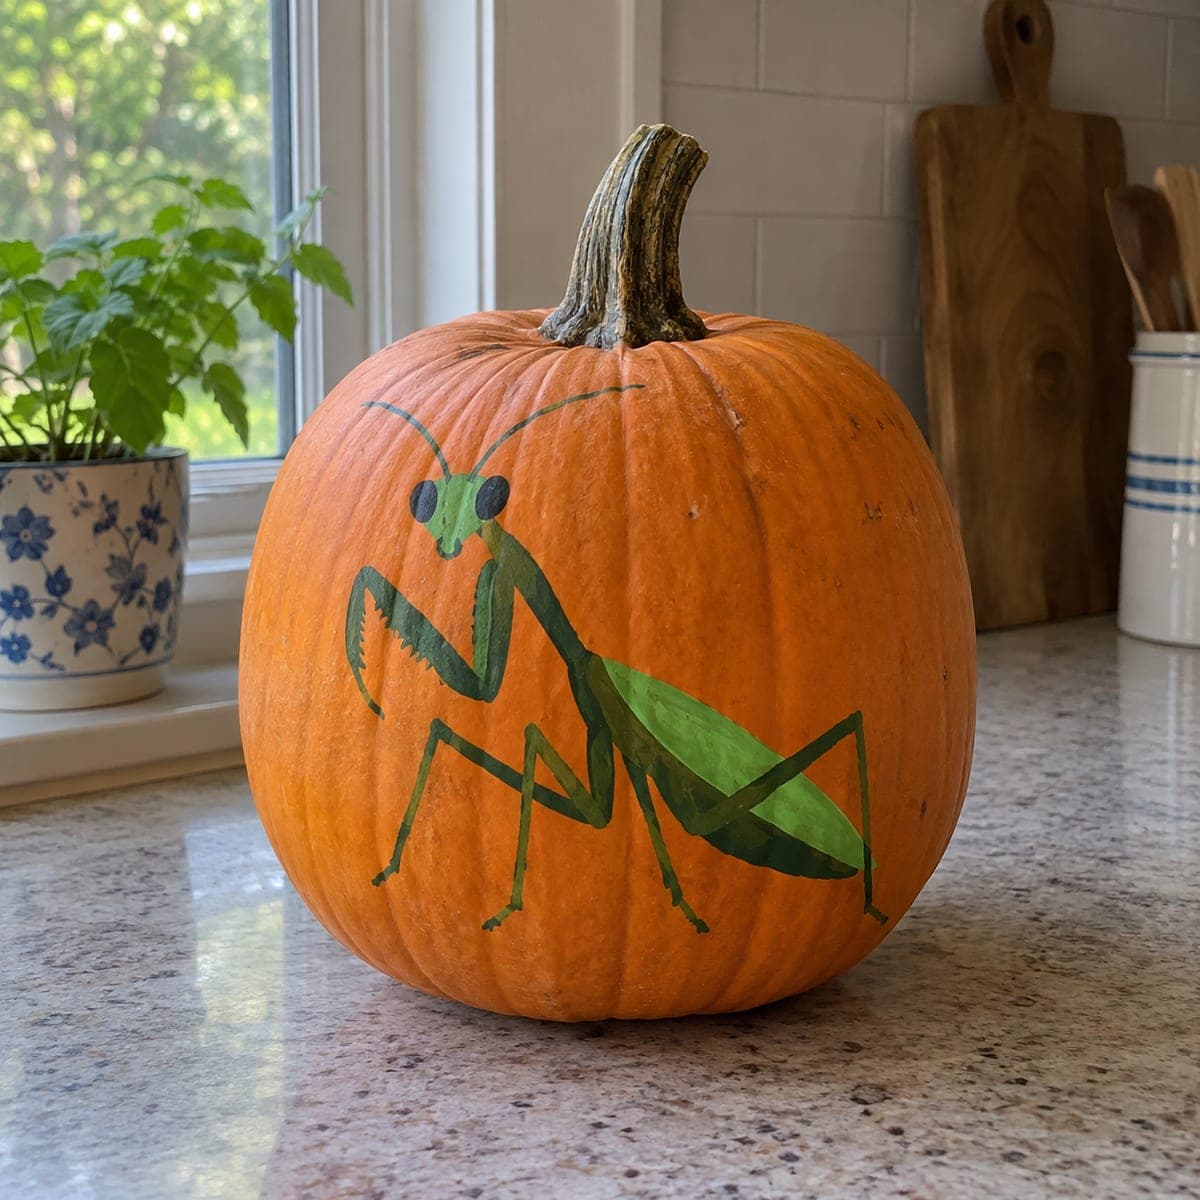
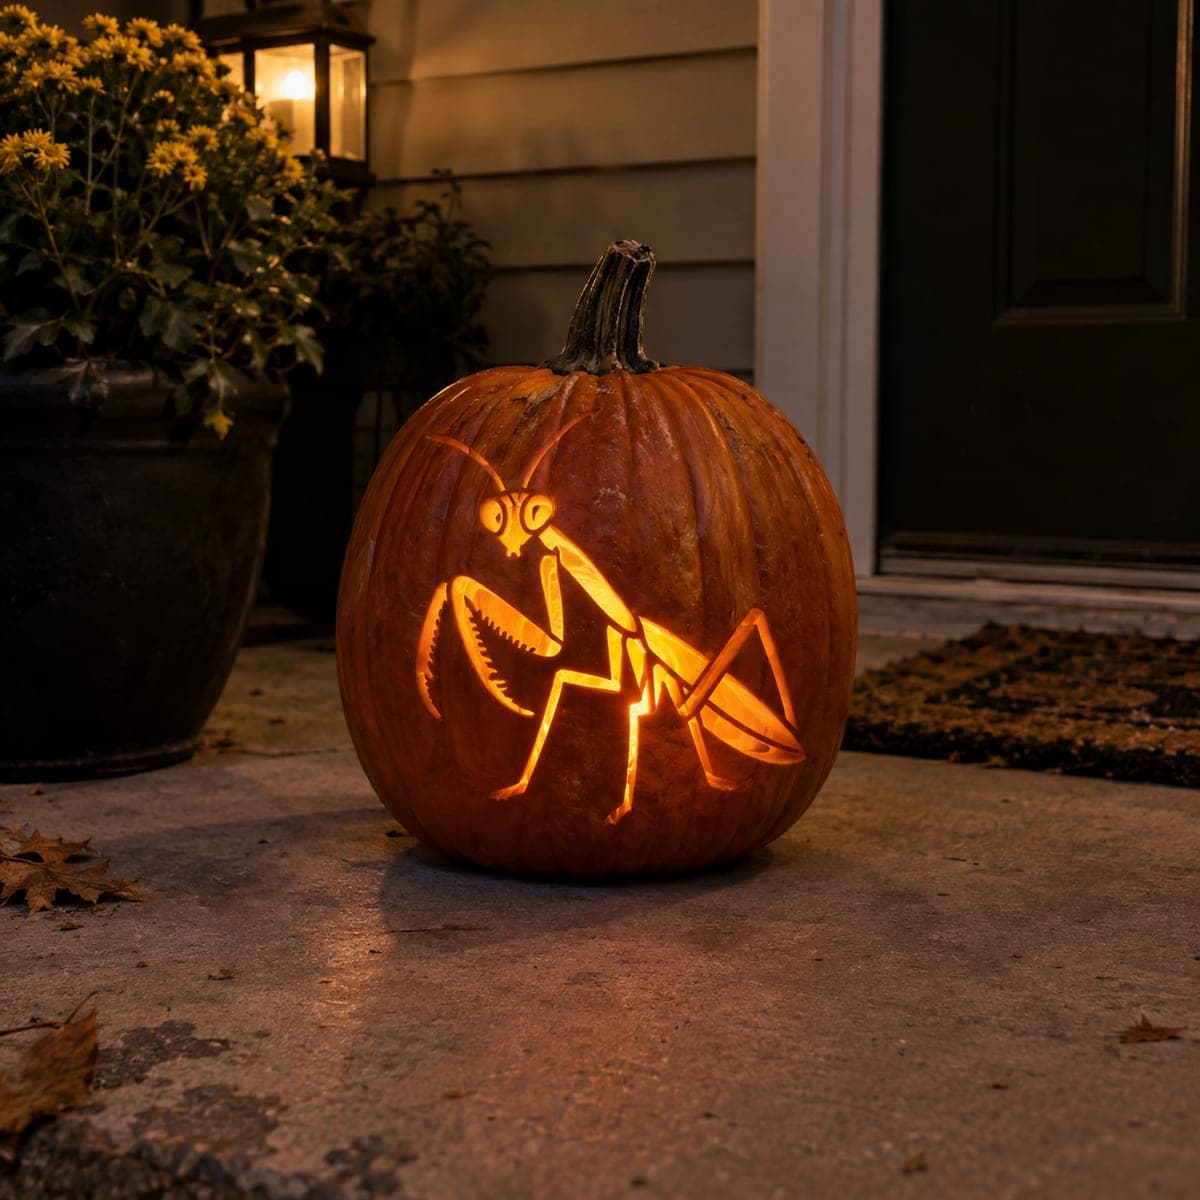
A praying mantis rears up with folded forelegs on this glowing pumpkin, its bulging eyes, bent legs, and segmented body traced in clean pierced lines. Insect designs reward careful sequencing, so carve the antennae and skinny legs first while the shell is stiff, then open the larger body sections. It is an unexpected pumpkin carving idea for bug-loving kids and gardeners, and a bright tealight makes every joint of the linework readable from the street.

This is an AI-generated concept image: a realistic, carvable design idea rather than a photo of a finished carve. AI concepts are always labeled and sit out the leaderboard and the contest.

No ratings yet · Sign in to rate
Comments (0)

  • No comments yet — be the first.

Save without an account. Sign in to like or comment.

Our tips for carving a similar design

The core trick here is thin pierced linework that reads like a drawing rather than solid cut shapes. You carve the mantis as a set of clean lines and narrow openings, saving a few slightly wider cuts inside the body for a brighter core glow. Work from the most fragile parts to the largest openings so the shell stays firm while you handle the skinny legs and antennae.

Written by PumpkinCarvingIdeas.com, inspired by the image above. These are our suggestions, not instructions from the uploader. This approach to the AI concept has not been tested on a real pumpkin.

From pumpkin to porch

  1. Prep the pumpkin and transfer the design

    Pick a tall, smooth pumpkin with a flat-ish front panel for the mantis profile. Cut a lid from the bottom or the back rather than the top so the stem stays intact and the shell above stays strong. Scoop the inside wall on the front down to about one inch thick so light passes easily. Tape your stencil flat and poke the outline through with a pin or a transfer tool, marking the antennae, legs, eyes, and body segments.

  2. Score the antennae and thin legs first

    While the shell is still stiff and undisturbed, carve the skinniest details. Use a fine detail saw or a craft knife to cut the long antennae and the narrow bent legs as thin channels. Keep every line connected to solid pumpkin so nothing floats free, and leave small bridges where two lines almost meet. Take these slow, since thin cuts near the top of the shell are the easiest to crack.

  3. Cut the eyes and head detail

    Move to the bulging eyes and the small marks around the head. Cut the eye outlines as clean rings, leaving a dot of skin in the center so each eye keeps its shape. Keep the blade angled straight in for crisp edges on these curves. Wipe away pulp as you go so you can read your lines clearly.

  4. Open the spiky forelegs

    Carve the folded, saw-toothed forelegs next. Make the tiny spine cuts as short pierced slots rather than one long opening, which keeps the leg edge strong and gives that serrated look. Connect the slots only after each one is fully cut. This is the busiest area, so rest your hand and take breaks to avoid rushing a slip.

  5. Cut the body segments last

    Save the largest openings, the segmented thorax and the wide back leg, for the end when smaller cuts are done. Remove these bigger pieces gently by pushing outward with a thumb from inside. Clean up every edge with the tip of your knife so the linework looks sharp. Leaving these for last means the shell stayed rigid during all the delicate work.

  6. Light it and photograph

    Drop in one or two bright LED tealights so the beam reaches the top antennae and the lower legs evenly. Set the pumpkin at eye level on a step and shoot after dark for the strongest contrast. If any line looks dim, shave a little more from the inside wall behind it. A cool night helps the carving last, and a dab of petroleum jelly on cut edges slows drying.

Gather your supplies

Check things off as you get ready.

Work on a stable surface, keep your free hand out of the cutting path, and have an adult handle sharp tools.

Three levels of light

  • Leave intact

    The broad orange shell around the mantis stays untouched so the bug stands out against a dark field.

  • Peel & shade

    Shallow-scraped skin along the body segments and leg joints can give a soft mid glow that suggests depth.

  • Cut through

    The pierced antennae, spiky forelegs, eye rings, and open body sections cut through for the brightest lines.

Learn the carving basics

Before you start cutting

How do I keep the thin antennae and legs from breaking?

Carve them first while the shell is firm and undisturbed, and keep each line narrow and fully connected to solid pumpkin. Avoid cutting two thin lines so close that the strip between them gets fragile. If a spot feels weak, leave a small bridge of skin to hold it together.

This is an AI concept image, so can a real pumpkin look like this?

Yes, the design translates well as long as you treat the legs and antennae as pierced lines rather than free-floating pieces. Keep the serrated foreleg edges as a row of short slots instead of one long thin sliver. That keeps every detail attached and structurally sound.

Where should I put the light for the best effect?

Use one or two bright LED tealights and position them so light reaches both the tall antennae and the lower legs. A single low light can leave the top lines dim, so raise a light on a small block if needed. Thin the inside wall behind any line that still looks faint.

Your take belongs here, too.

Changed a detail? Made it simpler? Share a photo of your version and tell the community what worked.

Share your pumpkin

More pumpkins like this

You've reached the end · 8 pumpkins
The Patch Report

Fresh pumpkins, in your inbox.

The best new carvings, ideas worth stealing, and how-tos for carving season. Short, seasonal, and gone by November.

A short email during carving season. Unsubscribe anytime. See our privacy policy.