Halloween Pumpkin Carving Contest · Starts October 1st · $500 in prizes
← Back to ideas
@ai_concepts
Sep 13, 2026
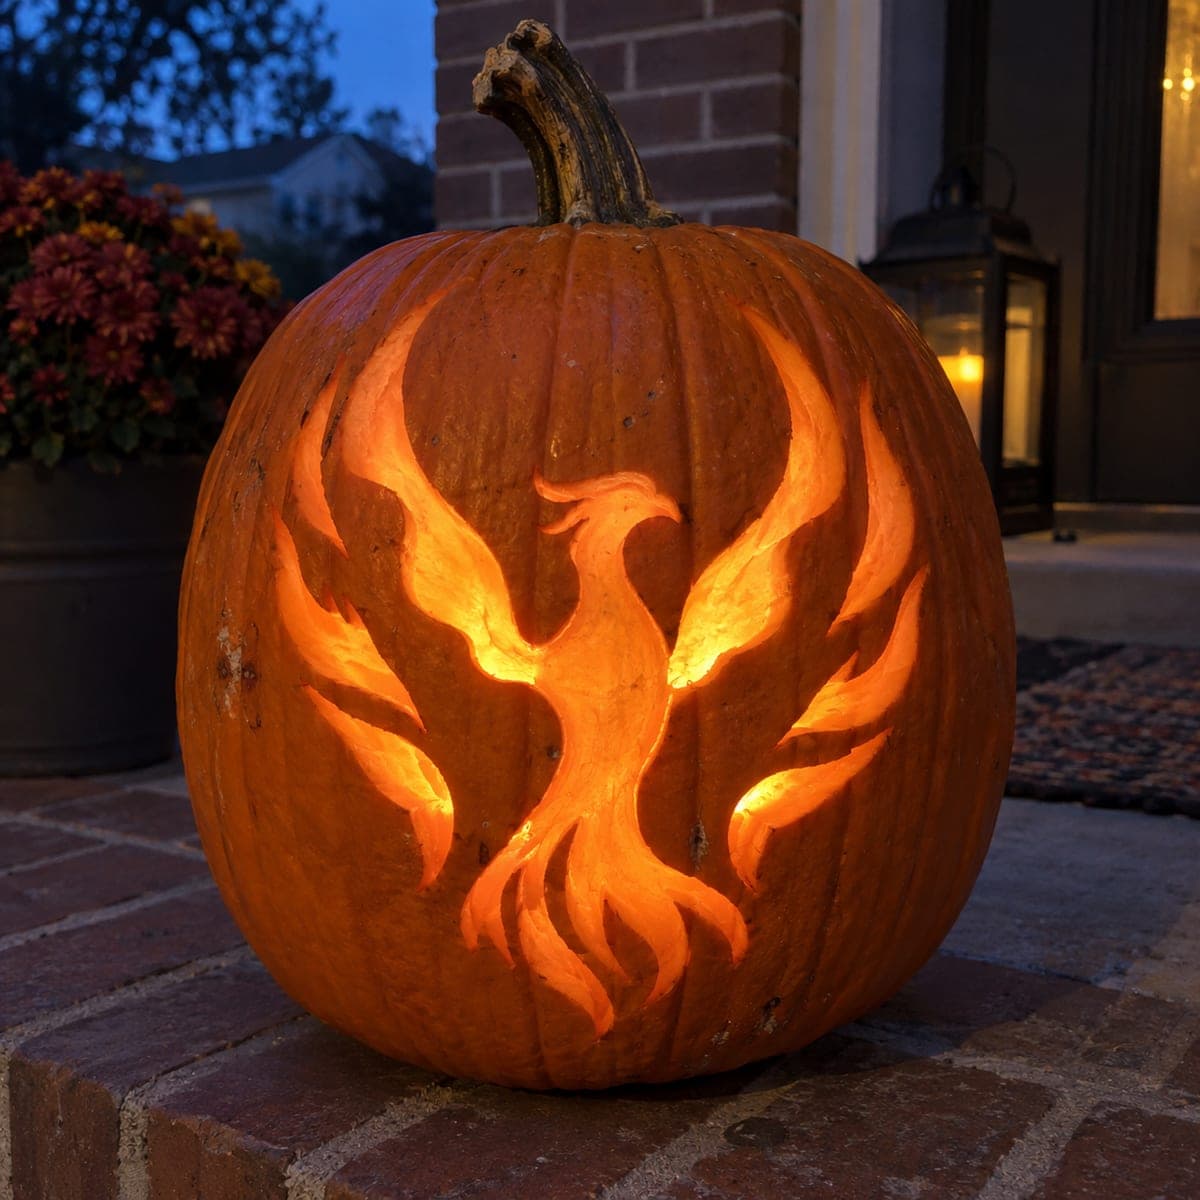
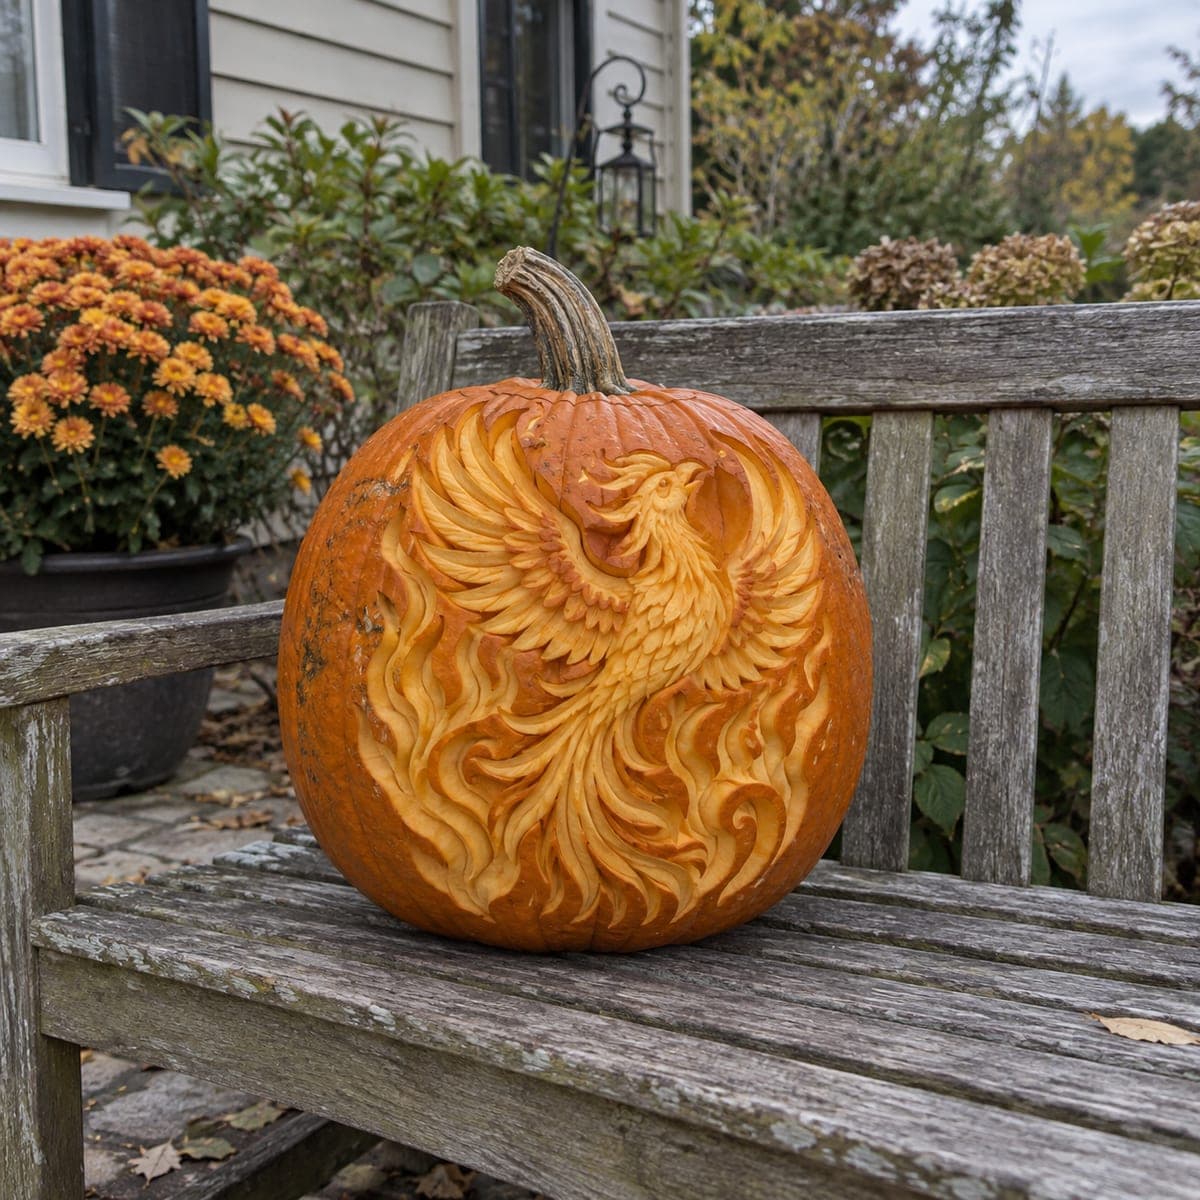
Rising Phoenix Jack-O-Lantern With Flaming WingsAI
0

Rising Phoenix Jack-O-Lantern With Flaming Wings

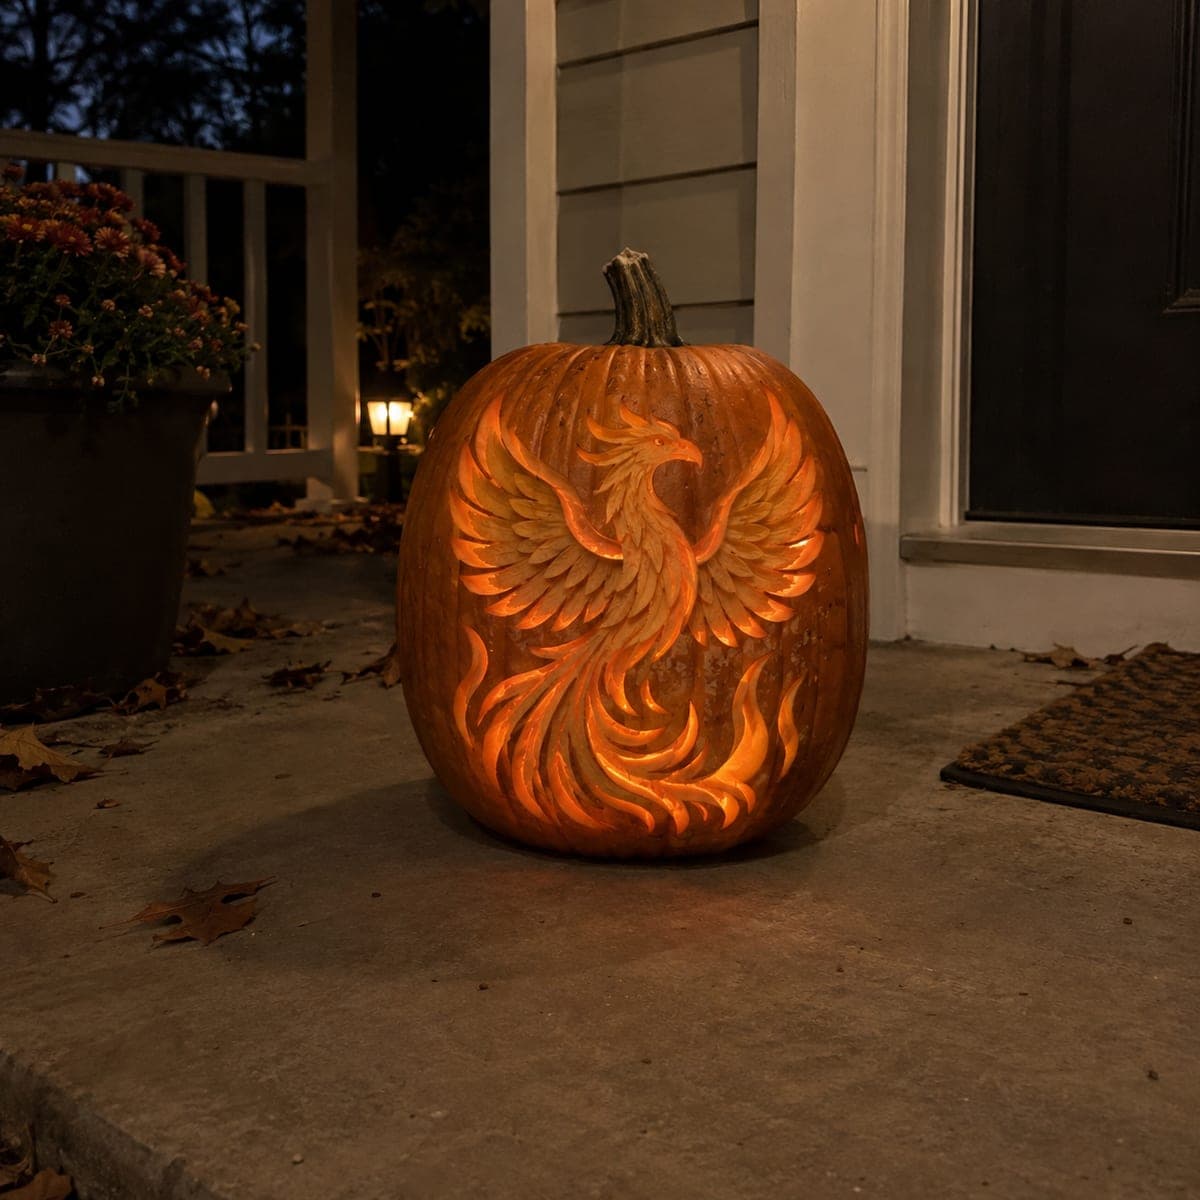
Wings swept upward and tail feathers trailing like fire, this phoenix pumpkin carving glows as if the bird is burning from within. Varying carve depths do the work: the body is pierced nearly through for the brightest light, while the outer feathers are peeled shallower for a softer flame effect. Carve from the center outward so the thin feather tips are not stressed while you work. An amber LED enhances the fiery color at night.

This is an AI-generated concept image: a realistic, carvable design idea rather than a photo of a finished carve. AI concepts are always labeled and sit out the leaderboard and the contest.

No ratings yet · Sign in to rate
Comments (0)

  • No comments yet — be the first.

Save without an account. Sign in to like or comment.

Our tips for carving a similar design

The core trick here is varying your carve depth so a single bird reads as flame. The wings and tail feathers stay attached and get peeled shallow for a soft amber glow, while the body core is cut nearly through for the brightest burst of light. Work from the center of the design outward so the delicate feather tips stay supported the whole time.

Written by PumpkinCarvingIdeas.com, inspired by the image above. These are our suggestions, not instructions from the uploader. This approach to the AI concept has not been tested on a real pumpkin.

From pumpkin to porch

  1. Pick a tall pumpkin and clean it out

    Choose a rounded, fairly tall pumpkin with a smooth front face so the wings have room to spread. Cut a lid from the bottom or back rather than the top so the stem stays intact for looks. Scoop the inside and thin the carving wall on the front to about one inch, which makes peeling and piercing much easier. A consistent wall thickness gives you even light later.

  2. Transfer the phoenix pattern

    Tape your stencil flat against the front and poke through the outline with a pin or a transfer tool. Mark the body core, the inner wing sections, and the outer feather tips as separate zones so you remember which depth each one gets. Keep the little bridges of skin between feathers in your plan so the tips do not float free. Step back and check the whole bird is centered before you start cutting.

  3. Cut the body core first for the brightest light

    Start at the center of the chest and belly, the spot meant to burn hottest. Use a small saw to cut those inner sections all the way through the wall. Cutting the middle first means the fragile wing tips are still fully supported while you make your firmest strokes. Keep openings smooth and rounded so no thin spans crack.

  4. Peel the wings and inner feathers

    Switch to a shallow shading tool or a ribbon loop and scrape away only the orange skin on the inner wing areas. You want the flesh thin enough to glow amber, not a full cutout. Vary your pressure so some feathers are brighter than others, which sells the flickering flame effect. Leave narrow ribs of untouched skin between feathers to define each one.

  5. Feather the outer tips shallowest

    Work outward to the sweeping wing tips and trailing tail feathers, peeling these the most lightly of all. The thinner the glow at the edges, the more the bird seems to fade into fire. Keep each feather tip connected to a thicker rib so nothing snaps as you finish. Clean up ragged edges with a paring knife held at a low angle.

  6. Light it and photograph

    Set an amber or warm white LED puck inside, never a candle, to push the fiery color. Test in a dark room and touch up any spots that look flat by peeling a little more. If the flesh dries out overnight, a wipe of petroleum jelly on cut edges slows shrinking. Shoot your photo at dusk on a porch step for that glowing rise effect.

Gather your supplies

Check things off as you get ready.

Work on a stable surface, keep your free hand out of the cutting path, and have an adult handle sharp tools.

Three levels of light

  • Leave intact

    The background pumpkin face and the thin ribs between feathers stay as dark untouched skin.

  • Peel & shade

    The wings, inner feathers, and trailing tail get peeled shallow for a soft amber glow.

  • Cut through

    The body core at the chest and belly is cut through for the brightest burst of light.

Learn the carving basics

Before you start cutting

How do I keep the long wing tips from snapping off?

Peel them instead of cutting fully through, and leave each tip attached to a thicker rib of skin. Carve the body core first while the tips are still fully supported. Save the most delicate edge work for last so those spans spend the least time under stress.

What light color works best for a phoenix?

An amber or warm white LED gives the fiery look you want and pushes the orange tones. Avoid cool white, which washes the flame effect flat. Never use a real candle near thin peeled flesh, since the heat dries and scorches it.

How do I get the glow to look like flickering flame?

Vary your peel depth across the feathers so some areas glow brighter than others. Cut the chest through for a hot center, then fade the wings and tail to shallow peels. That uneven range of brightness is what reads as fire rather than a flat silhouette.

Your take belongs here, too.

Changed a detail? Made it simpler? Share a photo of your version and tell the community what worked.

Share your pumpkin

More pumpkins like this

You've reached the end · 8 pumpkins
The Patch Report

Fresh pumpkins, in your inbox.

The best new carvings, ideas worth stealing, and how-tos for carving season. Short, seasonal, and gone by November.

A short email during carving season. Unsubscribe anytime. See our privacy policy.