Halloween Pumpkin Carving Contest · Starts October 1st · $500 in prizes
← Back to ideas
@ai_concepts
Sep 6, 2026
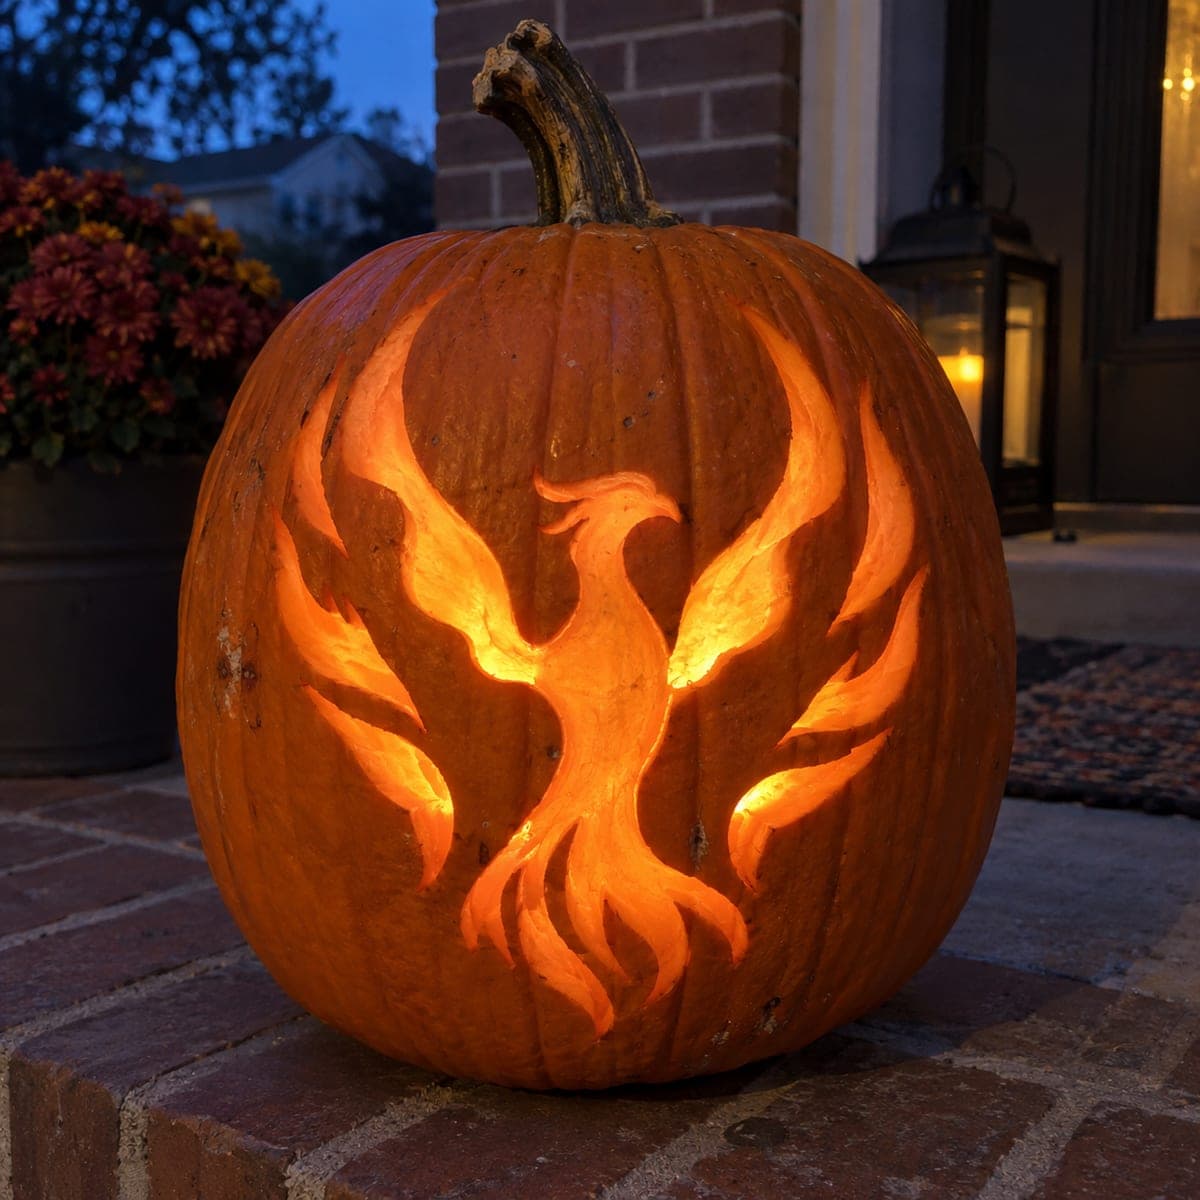
Rising Phoenix Relief Carved PumpkinAI
0

Rising Phoenix Relief Carved Pumpkin

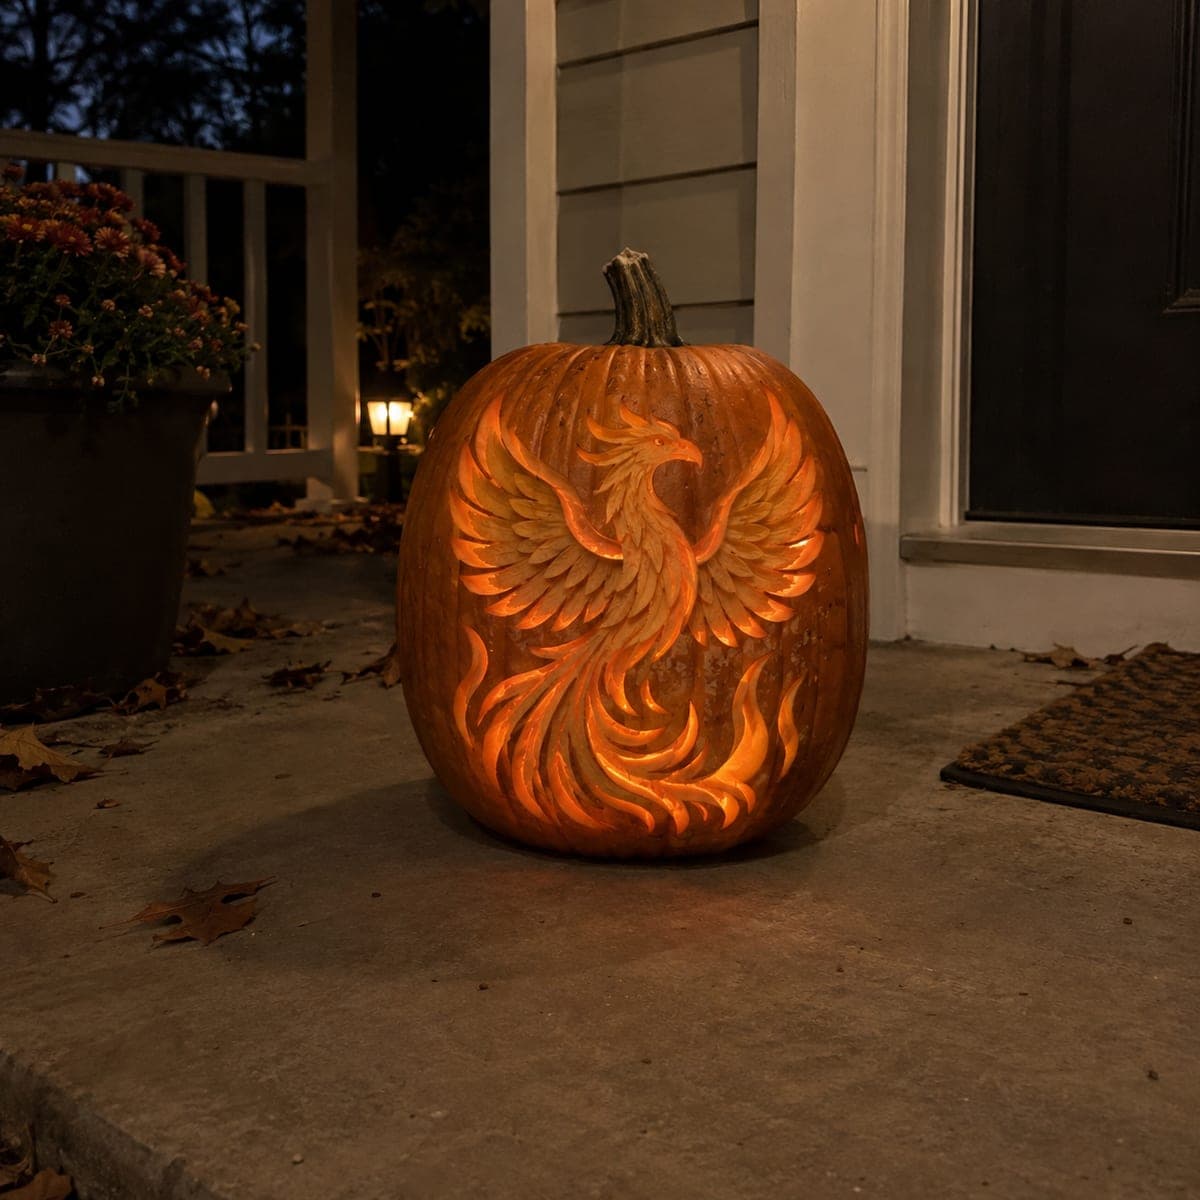
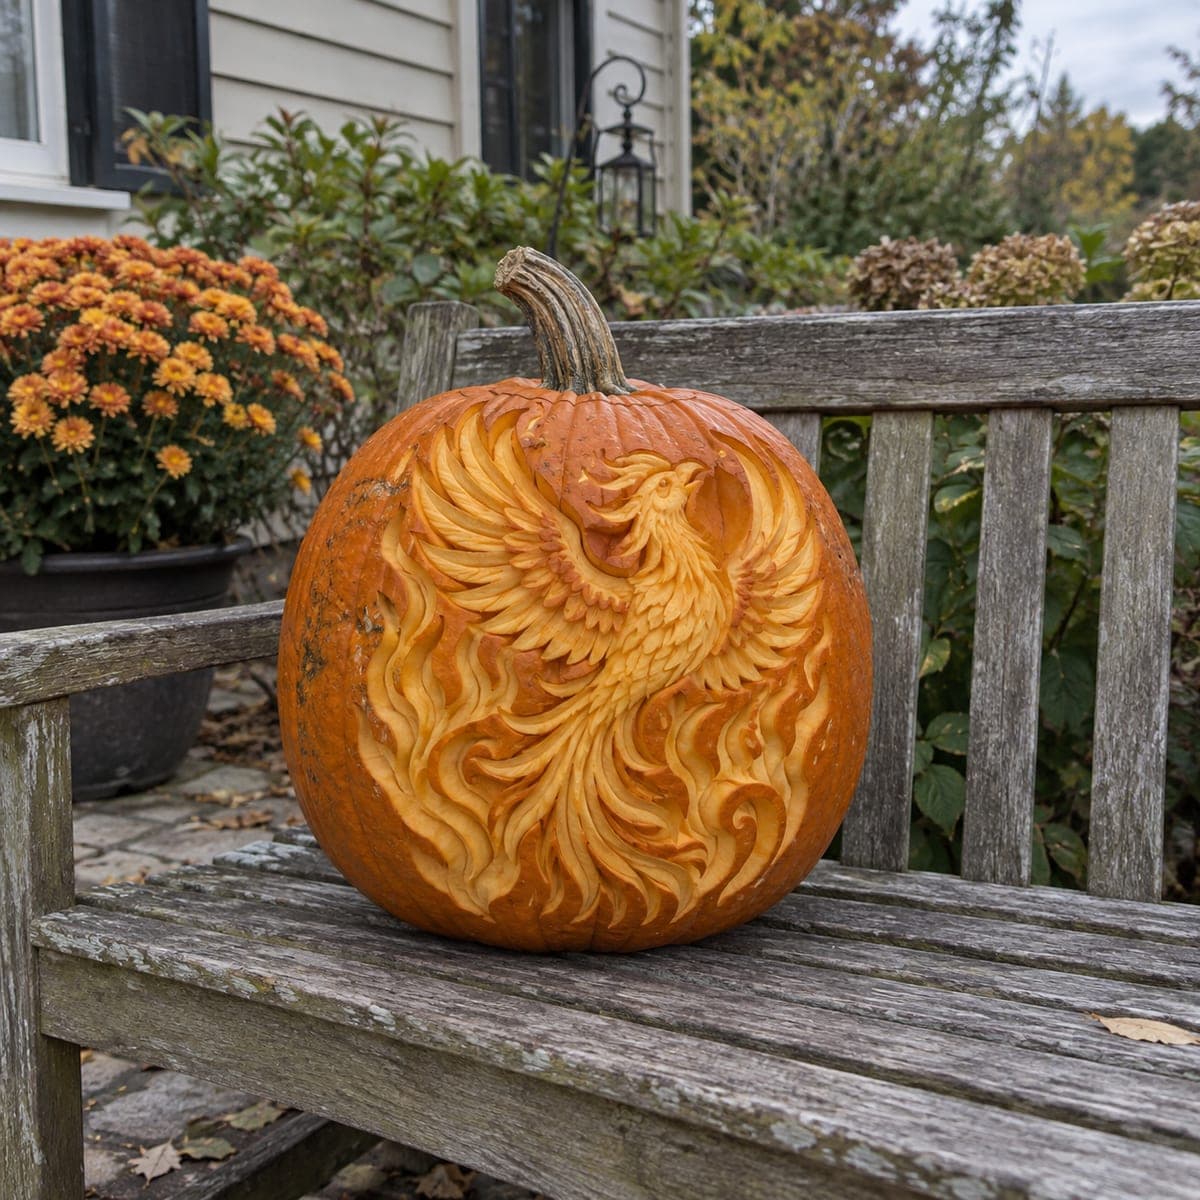
A phoenix bursts upward in swirling flame across this relief carved pumpkin, wings spread and tail feathers curling into fire. All the drama comes from sculpting the surface at multiple depths, no pierced holes at all, so it displays beautifully unlit in daylight. Work from a printed template, carving the deepest background areas first so the bird rises forward. Ribbon and loop tools handle the feather curls better than knives.

This is an AI-generated concept image: a realistic, carvable design idea rather than a photo of a finished carve. AI concepts are always labeled and sit out the leaderboard and the contest.

No ratings yet · Sign in to rate
Comments (0)

  • No comments yet — be the first.

Save without an account. Sign in to like or comment.

Our tips for carving a similar design

This is a relief carving, so the whole effect comes from removing skin at different depths rather than cutting all the way through. You leave the phoenix standing proudest, scoop the background deeper so the bird appears to rise, and shape each feather and flame curl with looped ribbon tools. Because nothing is pierced, it reads beautifully in daylight and glows softly at night from a low LED behind or beside it.

Written by PumpkinCarvingIdeas.com, inspired by the image above. These are our suggestions, not instructions from the uploader. This approach to the AI concept has not been tested on a real pumpkin.

From pumpkin to porch

  1. Transfer the phoenix template

    Pick a large, smooth, evenly round pumpkin so you have room for the wings and swirling tail. Print the phoenix stencil sized to fill the front face, then tape it flat and poke the outlines with a pin or transfer tool. Mark the bird's body, each wing feather, the head, and the flame swirls separately so you can track depth later. Keep the template on until you have all your reference dots down.

  2. Plan your depths before cutting

    Since there are no holes, decide which areas are highest, middle, and deepest. The phoenix body and near wing stay highest, the far wing and inner feathers sit slightly lower, and the open background drops deepest. Lightly pencil these zones so you do not over carve early. Working shallow to deep keeps you from removing material you wish you had kept.

  3. Scoop the deep background first

    Use a ribbon or loop tool to remove the outer skin and shave down the background around the bird, working the deepest cuts between and behind the flames. Keep the walls smooth and let the phoenix silhouette rise as a raised island. Go gradually and check depth often, since you cannot add material back. Adults should handle the sharp loop tools and take slow, controlled passes.

  4. Sculpt the feathers and flames

    Now carve the layered detail into the raised areas, rounding each feather so its tip curls forward and its base sinks back. Use a small U-gouge for the fine feather lines and the licking flame tips at the tail. Vary depth within each feather to catch shadow, which is where the drama comes from. Leave a thin ridge between feathers so no section collapses.

  5. Refine the head and shade the surface

    Bring the head, beak, and eye forward as the sharpest, highest detail so it draws the eye. Peel just the top skin off the mid areas to lighten them, and skim the highlights on the leading wing edges thinner still for a pale glow. Blend the transitions so the surface flows from dark orange skin into bright carved feathers. Step back often to judge the light and dark balance.

  6. Preserve, light, and photograph

    Wipe the carved surface, then coat it with a mix of water and a little lemon juice or a light petroleum jelly rub to slow drying. Because there are no cutouts, set a small LED off to one side or low behind the pumpkin to rake light across the relief and deepen the shadows. Shoot it in daylight too, since this design is built to show without any light at all. Store it cool between displays to keep the fine feathers crisp.

Gather your supplies

Check things off as you get ready.

Work on a stable surface, keep your free hand out of the cutting path, and have an adult handle sharp tools.

Three levels of light

  • Leave intact

    The untouched orange skin of the deep background and the pumpkin's lower body, keeping the phoenix framed in shadow

  • Peel & shade

    The mid depth feathers, far wing, and flame bodies, shaved to a soft glowing orange

  • Cut through

    No full cutouts on this design; the brightest points are the thinnest skimmed highlights on the head and leading wing edges

Learn the carving basics

Before you start cutting

Do I need to cut any holes for this to work?

No, this is a pure relief carving, so every effect comes from carving to different depths in the skin and flesh. It is designed to display well in daylight with no light at all. At night, a raking LED to the side brings out the shadows better than a light inside would.

How do I keep the fine feathers from breaking?

Leave a thin ridge of flesh between each feather rather than cutting them fully separate, so they support one another. Work shallow first and only deepen once the shapes are set. Because nothing is pierced through, the wall stays intact and strong.

What tools handle the feather curls best?

Looped ribbon tools and a small U-gouge scoop and round the curls far better than a straight knife. The loop lets you shave smooth, flowing hollows, while the gouge cuts the crisp feather lines. Save knives for the initial outline only.

Your take belongs here, too.

Changed a detail? Made it simpler? Share a photo of your version and tell the community what worked.

Share your pumpkin

More pumpkins like this

You've reached the end · 8 pumpkins
The Patch Report

Fresh pumpkins, in your inbox.

The best new carvings, ideas worth stealing, and how-tos for carving season. Short, seasonal, and gone by November.

A short email during carving season. Unsubscribe anytime. See our privacy policy.