Halloween Pumpkin Carving Contest · Starts October 1st · $500 in prizes
← Back to ideas
@ai_concepts
Sep 6, 2026
Scaled Dragon Head Relief Pumpkin CarvingAI
0

Scaled Dragon Head Relief Pumpkin Carving

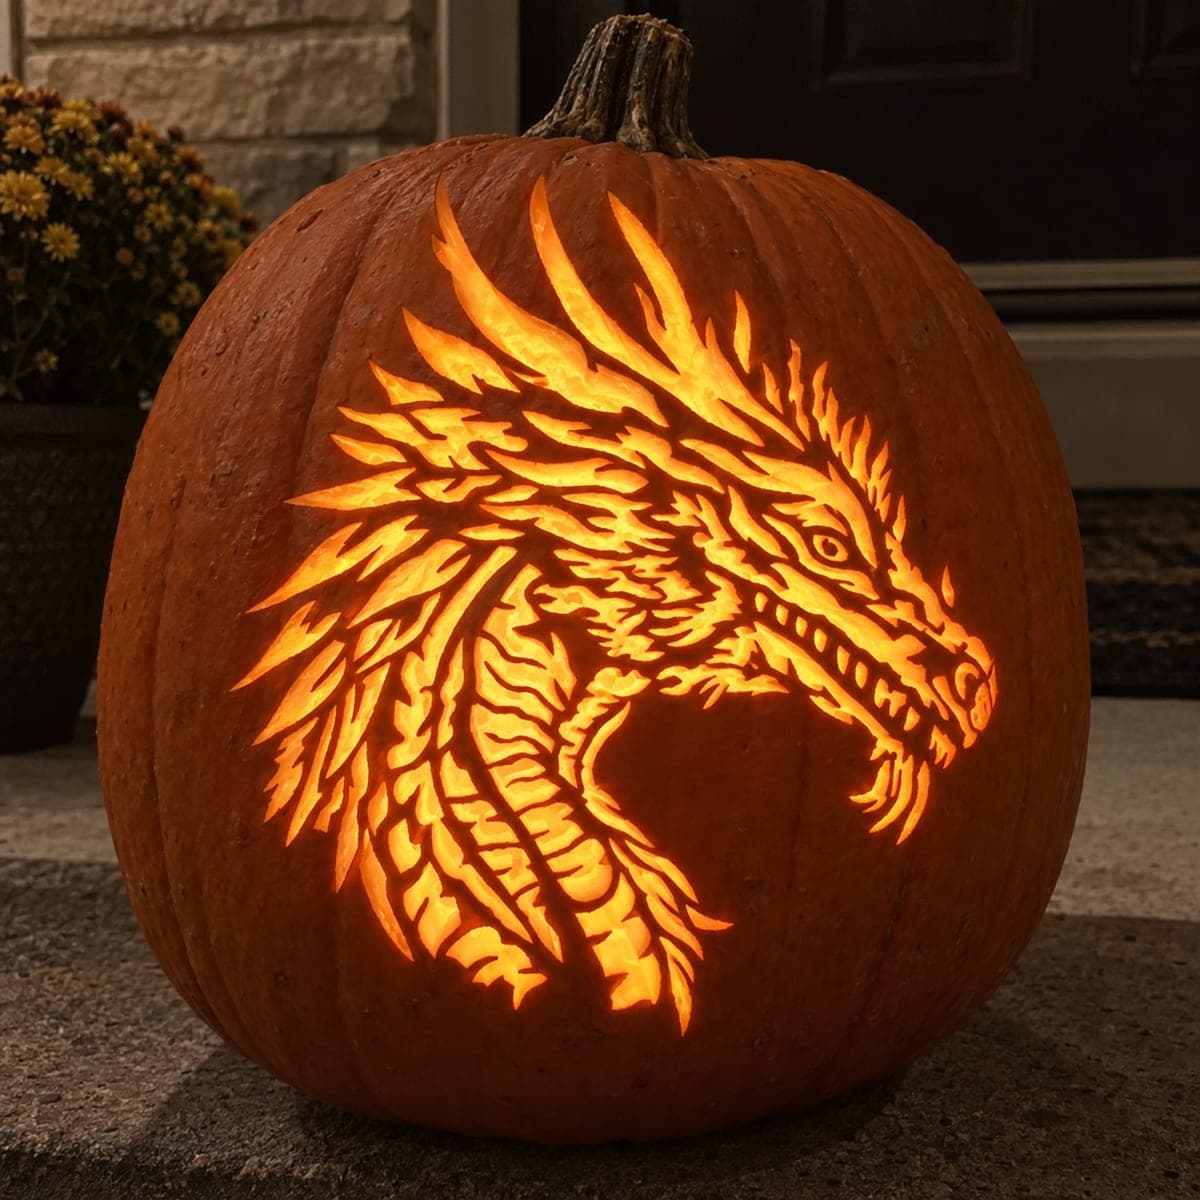
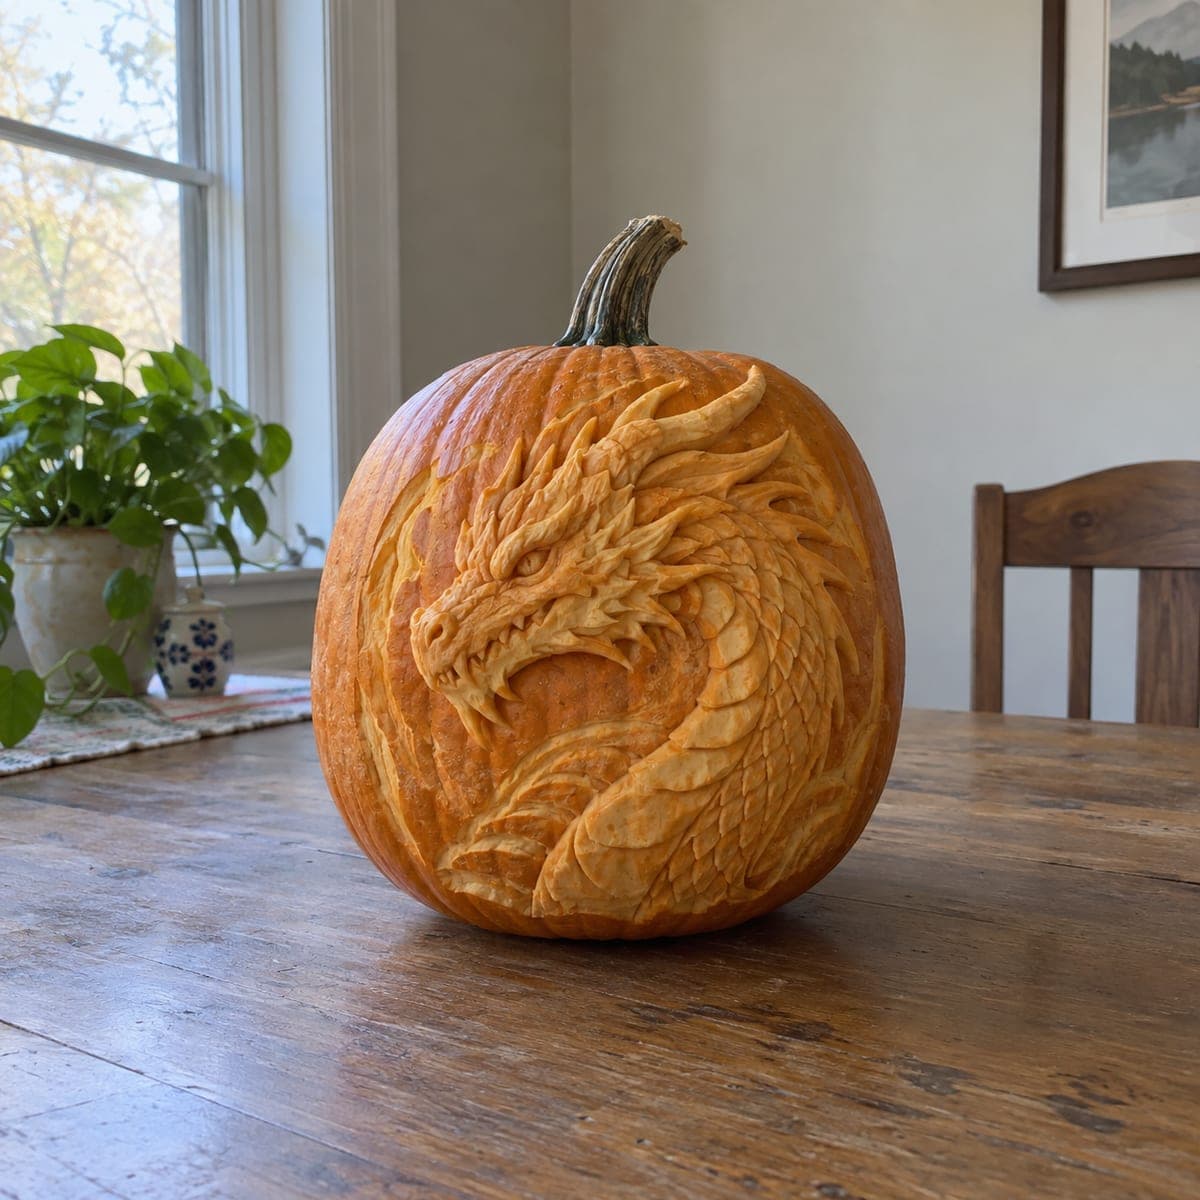
A dragon's head curls across this pumpkin in crisp sculpted relief, with swept-back horns, a snarling snout, and a neck armored in individually carved scales. No light is needed; the design reads through shadow and depth alone, which makes it a great daytime showpiece. Establish the head and horn silhouette first, then lay the scales in overlapping rows from the jaw down. Fantasy fans will recognize the hours of loop-tool work at a glance.

This is an AI-generated concept image: a realistic, carvable design idea rather than a photo of a finished carve. AI concepts are always labeled and sit out the leaderboard and the contest.

No ratings yet · Sign in to rate

Comments (0)

  • No comments yet — be the first.

Save without an account. Sign in to like or comment.

Our tips for carving a similar design

The core trick here is relief carving, where you shave away skin at different depths instead of cutting all the way through, so the dragon reads through light and shadow alone. Plan to lock in the head and horn silhouette first, then build the neck as overlapping rows of scales that step deeper as they curl toward the back. Because this is an AI concept, no real pumpkin exists, but the same method works on a large, firm pumpkin with a smooth face.

Written by PumpkinCarvingIdeas.com, inspired by the image above. These are our suggestions, not instructions from the uploader. This approach to the AI concept has not been tested on a real pumpkin.

From pumpkin to porch

  1. Pick a big, flat-faced pumpkin and prep it

    Choose a tall pumpkin with a broad, even panel and no soft spots, since relief work needs room and firm walls. Instead of opening the top, cut a lid in the base so the wall stays thick and uncut on the display side. Scrape the inside of the carving area down to about an inch so your loop tools glide without punching through. Wipe the face clean and dry before you transfer your design.

  2. Transfer and outline the silhouette

    Tape your dragon stencil over the face and poke through the main outlines, the horns, snout, jaw, eye, and the sweep of the neck. Connect the dots with a washable marker so you have a clear map. With a fine detail knife, score just the outer edge of the whole silhouette about an eighth inch deep. This gives you a crisp border to carve up against later.

  3. Rough in the depth with skin peeling

    Switch to a wide loop or ribbon tool and peel the skin off everything inside the silhouette, taking the orange skin down to the pale flesh. Leave the background pumpkin skin fully intact so the dragon pops against it. Work the whole shape to one shallow, even level first, then go back and sink the recessed areas, like behind the jaw and under the horns, a little deeper for shadow. Keep the deepest cuts well short of the shell so the wall stays strong.

  4. Sculpt the head, horns, and snarl

    Round the muzzle and brow by shaving more from the low areas and leaving the high ridges proud. Use a small loop tool to hollow the eye socket and define the nostril and the line of the open mouth. Keep any fangs short, thick, and attached at both the gum line and tip so they cannot snap off. The horns should taper smoothly back, staying raised above the neck behind them.

  5. Lay the scales in overlapping rows

    Starting just behind the jaw, carve a row of small curved scoops, each one a shallow scale. Work in rows down the neck, offsetting each row so the scales overlap like shingles. Let the rows shrink and step slightly deeper as the neck curls toward the edge to build the sense of a turning body. This is the slow part, so take breaks and keep your loop tool sharp for clean edges.

  6. Refine, seal, and photograph

    Step back often and deepen any shadows that look flat, especially around the eye and jaw. Smooth stray tool marks on the raised surfaces so light rolls across them evenly. Rub cut edges with a little petroleum jelly to slow browning, and store the pumpkin somewhere cool between viewings. Since this design lives on shadow, shoot it in bright side light during the day for the best photo.

Gather your supplies

Check things off as you get ready.

Work on a stable surface, keep your free hand out of the cutting path, and have an adult handle sharp tools.

Three levels of light

  • Leave intact

    The background pumpkin skin around the dragon stays untouched and dark, framing the whole silhouette.

  • Peel & shade

    The dragon's head, horns, and scale field are peeled to pale flesh so they glow softly and catch daylight.

  • Cut through

    Only the deepest shadow lines, like the eye socket, mouth gap, and the gaps between horns, are cut deepest for the darkest contrast.

Learn the carving basics

Before you start cutting

Do I need to put a light inside this dragon?

No, this design is built to read by daylight through relief depth and shadow, not backlight. If you want a little glow, add a small LED after dark, but never a candle since the thin sculpted areas can scorch. For most people this is a daytime showpiece.

How do I keep the scales from looking messy?

Work in consistent rows and offset each row like roof shingles so every scale overlaps the one below. Keep your loop tool sharp and use the same scooping motion for each scale so they match in size. Do the whole neck lightly first, then go back and deepen, rather than fully finishing one scale at a time.

This looks like an AI concept, can a real pumpkin hold all that detail?

Yes, if you choose a large pumpkin with thick, firm walls and a smooth face. The key is staying in relief and never cutting through the shell, so the wall supports all the fine scale work. Keep fangs and horn tips thick and attached so nothing breaks under its own weight.

Your take belongs here, too.

Changed a detail? Made it simpler? Share a photo of your version and tell the community what worked.

Share your pumpkin

More pumpkins like this

You've reached the end · 8 pumpkins
The Patch Report

Fresh pumpkins, in your inbox.

The best new carvings, ideas worth stealing, and how-tos for carving season. Short, seasonal, and gone by November.

A short email during carving season. Unsubscribe anytime. See our privacy policy.