Halloween Pumpkin Carving Contest · Starts October 1st · $500 in prizes
← Back to ideas
@ai_concepts
Sep 5, 2026
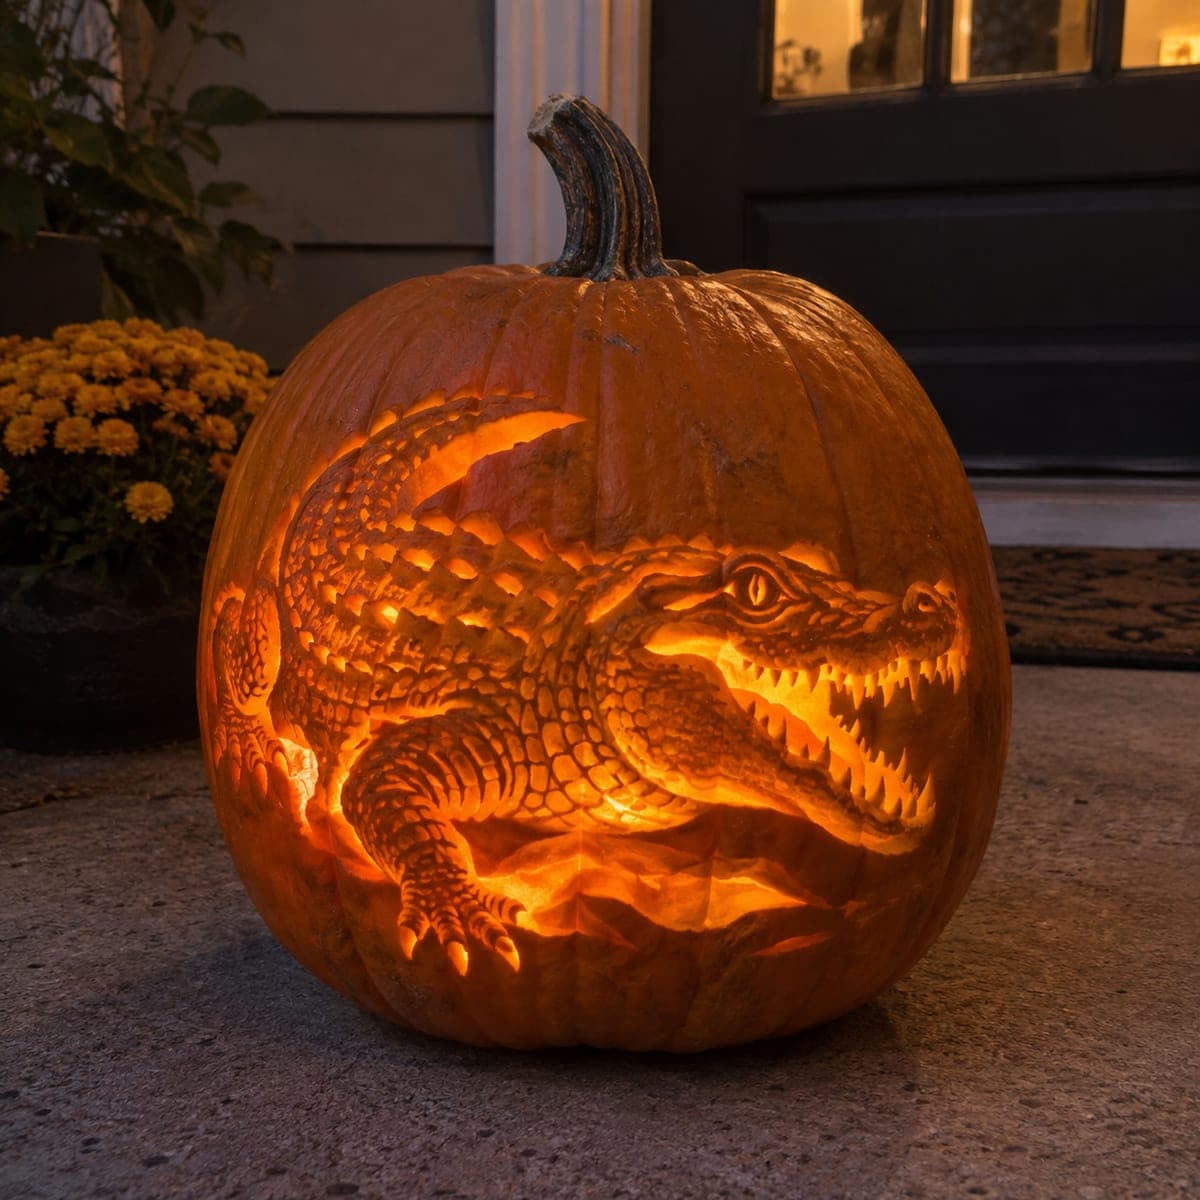
Snapping Alligator Relief Carved Jack-O-LanternAI
0

Snapping Alligator Relief Carved Jack-O-Lantern

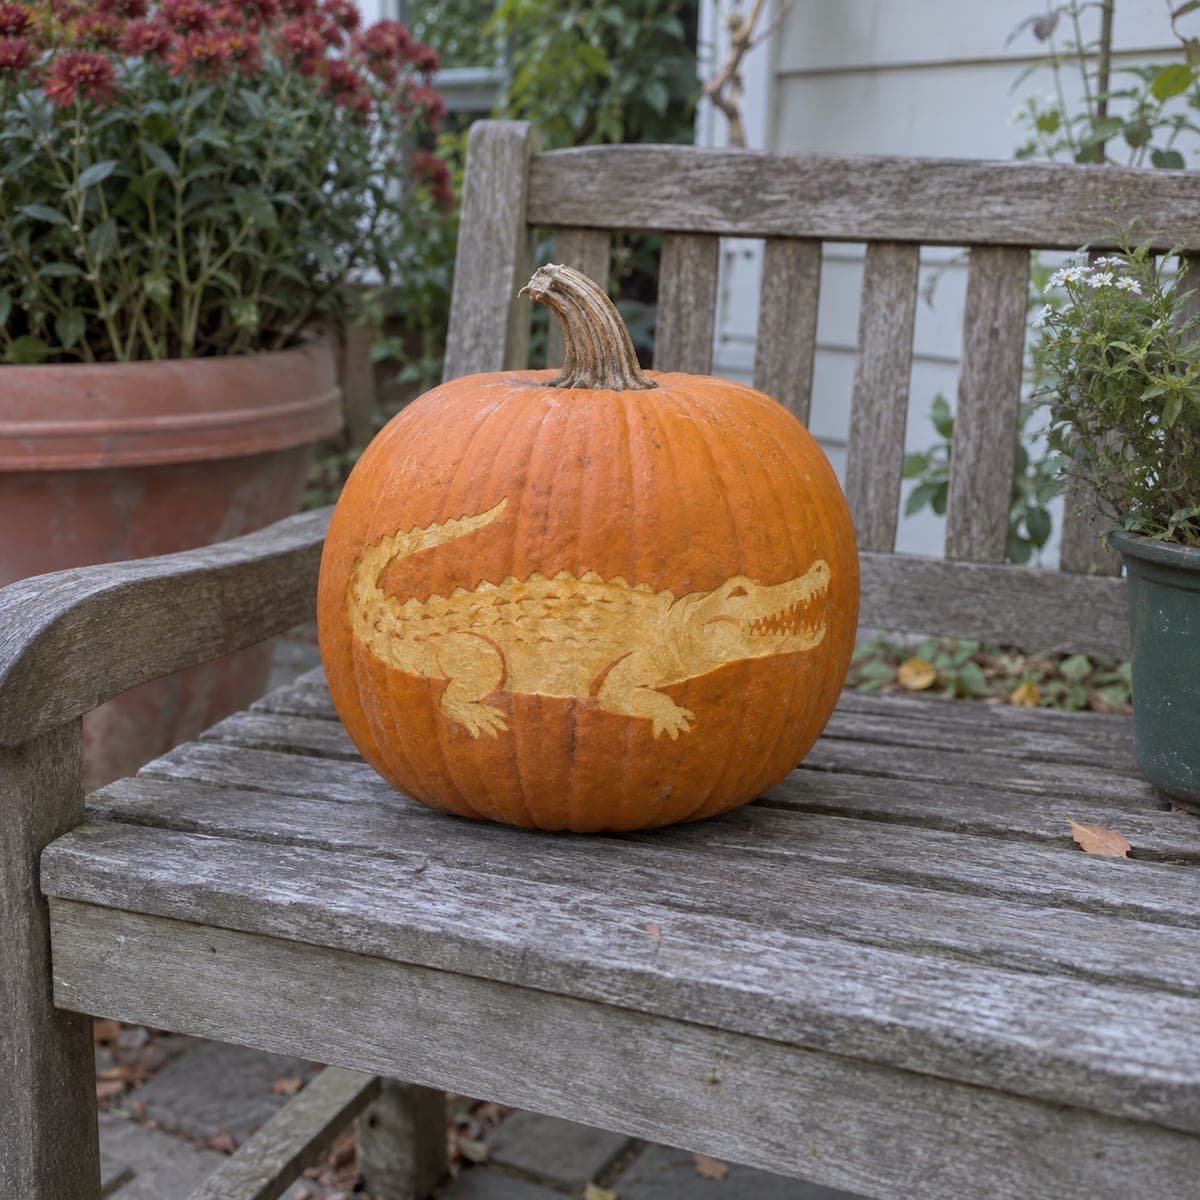
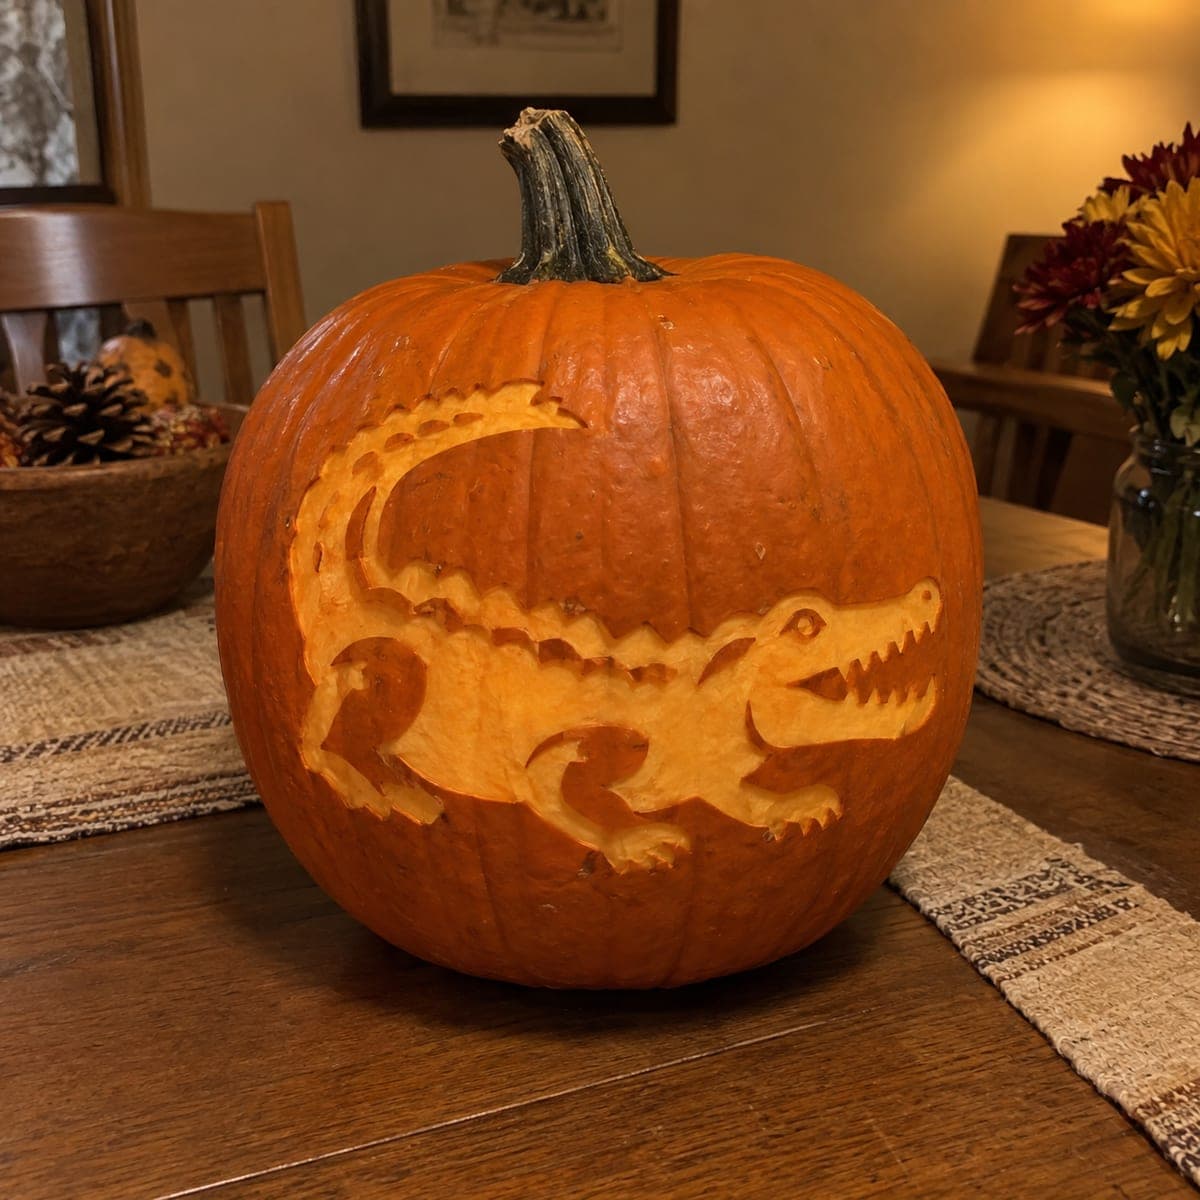
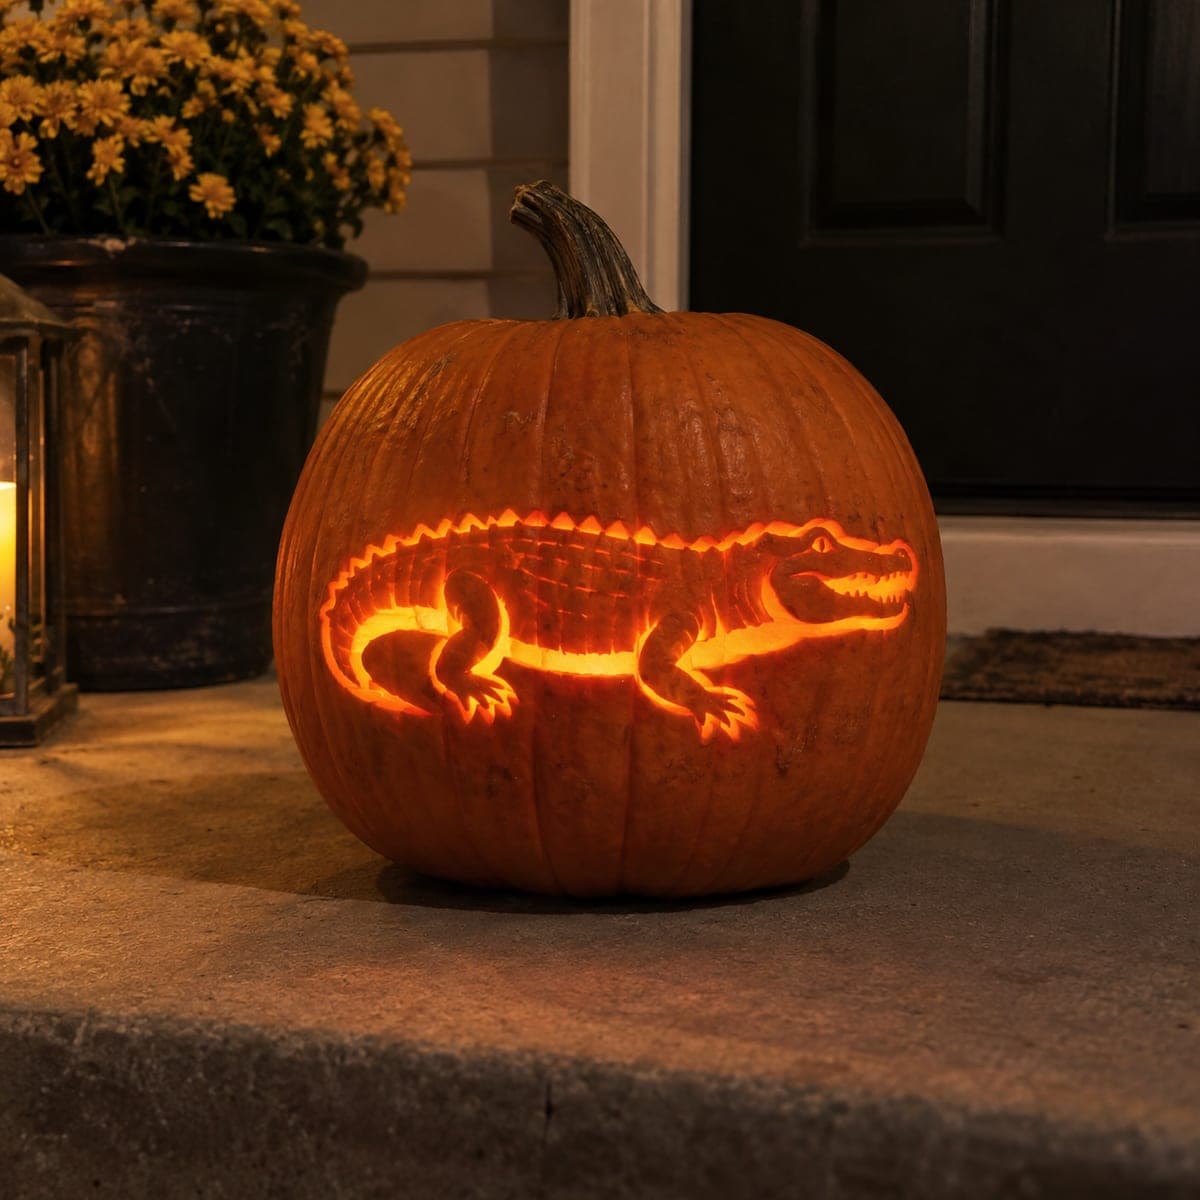
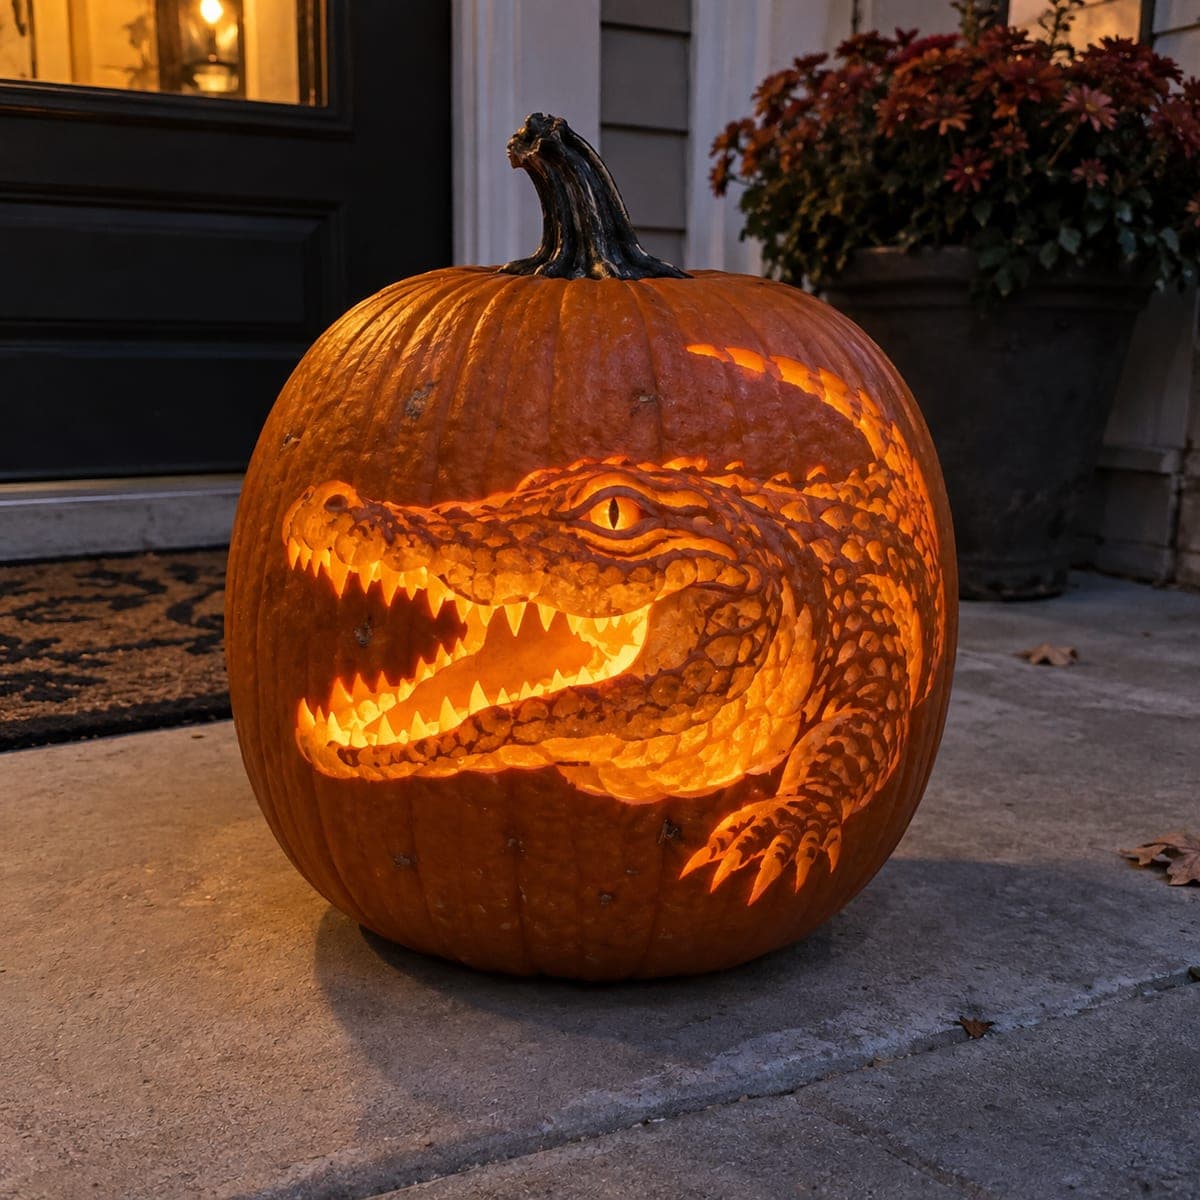
An alligator lunges across this pumpkin with jaws wide open, every tooth, scale, and clawed foot carved in glowing relief. The open mouth is cut deepest so it burns brightest, while the textured hide is etched at shallower depths for mid-tones. Rough in the whole gator with a marker before touching a blade, then carve the mouth interior first and work outward through the scales. This is a long project, so plan on several hours with loop tools.

This is an AI-generated concept image: a realistic, carvable design idea rather than a photo of a finished carve. AI concepts are always labeled and sit out the leaderboard and the contest.

No ratings yet · Sign in to rate
Comments (0)

  • No comments yet — be the first.

Save without an account. Sign in to like or comment.

Our tips for carving a similar design

The trick here is depth mapping: the open mouth is cut all the way through so it blazes brightest, while the scaly hide is shaved to different shallow depths for a range of mid-tone glows. Rough in the whole animal with a washable marker before any blade touches the shell, then carve the mouth interior first and work outward through the teeth, eye, scales, and clawed foot. Plan on several unhurried hours with loop and detail tools.

Written by PumpkinCarvingIdeas.com, inspired by the image above. These are our suggestions, not instructions from the uploader. This approach to the AI concept has not been tested on a real pumpkin.

From pumpkin to porch

  1. Pick a big pumpkin and open the back

    Choose a large, tall pumpkin with a smooth, blemish-free front panel to hold all this detail. Cut a lid or a back door rather than a top hole so the light stays hidden and the face panel stays intact. Scrape the inside wall behind the design down to about one inch thick with a loop tool. A thinner wall makes the relief shading much easier to control later.

  2. Draw the whole gator first

    Sketch the full alligator on the shell with a washable marker before you cut anything. Map the wide open jaws, the row of teeth, the ridged eye, the scaly back, and the clawed foot near the bottom. Mark which zones stay dark skin, which get shaved for glow, and which cut all the way through. Having this whole plan on the pumpkin keeps a long project from drifting.

  3. Cut the mouth interior first

    The open mouth is your one true cutout, so carve it now while the shell is strongest. Use a fine saw to remove the throat and gap between the jaws so light pours through brightest here. Leave narrow bridges of shell between the individual teeth so each fang stays attached and structurally sound. Cut the teeth as connected triangles rather than free-floating points that could snap off.

  4. Shave the hide for mid-tones

    Switch to loop tools and peel the outer skin off the scaly back, snout, and jaw to let a dim orange glow through. Vary your depth: press deeper where you want brighter scales and stay shallow where you want dim ones. Work outward from the mouth so your hand always rests on uncarved shell. This shading step is the slow heart of the piece, so take breaks.

  5. Detail the eye, scales, and claws

    Use a small detail tool to score the individual scale outlines and the ridge above the eye without cutting through. Leave the eye slit as a thin peeled line so it catches a spark of light. Etch the clawed foot near the base with shallow strokes so the toes read clearly. Keep untouched skin around each shaded area to frame the shapes.

  6. Light it and photograph

    Drop in a bright LED puck or a couple of battery tea lights, never a flame near all this thin shaved shell. Angle one light toward the open mouth so the throat glows hottest. Rub a little petroleum jelly on the cut edges to slow drying and keep the teeth from curling. Shoot your photo at dusk on a porch step for the best contrast.

Gather your supplies

Check things off as you get ready.

Work on a stable surface, keep your free hand out of the cutting path, and have an adult handle sharp tools.

Three levels of light

  • Leave intact

    The untouched outer skin around the body and background stays dark and defines the gator's outline.

  • Peel & shade

    The scaly back, snout, jaw, eye ridge, and clawed foot are shaved to a dim orange for the hide texture.

  • Cut through

    The open mouth and throat are cut through for the brightest blaze, with teeth left as attached triangles.

Learn the carving basics

Before you start cutting

How do I keep all those teeth from breaking?

Carve the teeth as one connected zigzag strip rather than separate floating points. Leave a small bridge of shell at the base of each tooth so it stays anchored to the jaw. Cutting the mouth early, while the pumpkin is firm, also helps them hold.

This is an AI concept, so can a real pumpkin actually look like this?

Yes, a design like this is achievable with patience and loop tools. The key is treating the mouth as the only full cutout and doing everything else as shallow relief shading. Keep the shaved areas connected and the teeth bridged so nothing collapses.

How do I get the different brightness levels in the scales?

Brightness comes from how much shell you remove. Shave close to the inner wall for bright scales and leave more skin for dim ones. Test as you go by holding an LED inside so you can see the glow before committing to a deeper cut.

Your take belongs here, too.

Changed a detail? Made it simpler? Share a photo of your version and tell the community what worked.

Share your pumpkin

More pumpkins like this

You've reached the end · 8 pumpkins
The Patch Report

Fresh pumpkins, in your inbox.

The best new carvings, ideas worth stealing, and how-tos for carving season. Short, seasonal, and gone by November.

A short email during carving season. Unsubscribe anytime. See our privacy policy.