Halloween Pumpkin Carving Contest · Starts October 1st · $500 in prizes
← Back to ideas
@ai_concepts
Sep 6, 2026
Alligator Etched Pumpkin Carving IdeaAI
0

Alligator Etched Pumpkin Carving Idea

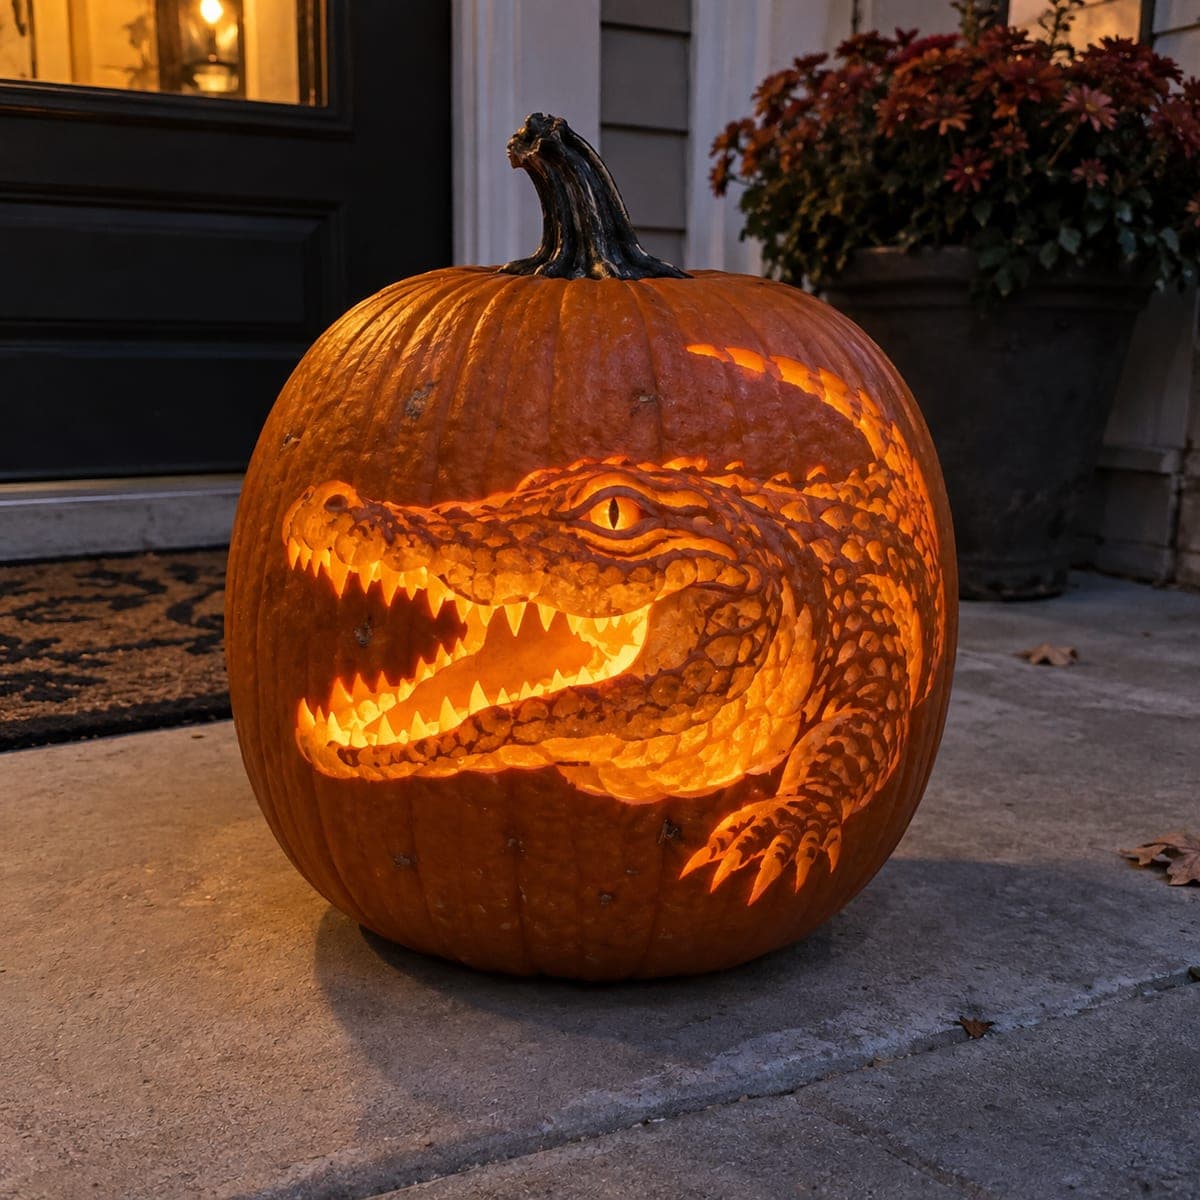
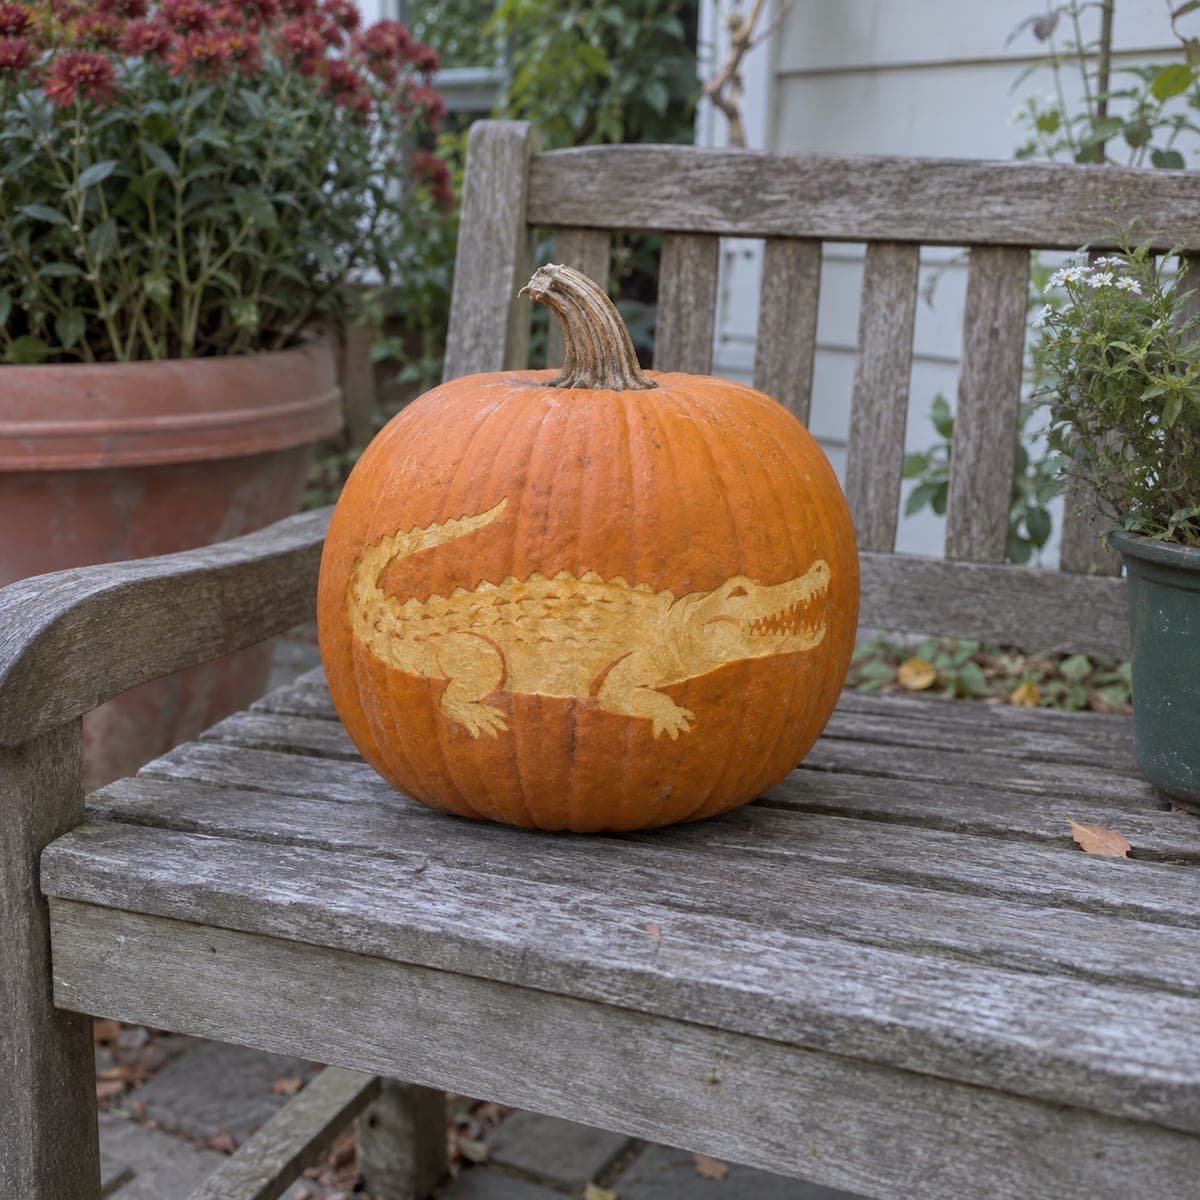
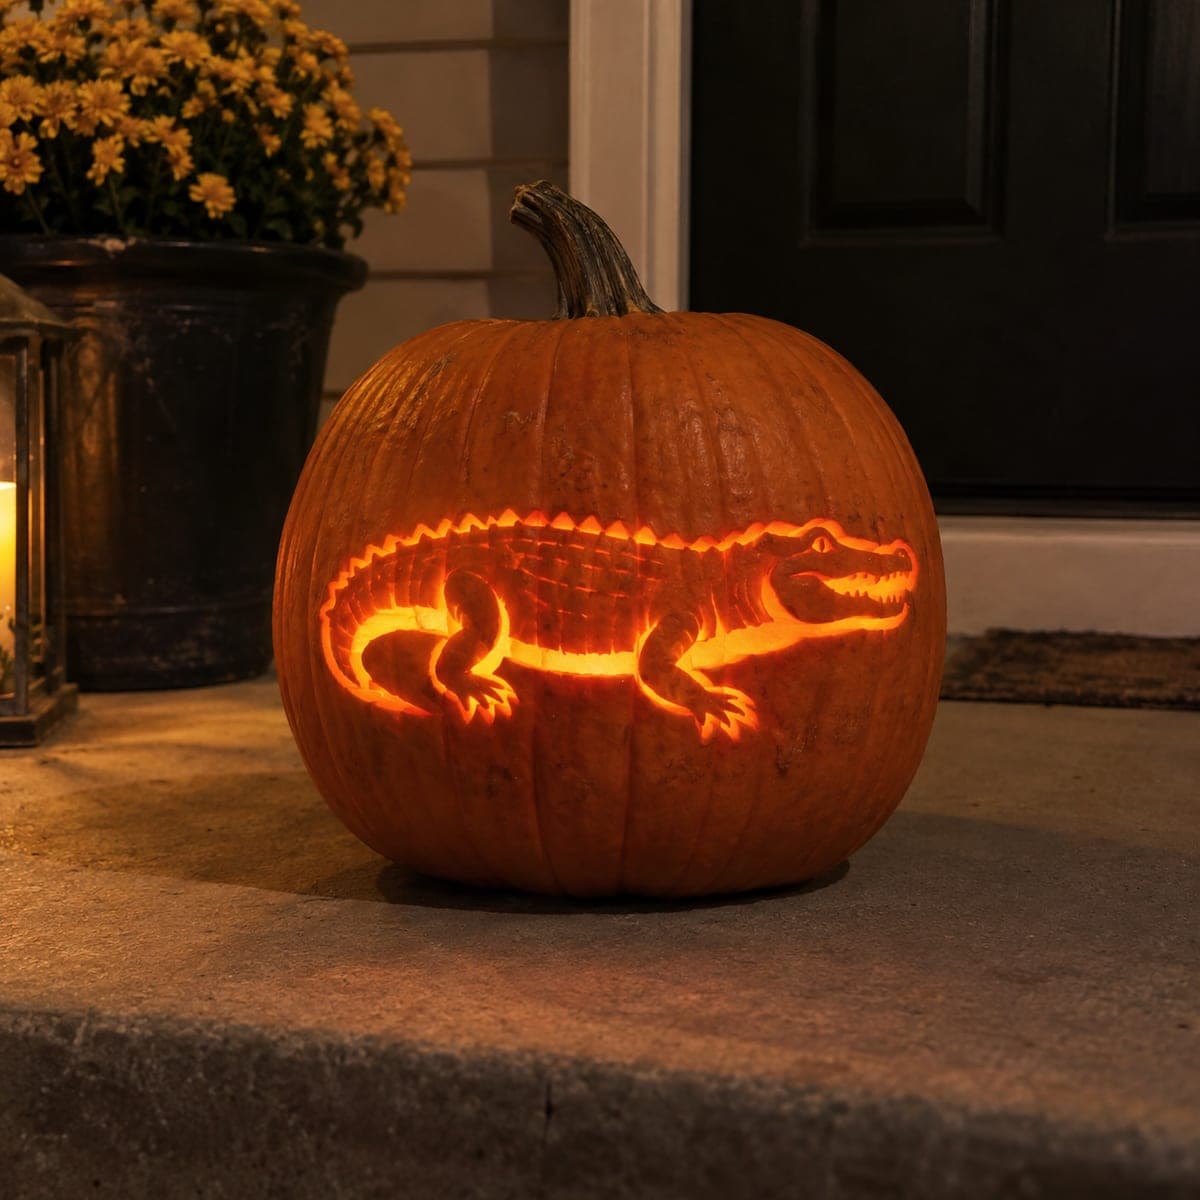
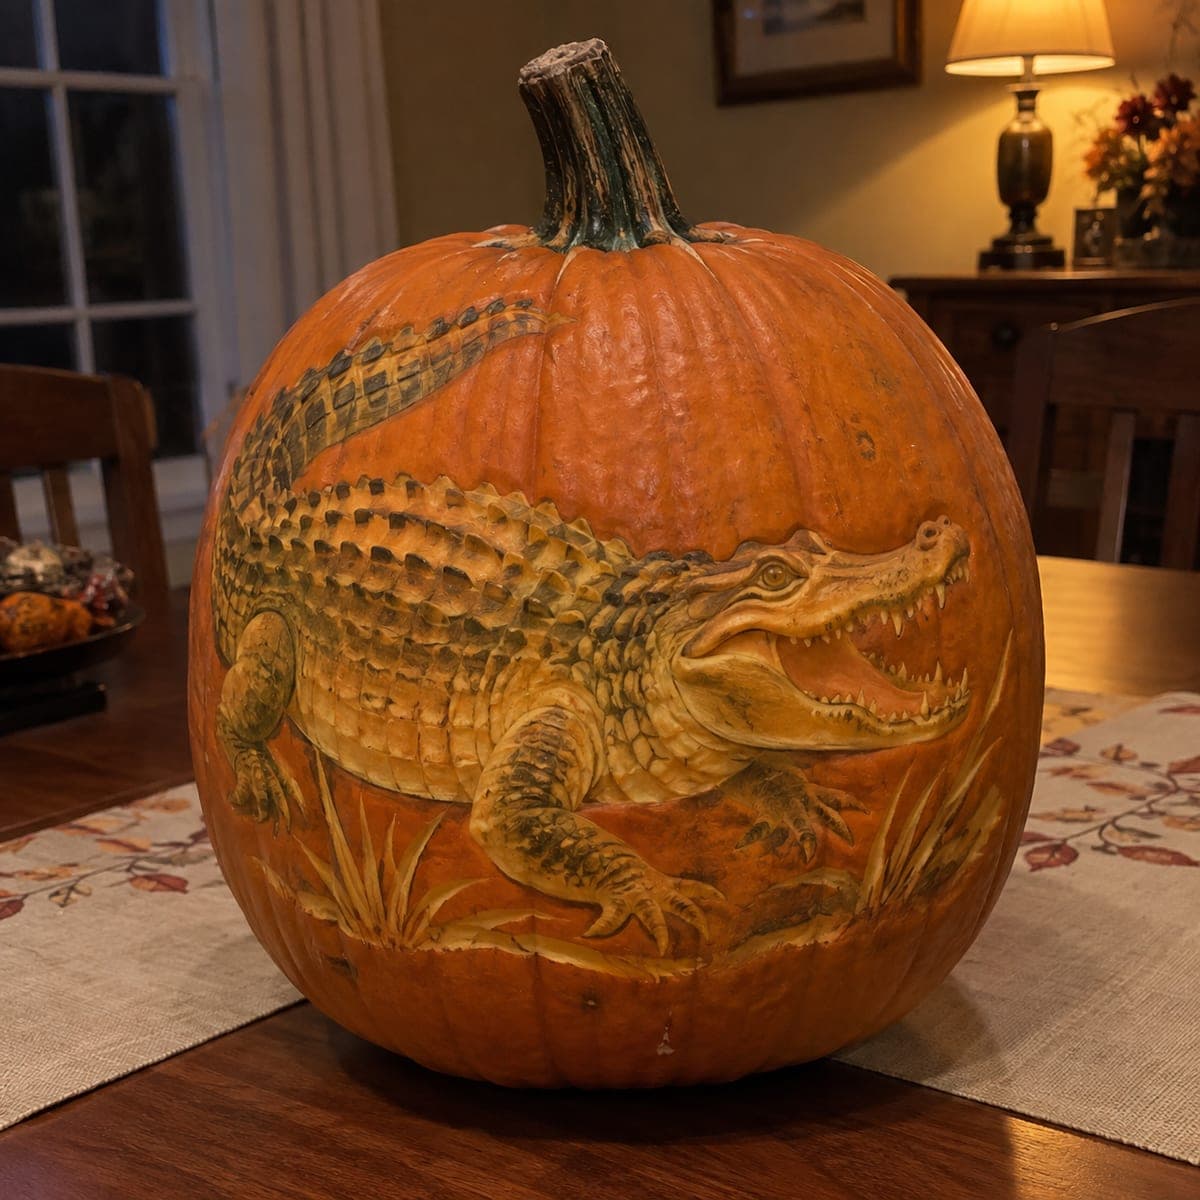
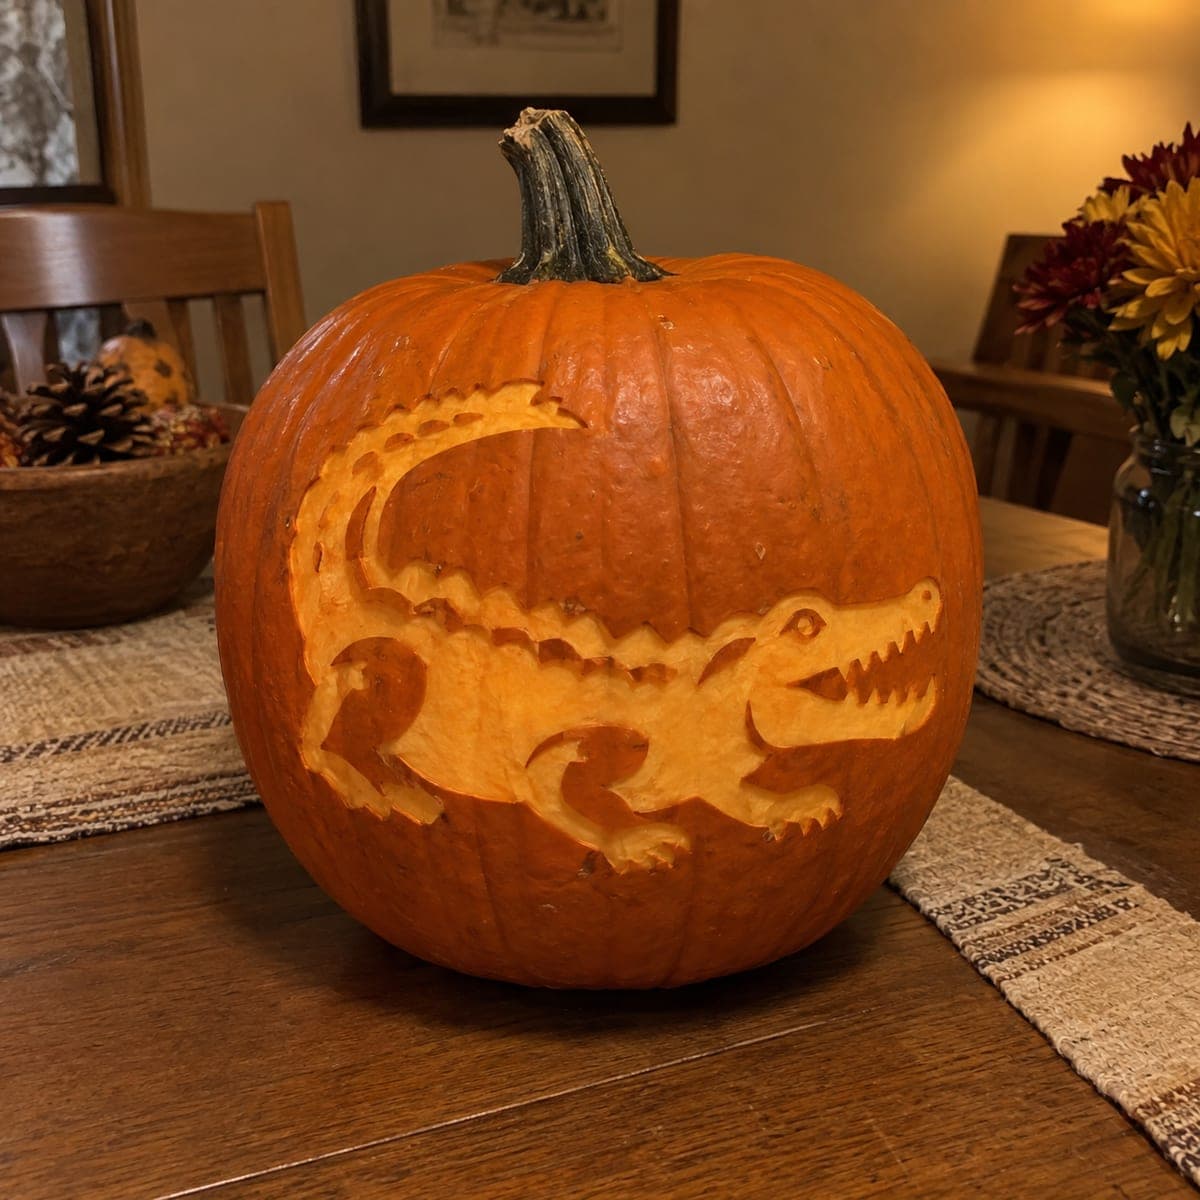
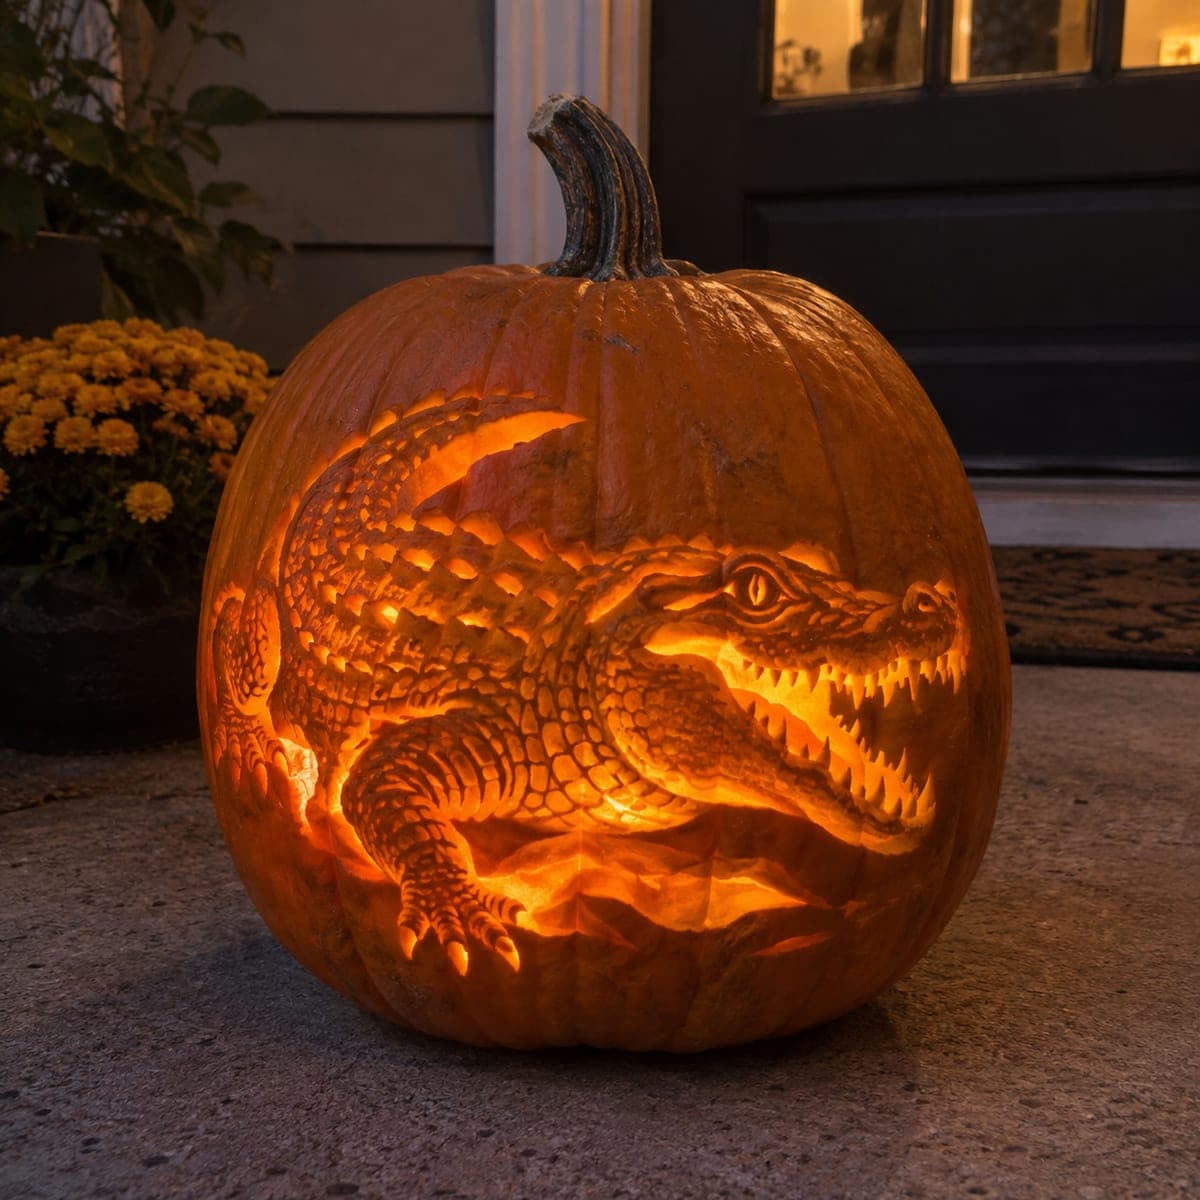
An alligator with a ridged back, open toothy jaws, and clawed feet stretches across this etched pumpkin in creamy relief. The scaly texture along the spine is a row of small scallop cuts, easy to repeat once you find the rhythm with a small gouge. Peel the body silhouette first, then add the ridges, eye, and teeth details on top. A fun pumpkin carving idea for Gator fans or any reptile-obsessed kid in the house.

This is an AI-generated concept image: a realistic, carvable design idea rather than a photo of a finished carve. AI concepts are always labeled and sit out the leaderboard and the contest.

No ratings yet · Sign in to rate
Comments (0)

  • No comments yet — be the first.

Save without an account. Sign in to like or comment.

Our tips for carving a similar design

The core trick here is surface etching rather than cut-through openings, so the whole alligator glows as a soft creamy silhouette instead of a bright hole. You peel the skin off the full body shape first, then layer the ridged spine, eye, and teeth as shallow texture on top. Keep the outline as one connected shape so the pumpkin wall stays strong.

Written by PumpkinCarvingIdeas.com, inspired by the image above. These are our suggestions, not instructions from the uploader. This approach to the AI concept has not been tested on a real pumpkin.

From pumpkin to porch

  1. Transfer the gator outline

    Pick a clean side-profile alligator design and tape the paper stencil to the smoothest face of the pumpkin. Poke the outline with a pushpin or transfer wheel, spacing dots close together along the curved tail and jaws. Peel the paper away and connect the dots lightly with a washable marker so you can see the full silhouette before any cutting. This is a body carving, not a lit lid, so you can leave the top intact or cut a small back vent later for the LED.

  2. Peel the body to the mid layer

    With a ribbon or loop tool, shave off just the outer skin inside the whole alligator shape down to the pale flesh. Work in thin passes and aim for an even depth so the body glows one consistent tone. Round your strokes to follow the belly and tail curve. Take your time at the narrow feet and tail tip so you do not gouge through.

  3. Cut the ridged spine scallops

    Along the top of the back and tail, use a small V or U gouge to carve a row of little scalloped notches for the scaly ridge. Find a rhythm by spacing them evenly, and go a touch deeper than the body peel so they read as darker texture. Repeat the same motion down the tail, letting the scallops shrink as the tail narrows. Practice a few on a scrap piece first to lock in the depth.

  4. Add the eye, teeth, and claws

    Etch a small ring for the eye and leave the center skin dark so it stands out. For the jaws, carve a thin line of triangle teeth by removing tiny bits so they show up as pale points against the peeled mouth. Do the same for the clawed feet with short tapered cuts. Keep all of these shallow, since they are detail on top of the body, not holes.

  5. Deepen a few accents for full glow

    If you want extra brightness, cut fully through in just a couple of tight spots such as the open mouth gap or between a few teeth. Save these cut-throughs for last so the pumpkin wall stays rigid while you etch. Keep each opening small so the design keeps its relief look rather than turning into a plain stencil hole.

  6. Light it and photograph

    Set a battery LED puck inside through a small back vent or the bottom, and warm white gives the friendliest gator glow. Dab cut edges with a little petroleum jelly to slow drying and keep the etched flesh bright. Shoot in a dim room so the peeled body and scallop ridges show their soft contrast. Store it cold overnight to stretch its life.

Gather your supplies

Check things off as you get ready.

Work on a stable surface, keep your free hand out of the cutting path, and have an adult handle sharp tools.

Three levels of light

  • Leave intact

    The untouched orange background around the gator and the small dark eye center

  • Peel & shade

    The full alligator body, legs, and tail shaved to a soft creamy orange glow

  • Cut through

    A few optional through-cuts at the open mouth or between teeth for the brightest pops

Learn the carving basics

Before you start cutting

Do I need to cut all the way through for this design?

No, this is mostly an etched carving where you only peel the outer skin so the body glows dim and warm. You can add one or two small cut-throughs at the mouth for extra brightness, but the alligator reads best as soft relief. Keeping it shallow also leaves the pumpkin wall strong.

How do I keep the spine scallops even?

Mark evenly spaced dots along the back first, then carve one notch at each dot with the same wrist motion. Doing a short practice row on a scrap piece helps you find a consistent depth and width. Let the scallops gradually get smaller as they run down the tail.

This is shown as a concept image, so will a real one work?

Yes, the design is built for real carving because it relies on skin peeling and shallow etching rather than fragile floating pieces. The teeth and claws are cut as texture on solid flesh, so nothing thin needs to hang free. Just keep any true openings small and cut them last.

Your take belongs here, too.

Changed a detail? Made it simpler? Share a photo of your version and tell the community what worked.

Share your pumpkin

More pumpkins like this

You've reached the end · 8 pumpkins
The Patch Report

Fresh pumpkins, in your inbox.

The best new carvings, ideas worth stealing, and how-tos for carving season. Short, seasonal, and gone by November.

A short email during carving season. Unsubscribe anytime. See our privacy policy.