Halloween Pumpkin Carving Contest Β· Starts October 1st Β· $500 in prizes
← Back to ideas
@ai_concepts
Aug 22, 2026
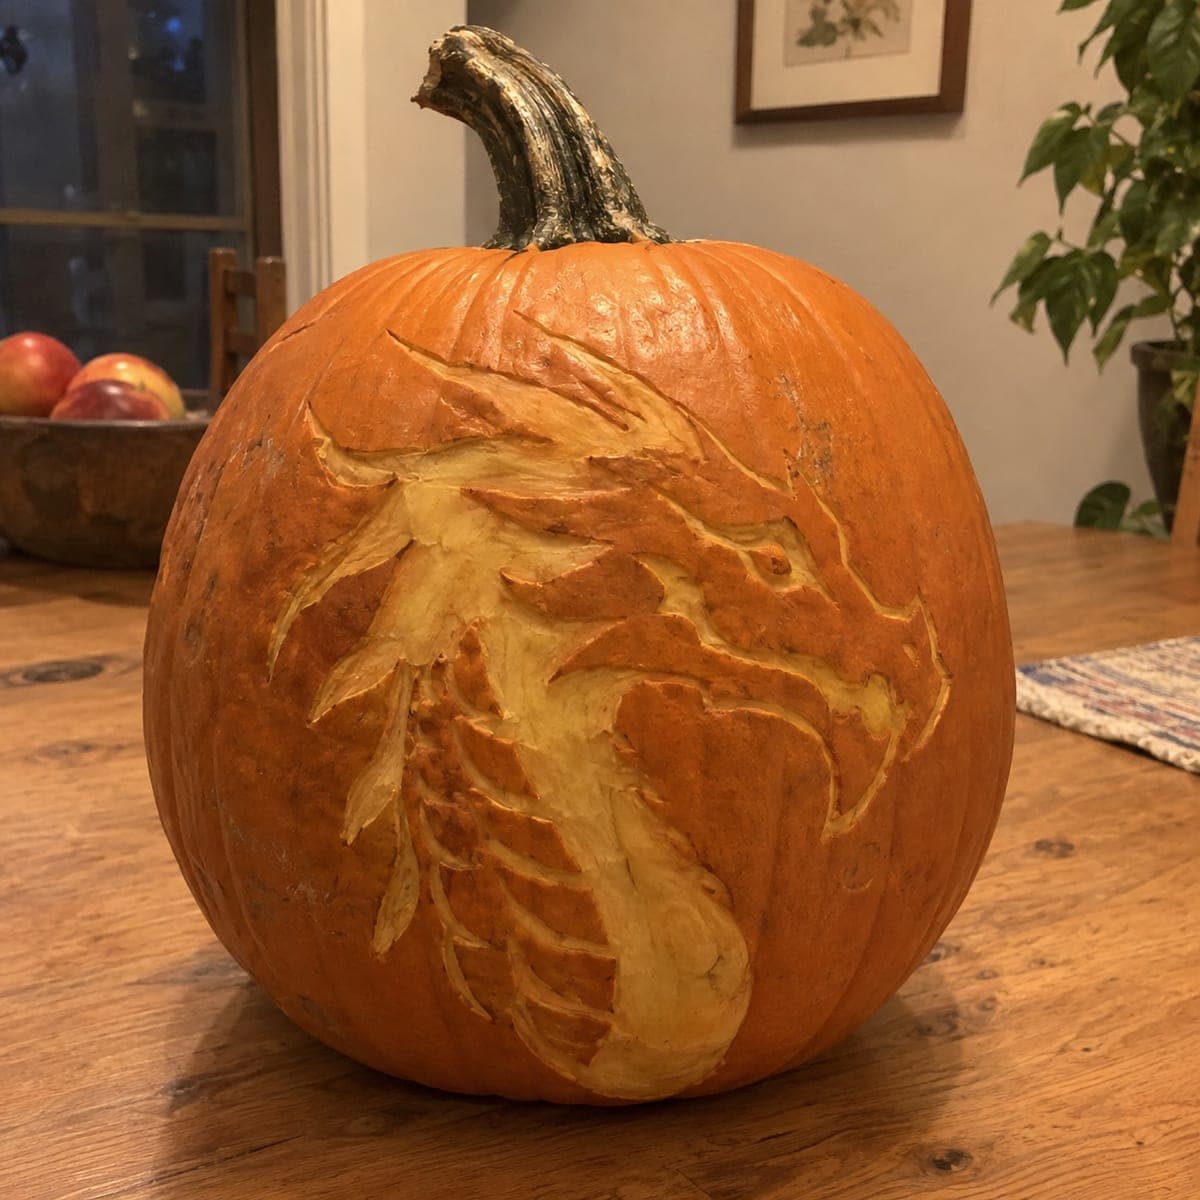
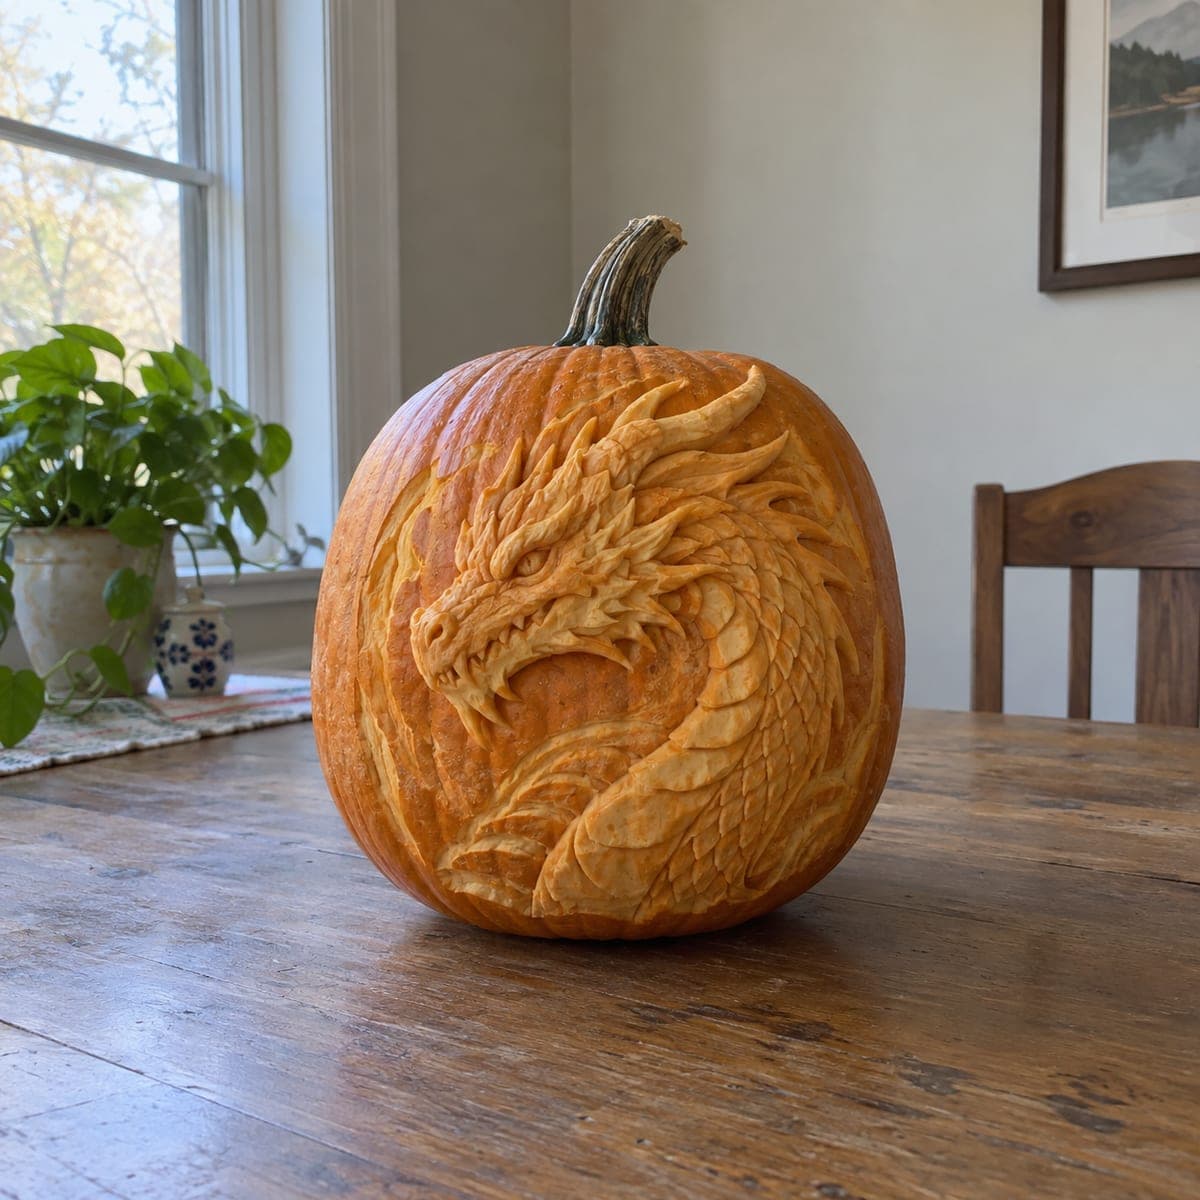
Fierce Dragon Head Relief Carved PumpkinAI
0

Fierce Dragon Head Relief Carved Pumpkin

A horned dragon head with a scaled, serpentine neck sweeps across this pumpkin in shallow relief, every spike and jaw line shaved out of the rind. This is a surface carving, so the design shows best in daylight or under a spotlight rather than with an interior candle. Work from a printed pattern, cut your outlines with a V-tool, then peel the skin between them, leaving the darker orange ridges to define the scales.

This is an AI-generated concept image: a realistic, carvable design idea rather than a photo of a finished carve. AI concepts are always labeled and sit out the leaderboard and the contest.

No ratings yet Β· Sign in to rate

Comments (0)

  • No comments yet β€” be the first.

Save without an account. Sign in to like or comment.

Our tips for carving a similar design

The core trick here is relief carving, where you shave away only the outer skin and a thin layer of flesh instead of cutting all the way through. You leave the darkest orange ridges standing to draw the spikes, jaw line, and scaled neck, then peel the areas around them for lighter tones. Because this is a surface piece, it reads best in daylight or under a spotlight rather than lit from inside.

Written by PumpkinCarvingIdeas.com, inspired by the image above. These are our suggestions, not instructions from the uploader. This approach to the AI concept has not been tested on a real pumpkin.

From pumpkin to porch

  1. Pick a firm pumpkin and plan the layout

    Choose a pumpkin with a broad, smooth face and a firm rind so shallow cuts hold their edges. Wipe the surface clean and dry it. Position the design so the dragon's snout points into the widest, flattest area, letting the neck sweep down toward the base. Since a real pumpkin does not exist for this concept, treat these steps as one way to recreate the look.

  2. Transfer a printed pattern

    Print a dragon head pattern sized to your pumpkin and tape it firmly in place. Poke through the main outlines with a pin or transfer tool, spacing dots close together along the horns, jaw, and scale lines. Peel the paper away and connect the dots lightly with a washable marker. Double check that the horns and spikes stay connected to the head so nothing floats free.

  3. Score the outlines with a V-tool

    Trace all your main lines with a V-gouge or a small detail knife, cutting only a few millimeters deep. Keep the blade shallow and let your other hand steady the pumpkin, never resting fingers in the blade path. These grooves become the darker boundaries between scales and spikes. Adults should handle all sharp tools, and take breaks to keep your grip relaxed.

  4. Peel the skin for mid tones

    Using a loop tool or a shallow gouge, scrape the skin off the areas you want to glow soft orange, such as the cheek, the open scale fields, and the flowing neck. Work in the direction of each scale so the texture flows naturally. Leave the raised ridges and spike tips untouched so they stay dark and define the form. Vary how deep you scrape to get lighter and darker patches.

  5. Deepen accents and refine texture

    Go back into the eye socket, nostril, and the gaps between individual scales and shave a little deeper for your brightest highlights. Add short flicked strokes along the mane and horns to suggest movement. Step back often to check that the darker skin still reads as the outline of the head. Smooth any ragged edges with the tip of your knife.

  6. Light it and photograph

    Set the finished pumpkin under a bright spotlight or shoot it in daylight, since surface relief shows best with light hitting it from the side. Angle a lamp low to cast small shadows in the grooves, which makes the scales pop. If you want a faint interior glow, add a battery LED, never a candle, but keep the main light external. Snap photos from slightly to the side to capture the depth.

Gather your supplies

Check things off as you get ready.

Work on a stable surface, keep your free hand out of the cutting path, and have an adult handle sharp tools.

Three levels of light

  • Leave intact

    The raised ridges, horn tips, jaw edge, and spike outlines stay as untouched dark skin.

  • Peel & shade

    The cheek, open scale fields, and sweeping neck get skin-peeled for a soft orange glow.

  • Cut through

    Only tiny accents like the eye and nostril are shaved deepest for the brightest highlights, with no full openings.

Learn the carving basics

Before you start cutting

Do I need to hollow out the pumpkin?

For a relief carving like this you do not have to gut the whole pumpkin, since the design lives on the surface. If you want a faint interior glow you can scoop out the back and thin the wall behind the face, then add a battery LED. Otherwise leave it solid so the rind stays firm for shallow cuts.

How do I keep the horns and spikes from looking flat?

Cut the grooves around each horn a little deeper than the surrounding scales so the dark ridge stands out. Then scrape the flesh beside each spike slightly to lift it visually. Side lighting does the rest by casting small shadows that give the spikes dimension.

Why does the caption say to skip the candle?

This is a surface design, so light passing through would wash out the shallow detail instead of revealing it. The scales and jaw line show through reflected light and shadow, which is why daylight or a spotlight works best. Use a battery LED only as a gentle extra, never an open flame.

Your take belongs here, too.

Changed a detail? Made it simpler? Share a photo of your version and tell the community what worked.

Share your pumpkin

More pumpkins like this

You've reached the end Β· 8 pumpkins
The Patch Report

Fresh pumpkins, in your inbox.

The best new carvings, ideas worth stealing, and how-tos for carving season. Short, seasonal, and gone by November.

A short email during carving season. Unsubscribe anytime. See our privacy policy.