Halloween Pumpkin Carving Contest · Starts October 1st · $500 in prizes
← Back to ideas
@ai_concepts
Sep 25, 2026
Sharply Angled Triangle Eye Scary Pumpkin FaceAI
0

Report this carving

Tell us what is wrong. Reports are private.

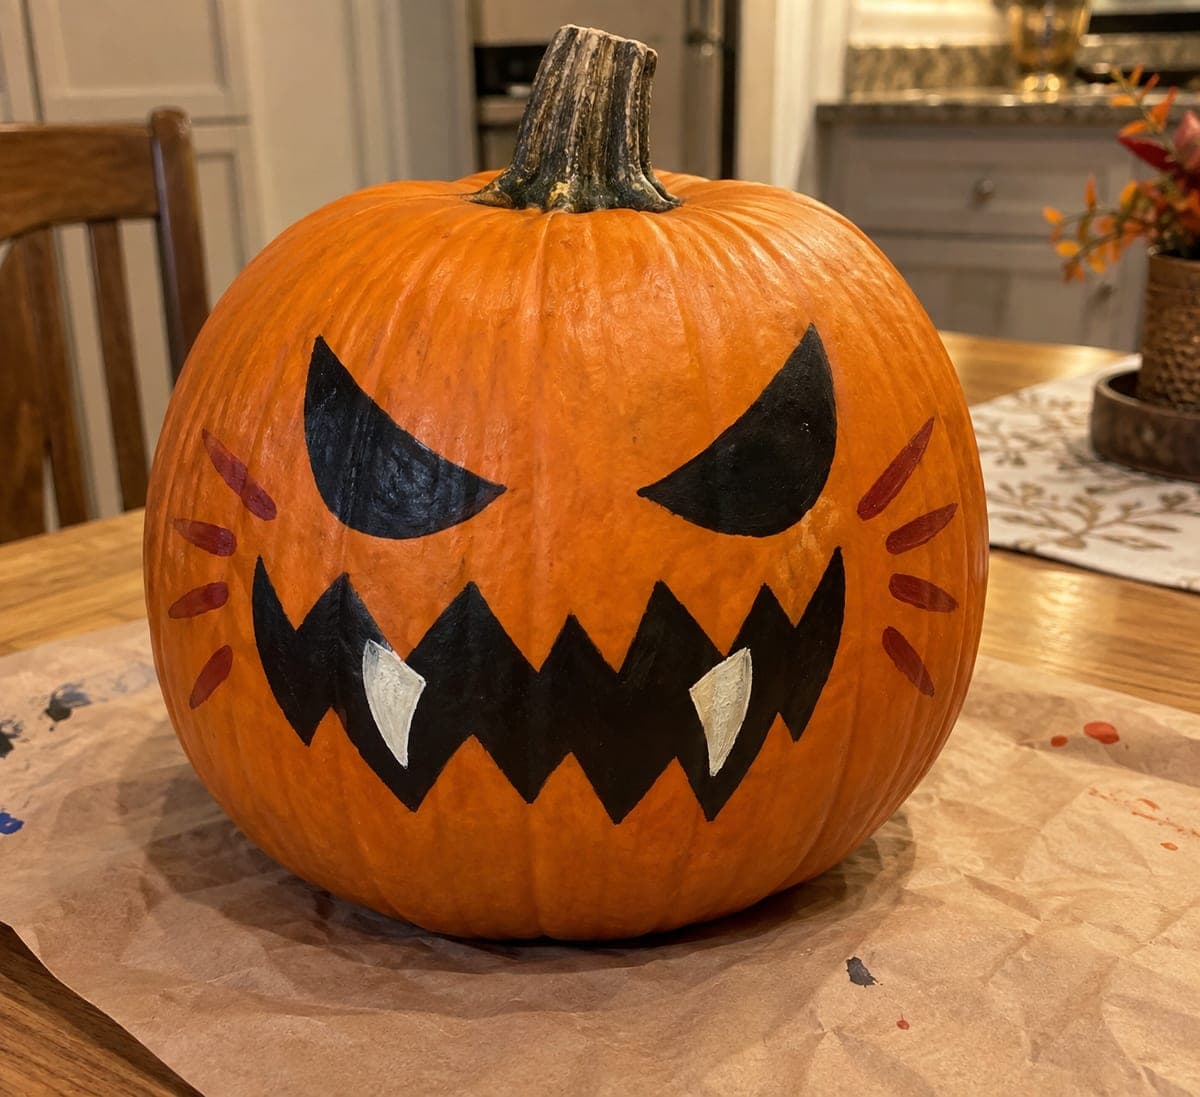
Sharply Angled Triangle Eye Scary Pumpkin Face

Two sharply angled triangle eyes and a broad jagged mouth with four big rooted triangular teeth define this easy scary pumpkin face design, pared down to just the elements that read as genuinely menacing. No thin or fragile details means the design holds up even for first-time carvers. The angle on the eye triangles is the key to the scary effect: tilt both inner corners downward steeply toward the nose so they look aggressive rather than surprised. Display this one at adult eye level on a porch post for maximum impact after dark.

No ratings yet · Sign in to rate
Comments (0)

  • No comments yet — be the first.

Save without an account. Sign in to like or comment.

Our tips for carving a similar design

The scary effect comes entirely from the eye angle: both inner corners tilted steeply downward toward the nose bridge transform neutral triangles into an aggressive glare. Four broad rooted triangular teeth reinforce the menace without adding fragile narrow points. No thin or complex details means this design is achievable on a first carving session while still looking genuinely threatening at night.

From pumpkin to porch

  1. Hollow from the back

    Cut a lid from the back panel so the front stays clean. Scoop the interior to about an inch of wall thickness. For sharp triangular cuts, a consistently thinned wall produces the cleanest angled corners.

  2. Mark the slanted eye triangles

    Draw two triangles at eye height with the inner corners pointed steeply downward toward the center of the pumpkin. Both inner corners should sit at least an inch lower than the outer corners. Check from a distance before cutting: the downward tilt should look unmistakably aggressive rather than merely surprised.

  3. Cut both eye triangles

    Cut the two eye triangles while the face is still structurally intact. Three straight cuts per eye, made slowly at the angled corners, produce the sharp threatening geometry. Pop each plug cleanly and smooth any rough edges with a detail knife.

  4. Mark and cut the jagged mouth

    Sketch a wide jagged mouth with four broad triangular teeth below the eyes. Each tooth must connect solidly to both the upper and lower lip at its base. Cut the outer boundaries of the mouth opening first, then cut the gaps between the teeth carefully, working tooth by tooth to avoid snapping the pointed tips.

  5. Light and position at eye level

    Insert a warm LED and display the pumpkin at approximately adult waist to chest height on a porch post or step so visitors meet the angled eyes directly as they approach. The threatening expression reads best when the viewer is at the same height as the pumpkin face rather than looking down at it.

Written with AI to match this design

Gather your supplies

Check things off as you get ready.

Work on a stable surface, keep your free hand out of the cutting path, and have an adult handle sharp tools.

Three levels of light

  • Leave intact

    All uncut rind including the brow, the area between eyes, and the cheeks stays dark to define the threatening expression

  • Peel & shade

    None

  • Cut through

    Both sharply angled eye holes and the full jagged mouth including all four triangular tooth gaps glow at full brightness

Learn the carving basics

Before you start cutting

How steep does the inner eye corner need to be for the scary effect to work?

The inner corner should sit at least an inch lower than the outer corner on a medium pumpkin. Any less tilt and the face starts looking surprised rather than angry. Test the angle on paper first by drawing the face at actual scale and viewing it from a few feet away before committing to the rind.

Can I add a nose hole without softening the scary expression?

A small rectangular or diamond-shaped nose hole adds darkness without the friendliness of a triangle nose. Avoid a round nose hole, which tends to soften the face into a surprised expression. If in doubt, leave the nose out entirely since the two eyes and the jagged mouth are sufficient to carry the design.

How do I stop the triangular tooth tips from snapping?

Make each tooth base at least an inch wide at its connection to the lip. Cut the straight sides of each tooth before cutting across the pointed tip so the plug can fall away cleanly. Approach the tip from both sides with short careful strokes rather than cutting straight through the point in one pass.

Your take belongs here, too.

Changed a detail? Made it simpler? Share a photo of your version and tell the community what worked.

Share your pumpkin

More pumpkins like this

You've reached the end · 8 pumpkins
The Patch Report

Fresh pumpkins, in your inbox.

The best new carvings, ideas worth stealing, and how-tos for carving season. Short, seasonal, and gone by November.

A short email during carving season. Unsubscribe anytime. See our privacy policy.