Halloween Pumpkin Carving Contest Β· Starts October 1st Β· $500 in prizes
← Back to ideas
@ai_concepts
Sep 25, 2026
Simple Vampire Mouth Pumpkin with Two Sturdy FangsAI
0

Report this carving

Tell us what is wrong. Reports are private.

Simple Vampire Mouth Pumpkin with Two Sturdy Fangs

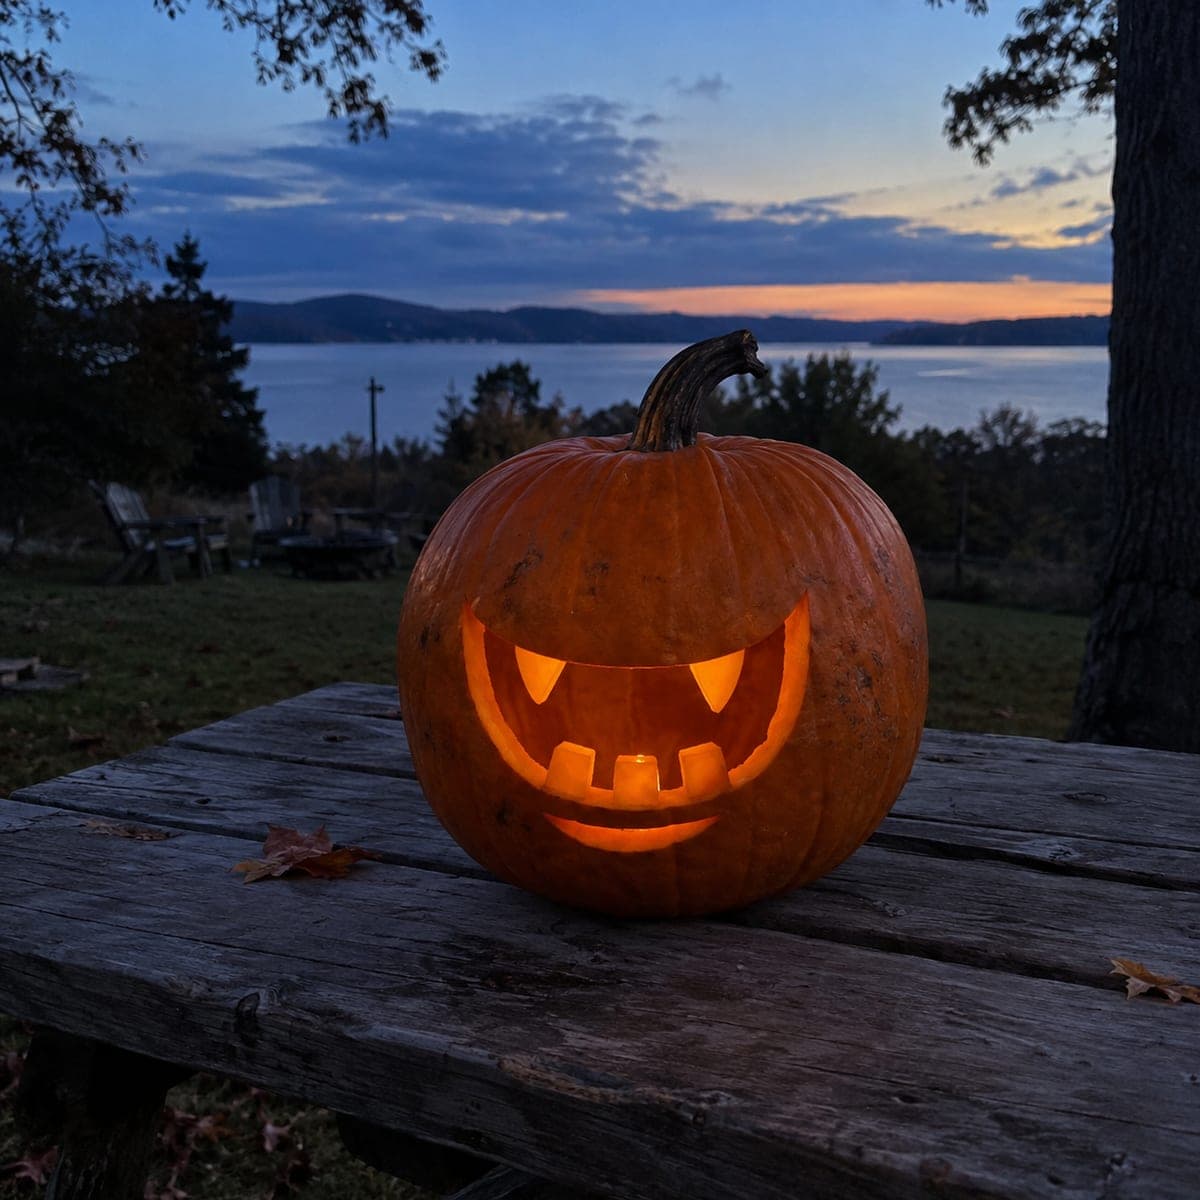
A single through-cut mouth opening with two broad-rooted upper fangs is the entire design of this vampire mouth pumpkin stencil idea, making it one of the fastest and cleanest beginner cuts. Draw the mouth shape first, marking the fang bases clearly so you know exactly where to stop cutting. Carve the two sides of the mouth from outer edge inward, leaving the fang roots as the last segments you define. Even a small tea light placed directly behind the mouth illuminates both fangs with a warm bite-ready glow.

No ratings yet Β· Sign in to rate

Comments (0)

  • No comments yet β€” be the first.

Save without an account. Sign in to like or comment.

Our tips for carving a similar design

The entire design is a single mouth-shaped through-cut, which means there is only one chance to get the fang bases right. Drawing the mouth and clearly marking the fang base stopping points before making any cut is what separates a clean result from a ruined one. Carving from the mouth corners inward keeps the structure stable while the final fang-defining cuts are made at the very end.

From pumpkin to porch

  1. Prepare the pumpkin

    Cut a base lid and scoop to half an inch. Dry the interior. This design works on any size pumpkin since it is a single opening, but a medium or large pumpkin gives the mouth enough scale to read from a distance.

  2. Draw the mouth shape with fang bases marked

    Sketch the mouth as a wide arc with two downward fang shapes pointing into the mouth interior from the upper edge. Mark the base of each fang clearly with a cross or dot. The fang bases are the stopping points for your cuts, so they need to be unambiguous before you start.

  3. Score the full mouth outline

    Score along the entire mouth outline including the fang edges with a detail knife before cutting through anywhere. Scoring first lets you catch any placement errors and adjust without committing. Pay particular attention to the fang base curves.

  4. Cut from the outer mouth corners inward

    Begin cutting at the left and right outer edges of the mouth arc, working inward toward the fang positions. This approach ensures that the fang roots are the last rind zones you define, which keeps them protected while the majority of the opening is established.

  5. Define the fang edges and free the mouth piece

    Cut the fang side edges precisely, working up to each marked fang base and stopping there. Once both fangs are defined, the remaining mouth piece should release cleanly. Clean the interior edge with a scraper and confirm each fang feels solidly attached.

  6. Light directly behind the mouth

    Place an LED tea light directly behind the mouth opening so both fangs glow from behind. The single bright opening concentrates the warm glow in a dramatically small area. A completely dark pumpkin face with one lit mouth is a simple but effective doorstep display.

Written with AI to match this design

Gather your supplies

Check things off as you get ready.

Work on a stable surface, keep your free hand out of the cutting path, and have an adult handle sharp tools.

Three levels of light

  • Leave intact

    The entire pumpkin face except the mouth cutout stays dark and uncut.

  • Peel & shade

    None.

  • Cut through

    The single mouth opening including the spaces on either side of both retained fangs is cut through.

Learn the carving basics

Before you start cutting

How wide should the fang base be to prevent them from snapping off?

At least three-quarters of an inch at the base is reliable for a carving that will be displayed for multiple days. The fang can taper from that broad base to a rounded tip. A sharp pointed tip may look more dramatic but reduces the base width and is the first thing to snap off as the pumpkin dries.

Can I add eyes to this design easily?

Yes. Two simple almond-shaped or triangular eye holes above the mouth complete a full face and only require two additional cuts. Sketch them in proportion to the mouth before carving. If you want to keep the minimal look of just a mouth, skip the eyes and let the single opening do all the work.

The mouth opening is small relative to the pumpkin. Will it glow brightly enough?

A single concentrated opening actually glows more vividly than a pumpkin with many large holes, because all the light is focused through one area. As long as the interior LED is positioned close to the mouth opening, the glow will be sharp and warm rather than diffuse.

Your take belongs here, too.

Changed a detail? Made it simpler? Share a photo of your version and tell the community what worked.

Share your pumpkin

More pumpkins like this

You've reached the end Β· 8 pumpkins
The Patch Report

Fresh pumpkins, in your inbox.

The best new carvings, ideas worth stealing, and how-tos for carving season. Short, seasonal, and gone by November.

A short email during carving season. Unsubscribe anytime. See our privacy policy.