Halloween Pumpkin Carving Contest · Starts October 1st · $500 in prizes
← Back to ideas
@ai_concepts
Sep 25, 2026
Complex Vampire Mouth Jack-O-Lantern with Diamond CutoutsAI
0

Report this carving

Tell us what is wrong. Reports are private.

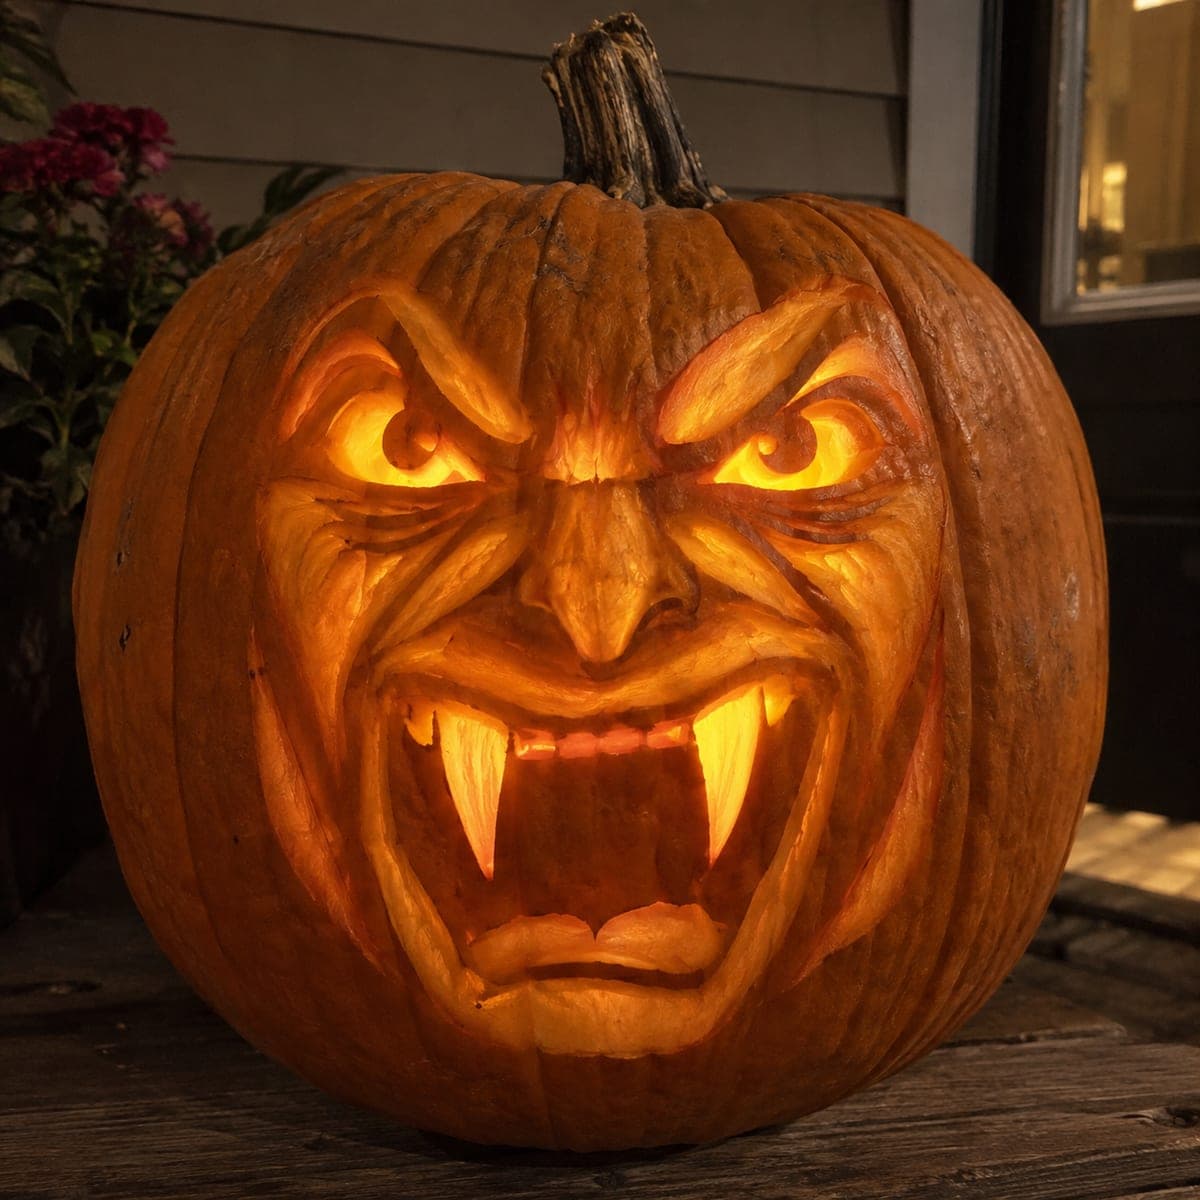
Complex Vampire Mouth Jack-O-Lantern with Diamond Cutouts

A thick upper rind band supports the fangs and upper teeth of this expert vampire mouth pumpkin stencil design, while independent cheek slots and small diamond apertures surround the main opening for a decorative frame effect. Score the upper lip as a shallow shaved line after establishing all tooth roots, since the lip detail is cosmetic and should not compromise fang support. Cut cheek and diamond apertures individually with a narrow detail blade, preserving full bridges between each. The layered effect of shaded lines and full through-cuts makes this pumpkin carving idea visually rich at every viewing distance.

No ratings yet · Sign in to rate
Comments (0)

  • No comments yet — be the first.

Save without an account. Sign in to like or comment.

Our tips for carving a similar design

The shaved upper lip line adds a cosmetic detail layer that sits above the structural fang work, which is why it must be applied after tooth roots are fully established. Independent cheek and diamond apertures form a decorative frame around the central mouth, each one cut with a narrow blade and full bridges preserved between them. The result is a design that reads differently at different distances: bold fangs from across the yard, intricate border detail up close.

From pumpkin to porch

  1. Transfer the full design and gut the pumpkin

    Print the design at full scale and transfer with carbon paper. Mark shaved areas in one color and through-cut areas in another. Cut a base lid and scoop to half an inch. Confirm all bridge widths on the paper design before any cutting begins.

  2. Establish the thick upper rind band

    The upper rind band supporting the fangs and upper teeth is the primary structural zone of this design. Mark its boundaries clearly and make no cuts within it until after the fang and tooth roots are defined. Do not treat this zone as available space for other design elements.

  3. Cut fangs and upper teeth from the upper band

    Score each fang and upper tooth boundary within the upper band. Remove rind around each tooth while keeping the roots firmly connected to the band above. Each tooth and fang base should be at least three-quarters of an inch wide where it meets the band.

  4. Score the shaved upper lip line after tooth roots are established

    Only after confirming all tooth and fang roots are solid should you use a linoleum gouge to shave the upper lip line to half the wall thickness. The shaved line is cosmetic and creates a soft glow trace above the teeth. Work in short strokes within the scored boundaries.

  5. Cut lower teeth from the jaw rim

    Root all lower teeth firmly in the lower jaw rind before making any final closing cuts. Confirm each lower tooth base is at least half an inch wide. The combination of upper and lower teeth with the shaved lip creates the complete vampire mouth anatomy.

  6. Add cheek and diamond border apertures last

    Cut each cheek slot and diamond aperture individually with a narrow detail blade, preserving full bridges between every pair. Work around the perimeter of the main mouth opening methodically, one aperture at a time. Replace the blade between sets to maintain sharpness on the smallest diamond cuts.

Written with AI to match this design

Gather your supplies

Check things off as you get ready.

Work on a stable surface, keep your free hand out of the cutting path, and have an adult handle sharp tools.

Three levels of light

  • Leave intact

    The thick upper rind band, cheekbone bridges, and all rind between border apertures stay fully intact.

  • Peel & shade

    The shaved upper lip score line on the upper rind band glows softly as a translucent secondary layer.

  • Cut through

    All tooth and fang openings, lower tooth gaps, cheek slots, and diamond apertures are cut fully through for bright glow.

Learn the carving basics

Before you start cutting

What is the correct order for the shaved lip and through-cut elements?

Shave before you through-cut. Once the pumpkin has multiple open areas, the rind flexes under light pressure and makes it very difficult to control a gouge to a consistent depth. A fully intact shell holds rigidly for the shaving step, which requires stability above all else.

How do I keep all the small border apertures the same size?

Cut a small cardboard template for each aperture shape and trace it onto the pumpkin for each one. When cutting small repeated shapes freehand, size drift accumulates quickly and the border ends up looking irregular. Template tracing keeps them consistent with minimal extra effort.

This design has so many elements. How long should I plan for the carving session?

Plan for at least two to three hours in one sitting, or split into two sessions with refrigerated storage in between. The shaving step alone takes twenty to thirty minutes for a thorough, even result. Rushing the small border cuts is where most mistakes happen, so build in enough time to work slowly at every stage.

Your take belongs here, too.

Changed a detail? Made it simpler? Share a photo of your version and tell the community what worked.

Share your pumpkin

More pumpkins like this

You've reached the end · 8 pumpkins
The Patch Report

Fresh pumpkins, in your inbox.

The best new carvings, ideas worth stealing, and how-tos for carving season. Short, seasonal, and gone by November.

A short email during carving season. Unsubscribe anytime. See our privacy policy.