Halloween Pumpkin Carving Contest · Starts October 1st · $500 in prizes
← Back to ideas
@ai_concepts
Jul 10, 2026
Simple Alpaca Stencil Pumpkin Carving IdeaAI
0

Simple Alpaca Stencil Pumpkin Carving Idea

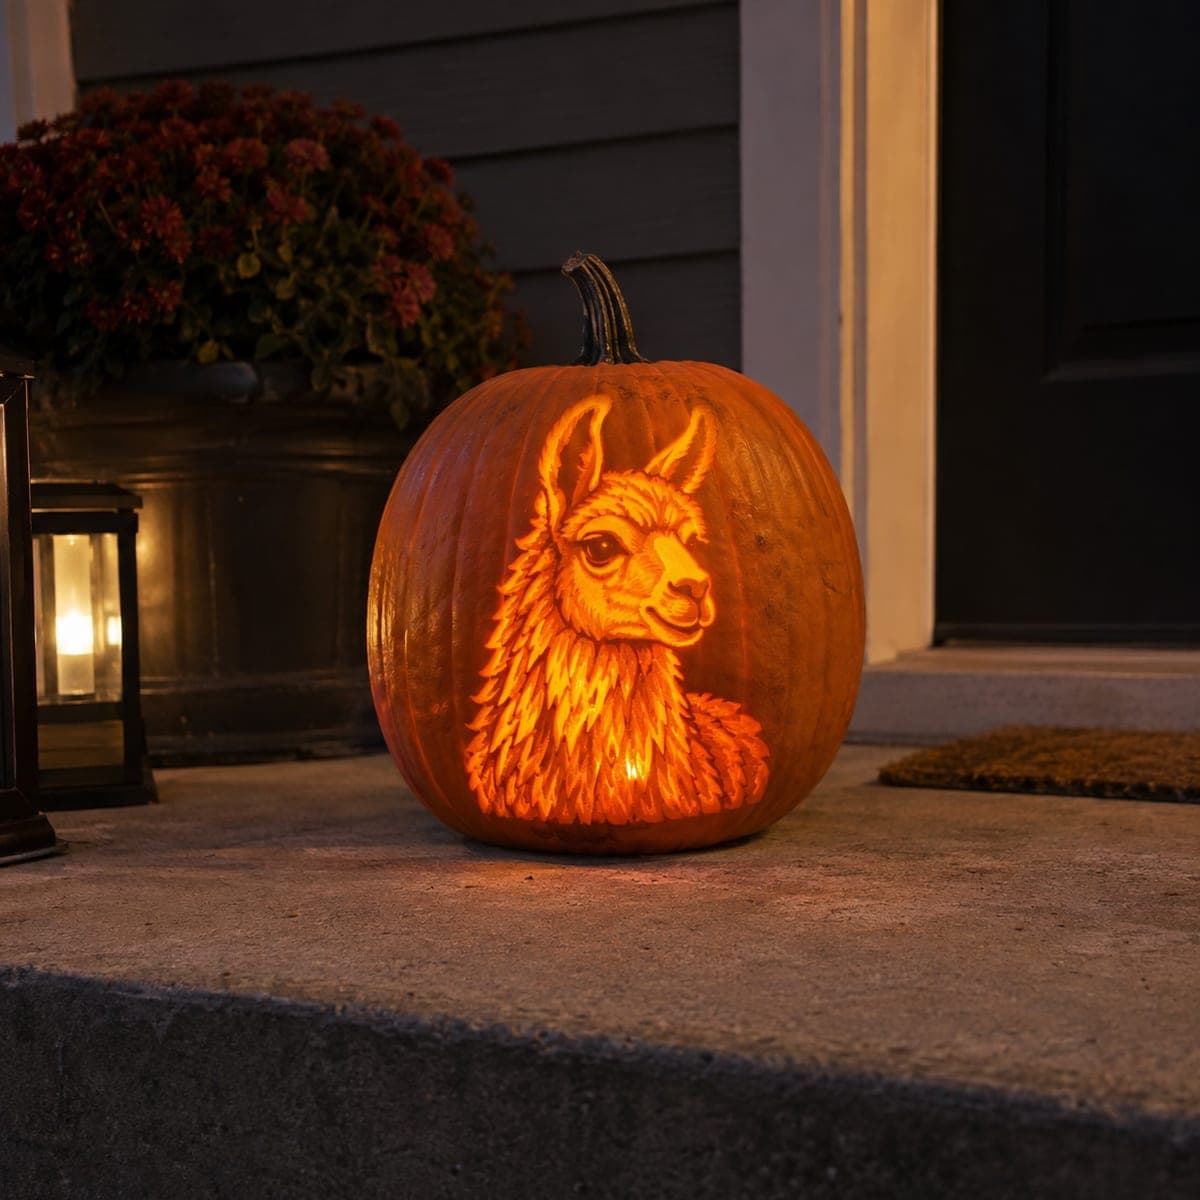
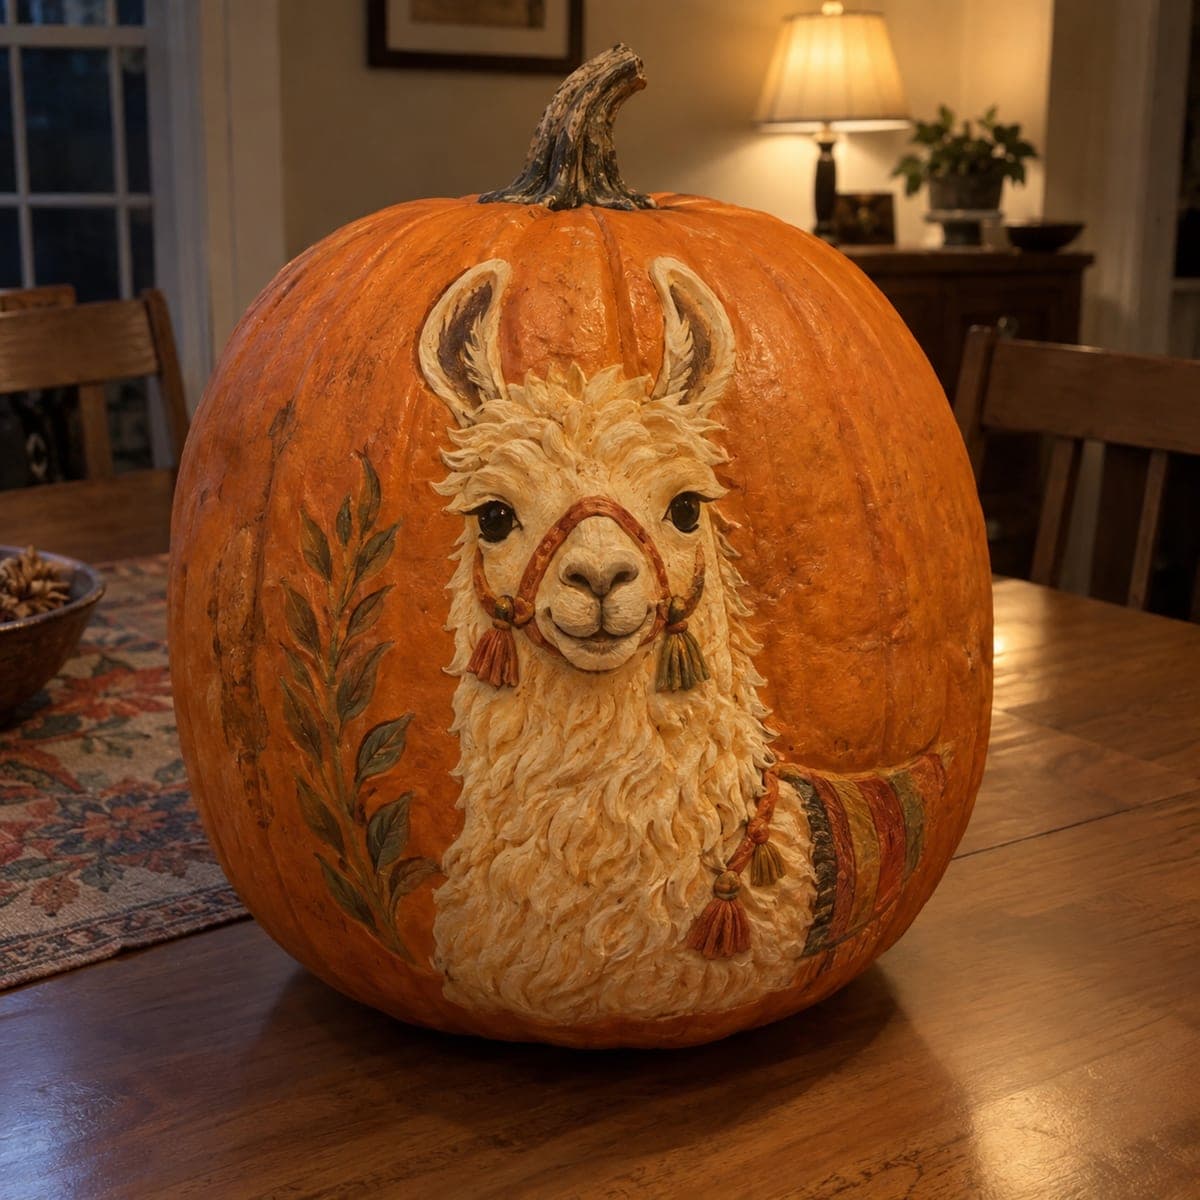
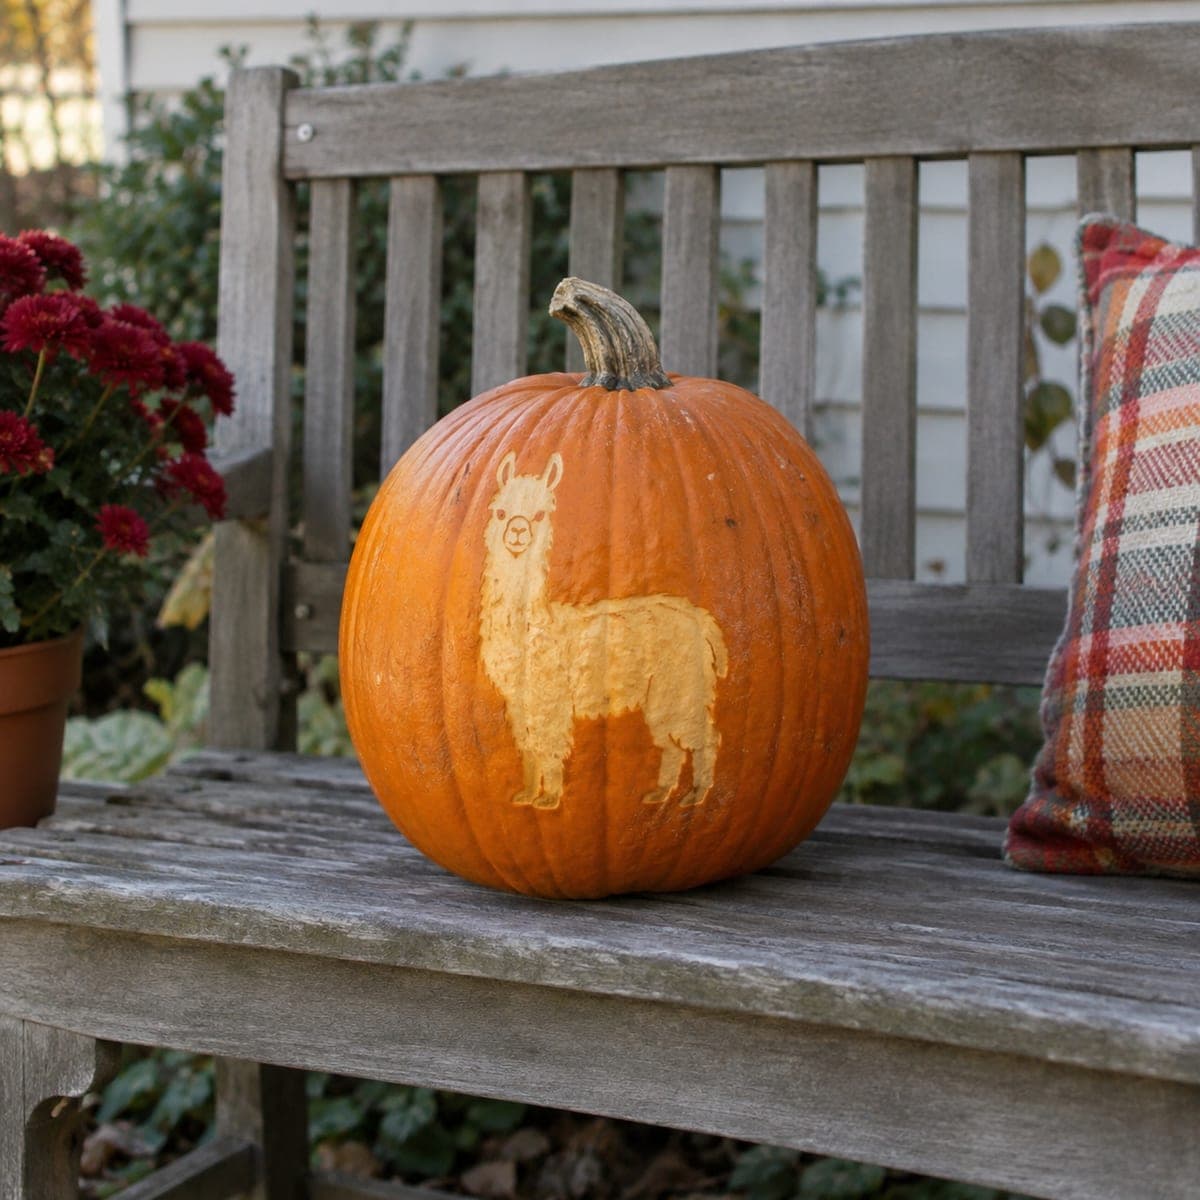
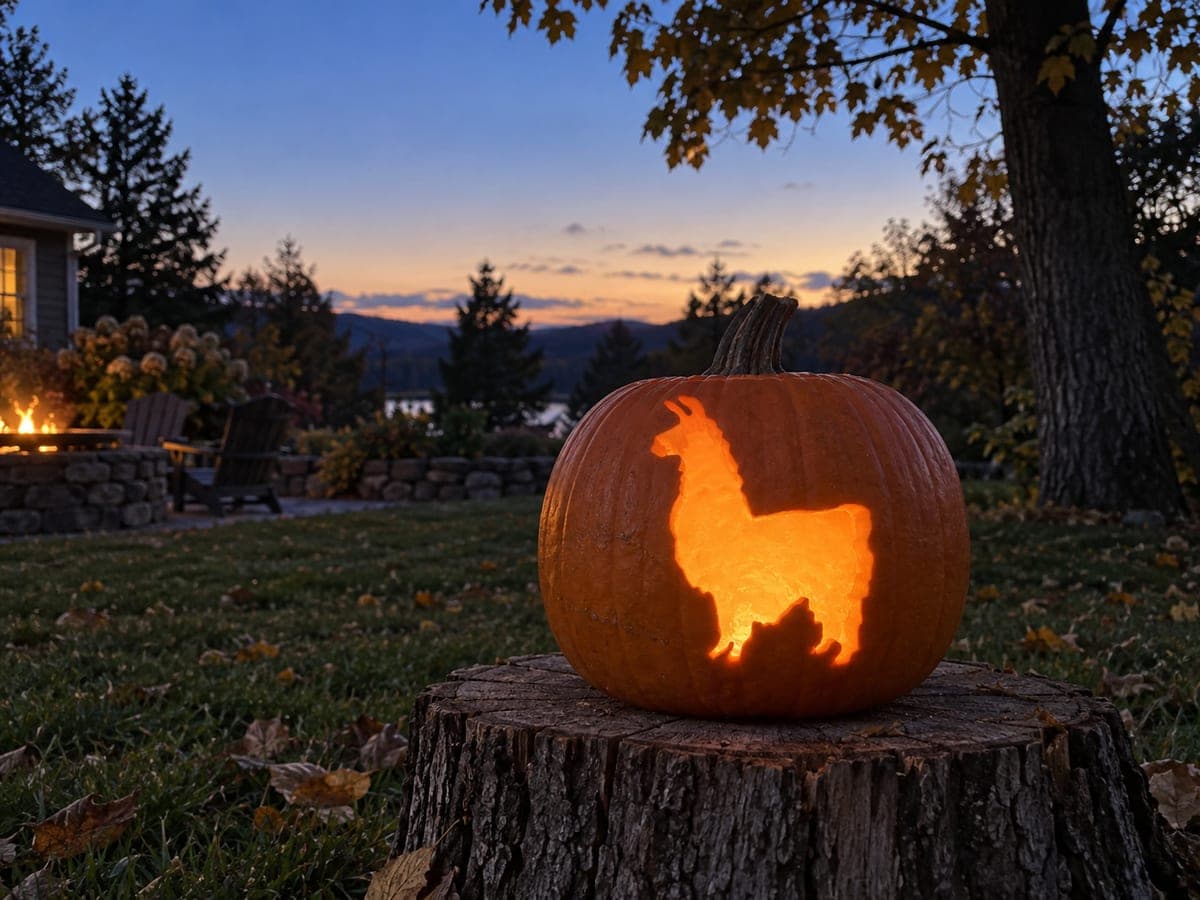
A fluffy alpaca with a sweet little face is peeled into this pumpkin as one flat, pale shape, with just a few interior lines for the eyes and muzzle. It is an approachable pumpkin carving idea for anyone comfortable with a peeler or loop tool, since there are no pierced cuts to break. Trace a printed alpaca outline, strip the skin inside the lines evenly, and set it on a bench or hay bale for a farm-style fall display.

This is an AI-generated concept image: a realistic, carvable design idea rather than a photo of a finished carve. AI concepts are always labeled and sit out the leaderboard and the contest.

No ratings yet · Sign in to rate
Comments (0)

  • No comments yet — be the first.

Save without an account. Sign in to like or comment.

Our tips for carving a similar design

The whole trick here is that the alpaca is one flat peeled shape rather than a pierced cutout, so the skin comes off inside the outline and glows soft orange while the untouched pumpkin stays dark around it. A few shallow interior lines suggest the eyes, muzzle, and fluffy chest. Because nothing is cut all the way through, the shape stays strong and there is little chance of anything snapping.

Written by PumpkinCarvingIdeas.com, inspired by the image above. These are our suggestions, not instructions from the uploader. This approach to the AI concept has not been tested on a real pumpkin.

From pumpkin to porch

  1. Pick a smooth, flat-faced pumpkin

    Choose a pumpkin with one broad, fairly smooth side and shallow ribs so your alpaca sits flat and reads clearly. Wipe the surface clean and dry it well. A section without deep grooves gives the peeled shape an even glow. Set it on a table at a comfortable working height.

  2. Transfer the alpaca outline

    Print an alpaca or llama stencil sized to fill most of the flat panel. Tape it firmly in place, then trace the outer body line and the small interior marks for the eyes and muzzle using a poker or pushpin. Space your dots close together so the shape is easy to follow. Peel away the paper and connect the dots lightly with a marker if it helps.

  3. Score the outline cleanly

    With a small detail knife, an adult should trace just the outer body line about a quarter inch deep, cutting only through the skin and not into the flesh. This gives the peeled area a crisp edge. Keep the blade shallow and take your time on the ears and legs. Do not cut all the way through anywhere.

  4. Peel the body to a smooth glow

    Use a loop tool or vegetable peeler to strip the skin off everywhere inside the outline, staying just inside your scored line. Work down to an even, pale layer so light passes through consistently. Keep the depth uniform for a soft, flat glow across the whole alpaca. Pause often to hold it up and check for dark patches you missed.

  5. Add gentle shading and the face

    For the fluffy chest and legs, peel a touch deeper in a few spots to hint at texture, but keep it subtle. Scrape the eyes and muzzle lines just slightly deeper than the body so they read as soft features without piercing through. This shading is what gives the alpaca its sweet expression. Step back and blend any hard lines with the loop tool.

  6. Light it and stage the display

    Drop a battery LED tealight or a small puck light inside through a lid or bottom opening, and skip real candles since the thin peeled skin can scorch. Set the alpaca facing your viewers. Place it on a bench, hay bale, or step surrounded by mums for a farm-style fall scene. Snap your photo at dusk when the peeled glow shows best.

Gather your supplies

Check things off as you get ready.

Work on a stable surface, keep your free hand out of the cutting path, and have an adult handle sharp tools.

Three levels of light

  • Leave intact

    The pumpkin skin all around the alpaca stays untouched and dark, framing the shape.

  • Peel & shade

    The entire alpaca body is peeled to a smooth pale layer for a soft mid orange glow.

  • Cut through

    Nothing is cut fully through on this design, which keeps the shape strong and beginner safe.

Learn the carving basics

Before you start cutting

Do I need to cut all the way through anywhere?

No, and that is what makes this one so forgiving. The alpaca is entirely a peeled shape, so light glows through the thinned skin rather than shining through open holes. Keeping everything shallow means the legs and ears cannot snap off.

How deep should I peel for a good glow?

Aim for a thin, even layer where the flesh turns slightly translucent, usually about an eighth of an inch of skin removed. Test as you go by holding an LED behind the area. If a spot stays dark, peel a little more until the glow evens out.

How do I keep the little face from looking muddy?

Keep the eyes and muzzle as light score lines just a hair deeper than the surrounding body, not deep gouges. Subtle contrast is enough to suggest the features once the pumpkin is lit. Less is more here, so stop before it looks overworked.

Your take belongs here, too.

Changed a detail? Made it simpler? Share a photo of your version and tell the community what worked.

Share your pumpkin

More pumpkins like this

You've reached the end · 8 pumpkins
The Patch Report

Fresh pumpkins, in your inbox.

The best new carvings, ideas worth stealing, and how-tos for carving season. Short, seasonal, and gone by November.

A short email during carving season. Unsubscribe anytime. See our privacy policy.