Halloween Pumpkin Carving Contest · Starts October 1st · $500 in prizes
← Back to ideas
@ai_concepts
Sep 14, 2026
Simple Standing Chicken PumpkinAI
0

Simple Standing Chicken Pumpkin

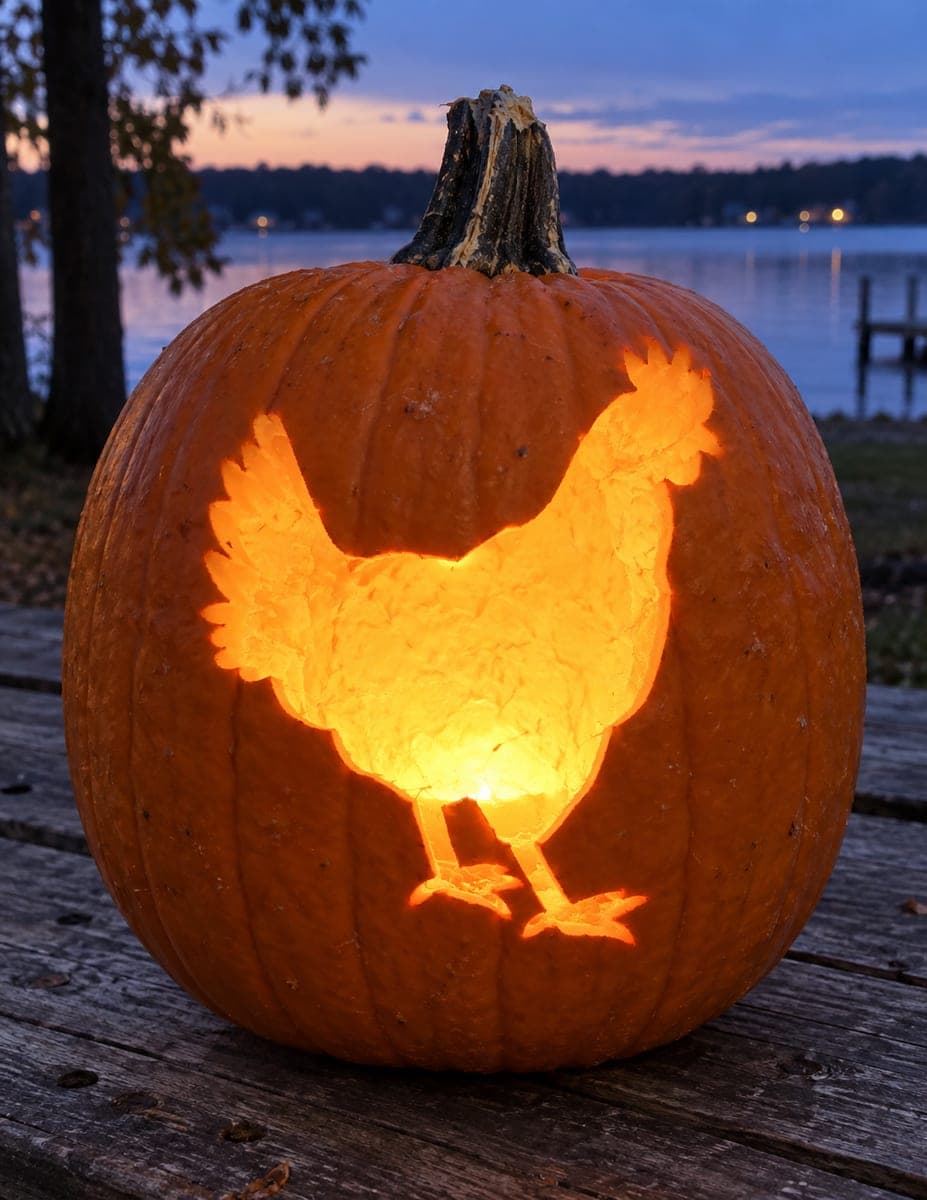
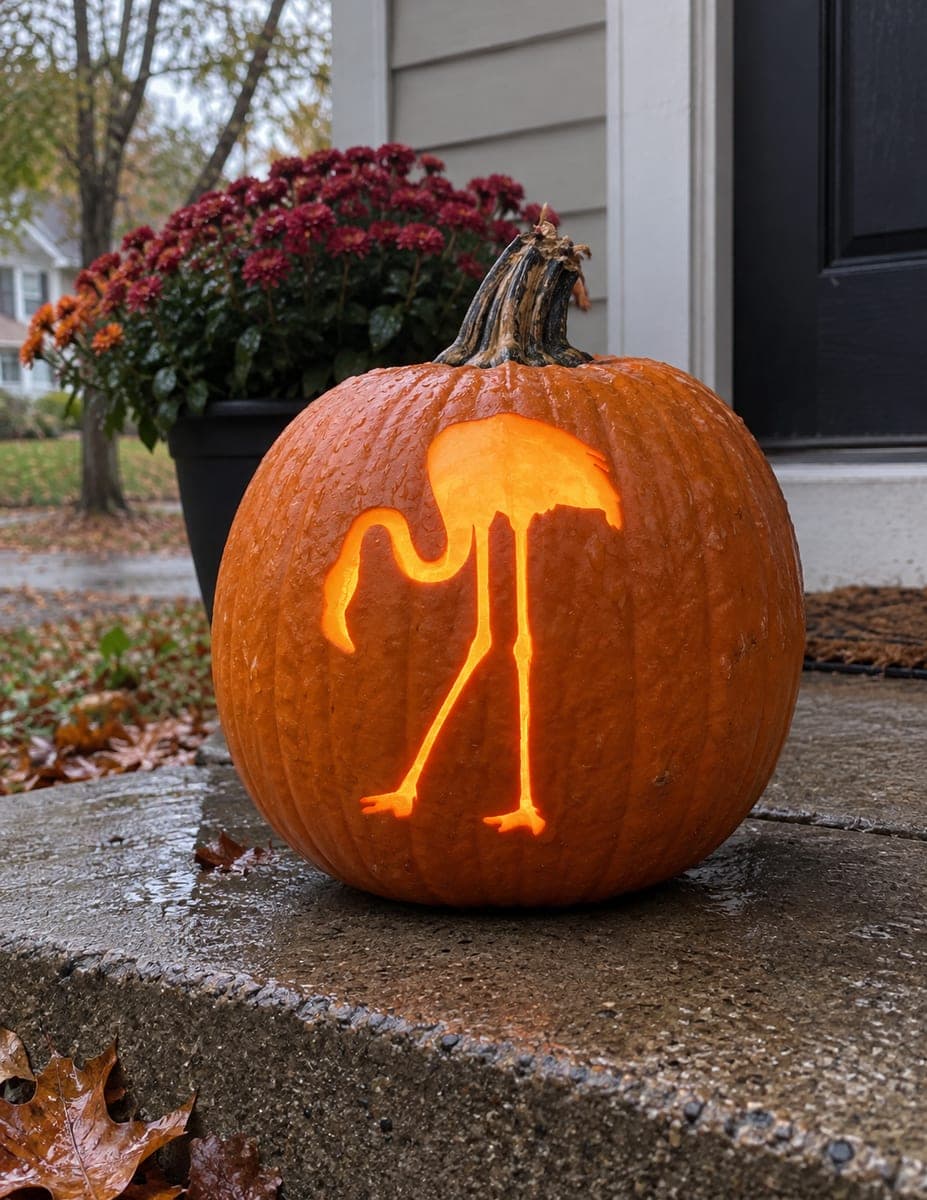
A plump hen stands facing left with wings spread slightly and three-toed feet visible at the bottom, all glowing as a single large cutout shape. The feather texture along the wings and body edge adds detail to this otherwise simple animal pumpkin carving idea. Carve the small individual toe sections and the comb points at the top of the head first, then remove the large body area so the fragile extremities stay supported until the final stage.

This is an AI-generated concept image: a realistic, carvable design idea rather than a photo of a finished carve. AI concepts are always labeled and sit out the leaderboard and the contest.

No ratings yet · Sign in to rate
Comments (0)

  • No comments yet — be the first.

Save without an account. Sign in to like or comment.

Our tips for carving a similar design

The core trick here is one big glowing silhouette of a standing hen, with the outline edges softened by shallow feather texture so the body reads as fluffy rather than flat. You build the whole design as a single large cutout, but the fragile parts, the pointed comb at the top and the thin three-toed feet at the bottom, get cut first while the surrounding skin still supports them. Since this is an AI concept and no real pumpkin exists, treat it as a plan you could follow to get a similar look.

Written by PumpkinCarvingIdeas.com, inspired by the image above. These are our suggestions, not instructions from the uploader. This approach to the AI concept has not been tested on a real pumpkin.

From pumpkin to porch

  1. Pick your pumpkin and light it

    Choose a tall, round pumpkin with a smooth front panel wide enough for a full-body chicken shape. Cut a lid from the bottom or the back rather than the top so the stem stays intact for looks. Scrape the inside wall behind the design down to about one inch thick so light passes through evenly. Test-fit an LED tea light or puck light before you carve, never a real flame.

  2. Transfer the hen outline

    Print or draw the standing chicken facing left, with the wing lifted slightly, the plump body, the comb points on top of the head, and three-toed feet at the bottom. Tape the pattern flat against the front and poke closely spaced dots along every line with a pushpin or awl. Pay extra attention to the small toe segments and the comb tips so you can find them later. Remove the paper and connect the dots with a pencil if the pattern feels faint.

  3. Cut the tiny extremities first

    Start with the smallest, most fragile openings while the pumpkin wall is still fully supported. Carefully saw out the individual toe sections and the little gaps between them, then cut the comb points at the top of the head. Use a fine detail saw and gentle sawing motion, letting the tool do the work so thin walls do not snap. Leave narrow bridges of skin between adjacent toes so each stays anchored.

  4. Remove the large body area

    Now cut the big main silhouette, the body, breast, and lifted wing, as one large opening. Work from the center outward and support the piece with your free hand so it does not tear free early and crack a thin edge. Because the openings meet the toes and comb you already cut, go slowly where the lines join. Pop the interior slug out gently once the full outline is released.

  5. Texture the feather edges

    For the soft feathered look, do not cut all the way through along the outer body and wing edge. Instead peel just the top skin in short overlapping strokes with a small gouge or lino tool to make a dim feather band. Feather the top of the wing and the tail into a few pointed peels so the outline looks fluffy rather than sharp. Keep these strokes shallow so they glow a softer orange than the full cutout.

  6. Light it and photograph

    Set an LED light inside and check the balance from a few feet back. If the belly looks dim, thin the inner wall behind it a little more. Wipe the cut edges, rub a thin coat of petroleum jelly on them to slow drying, and shoot your photo at dusk when the glow reads strongest against a dark background.

Gather your supplies

Check things off as you get ready.

Work on a stable surface, keep your free hand out of the cutting path, and have an adult handle sharp tools.

Three levels of light

  • Leave intact

    The untouched pumpkin skin around the hen stays dark and forms the background.

  • Peel & shade

    The feathered wing tips, tail, and outer body edge get skin-peeled for a soft mid glow.

  • Cut through

    The full body, breast, comb points, and three toed feet are cut through for the brightest light.

Learn the carving basics

Before you start cutting

Should I carve the feet or the body first?

Carve the small toe sections and comb points first, while the pumpkin wall around them is still solid and supportive. If you remove the big body opening first, the thin feet and comb lose their backing and can crack or tear. Saving the large cutout for last keeps the fragile extremities stable.

How do I keep the three toes from snapping?

Keep the toes fairly short and leave narrow skin bridges between them rather than cutting deep, isolated slivers. Use a fine detail saw with light pressure and let the blade glide instead of forcing it. Thin, unsupported points are the most common break, so err on the side of slightly chunkier toes.

How do I get the fluffy feather look without weakening the pumpkin?

Peel only the top layer of skin along the wing and body edge instead of cutting through. These shallow gouge strokes glow a dim orange and read as feathers while keeping the wall intact. Reserve full cutouts for the main body so the structure stays strong.

Your take belongs here, too.

Changed a detail? Made it simpler? Share a photo of your version and tell the community what worked.

Share your pumpkin

More pumpkins like this

You've reached the end · 8 pumpkins
The Patch Report

Fresh pumpkins, in your inbox.

The best new carvings, ideas worth stealing, and how-tos for carving season. Short, seasonal, and gone by November.

A short email during carving season. Unsubscribe anytime. See our privacy policy.