Halloween Pumpkin Carving Contest · Starts October 1st · $500 in prizes
← Back to ideas
@ai_concepts
Jul 24, 2026
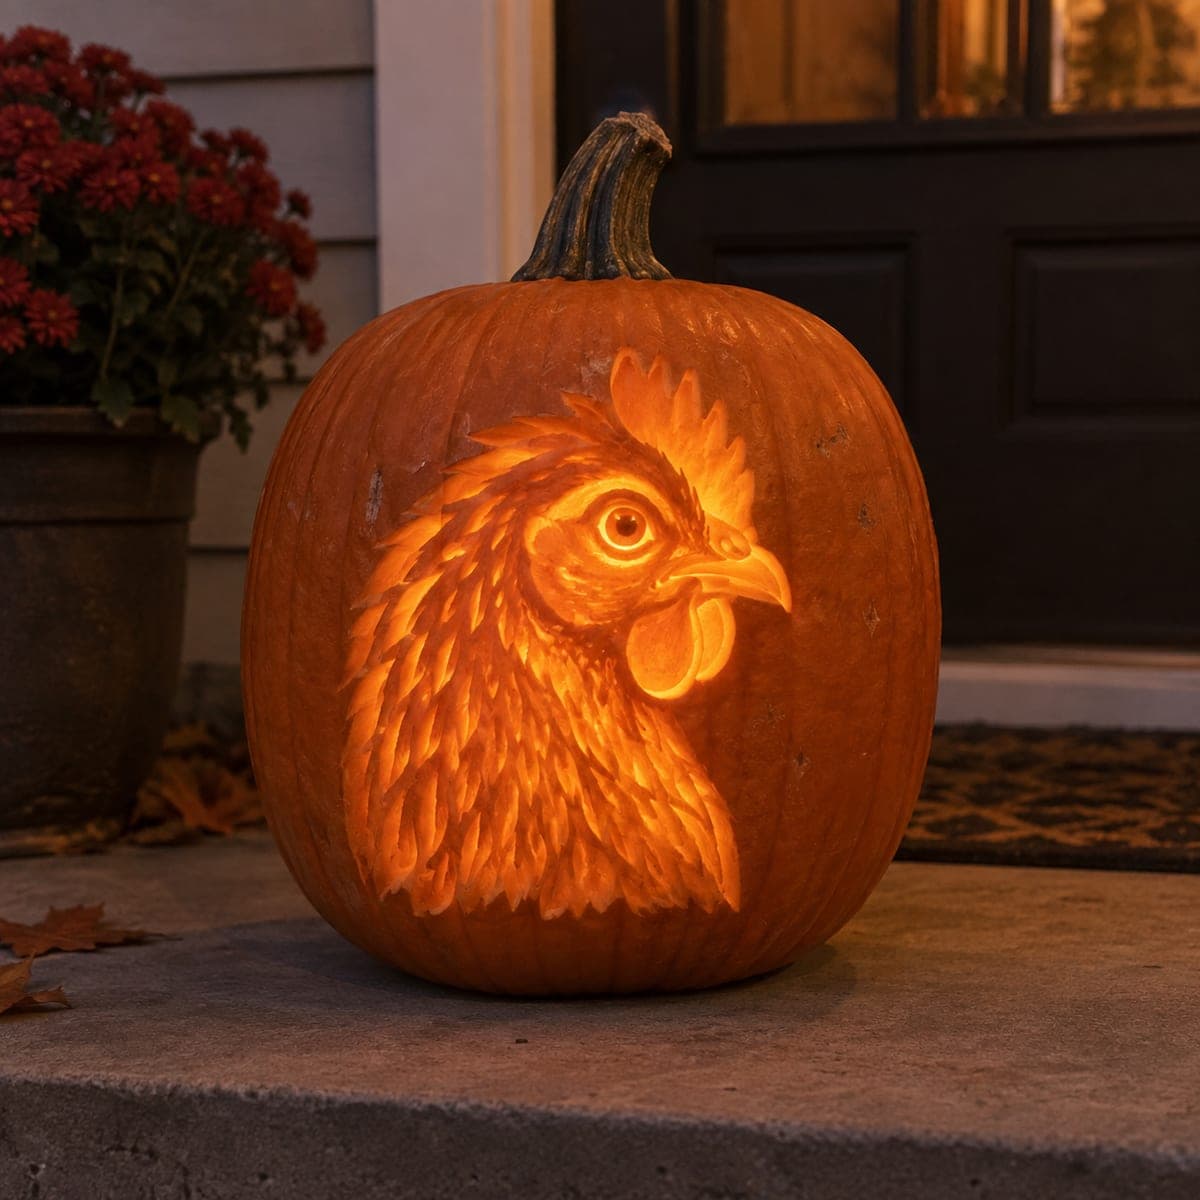
Realistic Hen Relief Carved Pumpkin SculptureAI
0

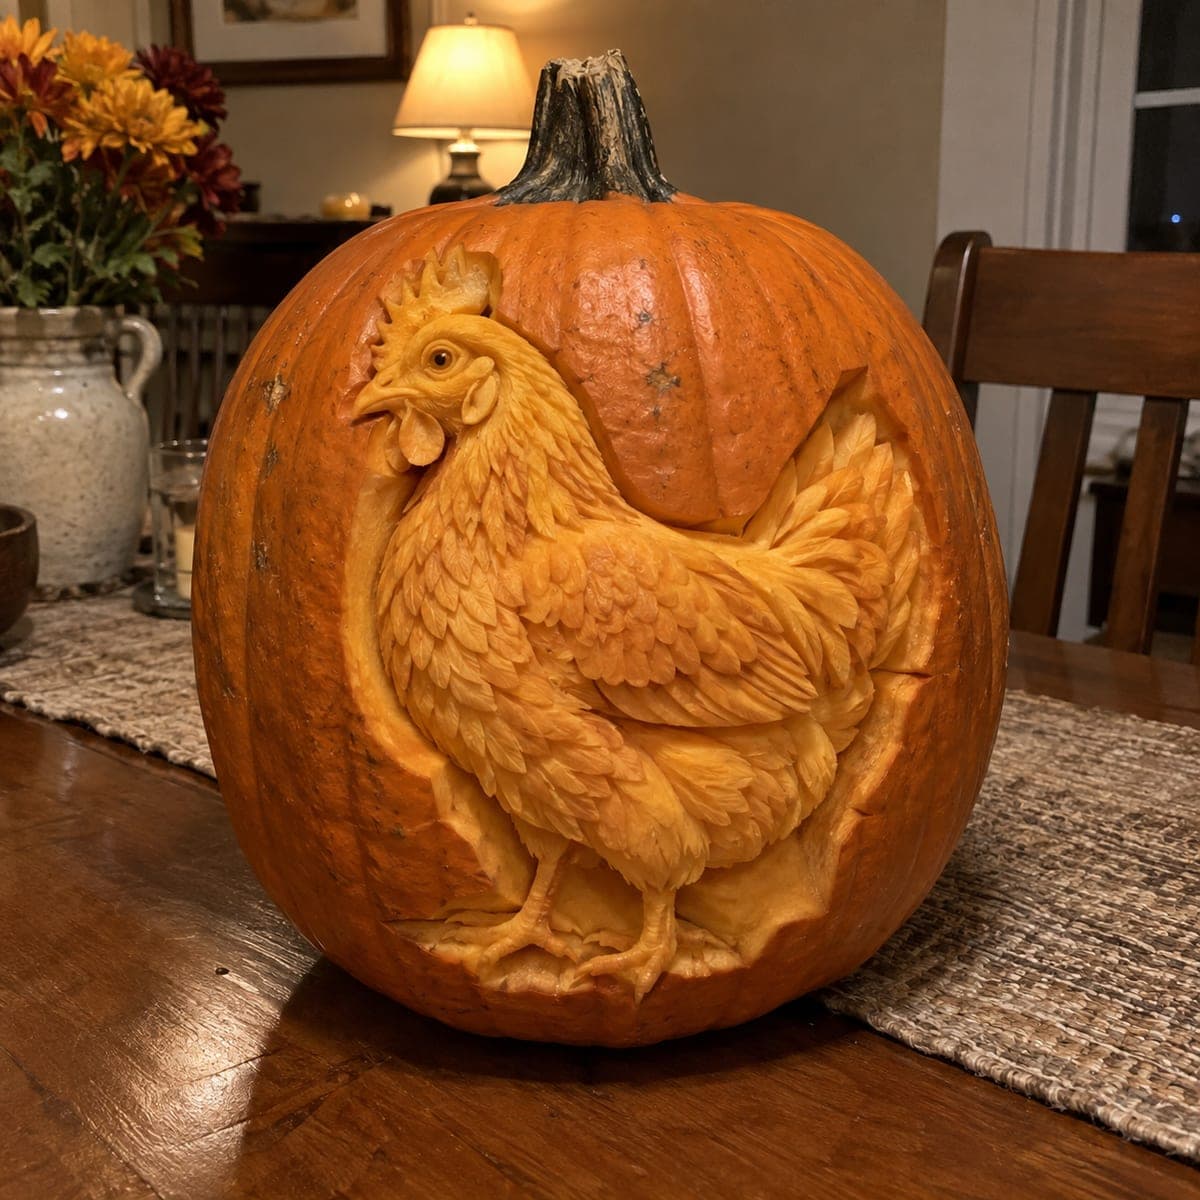
Realistic Hen Relief Carved Pumpkin Sculpture

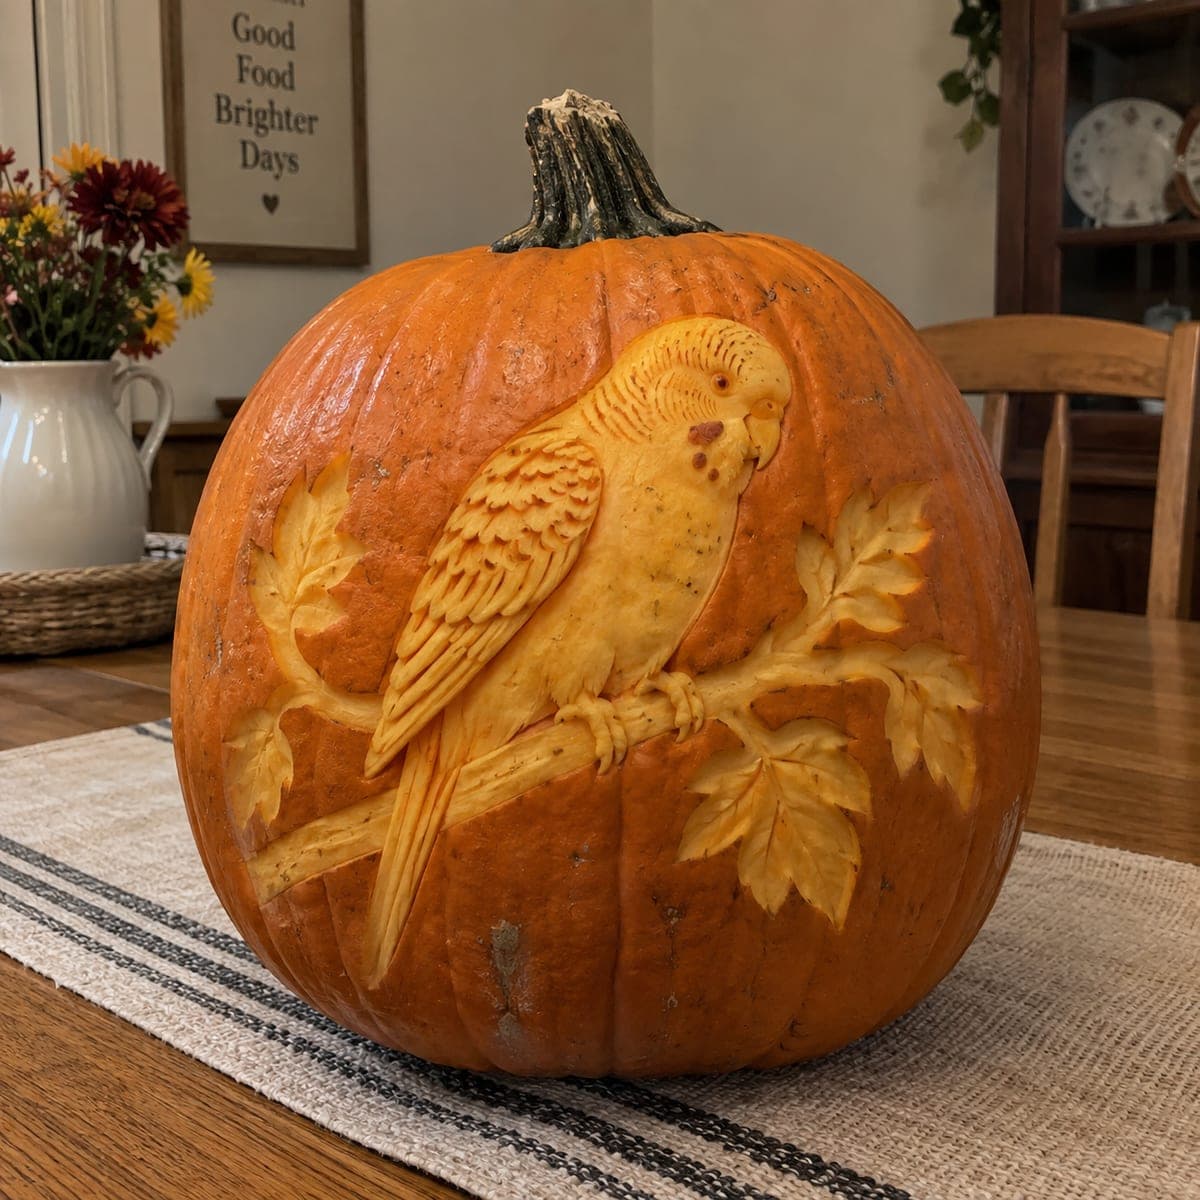
This hen looks sculpted rather than carved, with every wing feather, the comb, and the wattle raised in deep relief from the pumpkin's surface. Work like this calls for clay ribbon loops and a paring knife, removing the background first so the bird stands proud, then refining feathers from the head down toward the tail. Keep the pumpkin misted and wrapped in plastic between sessions. Display it unlit on a table where the shadows do the work.

This is an AI-generated concept image: a realistic, carvable design idea rather than a photo of a finished carve. AI concepts are always labeled and sit out the leaderboard and the contest.

No ratings yet · Sign in to rate
Comments (0)

  • No comments yet — be the first.

Save without an account. Sign in to like or comment.

Our tips for carving a similar design

The trick here is relief carving, where you remove the background skin and flesh so the hen stands proud of the surface instead of being cut clear through. Nothing is a full cutout, so this piece is meant to be displayed unlit with room light casting the shadows. Plan to work the background down first, then shape the bird from the head toward the tail so every feather layer overlaps the one below it.

Written by PumpkinCarvingIdeas.com, inspired by the image above. These are our suggestions, not instructions from the uploader. This approach to the AI concept has not been tested on a real pumpkin.

From pumpkin to porch

  1. Transfer the hen and open the lid

    Choose a tall pumpkin with a smooth, wide face and cut an access lid in the bottom rather than the top so the stem stays intact. Scrape the inside wall behind your design down to about one inch thick so shaping is easier. Tape your hen stencil to the face and poke the main outline with a pin, marking the body, the raised wing, the comb, and the legs. Step back and check the bird sits centered before you commit to any cuts.

  2. Score the outline and drop the background

    With a paring knife, cut straight down along the outer edge of the hen about a quarter inch deep. Use a large clay ribbon loop to shave the surrounding background down and away so the whole bird rises above it. Take the background lower near the head and tail to build depth, and keep the edge clean so the silhouette reads sharply. Work slowly and resist going too deep near thin areas like the legs and comb.

  3. Establish the big forms

    Now round off the body so it swells forward and the tail sweeps back. Use the loop tool to sink the space between the breast, the raised wing, and the drooping tail feathers so those masses separate visually. Round the head and beak forward off the surface. Think in broad planes first and save the fine feather detail for later so you do not lose your depth.

  4. Carve feathers from the head down

    Switch to a small detail loop and start layering feathers at the neck, cutting little overlapping U shapes that each tuck under the one above. Move down the wing and body, then finish with the long tail feathers, keeping the flow of the rows consistent. Vary the depth so some feathers catch more shadow than others, which is what sells the sculpted look. For the comb and wattle, leave them slightly raised and rounded, and keep a bit of extra thickness so they do not snap off.

  5. Refine the face and legs

    Define the eye by carving a shallow socket and leaving a rounded bead of flesh for the eyeball, then shade around it. Shape the beak with two clean planes and undercut the wattle a touch so it hangs. For the legs and feet, keep them as raised ridges attached to the surface rather than free-standing, since thin cut pieces would be fragile. Smooth any rough tool marks with the tip of your paring knife.

  6. Preserve and photograph

    Mist the whole carving with water, wrap it in plastic, and refrigerate it between sessions to keep the flesh from drying and curling. When it is done, wipe the surface, set it on a table, and let ambient room light rake across the relief so the feathers cast their own shadows. A small LED placed to the side, never a candle, deepens those shadows nicely. Shoot photos in soft side light to capture the sculpted depth.

Gather your supplies

Check things off as you get ready.

Work on a stable surface, keep your free hand out of the cutting path, and have an adult handle sharp tools.

Three levels of light

  • Leave intact

    The untouched outer skin left around the hen and on the upper pumpkin reads as the darkest background.

  • Peel & shade

    The peeled body, wing, and background flesh glow a soft dim orange and carry all the shading.

  • Cut through

    No full cutouts here, since this is a relief piece meant to be read by shadow rather than backlight.

Learn the carving basics

Before you start cutting

Do I need to cut all the way through the pumpkin?

No. This is a relief carving, so you only remove the skin and part of the flesh to build depth. Cutting through would break the sculpted effect and weaken the thin feathers. The design relies on shadow, not light passing through.

How do I keep the feathers and comb from breaking off?

Keep every feather, the comb, and the wattle attached to the surface as raised ridges rather than free-standing flaps. Leave a little extra thickness under any part that projects. Work from the top down so you are not leaning on finished detail as you carve below it.

Why display it unlit, and how do I light it if I want to?

A relief carving shows best with side lighting that rakes across the surface and casts shadows into the feather rows. A light inside would wash that out. If you want a glow, place a small LED off to one side, and never use a candle near the thin carved flesh.

Your take belongs here, too.

Changed a detail? Made it simpler? Share a photo of your version and tell the community what worked.

Share your pumpkin

More pumpkins like this

You've reached the end · 8 pumpkins
The Patch Report

Fresh pumpkins, in your inbox.

The best new carvings, ideas worth stealing, and how-tos for carving season. Short, seasonal, and gone by November.

A short email during carving season. Unsubscribe anytime. See our privacy policy.