Halloween Pumpkin Carving Contest · Starts October 1st · $500 in prizes
← Back to ideas
@ai_concepts
Aug 11, 2026
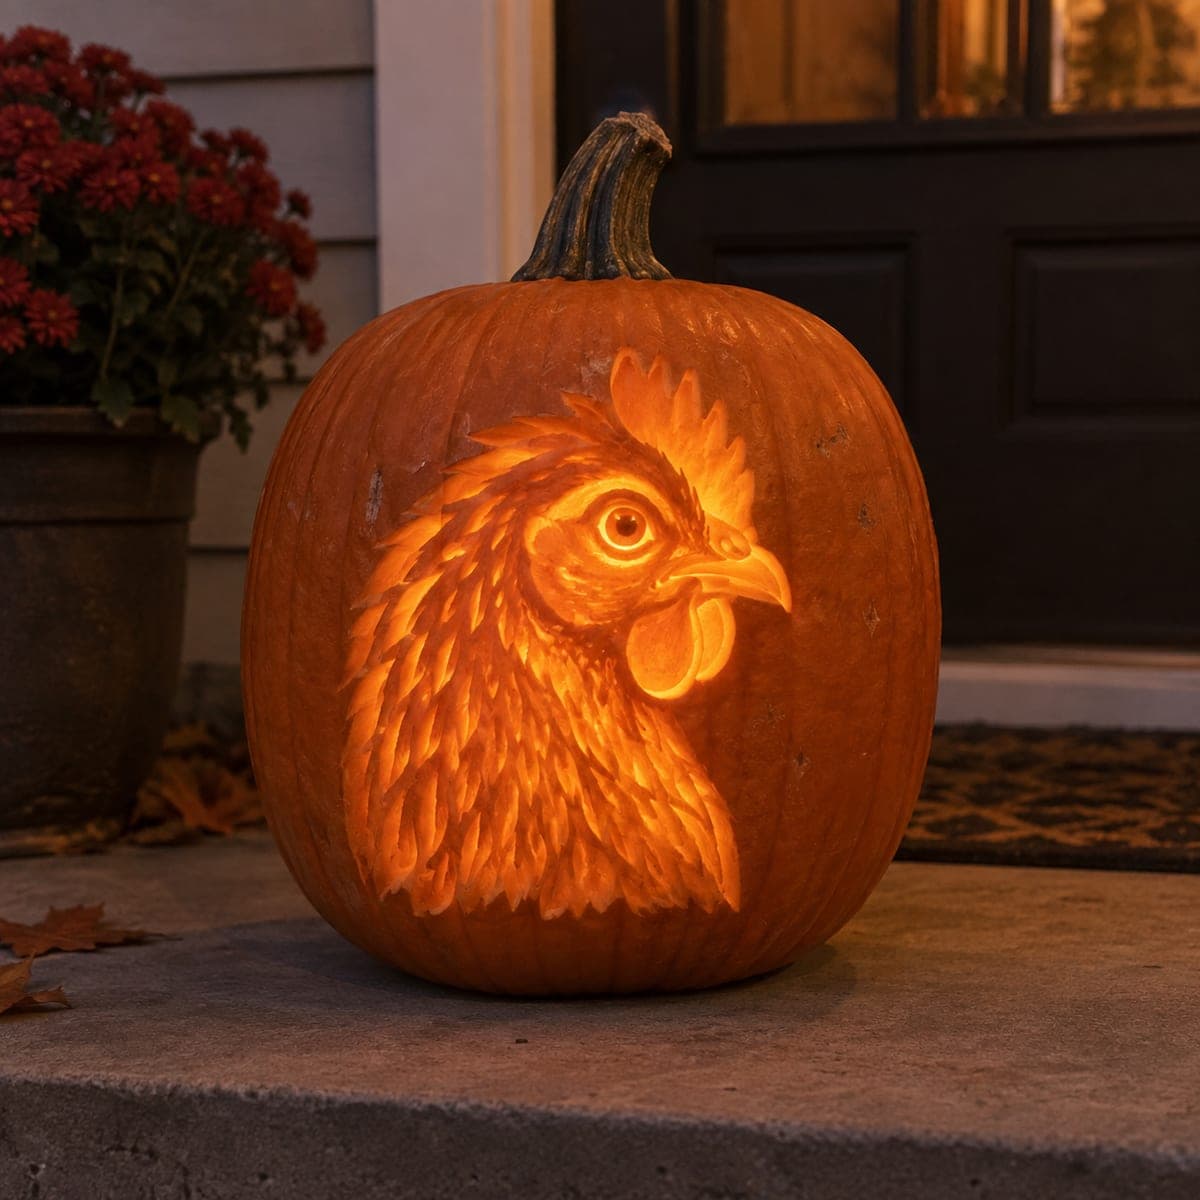
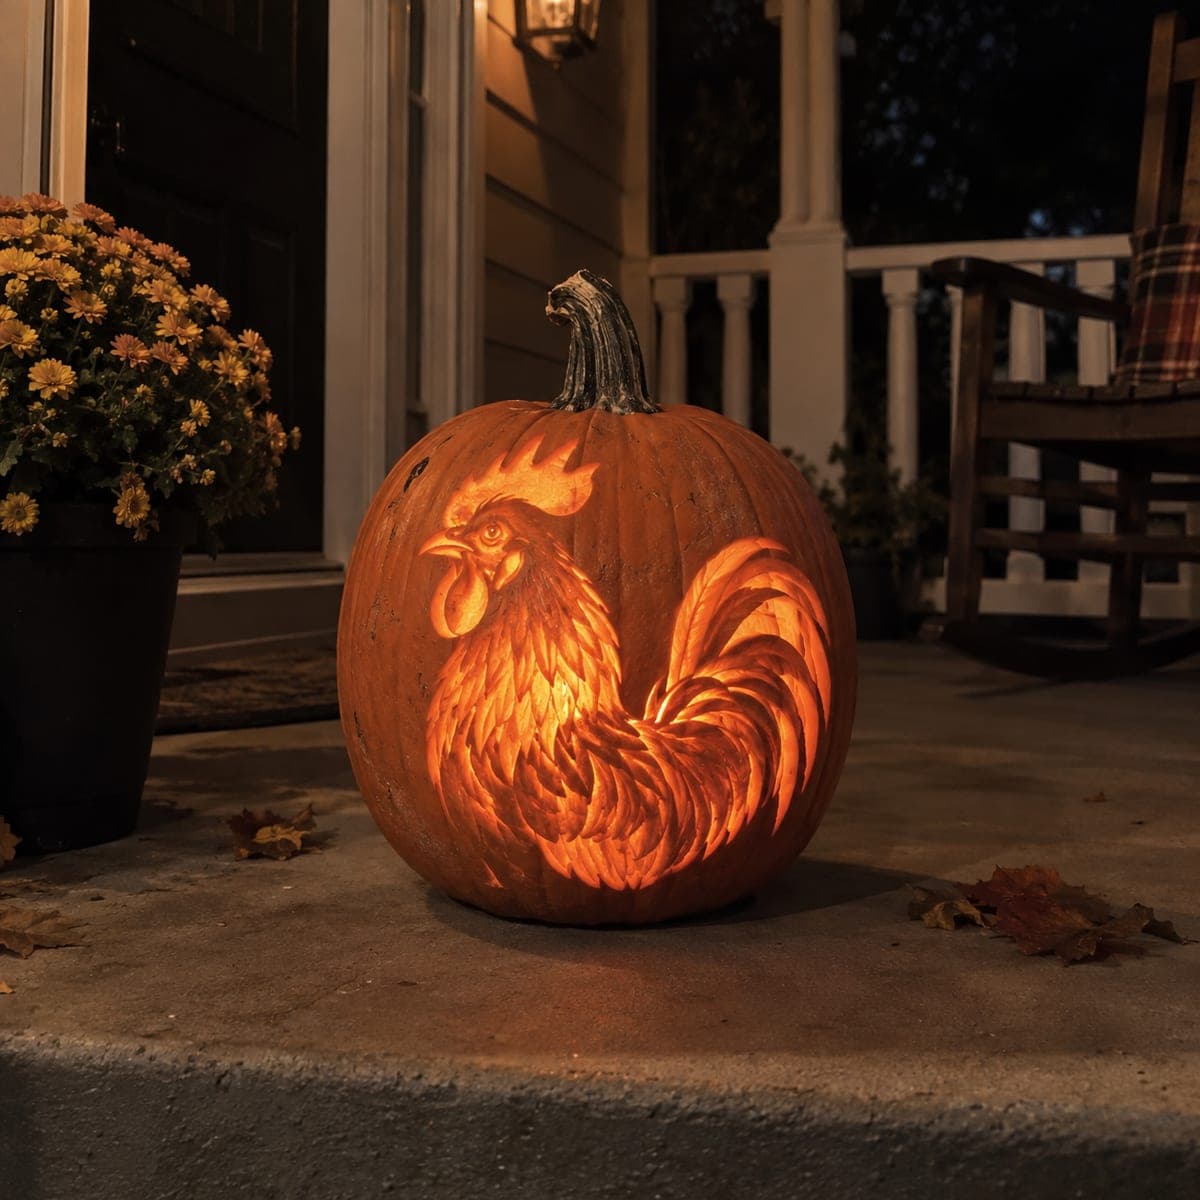
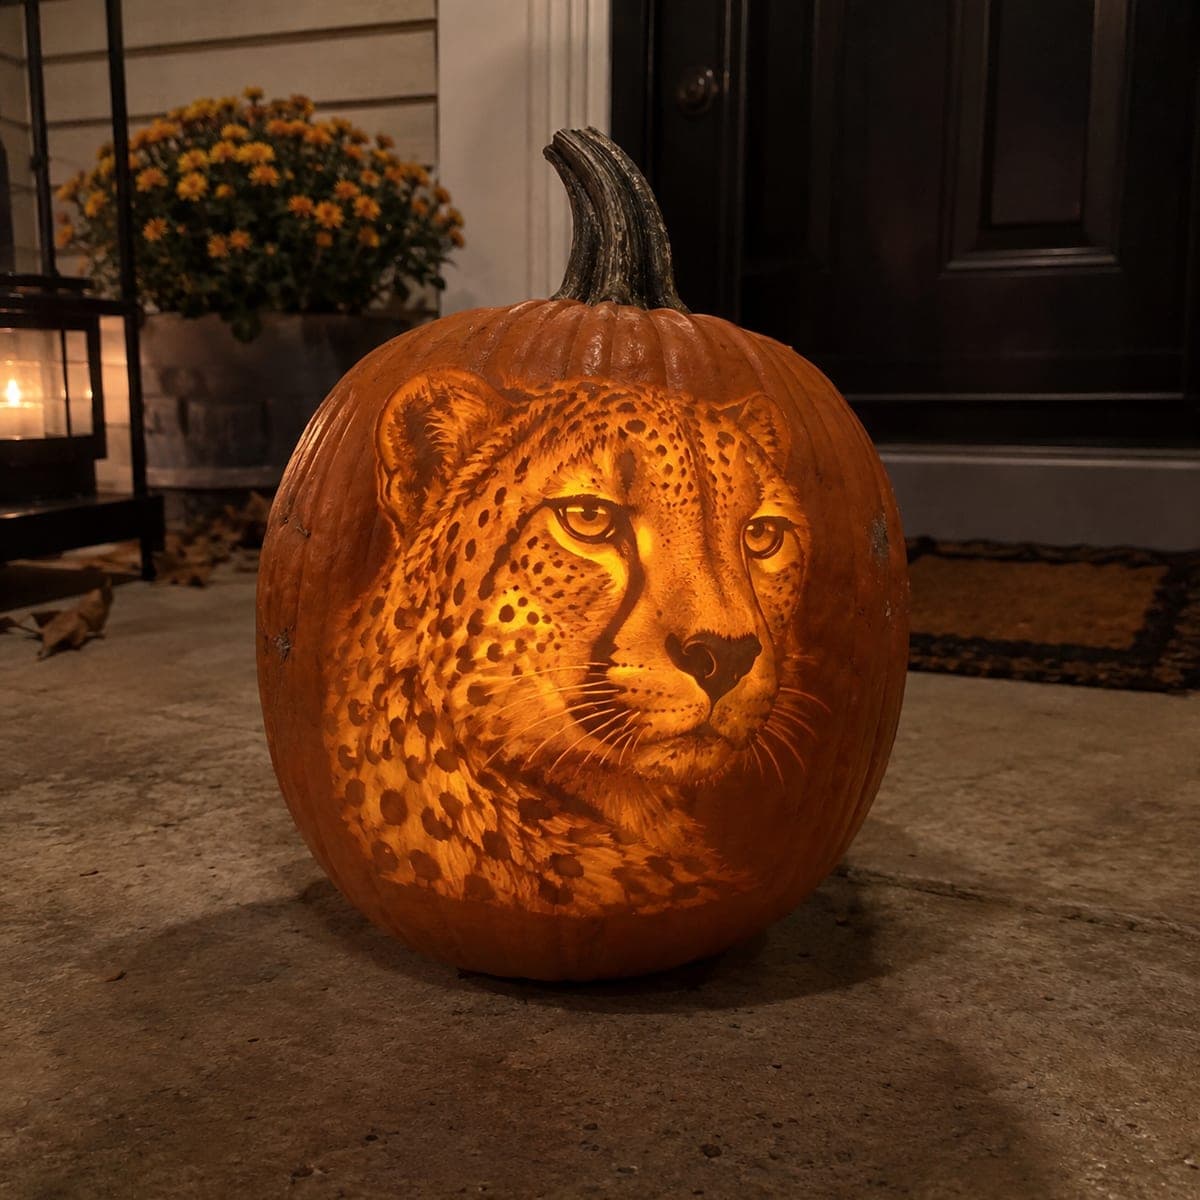
Rooster Portrait Carved Pumpkin with Feather DetailAI
0

Rooster Portrait Carved Pumpkin with Feather Detail

A bold rooster head fills the face of an orange pumpkin, feathers fanning from crown to chest in deeply shaded layers of orange and gold. The pumpkin carving idea uses surface shading at several depths to separate the beak, comb, wattle, and individual feathers without a single cutout opening. Work the background to a medium depth first to create contrast, then carve the fine feather lines with a v-gouge going from body outward so chip-outs follow the natural grain direction. The result glows warmly on a porch step from even a low tea-light inside.

This is an AI-generated concept image: a realistic, carvable design idea rather than a photo of a finished carve. AI concepts are always labeled and sit out the leaderboard and the contest.

No ratings yet · Sign in to rate
Comments (0)

  • No comments yet — be the first.

Save without an account. Sign in to like or comment.

Our tips for carving a similar design

The whole rooster is built from surface shading at different depths, with no cutouts at all, so the light glows through the thinned pumpkin wall instead of open holes. The core trick is contrast: scoop the background to a medium depth first so the rooster reads as a raised silhouette, then use a v-gouge to carve feather lines from the body outward. Beak, comb, and wattle each get their own depth so the light separates them naturally.

Written by PumpkinCarvingIdeas.com, inspired by the image above. These are our suggestions, not instructions from the uploader. This approach to the AI concept has not been tested on a real pumpkin.

From pumpkin to porch

  1. Prep the pumpkin and transfer the design

    Pick a tall pumpkin with a smooth, wide face and cut a lid from the bottom rather than the top so the stem stays intact for display. Scoop the inside until the front wall is about one inch thick, which is thin enough to glow when shaded. Tape your rooster stencil to the flattest part of the face and poke the outline with a transfer tool or push pin. Trace the comb, eye, beak, wattle, and the main feather groups so you have a clear map before any blade touches the skin.

  2. Score the outlines and background edge

    With a fine detail saw or a small knife, lightly score along the outer edge of the rooster silhouette and the border where feathers meet the plain background. These are guide cuts only, so keep them shallow. Scoring first keeps your later shading strokes from wandering past the design. Take your time and let the point follow the traced lines rather than forcing it.

  3. Shade the background to medium depth

    Use a ribbon or loop tool to peel away the skin in the whole background area around the rooster, going down to a medium depth so it glows dim orange. Keep this layer even so the raised rooster pops against it. Work in smooth passes and brush out the pulp as you go to see your progress. This step does the most work to make the bird stand out, so be patient and check it against a light.

  4. Carve the feather layers from body outward

    Switch to a small v-gouge and cut the feather lines starting near the body and pulling outward toward the tips, so each chip follows the natural grain and flakes off cleanly. Vary your depth: deeper strokes read as bright feather edges, shallow scrapes stay dim for the ones tucked behind. Overlap the feather groups the way shingles layer so the chest and neck feel full. Rock the gouge gently rather than digging, and re-sharpen if the tool starts to tear instead of slice.

  5. Detail the comb, eye, beak, and wattle

    Give the comb and wattle a shallower peel than the deepest feathers so they glow a touch softer and read as a different texture. Round the beak by shading its lower edge deeper than its top to suggest a curved surface. For the eye, thin a small round area for the bright ring and leave a tiny dot of untouched skin in the center for the pupil. Keep every stroke as surface work, since this design has no openings to cut through.

  6. Light it and photograph

    Set a battery LED puck or a string of warm LEDs inside, never an open flame, since candle heat can scorch a thin shaded wall. Position the light low and slightly forward so it washes up through the feather detail. Take your photo at dusk on a porch step to catch the warm glow against the dark. If any area looks flat, thin it a little more and check again.

Gather your supplies

Check things off as you get ready.

Work on a stable surface, keep your free hand out of the cutting path, and have an adult handle sharp tools.

Three levels of light

  • Leave intact

    The plain background field and the tiny center dot of the eye stay as untouched skin so they read dark.

  • Peel & shade

    The comb, wattle, and the bulk of the feathers get skin-peeled to varying depths for a mid orange glow.

  • Cut through

    Nothing is cut all the way through on this design, but the thinnest scraped feather edges and the eye ring glow brightest.

Learn the carving basics

Before you start cutting

This design has no cutouts, so how does it light up?

All the glow comes from thinning the pumpkin wall to different depths, called relief or shading carving. Where you peel deeper, more light passes through and the pumpkin looks brighter. Because there are no open holes, the effect stays soft and even, which suits a detailed portrait like this rooster.

Why carve feather lines from the body outward?

Pulling the v-gouge from the body toward the feather tips lets each chip break away along the natural grain, so the cuts come out clean instead of ragged. It also mimics how real feathers layer, giving the chest and neck a natural flow. Work in the same direction across each feather group for a consistent look.

How thick should the shaded wall be so it glows but stays strong?

Scoop the inside of the face to about one inch before you start shading, then remove skin from there. In the brightest feather edges you can go quite thin, but leave enough material that the wall does not become translucent and floppy. Check against your LED as you work and stop thinning once an area glows the way you want.

Your take belongs here, too.

Changed a detail? Made it simpler? Share a photo of your version and tell the community what worked.

Share your pumpkin

More pumpkins like this

You've reached the end · 8 pumpkins
The Patch Report

Fresh pumpkins, in your inbox.

The best new carvings, ideas worth stealing, and how-tos for carving season. Short, seasonal, and gone by November.

A short email during carving season. Unsubscribe anytime. See our privacy policy.