Halloween Pumpkin Carving Contest · Starts October 1st · $500 in prizes
← Back to ideas
@ai_concepts
Jul 29, 2026
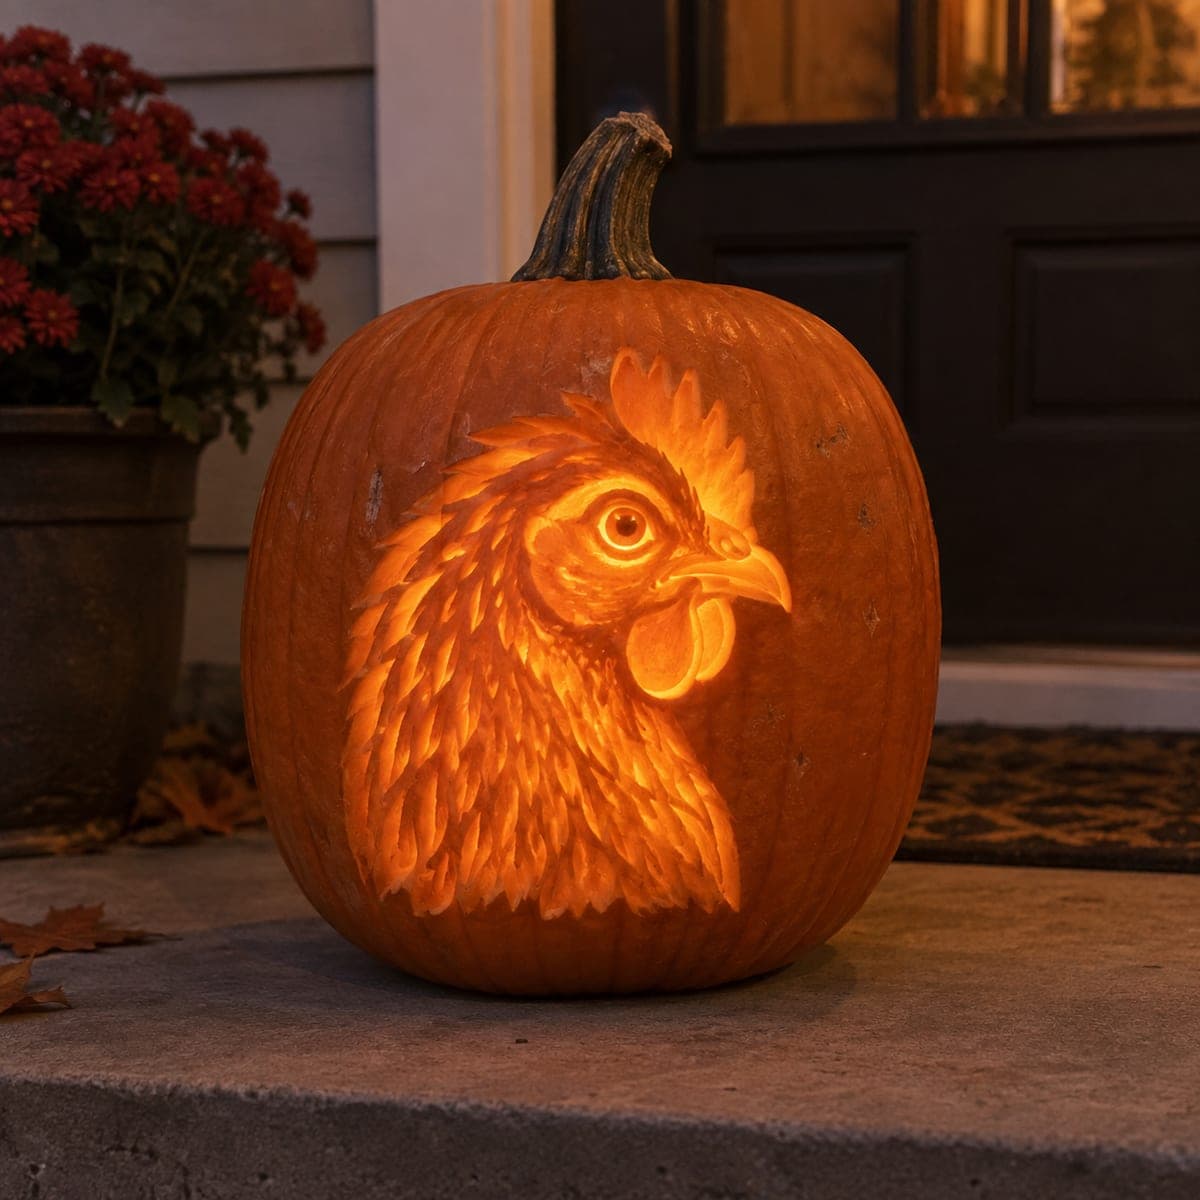
Crowing Rooster Pumpkin Carving With Feathered TailAI
0

Crowing Rooster Pumpkin Carving With Feathered Tail

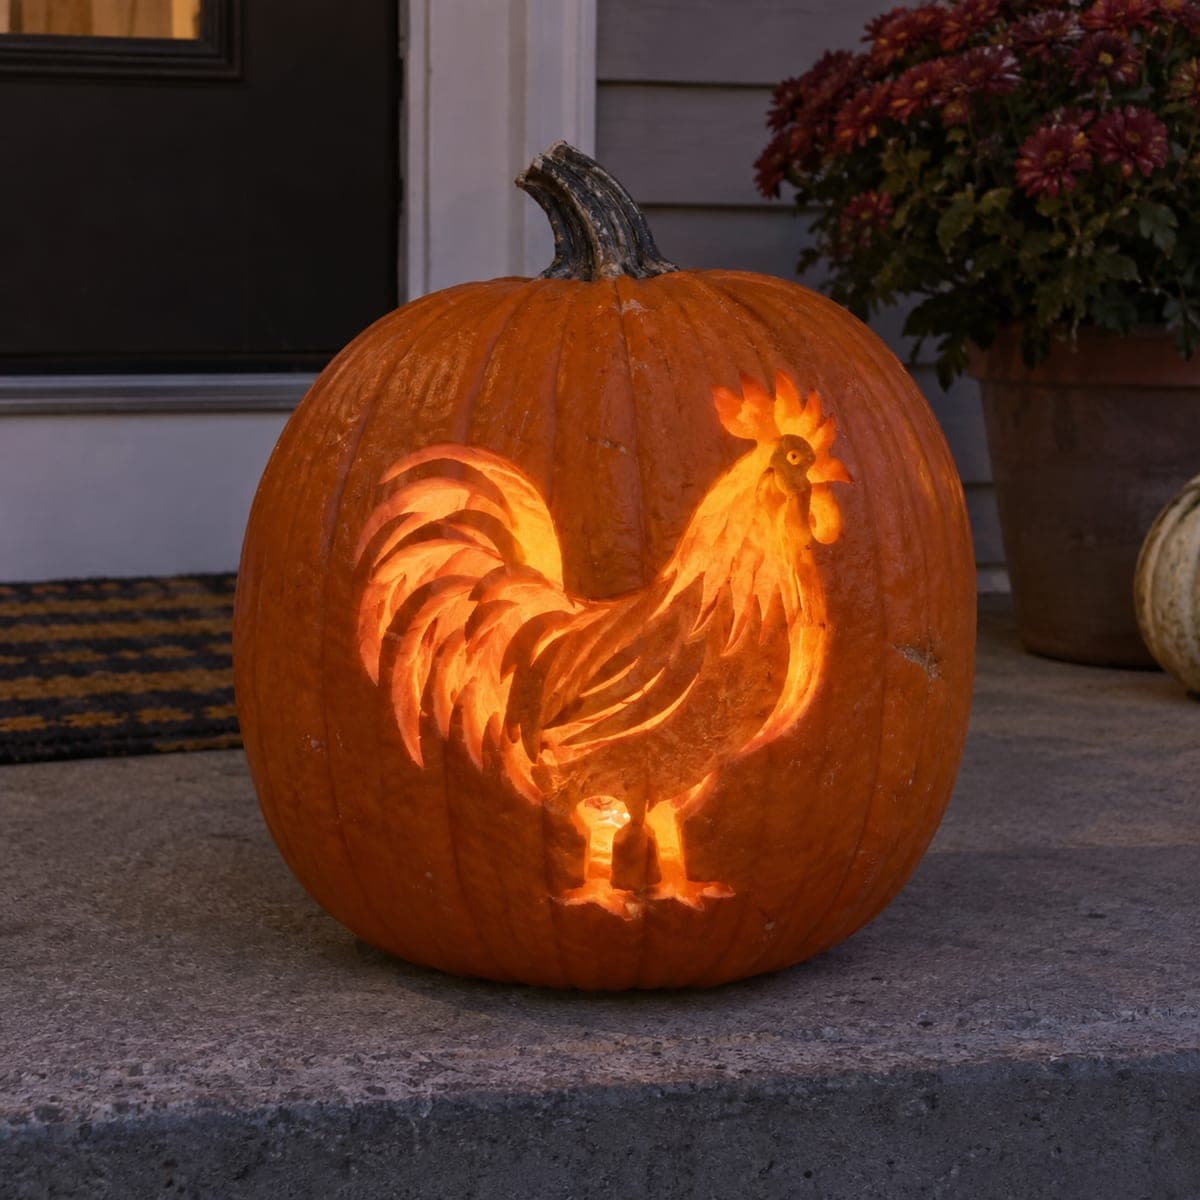
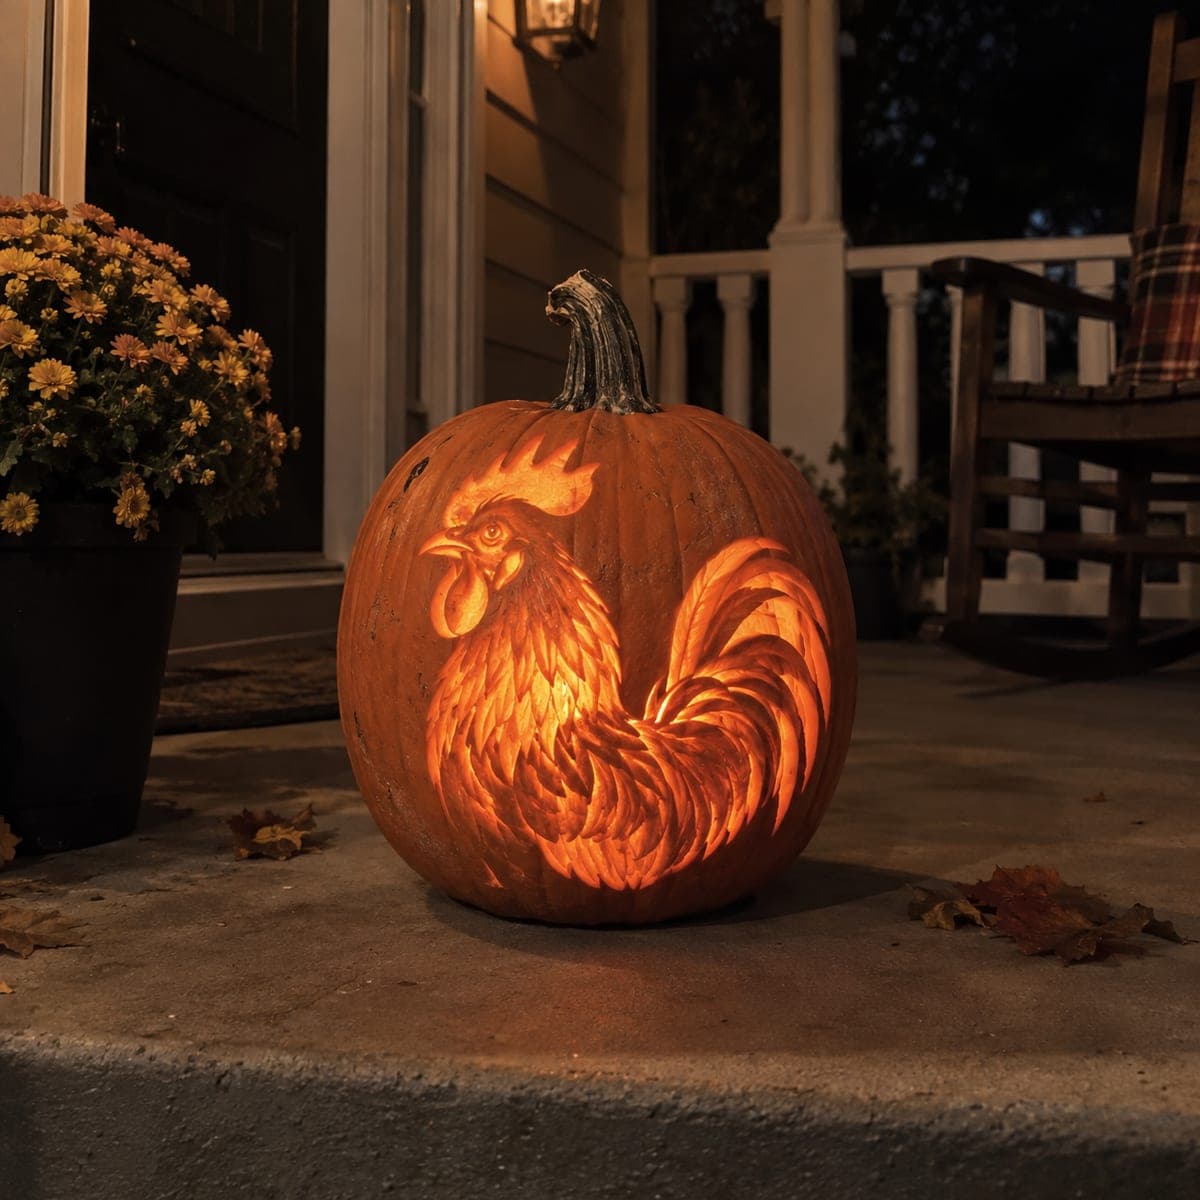
Backlit feathers cascade through this rooster pumpkin carving, from the detailed head and wattle down a wing of layered plumes to a huge sweeping tail. The bird glows in graded tones because each feather group is shaved to a different thickness, with only tiny slivers cut fully through for sparkle. Work feather by feather from the head backward, and keep a spray bottle handy so the thin areas do not dry and crack mid-carve. This one deserves a prime porch spot.

This is an AI-generated concept image: a realistic, carvable design idea rather than a photo of a finished carve. AI concepts are always labeled and sit out the leaderboard and the contest.

No ratings yet · Sign in to rate
Comments (0)

  • No comments yet — be the first.

Save without an account. Sign in to like or comment.

Our tips for carving a similar design

The whole effect here comes from shading, not cutting. Each feather group is shaved to a different thickness so the pumpkin glows in graded tones, with only a few tiny slivers cut fully through for sparkle. Since this is an AI concept image and no real pumpkin exists, treat it as a target look and plan to build it feather by feather from the head toward the tail.

Written by PumpkinCarvingIdeas.com, inspired by the image above. These are our suggestions, not instructions from the uploader. This approach to the AI concept has not been tested on a real pumpkin.

From pumpkin to porch

  1. Pick a big pumpkin and open it from the back

    Choose a tall, wide pumpkin with a smooth clean face for the rooster. Cut a large access hole in the back rather than the top so the front stays unbroken for your feathers. Scrape the inside wall behind the design down to about one inch thick so light passes through evenly. A thinner, uniform wall makes shading much more predictable.

  2. Transfer the rooster outline

    Tape your stencil over the front and poke the main outlines with a pin: the head, comb, wattle, body, wing, and the sweeping tail. Mark which zones are darkest and which are brightest so you have a road map before any blade touches the shell. Keep the drawing loose since the feathers are built with texture, not precise lines. Take a photo of the marked pumpkin as a reference.

  3. Shave the mid-tone feathers first

    Using a ribbon or gouge tool, skin off just the orange outer layer across the body and wing to create the base mid glow. Work one feather at a time, following the direction each plume points. Vary how deep you shave so some feathers read lighter than their neighbors. Mist the surface with a spray bottle often so thin areas do not dry out and crack while you work.

  4. Deepen the brightest plumes

    Go back into the tail and the leading edges of the wing and shave those feathers thinner so they glow brighter. Leave a raised lip between feathers to keep each one distinct and to hold the shape. This layering from head backward is what gives the tail its cascading depth. Stop shaving before you break through, since the goal is graded light, not open holes.

  5. Detail the head and add sparkle cuts

    Carve the eye, beak, and wattle with the most contrast so the face stays the focal point. Only now make the few tiny full cutouts, small slivers along feather tips and a highlight in the eye, for bright sparks. Cut these last and keep them small so the shell stays strong. Leave narrow bridges of skin between cuts so no feather tip falls away.

  6. Light it and photograph on the porch

    Drop in a bright LED puck or two, never a candle, and aim the light so it fills the tail. Set the pumpkin on a covered porch step and check the glow from a few feet back. Touch up any feather that reads too dark by shaving it a hair thinner. Rub the cut edges with petroleum jelly to slow drying and take your photos the first night when detail is crispest.

Gather your supplies

Check things off as you get ready.

Work on a stable surface, keep your free hand out of the cutting path, and have an adult handle sharp tools.

Three levels of light

  • Leave intact

    Background pumpkin skin around the bird and the darkest shadow feathers stay untouched for contrast.

  • Peel & shade

    The body, wing, and most of the tail feathers are skin-peeled to different depths for the graded orange glow.

  • Cut through

    Only a few tiny slivers at feather tips and a highlight in the eye are cut fully through for bright sparkle.

Learn the carving basics

Before you start cutting

How do I get the feathers to glow in different shades?

The tones come entirely from thickness. Shave each feather group to a slightly different depth, leaving thicker skin where you want dim areas and thinner skin where you want brighter areas. Test often with your LED inside, since the glow looks very different lit than it does in daylight.

Do I need to cut any big openings for this design?

No, and that is the point. This rooster is almost all shading, with just a handful of tiny sliver cuts for sparkle. Keeping the shell mostly intact is what lets the graded light read as feathers instead of holes, and it keeps the pumpkin structurally strong.

How do I stop the thin shaved areas from cracking?

Mist the surface with a spray bottle every few minutes while you carve so the shaved feathers do not dry out. When you finish, rub petroleum jelly over the cut and shaved areas to seal in moisture. Keep the pumpkin cool and out of direct sun between display sessions.

Your take belongs here, too.

Changed a detail? Made it simpler? Share a photo of your version and tell the community what worked.

Share your pumpkin

More pumpkins like this

You've reached the end · 8 pumpkins
The Patch Report

Fresh pumpkins, in your inbox.

The best new carvings, ideas worth stealing, and how-tos for carving season. Short, seasonal, and gone by November.

A short email during carving season. Unsubscribe anytime. See our privacy policy.