Halloween Pumpkin Carving Contest · Starts October 1st · $500 in prizes
← Back to ideas
@ai_concepts
Sep 25, 2026
Simple Mountain Triangle and Moon Pumpkin CarvingAI
0

Report this carving

Tell us what is wrong. Reports are private.

Simple Mountain Triangle and Moon Pumpkin Carving

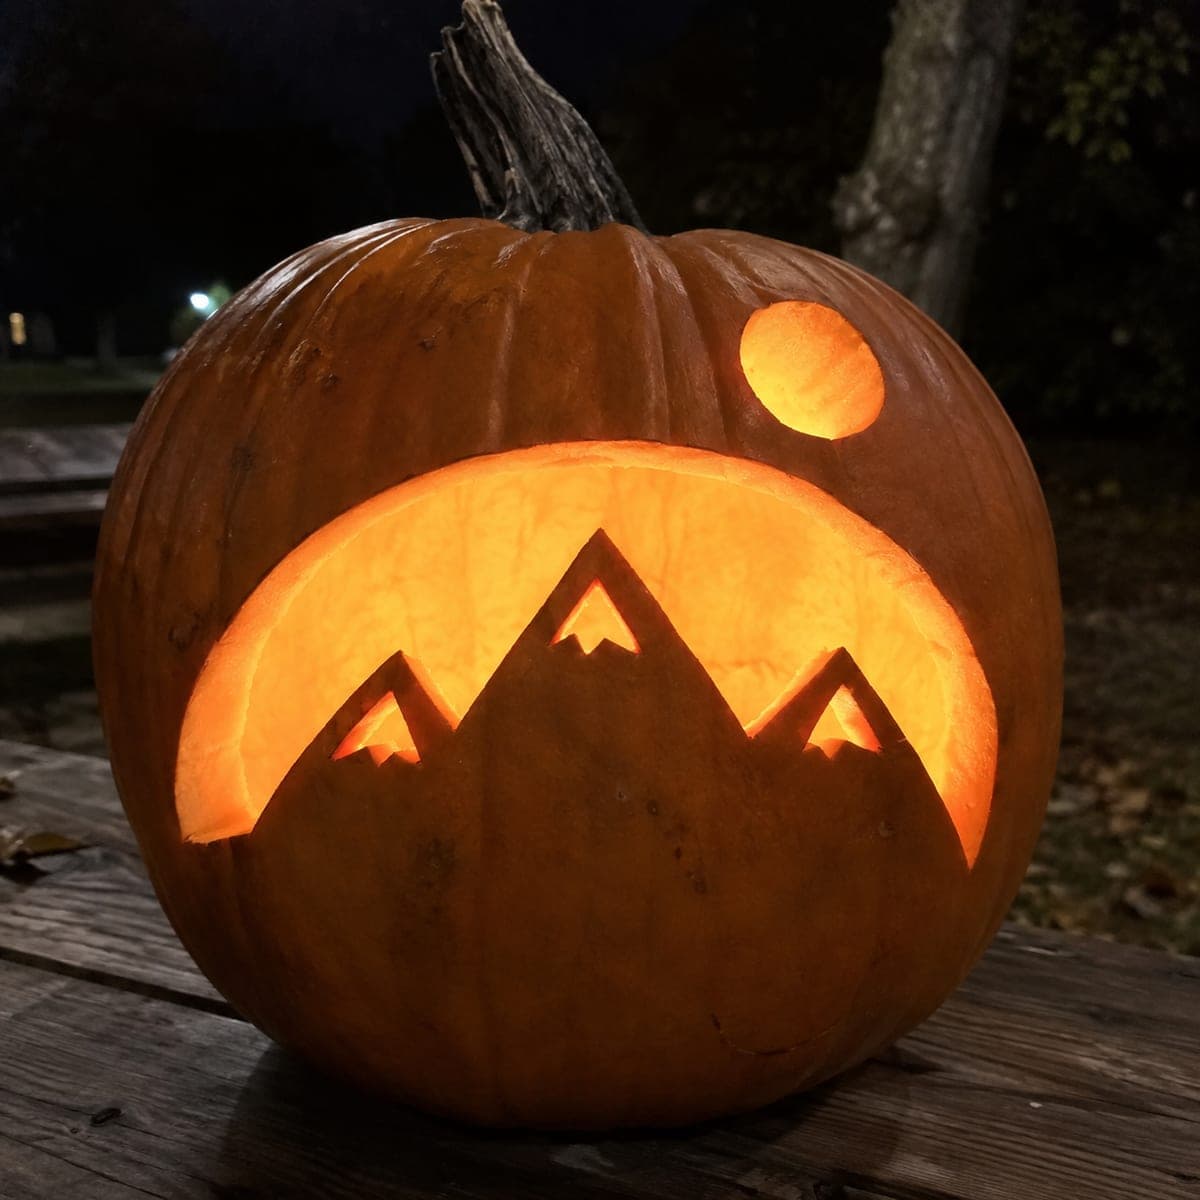
Separate glowing mountain triangles and a circular moon cutout make this easy mountain pumpkin carving idea approachable for carvers of any skill level. Each triangle and the moon are independent apertures with wide rind between them, so no piece is at risk of falling out. Cut the moon circle first to get a feel for your saw, then move to the triangles working from the largest to the smallest. A candle inside makes the geometric shapes glow like a minimalist night-sky illustration.

No ratings yet · Sign in to rate

Comments (0)

  • No comments yet — be the first.

Save without an account. Sign in to like or comment.

Our tips for carving a similar design

The mountain triangles and circular moon are all independent apertures separated by wide rind, so no piece is at structural risk and beginners can cut each shape with confidence. Cutting the moon circle first builds familiarity with curved cuts before moving to the angled triangle edges. The geometric shapes glow like a minimalist night-sky illustration against the solid orange rind.

From pumpkin to porch

  1. Hollow the pumpkin

    Cut a wide back lid and scoop interior pulp until walls are an inch thick throughout. Even wall thickness makes cutting the circle and triangles easier to control. Wipe the face dry before attaching any template.

  2. Transfer the layout

    Arrange the moon circle above the mountain triangles on a template sheet sized to the pumpkin face. Confirm at least an inch of rind separates all shapes from each other and from the pumpkin edges. Tape the template flat, trace with a stylus, remove the paper, and go over the lines with a marker.

  3. Cut the moon circle

    Use a small jab saw to cut the circular moon opening with smooth curved strokes. Work around the circle in sections, rotating the pumpkin toward you as you go. The curved cut builds your saw confidence for the more angular triangle cuts that follow.

  4. Cut the largest mountain triangle

    Start with the tallest central triangle. Three straight cuts form the shape, one per side. Keep each cut line clean and straight by using a single confident stroke rather than short choppy ones. Push the triangle waste piece inward to release it.

  5. Cut the remaining triangles

    Work outward from the central triangle to the flanking smaller ones. Straight-sided triangles are among the fastest cuts in pumpkin carving. Confirm wall thickness after each cut to make sure no section is thinning unexpectedly.

  6. Light and display

    Place a battery LED or candle inside centered below the moon opening. The geometric shapes cast clean glowing forms. A dark shelf, step, or windowsill after dark lets the minimalist design read clearly without any distraction.

Written with AI to match this design

Gather your supplies

Check things off as you get ready.

Work on a stable surface, keep your free hand out of the cutting path, and have an adult handle sharp tools.

Three levels of light

  • Leave intact

    All rind surrounding and between the mountain triangles and moon circle stays solid and dark

  • Peel & shade

    None on this design

  • Cut through

    All mountain triangle apertures and the moon circle cut fully through for geometric amber glow

Learn the carving basics

Before you start cutting

How many mountain triangles should I cut for a balanced composition?

Three triangles work well: one tall central peak flanked by two shorter ones. This creates a natural focal point and mirrors the classic mountain silhouette look without overcrowding the face. If the pumpkin is large, a fourth smaller triangle off to one side adds depth.

Can I tilt the moon circle slightly so it looks like a crescent instead of a full moon?

The design is built around a full circular cut-through, so the opening itself is always a full circle. For a crescent look, cut a smaller circle and then add a second slightly overlapping circle immediately adjacent, cutting out the overlap section to create a crescent outline. This is a more advanced modification that requires precise template work.

My triangle corners look slightly rounded after cutting. How do I sharpen them?

Push the tip of a paring knife into each corner at a precise angle and make a short controlled cut to deepen the apex. Clean out any remaining attached rind at the corner point with the knife tip. Slightly rounded corners are barely noticeable once the pumpkin is lit and are not worth aggressive correction that could widen the triangle.

Your take belongs here, too.

Changed a detail? Made it simpler? Share a photo of your version and tell the community what worked.

Share your pumpkin

More pumpkins like this

You've reached the end · 8 pumpkins
The Patch Report

Fresh pumpkins, in your inbox.

The best new carvings, ideas worth stealing, and how-tos for carving season. Short, seasonal, and gone by November.

A short email during carving season. Unsubscribe anytime. See our privacy policy.