Halloween Pumpkin Carving Contest · Starts October 1st · $500 in prizes
← Back to ideas
@ai_concepts
Sep 25, 2026
Mountain Range Pumpkin With Glowing Snowcap OpeningsAI
0

Report this carving

Tell us what is wrong. Reports are private.

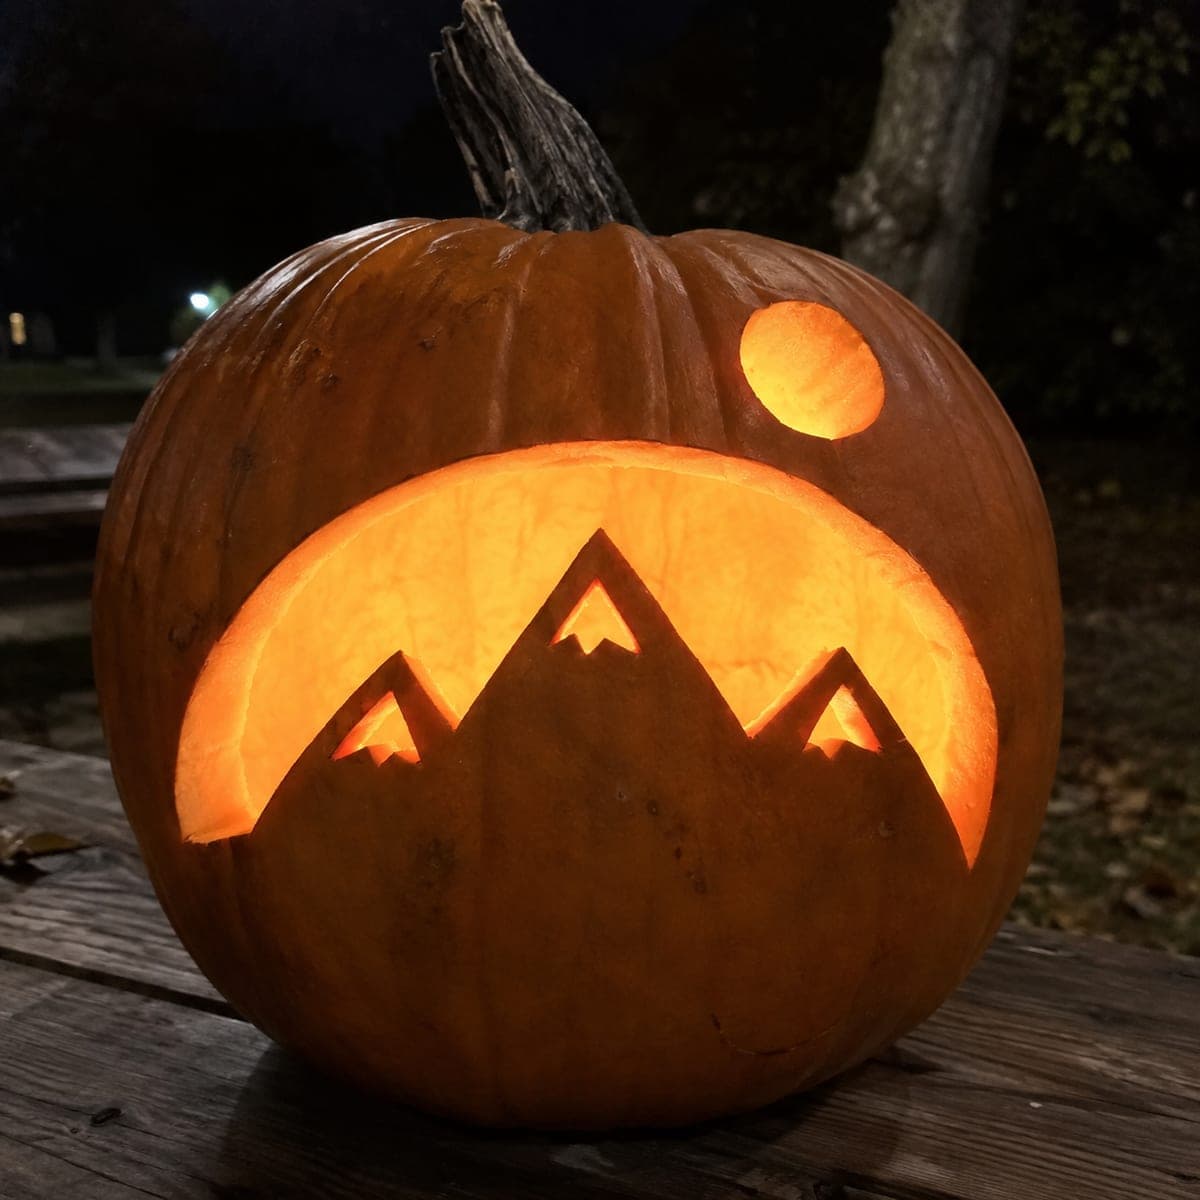
Mountain Range Pumpkin With Glowing Snowcap Openings

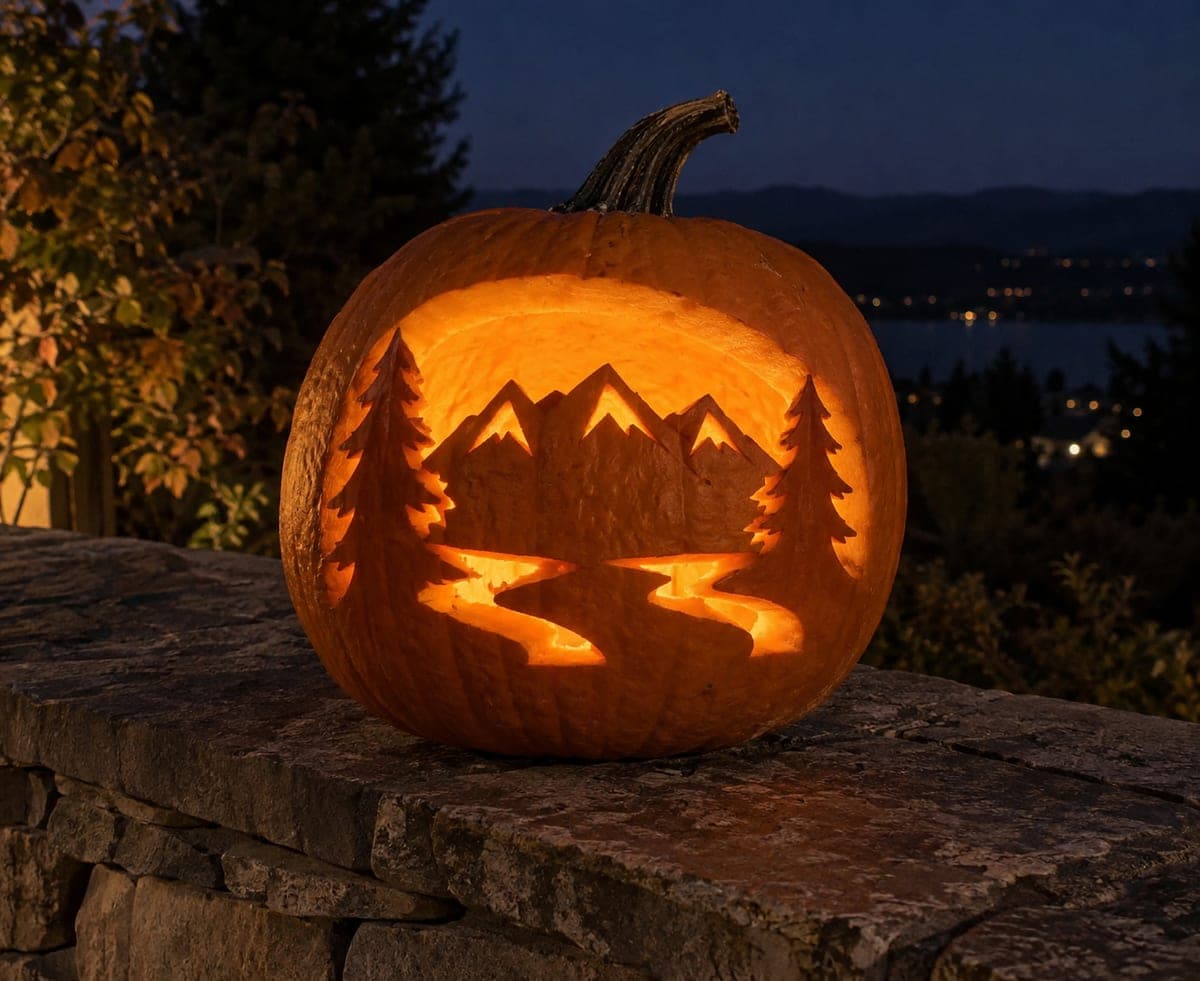
Broad mountain bases merge with the pumpkin shell while small snowcap apertures glow against the retained rind on this medium mountain pumpkin carving idea. The solid mountain silhouettes act as structural anchors, making this design sturdier than its layered look suggests. Score the mountain outlines first, cut the broad bases into the shell surface as shallow relief, then punch through only the snowcap shapes for a two-tone lit effect. The contrast between the opaque mountain bodies and the brightly glowing peaks is the design's strongest visual feature.

No ratings yet · Sign in to rate
Comments (0)

  • No comments yet — be the first.

Save without an account. Sign in to like or comment.

Our tips for carving a similar design

The broad mountain bases are carved as shallow relief into the shell surface, staying opaque while only the snowcap shapes at the peak tips are cut fully through for bright glow. Scoring the mountain outlines first establishes the relief boundary, and then the snowcap punch-throughs are cut within those boundaries. The contrast between the dark mountain silhouettes and the brightly glowing peaks is the strongest visual element.

From pumpkin to porch

  1. Hollow to even wall depth

    Cut the back lid and scrape interior walls to a consistent inch thick, paying particular attention to the upper face area where the snowcap cut-throughs will go. An uneven wall can cause the snowcap cuts to break through unexpectedly during the shallow mountain relief work.

  2. Transfer mountain and snowcap outlines

    Tape the template showing both the full mountain silhouettes and the smaller snowcap shapes within them. Trace all outlines with a stylus. Mark the mountain body areas for shallow relief in one color and the snowcap cut-throughs in a second color.

  3. Score and carve the mountain bases as relief

    Use a linoleum V-tool or a paring knife to score the mountain silhouette outlines into the rind. Then use a wide linoleum gouge or paring knife to carefully shave the rind surface within each mountain to a depth of about a third of the wall thickness. Keep the relief surface smooth and consistent.

  4. Cut the snowcap apertures

    Use a small jab saw or detail knife to cut the snowcap shapes fully through the rind within the already-relieved mountain body areas. The reduced wall thickness from the relief work makes these cuts easier to control. Push each snowcap piece inward gently to release it.

  5. Check and refine

    Hold a flashlight inside the pumpkin in a darkened room to check that the snowcap cut-throughs glow brightly and the mountain relief areas glow faintly or not at all depending on depth. Deepen any mountain relief areas that are glowing more than intended.

  6. Display and light

    Place a bright battery LED inside and confirm the two-tone effect reads clearly. Position outdoors or on a display surface where viewers approach from the front so the snowcap versus mountain contrast is immediately visible.

Written with AI to match this design

Gather your supplies

Check things off as you get ready.

Work on a stable surface, keep your free hand out of the cutting path, and have an adult handle sharp tools.

Three levels of light

  • Leave intact

    Broad mountain body areas carved to shallow relief stay mostly dark against the orange surface

  • Peel & shade

    Shallow relief mountain areas glow faintly at partial wall depth for a muted two-tone effect

  • Cut through

    Snowcap apertures cut fully through the mountain body for bright peak glow

Learn the carving basics

Before you start cutting

What is the right depth for the mountain body relief so it looks distinct from the untouched rind?

A third of the wall thickness is usually enough for the relief area to catch light differently from the untouched orange rind but not enough to transmit significant interior glow. Check the difference with a flashlight inside: the untouched rind should appear dark while the relieved mountain area shows just a faint surface texture variation.

Can I skip the relief carving and just cut all the snowcaps as separate holes in untouched rind above the mountains?

Yes, that is a simpler approach. The snowcaps would glow just as brightly, but you would lose the low mountain silhouette shadow effect that makes this design distinctive. Without the mountain relief, the snowcap holes just float against plain orange rind and the layered landscape illusion disappears.

How do I stop the mountain body relief from going too deep accidentally?

Work in thin passes with the linoleum gouge rather than pressing deeply in a single stroke. After every pass, test the depth by pressing a fingernail against the rind in the relief area. The rind should feel firm and springy, not thin or flexible. Stop at the first sign of flex.

Your take belongs here, too.

Changed a detail? Made it simpler? Share a photo of your version and tell the community what worked.

Share your pumpkin

More pumpkins like this

You've reached the end · 8 pumpkins
The Patch Report

Fresh pumpkins, in your inbox.

The best new carvings, ideas worth stealing, and how-tos for carving season. Short, seasonal, and gone by November.

A short email during carving season. Unsubscribe anytime. See our privacy policy.