Halloween Pumpkin Carving Contest · Starts October 1st · $500 in prizes
← Back to ideas
@ai_concepts
Sep 25, 2026
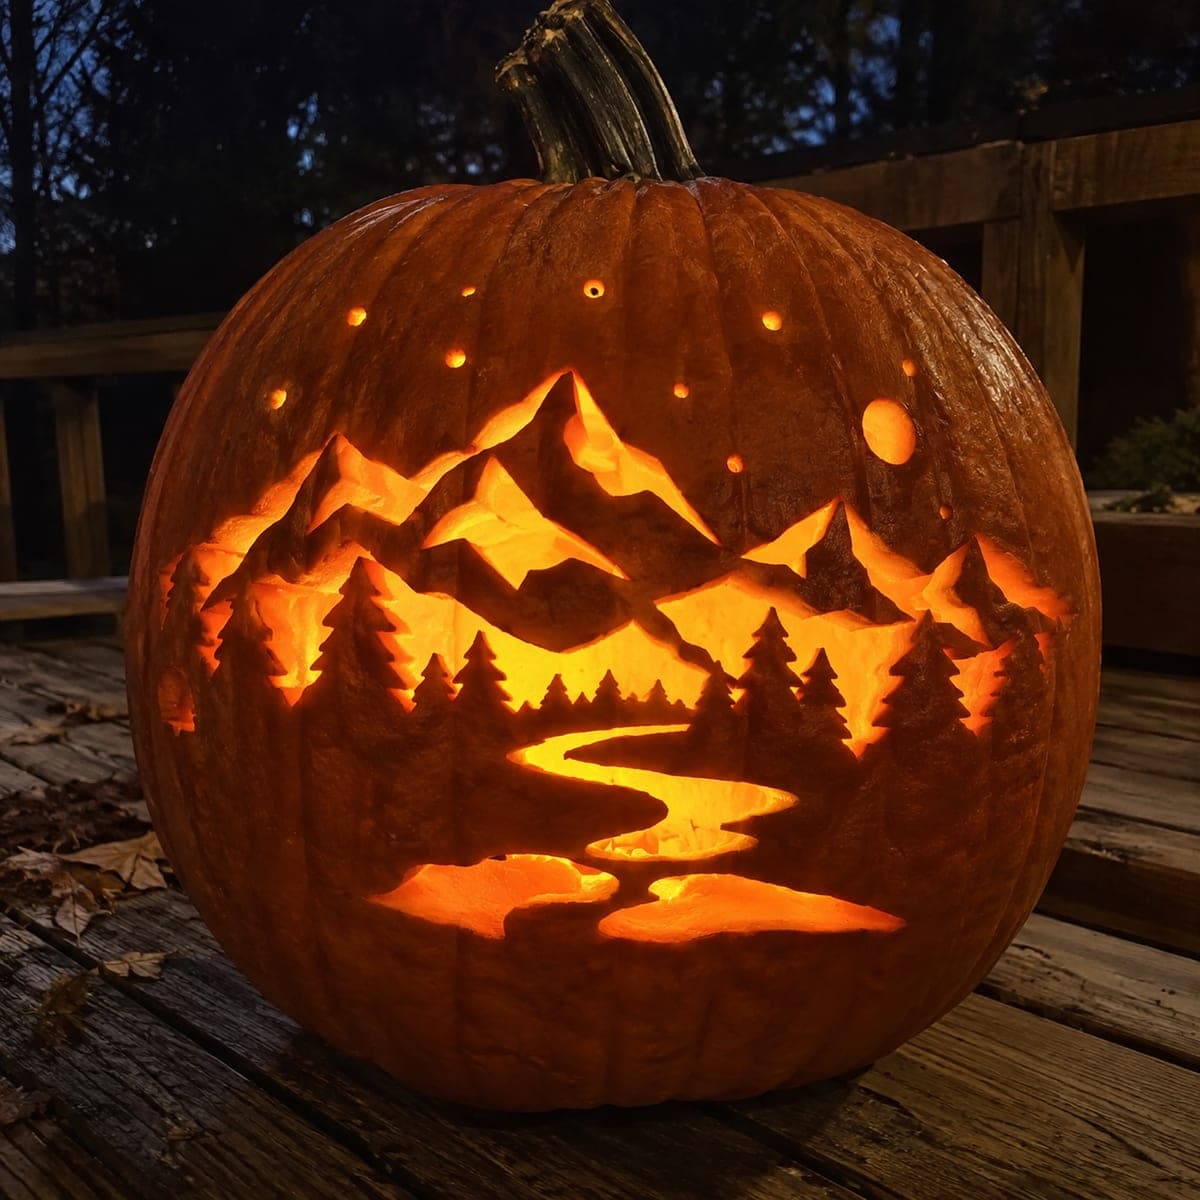
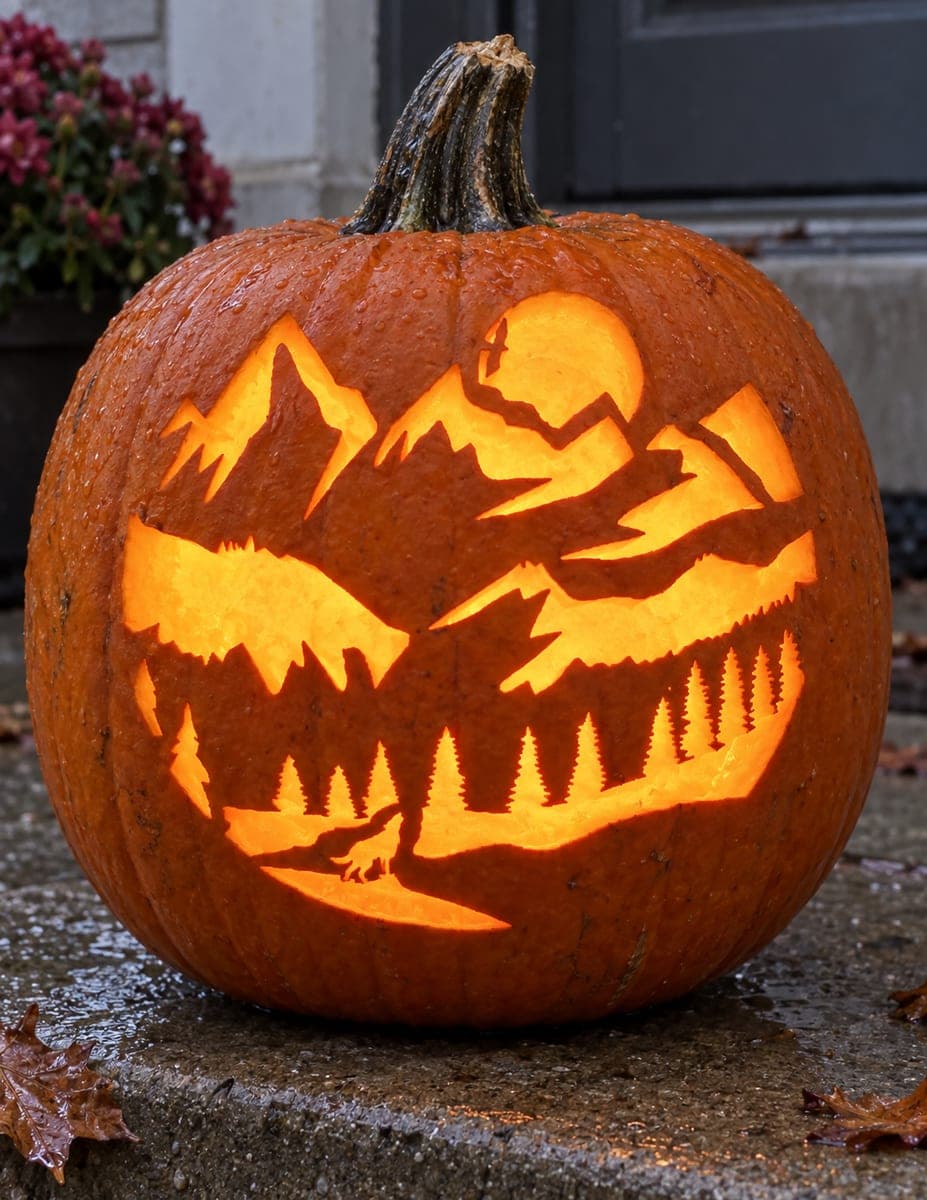
Intricate Mountain Landscape Pumpkin With Ridgeline AperturesAI
0

Report this carving

Tell us what is wrong. Reports are private.

Intricate Mountain Landscape Pumpkin With Ridgeline Apertures

Connected ridgelines, rooted pine trees, and flowing river openings form a full landscape on this expert mountain pumpkin carving, with each aperture preserved by broad structural bridges. The separate landscape openings require careful planning: map all the apertures before making any cuts to confirm every piece of rind stays connected. Cut the largest sky windows first, then the river sections, and finish with the pine-tree negative spaces along the ridgeline. Stone steps at night make an ideal display spot for this ambitious pumpkin carving idea.

No ratings yet · Sign in to rate

Comments (0)

  • No comments yet — be the first.

Save without an account. Sign in to like or comment.

Our tips for carving a similar design

The full landscape requires connected ridgelines that anchor at both sides of the pumpkin, pine trees with broad root connections, and flowing river apertures that snake between structural elements. Every aperture in the design is preserved by broad structural bridges, which means careful pre-cut mapping is not optional. The largest sky windows are cut first, then the river sections, and finally the pine-tree negative spaces along the ridgeline where bridges are at their narrowest.

From pumpkin to porch

  1. Map all apertures on paper before cutting

    Before touching the pumpkin, draw the full composition on a sheet of paper at scale and trace the path of every planned aperture. Identify every bridge, confirm each is at least half an inch wide, and mark any areas where the aperture-to-bridge ratio looks tight. Adjusting the template now is far easier than repairing a cracked bridge mid-carve.

  2. Hollow and prep carefully

    Cut the back lid and scrape walls to a consistent inch and a half. Expert designs benefit from slightly thicker walls because thin spots can crack unexpectedly when narrow ridgeline bridges are under stress. Transfer the full template with a stylus and use a three-color marker system: one for solid structure, one for full apertures, one for any planned shallow backed areas.

  3. Cut the largest sky windows

    Open the largest sky windows first, working from the widest section toward the narrower ridge passages. The outer pumpkin rim braces these upper cuts while the ridgeline and pine tree roots below remain fully intact. Remove each sky piece by pushing inward and check structural feel after each cut.

  4. Cut the river sections

    The river sections snake between retained mountain and tree forms. Cut each river segment individually rather than as one continuous cut, working from the widest bends to the tightest. Keep constant track of the bridges between river segments and adjacent pine tree roots.

  5. Cut pine-tree negative spaces along the ridgeline

    The pine-tree spaces are the narrowest cuts in the design, bordered tightly by ridgeline rind above and root rind below. Work with a fine detail saw using very short strokes. Confirm every root-to-ridgeline bridge remains intact after each pine-space is opened.

  6. Light and display on stone steps

    Place a very bright battery LED inside to illuminate the full depth of the landscape. Stone steps at night provide an ideal display surface that does not compete visually with the design. Step back at least six feet to appreciate the full panoramic effect from a distance.

Written with AI to match this design

Gather your supplies

Check things off as you get ready.

Work on a stable surface, keep your free hand out of the cutting path, and have an adult handle sharp tools.

Three levels of light

  • Leave intact

    All connected ridgelines, pine tree silhouettes, mountain forms, and outer rind stay dark and solid

  • Peel & shade

    None on this design

  • Cut through

    Sky windows, river apertures, and pine-tree negative spaces along the ridgeline cut fully through

Learn the carving basics

Before you start cutting

What is the single biggest risk factor for this design and how do I guard against it?

The ridgeline bridges where pine-tree negative spaces sit are the highest-risk points because the rind between an open pine space above and a river aperture below can be very narrow. Guard against it by confirming on paper that no bridge in that zone is narrower than half an inch before transferring the template. If any bridge is borderline, eliminate one pine-tree space from the design rather than accept a structural weak point.

Should I start with the river sections or the sky windows?

Start with the sky windows. They are the largest cuts and sit at the top of the design where the outer pumpkin rim provides the most bracing. Opening the sky first reveals the full ridgeline silhouette and lets you evaluate the structural condition of the entire upper landscape before tackling the more complex river sections in the middle zone.

How long can I expect an expert-level carving like this to last before it begins to deteriorate?

In cool, dry conditions a well-carved expert pumpkin typically looks its best for five to seven days. Applying a thin coat of petroleum jelly to all cut edges immediately after carving slows moisture loss. Keep the pumpkin in shade during the day and bring it indoors when not on display. Replace the battery LED regularly so fresh batteries maintain consistent brightness as the pumpkin ages.

Your take belongs here, too.

Changed a detail? Made it simpler? Share a photo of your version and tell the community what worked.

Share your pumpkin

More pumpkins like this

You've reached the end · 8 pumpkins
The Patch Report

Fresh pumpkins, in your inbox.

The best new carvings, ideas worth stealing, and how-tos for carving season. Short, seasonal, and gone by November.

A short email during carving season. Unsubscribe anytime. See our privacy policy.