Halloween Pumpkin Carving Contest · Starts October 1st · $500 in prizes
← Back to ideas
@ai_concepts
Aug 18, 2026
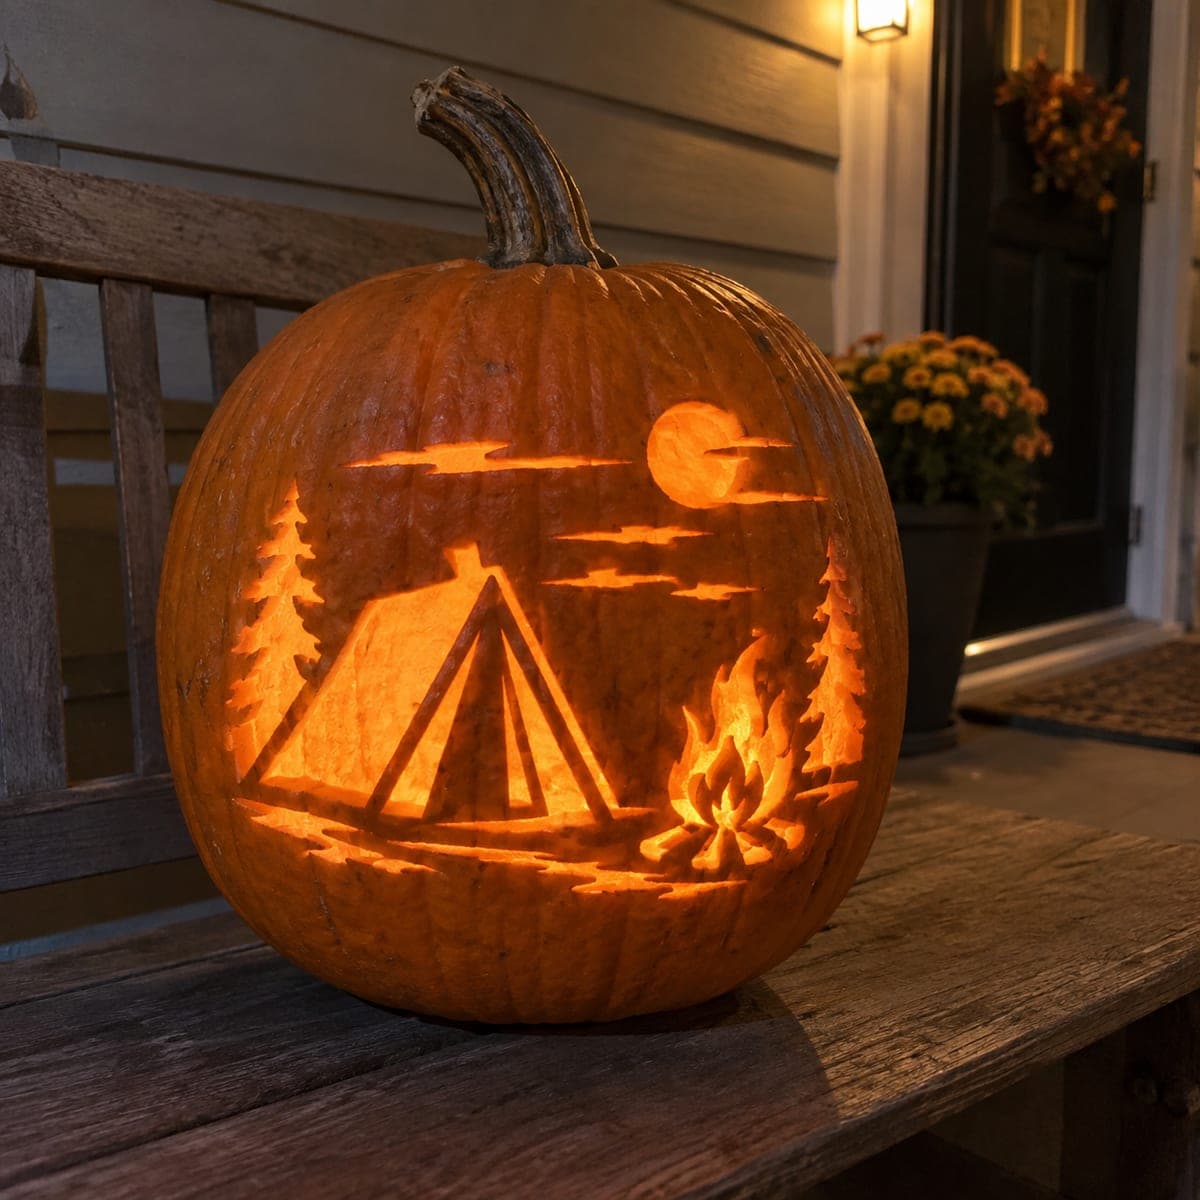
Mountain Campfire Scene Glowing Pumpkin CarvingAI
0

Mountain Campfire Scene Glowing Pumpkin Carving

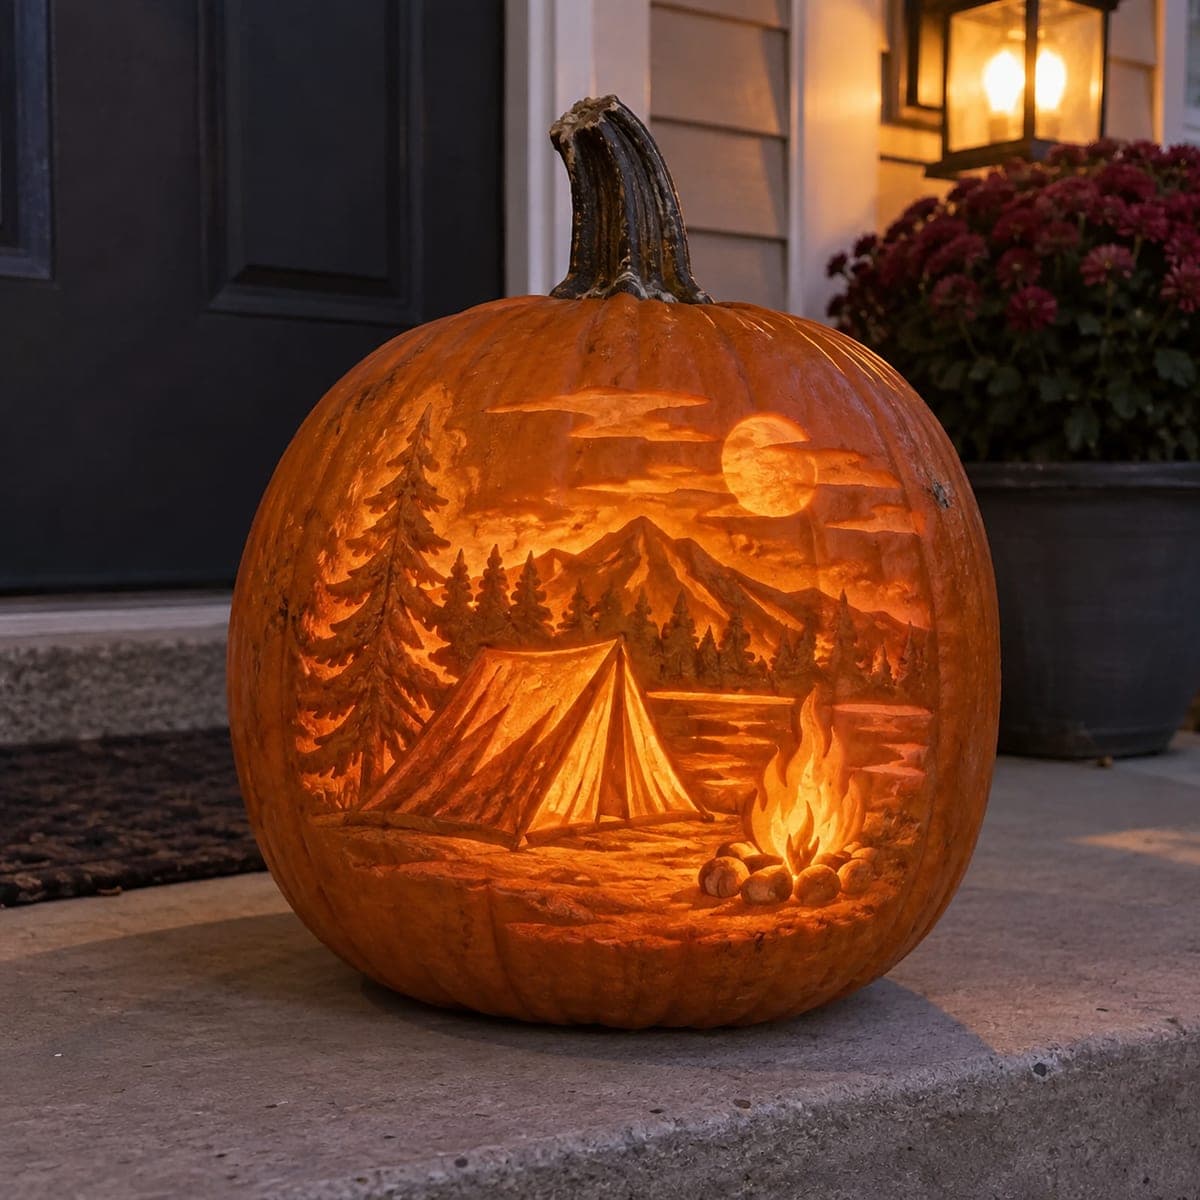
An entire wilderness postcard glows on this pumpkin: a canvas tent beside a blazing campfire, a lake reflecting carved mountains, towering pines, and a moon breaking through streaked clouds. Dozens of etched depth levels create the scene's light, from the thin bright fire to the darker tree shadows. Map the composition in marker zones first and etch the sky thinnest so it reads as distance. Rotate a warm LED inside until the fire glows hottest.

This is an AI-generated concept image: a realistic, carvable design idea rather than a photo of a finished carve. AI concepts are always labeled and sit out the leaderboard and the contest.

No ratings yet · Sign in to rate
Comments (0)

  • No comments yet — be the first.

Save without an account. Sign in to like or comment.

Our tips for carving a similar design

The core trick here is relief shading, where you skin the pumpkin to different depths rather than cutting all the way through. The plan is to map the scene into zones, then peel the sky and mountains thin so they read as soft distance while the campfire is cut deepest for the hottest glow. Everything stays connected, so the pumpkin holds its shape and the light does the storytelling.

Written by PumpkinCarvingIdeas.com, inspired by the image above. These are our suggestions, not instructions from the uploader. This approach to the AI concept has not been tested on a real pumpkin.

From pumpkin to porch

  1. Prep the pumpkin and plan the light

    Pick a large pumpkin with a broad, fairly flat front face for the scene. Cut a wide access hole in the bottom rather than the top so the design stays uninterrupted, then scrape the inside wall behind the fire and moon down to about one inch. An adult should handle all cutting tools. A thinner wall in those areas lets more light pass through later.

  2. Transfer and zone the composition

    Tape your stencil to the front and poke through the main outlines, or draw directly with a washable marker. Block the scene into marker zones: sky and clouds up top, moon, layered mountains, pine treeline, the tent, the lake, and the campfire in front. Label each zone with the depth you plan to reach so you do not lose track. This map keeps the many depth levels organized before a single cut.

  3. Etch the sky and moon first

    Using a fine loop or ribbon tool, peel the sky and cloud streaks very thinly so they glow as a soft, distant haze. Take the moon down a little deeper than the sky so it reads brighter and rounder. Leave narrow ribbons of untouched skin for the darkest cloud bands to create contrast. Work top to bottom so debris falls away from finished areas.

  4. Shade the mountains and pines

    Skin the mountains at a medium depth, leaving their shadowed slopes barely peeled and their moonlit faces peeled deeper. For the pines, carve the tree shapes but leave thin bridges of skin between branches so the delicate points stay attached and structurally sound. Vary depth from front trees to back trees to build the sense of distance. Keep the darkest tree shadows as untouched skin.

  5. Carve the tent, lake, and campfire

    Peel the tent canvas to a warm mid glow and leave its seams and pole lines as thin dark skin. Give the lake a smooth medium peel with a few brighter horizontal streaks for reflections. Save the campfire for last and cut its flames nearly or fully through so it burns brightest of all. Add the small stone ring as shallow peels so the fire stays the clear focal point.

  6. Light it and photograph

    Set a warm white LED inside and rotate it until the fire glows hottest and the sky stays soft. A second small LED aimed at the fire zone can push that area brighter if needed. Never use a candle, since the thin walls and long carving time make an open flame risky. Shoot in low light at dusk to capture the full range of depth levels.

Gather your supplies

Check things off as you get ready.

Work on a stable surface, keep your free hand out of the cutting path, and have an adult handle sharp tools.

Three levels of light

  • Leave intact

    Darkest cloud bands, shadowed mountain slopes, tent seams, and deep pine shadows stay as untouched skin.

  • Peel & shade

    The sky haze, moonlit mountain faces, tent canvas, and lake surface get skin-peeled for a mid glow.

  • Cut through

    The campfire flames are cut nearly or fully through for the brightest, hottest light in the scene.

Learn the carving basics

Before you start cutting

How do I keep so many depth levels from blending together?

Plan them before you cut by shading your reference into three or four tones and marking each zone on the pumpkin. Work from the thinnest, most distant elements like the sky down to the deepest cutout, the fire. Step back with the light on partway through to check that your contrast is reading the way you want.

Will the thin pine trees survive carving?

They will if you leave small bridges of skin connecting the branches and tips rather than cutting them free. Bridges keep fragile points supported so they do not snap or sag. Keep the trees as shaded relief instead of full cutouts, which also protects the pumpkin wall.

Why cut the access hole in the bottom instead of the top?

A bottom hole leaves the entire front face open for your scene and lets you set the pumpkin down over the light like a lid. It also keeps the stem intact for a natural look. Just scrape the interior wall thin behind the fire and moon so those areas glow strongest.

Your take belongs here, too.

Changed a detail? Made it simpler? Share a photo of your version and tell the community what worked.

Share your pumpkin

More pumpkins like this

You've reached the end · 8 pumpkins
The Patch Report

Fresh pumpkins, in your inbox.

The best new carvings, ideas worth stealing, and how-tos for carving season. Short, seasonal, and gone by November.

A short email during carving season. Unsubscribe anytime. See our privacy policy.