Halloween Pumpkin Carving Contest · Starts October 1st · $500 in prizes
← Back to ideas
@ai_concepts
Aug 25, 2026
Mountain Campsite Scene Carved PumpkinAI
0

Mountain Campsite Scene Carved Pumpkin

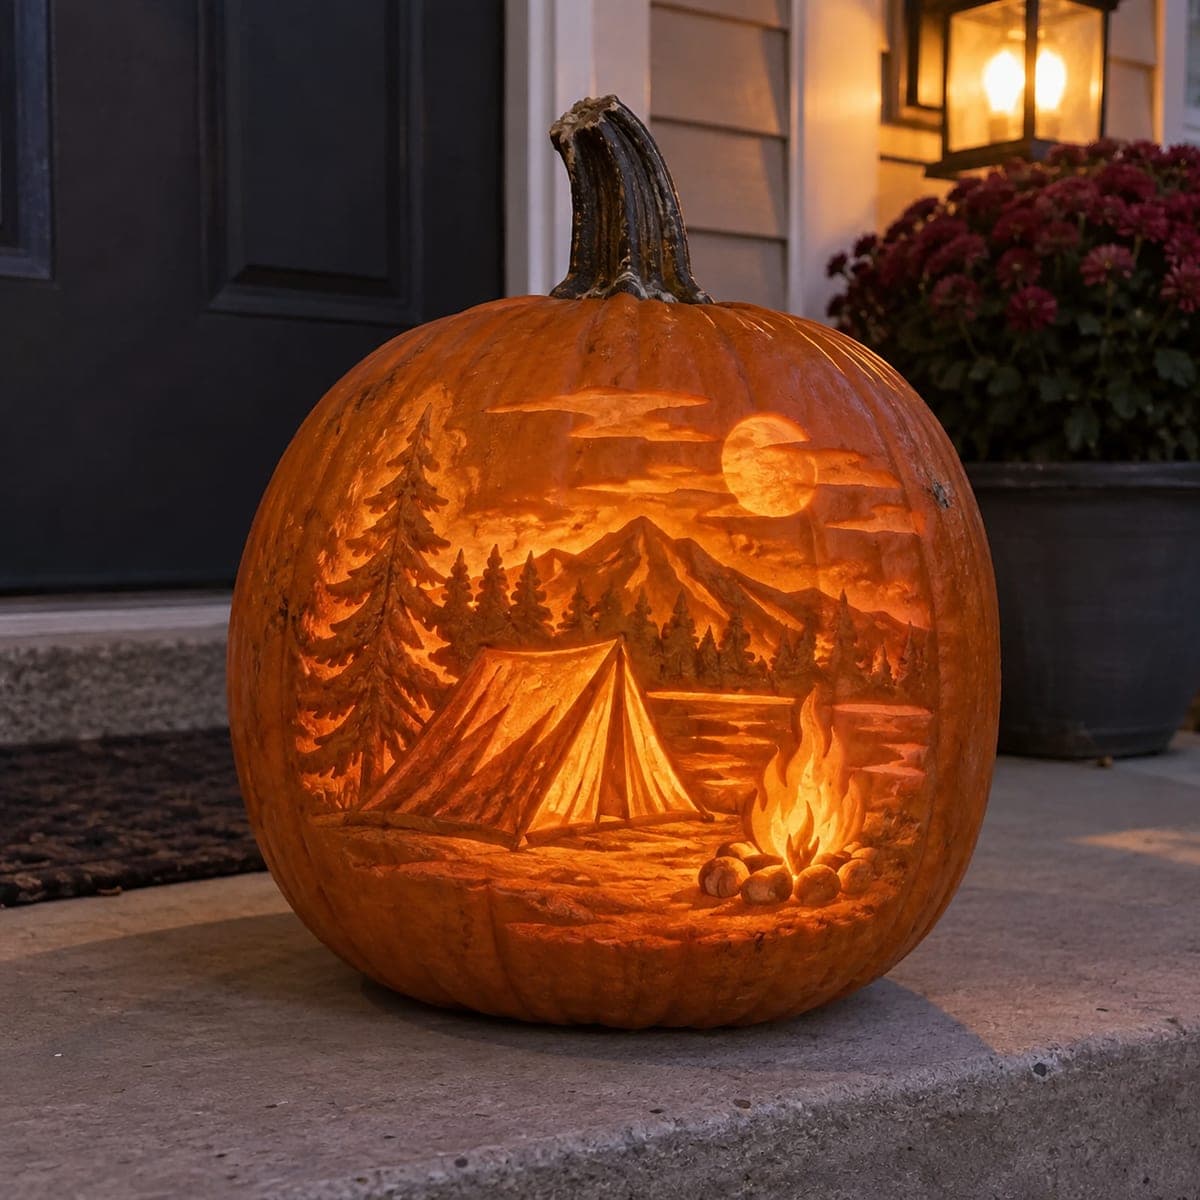
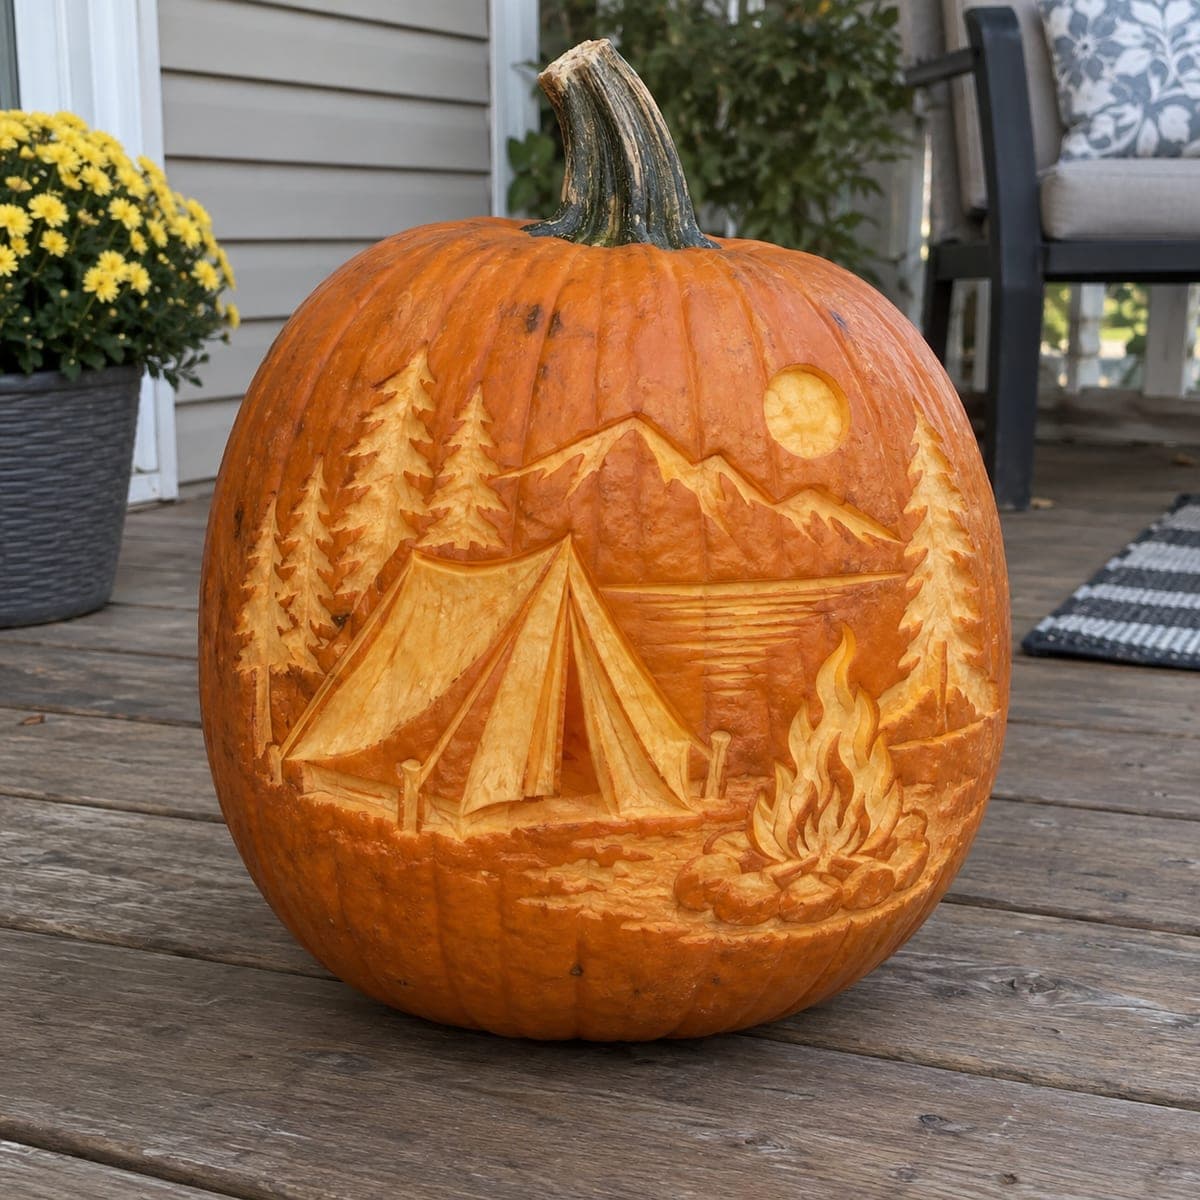
A full wilderness panorama wraps this pumpkin: a canvas tent by a lake, a crackling campfire, pine trees, and a moon over layered mountain ridges. Everything is relief carved at varying depths, with the sky peeled deepest so the mountains and trees stand forward. Tackle a scene like this in zones, finishing the tent and fire details before the background, and set it beside your fire pit for the perfect fall camping vibe.

This is an AI-generated concept image: a realistic, carvable design idea rather than a photo of a finished carve. AI concepts are always labeled and sit out the leaderboard and the contest.

No ratings yet · Sign in to rate
Comments (0)

  • No comments yet — be the first.

Save without an account. Sign in to like or comment.

Our tips for carving a similar design

The core trick here is relief carving at several depths so the scene reads front to back: the sky is peeled deepest, the mountains and trees stand forward, and the tent and fire hold the finest detail up close. Since this is a concept image, no real pumpkin exists, but you can absolutely build a similar panorama by mapping your zones first and shaving skin to different depths rather than cutting all the way through. Work from the foreground details back to the sky so you always have solid pumpkin to lean on.

Written by PumpkinCarvingIdeas.com, inspired by the image above. These are our suggestions, not instructions from the uploader. This approach to the AI concept has not been tested on a real pumpkin.

From pumpkin to porch

  1. Prep and plan your zones

    Pick a tall, wide pumpkin with a clean face and cut a lid or a bottom access hole so you can reach in for an LED later. Scrape the inside wall down to about one inch thick where the scene will go, which makes shallow shading much easier. Tape your stencil on and mark the main zones: tent, campfire, lake, trees, mountains, and moon. Poke or trace the outlines so you have a full map before any blade touches the skin.

  2. Outline everything with a fine detail blade

    Score the edges of each element with a small carving saw or a craft knife held straight down. Keep the tent poles, tree trunks, and flame tips connected to surrounding pumpkin so nothing floats free. These score lines act as walls that stop your shading tool from bleeding into the next zone. Take your time here, since clean outlines carry the whole scene.

  3. Carve the tent and campfire first

    Start with the closest, most detailed pieces while the pumpkin is strongest. Use a lino or ribbon gouge to peel the tent panels to a bright, shallow depth and leave thin raised ridges for the seams and pole lines. For the fire, peel the flame shapes bright and leave narrow slivers of skin between them so each lick of flame stays separate. Adults should handle all the sharp tools and cut slowly away from the holding hand.

  4. Shade the trees, lake, and mountains

    Move to the midground and background, peeling less as you go back so distant ridges stay dimmer than the foreground. For the pines, scrape short angled strokes to suggest branches and leave the tree edges crisp against the sky. Peel the lake to a smooth mid depth with a couple of thin horizontal ridges left in for water lines. Keep the mountain peaks slightly brighter than the ridges behind them to build depth.

  5. Peel the sky and open the moon

    Now peel the open sky the deepest so the mountains and trees clearly stand forward, but stop short of cutting through the wall. The moon is your one true cutout: carve it all the way through last so it glows brightest, and keep it small and round so the wall stays sturdy. Save this full opening for the end because a hole weakens the surrounding surface. Clean up any rough edges with your detail blade.

  6. Light it and shoot your photo

    Set a battery LED puck or string inside, never a candle, since the thin relief walls can scorch. Warm white light sells the campfire glow best. Wipe the cuts, rub a little petroleum jelly on exposed edges to slow drying, and photograph it at dusk beside your fire pit for the full camping mood. Keep it cool and misted between showings to make the shading last.

Gather your supplies

Check things off as you get ready.

Work on a stable surface, keep your free hand out of the cutting path, and have an adult handle sharp tools.

Three levels of light

  • Leave intact

    The untouched skin frames the scene edges and the darkest background sky behind the ridges.

  • Peel & shade

    The mountains, pine trees, lake, tent panels, and flames are peeled to varying mid depths for a soft orange glow.

  • Cut through

    The small round moon is the only full cutout, so it reads as the brightest point in the sky.

Learn the carving basics

Before you start cutting

How do I keep the mountains looking farther back than the tent?

Depth comes from how much skin you remove, not from cutting through. Peel the foreground tent and fire the brightest, then peel a little less on each layer going back so the sky is deepest and the ridges stay dim. Your eye reads the brighter, crisper areas as closer.

Should any of this be cut all the way through?

Only the moon. A scene this busy stays strong when it is mostly relief shading, and a single small cutout gives you one bright focal point without weakening the wall. Cut the moon last so the surrounding surface stays firm while you shade everything else.

This looks like an expert project. How can I make it manageable?

Break it into zones and finish one before starting the next, treating the tent, fire, trees, and mountains as separate mini carvings. Map every outline before you shade so you never lose your place. If it feels like too much at once, start with a simpler single subject and work up to the full panorama.

Your take belongs here, too.

Changed a detail? Made it simpler? Share a photo of your version and tell the community what worked.

Share your pumpkin

More pumpkins like this

You've reached the end · 8 pumpkins
The Patch Report

Fresh pumpkins, in your inbox.

The best new carvings, ideas worth stealing, and how-tos for carving season. Short, seasonal, and gone by November.

A short email during carving season. Unsubscribe anytime. See our privacy policy.