Halloween Pumpkin Carving Contest · Starts October 1st · $500 in prizes
← Back to ideas
@ai_concepts
Jul 22, 2026
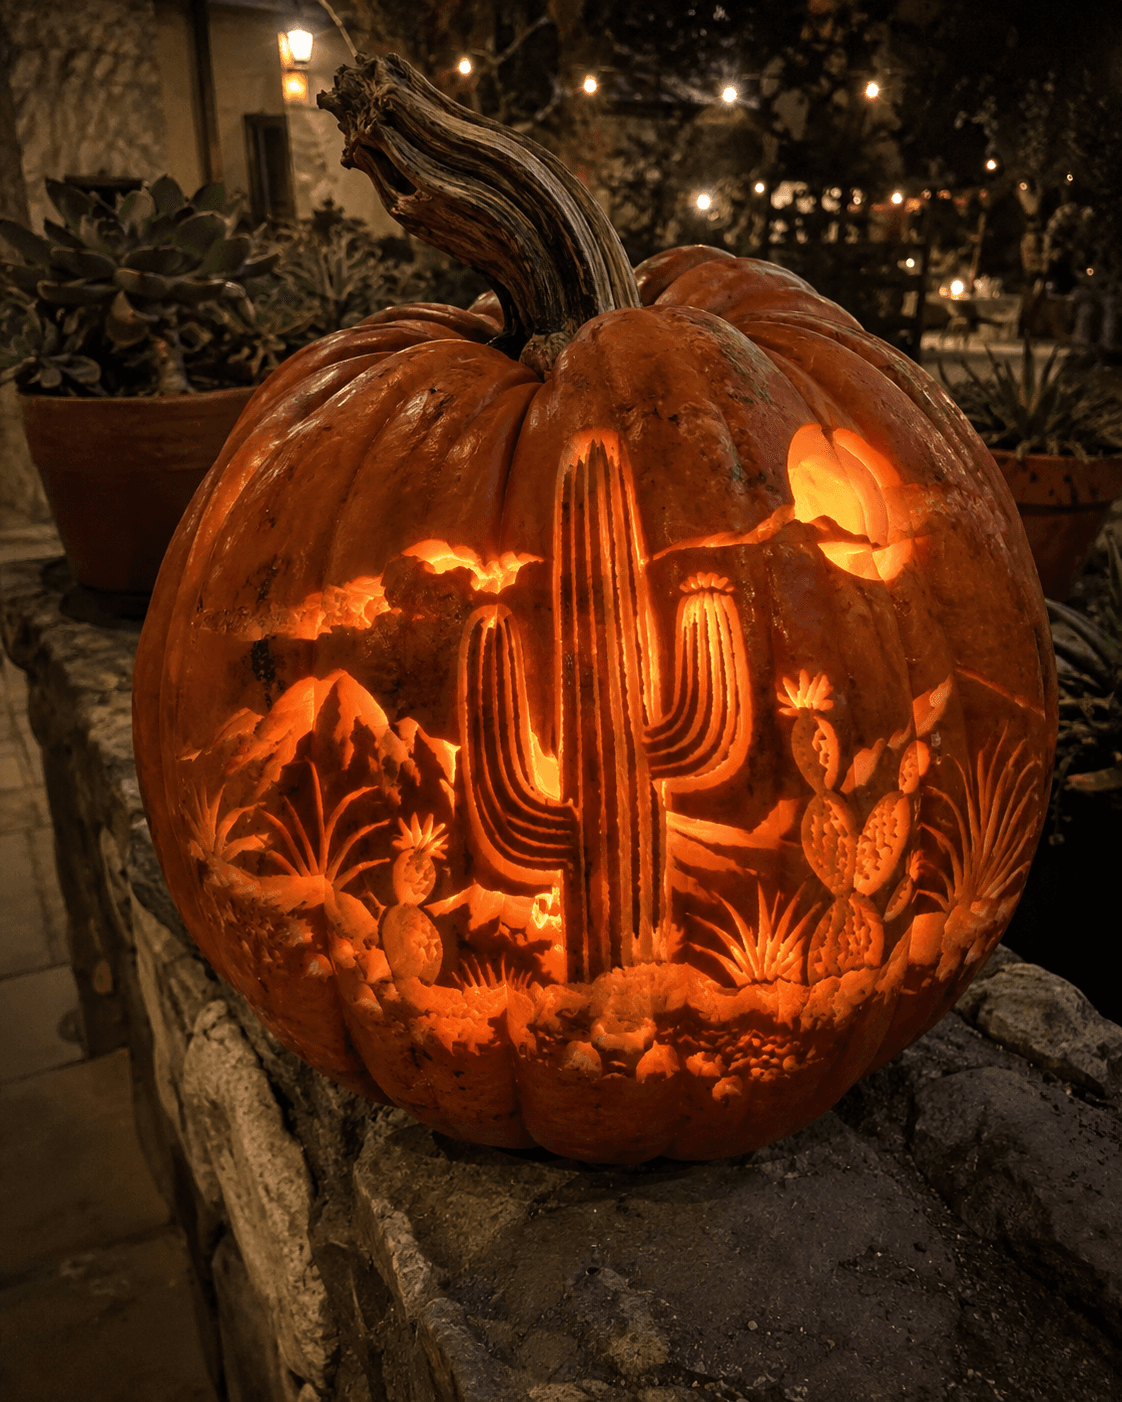
Desert Saguaro Cactus Scene Relief PumpkinAI
0

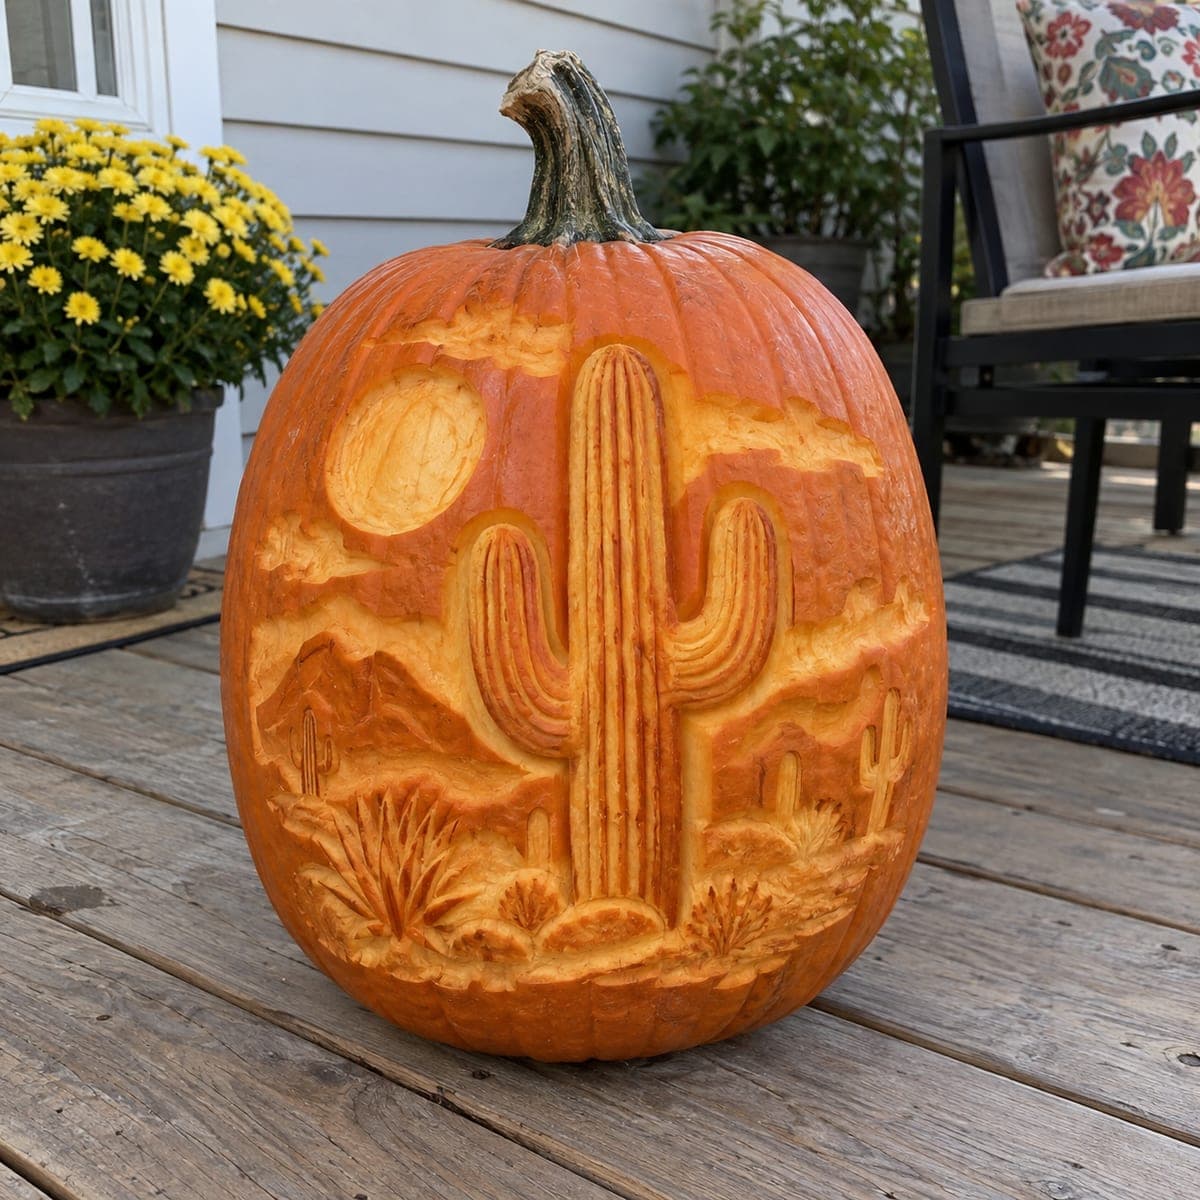
Desert Saguaro Cactus Scene Relief Pumpkin

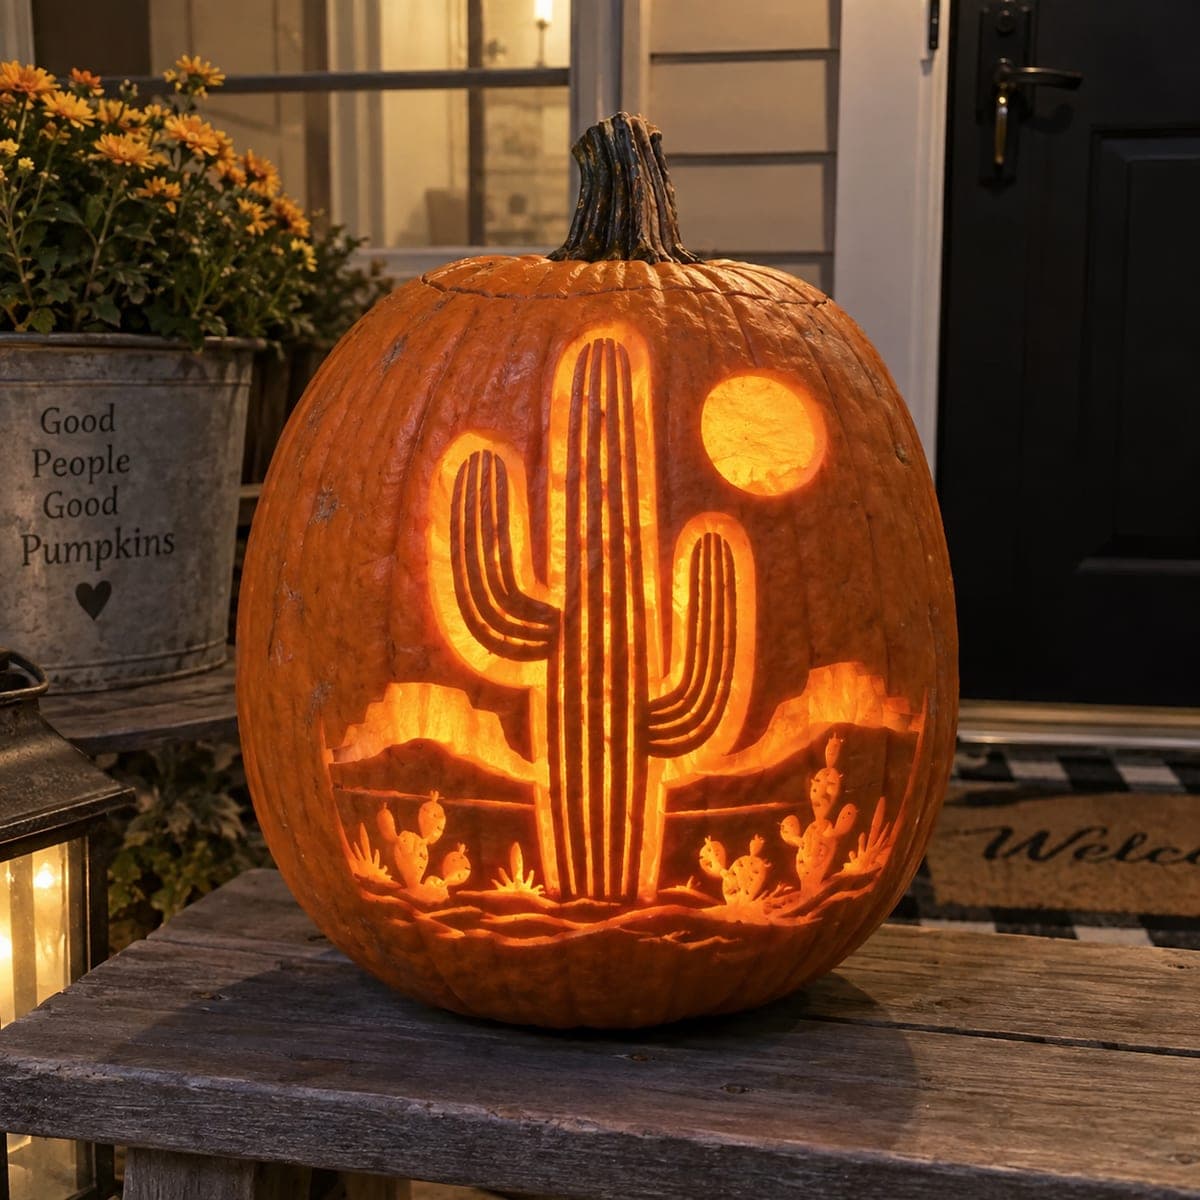
Saguaro cactus arms rise against carved desert mountains, a full sun, and scattered agave on this southwestern relief pumpkin. Layered depths separate sky, ridgeline, and foreground so the scene reads clearly even without a light inside. Map the horizon line first and carve the background shallowest, stepping deeper toward the foreground plants to build the sense of distance.

This is an AI-generated concept image: a realistic, carvable design idea rather than a photo of a finished carve. AI concepts are always labeled and sit out the leaderboard and the contest.

No ratings yet · Sign in to rate
Comments (0)

  • No comments yet — be the first.

Save without an account. Sign in to like or comment.

Our tips for carving a similar design

The core trick here is relief carving, where you shave skin to different depths instead of cutting all the way through. Peel the background shallow and step progressively deeper toward the foreground plants so the sky, mountain ridge, and agave separate into layers. The saguaro stays raised and nearly untouched, which lets it stand forward as the hero of the scene.

Written by PumpkinCarvingIdeas.com, inspired by the image above. These are our suggestions, not instructions from the uploader. This approach to the AI concept has not been tested on a real pumpkin.

From pumpkin to porch

  1. Prep and transfer the scene

    Pick a tall pumpkin with a broad, smooth front and scoop the pulp from the bottom so the wall is about an inch thick. Tape your desert stencil in place and poke through the outlines of the sun, saguaro, mountain ridgeline, and foreground plants. Connect the dots lightly with a washable marker. Map the horizon line first so you always know where the ground and sky meet.

  2. Outline every shape with a shallow score

    Using a fine detail knife or a small U-gouge, trace each element with a shallow score line to lock the composition. Keep the saguaro body and its two arms clearly separated from the sky behind them. Score around the sun disk and the mountain edges so those borders stay crisp. Do not remove any skin yet, just set your boundaries.

  3. Peel the sky and set the shallowest layer

    Skin the sky area behind the ridgeline first, removing only the outer orange layer for a soft mid glow. Keep this pass even and shallow since it sits farthest back. Leave the sun disk raised and mostly untouched so it stays lighter and pops against the peeled sky. Work in the same direction to keep the surface smooth.

  4. Step deeper for the mountains and midground

    Carve the mountain ridge and distant midground a little deeper than the sky to push them forward visually. Round the ridgeline gently and shade the far small cacti with light gouge strokes so they read as distant. Each layer toward the viewer should sit noticeably lower than the one behind it. Keep testing the depth by eye from a step back.

  5. Shape the saguaro and foreground plants

    Leave the main saguaro standing high and carve away the ground around it, then run shallow vertical grooves down the trunk and arms to suggest the cactus ribs. Carve the agave and grasses in the foreground the deepest for the strongest contrast and detail. Use a small gouge for the thin blade shapes, keeping each blade attached at its base so nothing snaps off. This foreground layer anchors the whole scene.

  6. Clean up, light, and photograph

    Go back over every edge to sharpen the transitions between layers and brush away loose shavings. Rub a thin coat of vegetable oil into the carved surfaces to slow browning and deepen the tone. Set a warm LED puck inside, never a candle, to bring a soft glow through the peeled areas. Shoot your photo in low evening light to show off the layered depth.

Gather your supplies

Check things off as you get ready.

Work on a stable surface, keep your free hand out of the cutting path, and have an adult handle sharp tools.

Three levels of light

  • Leave intact

    The raised saguaro trunk, its arms, and the sun disk stay untouched to hold the lightest, boldest shapes.

  • Peel & shade

    The sky behind the ridge and the distant midground get skin-peeled for a soft even glow that reads as depth.

  • Cut through

    No full cutouts are needed here; this is a relief scene, so keep the wall intact and let the LED glow through the thinnest peeled spots.

Learn the carving basics

Before you start cutting

Do I need to cut all the way through anywhere?

No, this design works entirely as a relief carving with no through cuts. The depth comes from peeling and shading skin at different levels, not from open holes. That is why it reads clearly even without a light inside.

How do I keep the saguaro looking three dimensional?

Leave the cactus body raised while carving away the ground and sky around it, so it physically stands proud of the surface. Then add shallow vertical grooves down the trunk and arms to mimic the ribs. Shading the sides slightly deeper than the center rounds it out.

Since this is an AI concept, can a real pumpkin hold all this detail?

Yes, as long as you keep the thin agave blades attached at the base and avoid undercutting the saguaro arms too far. Work on a thick, firm pumpkin wall and carve the deepest foreground details last. Treat the picture as inspiration and simplify any area that feels too fragile.

Your take belongs here, too.

Changed a detail? Made it simpler? Share a photo of your version and tell the community what worked.

Share your pumpkin

More pumpkins like this

You've reached the end · 8 pumpkins
The Patch Report

Fresh pumpkins, in your inbox.

The best new carvings, ideas worth stealing, and how-tos for carving season. Short, seasonal, and gone by November.

A short email during carving season. Unsubscribe anytime. See our privacy policy.