Halloween Pumpkin Carving Contest · Starts October 1st · $500 in prizes
← Back to ideas
@ai_concepts
Sep 5, 2026
Saguaro Cactus Desert Scene Carved PumpkinAI
0

Saguaro Cactus Desert Scene Carved Pumpkin

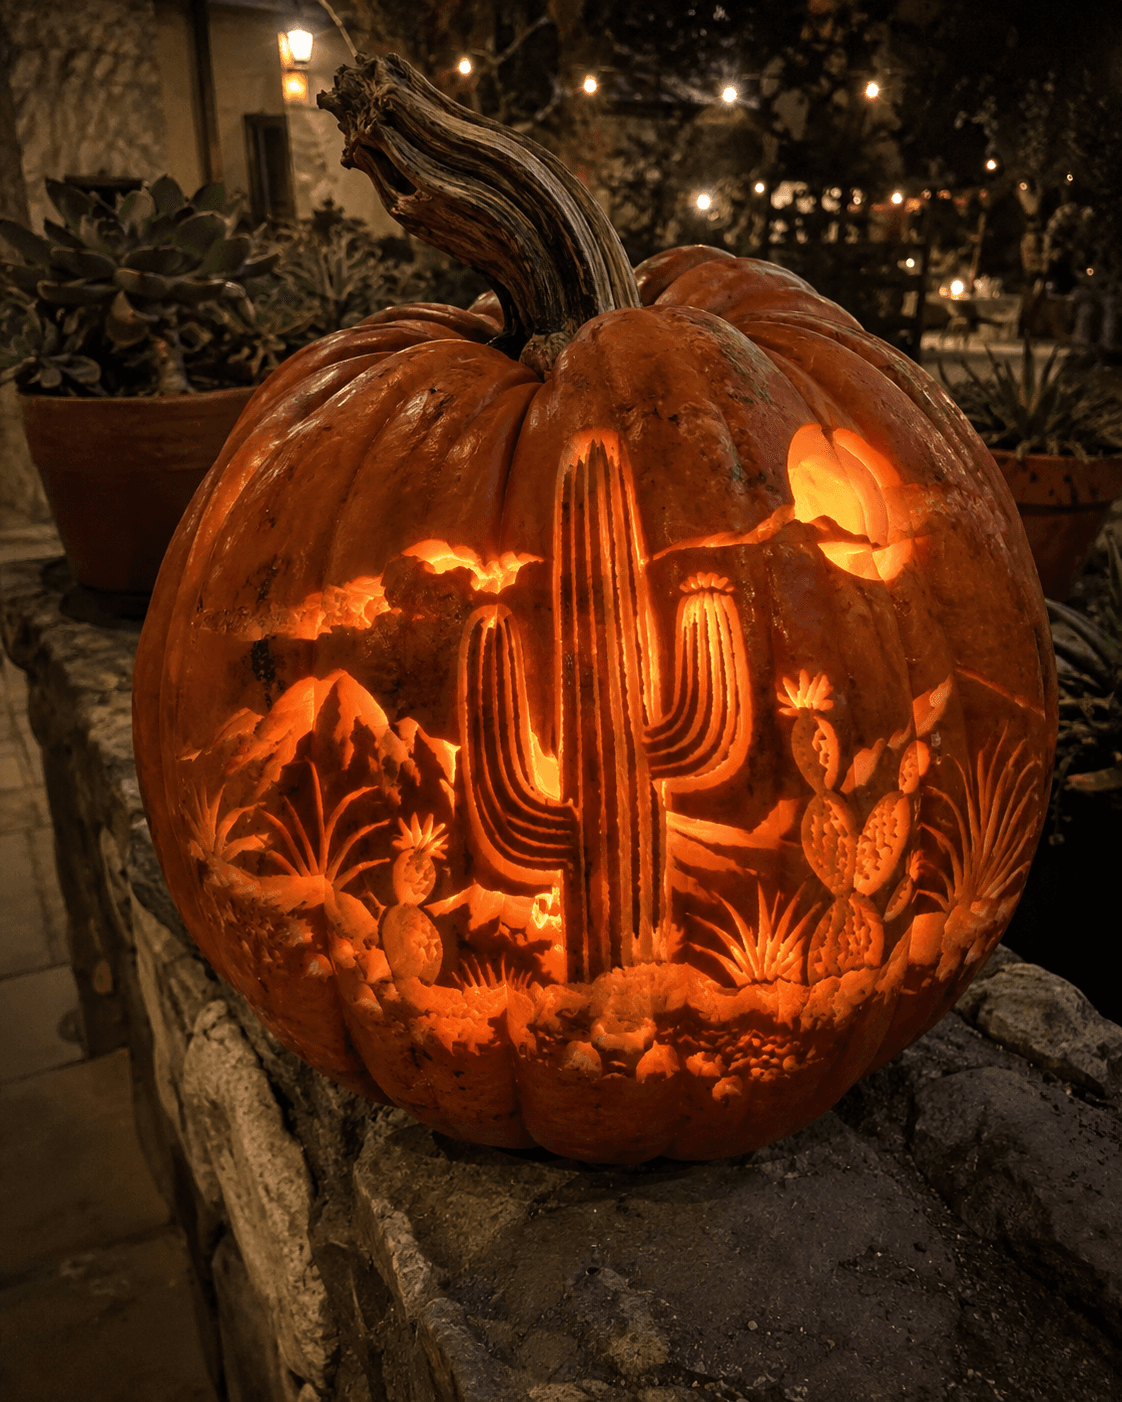
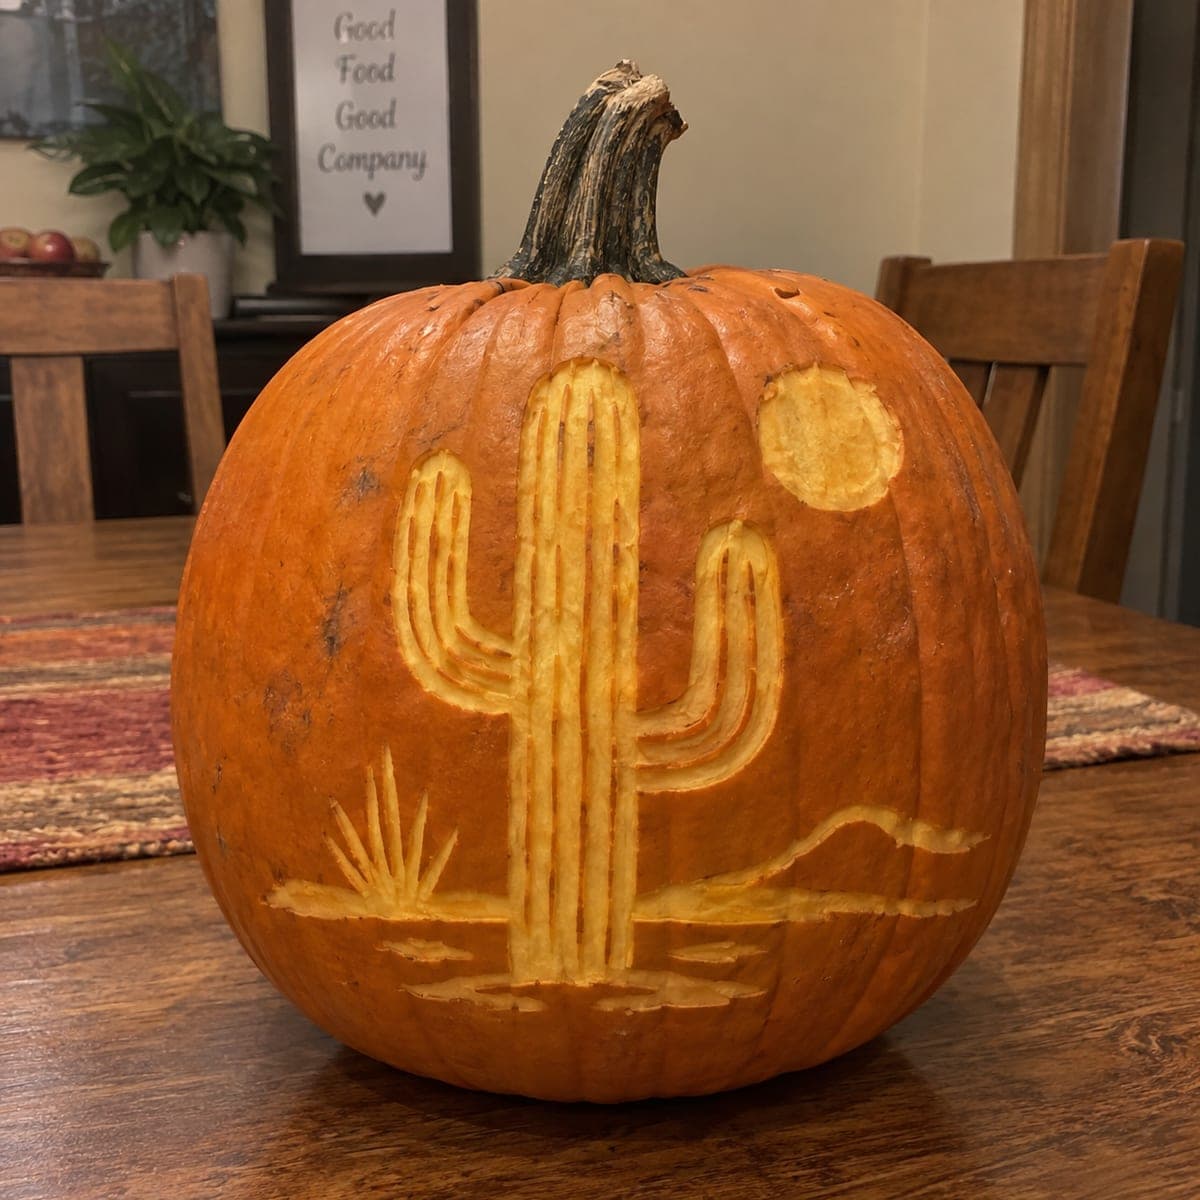
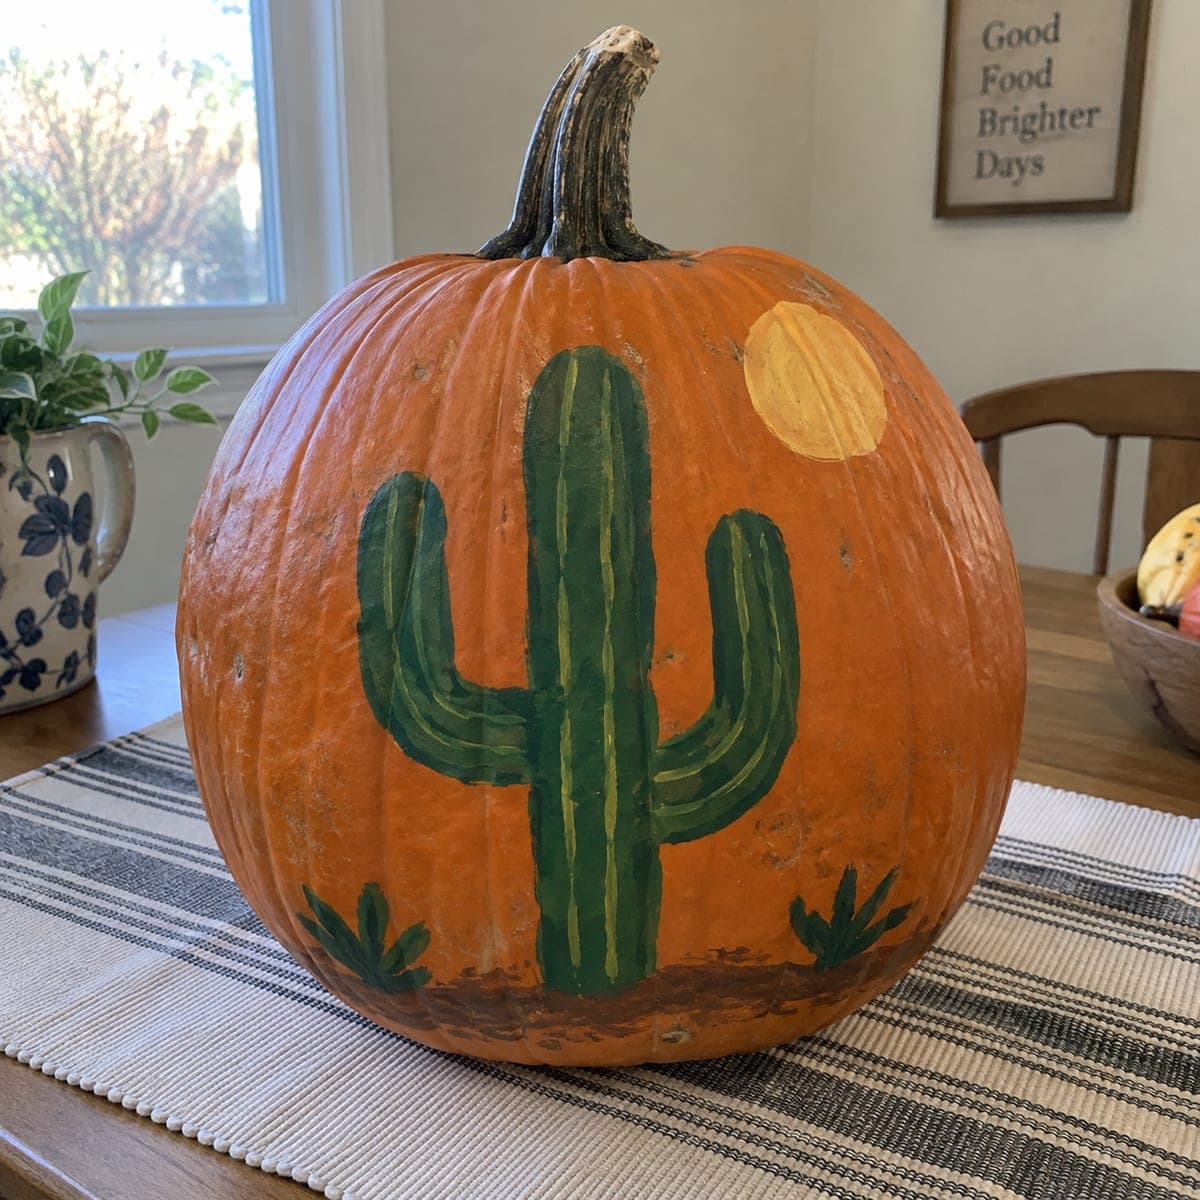
A tall saguaro cactus rises beside a full desert sun on this etched pumpkin scene, with distant hills, scrub grass, and scattered stones sketched along the base. Everything is shallow skin removal, no pierced cuts, so the design shows cleanly by daylight and suits fall decor beyond Halloween. Use a v-gouge for the cactus ridges and a wide peeler for the sun to keep the two textures distinct.

This is an AI-generated concept image: a realistic, carvable design idea rather than a photo of a finished carve. AI concepts are always labeled and sit out the leaderboard and the contest.

No ratings yet · Sign in to rate
Comments (0)

  • No comments yet — be the first.

Save without an account. Sign in to like or comment.

Our tips for carving a similar design

The whole scene relies on shallow skin removal, so nothing is cut all the way through and the picture reads cleanly even in daylight. The trick is contrasting two textures: fine ridged lines for the cactus and a smooth wide peel for the sun. Since this is a concept image, treat it as a plan for how you could etch a similar southwestern scene onto a real pumpkin.

Written by PumpkinCarvingIdeas.com, inspired by the image above. These are our suggestions, not instructions from the uploader. This approach to the AI concept has not been tested on a real pumpkin.

From pumpkin to porch

  1. Prep and pick a flat face

    Choose a tall, round pumpkin with a broad, blemish-free front panel for your scene. Wipe the surface clean and dry it. Since this design uses only surface etching, you can gut the pumpkin lightly or leave it whole and add an LED later through a small back door. An adult should handle all blades throughout.

  2. Transfer the layout

    Tape your stencil or sketch the composition with a washable marker: a tall central saguaro, two shorter arms reaching up, a full round sun to the upper right, and a low horizon with hills, scrub, and small stones near the base. Keep the cactus roughly centered and give the sun its own open space so the textures do not crowd. Poke light guide dots along the main outlines if you are using a paper stencil. Step back and check the proportions before you cut anything.

  3. Outline everything shallow

    With a small V-gouge, trace the outlines of the cactus, sun, hills, and grass, going only a few millimeters deep through the skin. Keep the tool moving away from your holding hand and take slow, steady passes. These shallow channels lock in your shapes so the wider peeling stays neat. Do not pierce through to the hollow at any point on this design.

  4. Carve the cactus ridges

    Use the V-gouge to pull long vertical lines down the trunk and up each arm, following the natural flutes of a saguaro. Space them evenly so the cactus keeps its ribbed texture. Then lightly scrape the skin between the ridges so the body glows while the grooves stay a touch darker. Add a small burst of straight radiating lines at the base for scrub grass.

  5. Peel the sun and horizon

    Switch to a wide ribbon loop or peeler and remove the skin inside the sun circle in one smooth, even field so it reads as a soft solid disc, distinct from the ridged cactus. Peel the hills and the thin foreground stone shapes the same way, keeping them shallow. Vary how much skin you take to suggest near and far: lighter scraping for distant hills, slightly deeper for nearby stones. Clean up any ragged edges with the V-gouge.

  6. Light it and photograph

    Set a warm LED puck or string inside, or simply display it as a daytime piece since the etching shows without backlight. If you want a glow, a battery LED behind a small back opening keeps the front intact. Shoot in low room light to catch the texture contrast between the smooth sun and the ribbed cactus. Mist the etched areas with water daily to slow browning.

Gather your supplies

Check things off as you get ready.

Work on a stable surface, keep your free hand out of the cutting path, and have an adult handle sharp tools.

Three levels of light

  • Leave intact

    The background sky, the deep grooves between cactus ridges, and all untouched skin stay dark orange.

  • Peel & shade

    The cactus body, the sun disc, the hills, scrub grass, and foreground stones are skin-peeled for a soft glow.

  • Cut through

    This etched design has no pierced cutouts; if you want one bright spot, you could cut fully through the sun circle only, saving it for last.

Learn the carving basics

Before you start cutting

Do I need to hollow the pumpkin if nothing is cut through?

Not for the carving itself, since every element is shallow surface etching. If you want an inner glow, cut a small door in the back and clean out just enough wall to seat an LED. For a pure daytime display you can leave it whole and simply mist it to keep the etched skin fresh.

How do I keep the sun and cactus looking different?

Use two tools and two motions. Pull the sun as one smooth, even peel so it reads as a solid soft disc, and cut the cactus as many fine vertical grooves so it stays ribbed. That texture contrast is what sells the scene, so resist smoothing the cactus or lining the sun.

Will the shallow etching brown quickly?

Peeled skin oxidizes faster than cut edges, so expect some darkening within a day or two. Mist the etched areas with water and wipe them, then store the pumpkin somewhere cool between showings. A light coat of food-safe oil on the exposed flesh can also slow the browning.

Your take belongs here, too.

Changed a detail? Made it simpler? Share a photo of your version and tell the community what worked.

Share your pumpkin

More pumpkins like this

You've reached the end · 8 pumpkins
The Patch Report

Fresh pumpkins, in your inbox.

The best new carvings, ideas worth stealing, and how-tos for carving season. Short, seasonal, and gone by November.

A short email during carving season. Unsubscribe anytime. See our privacy policy.