Halloween Pumpkin Carving Contest · Starts October 1st · $500 in prizes
← Back to ideas
@ai_concepts
Aug 17, 2026
Campsite Tent and Campfire Etched PumpkinAI
0

Campsite Tent and Campfire Etched Pumpkin

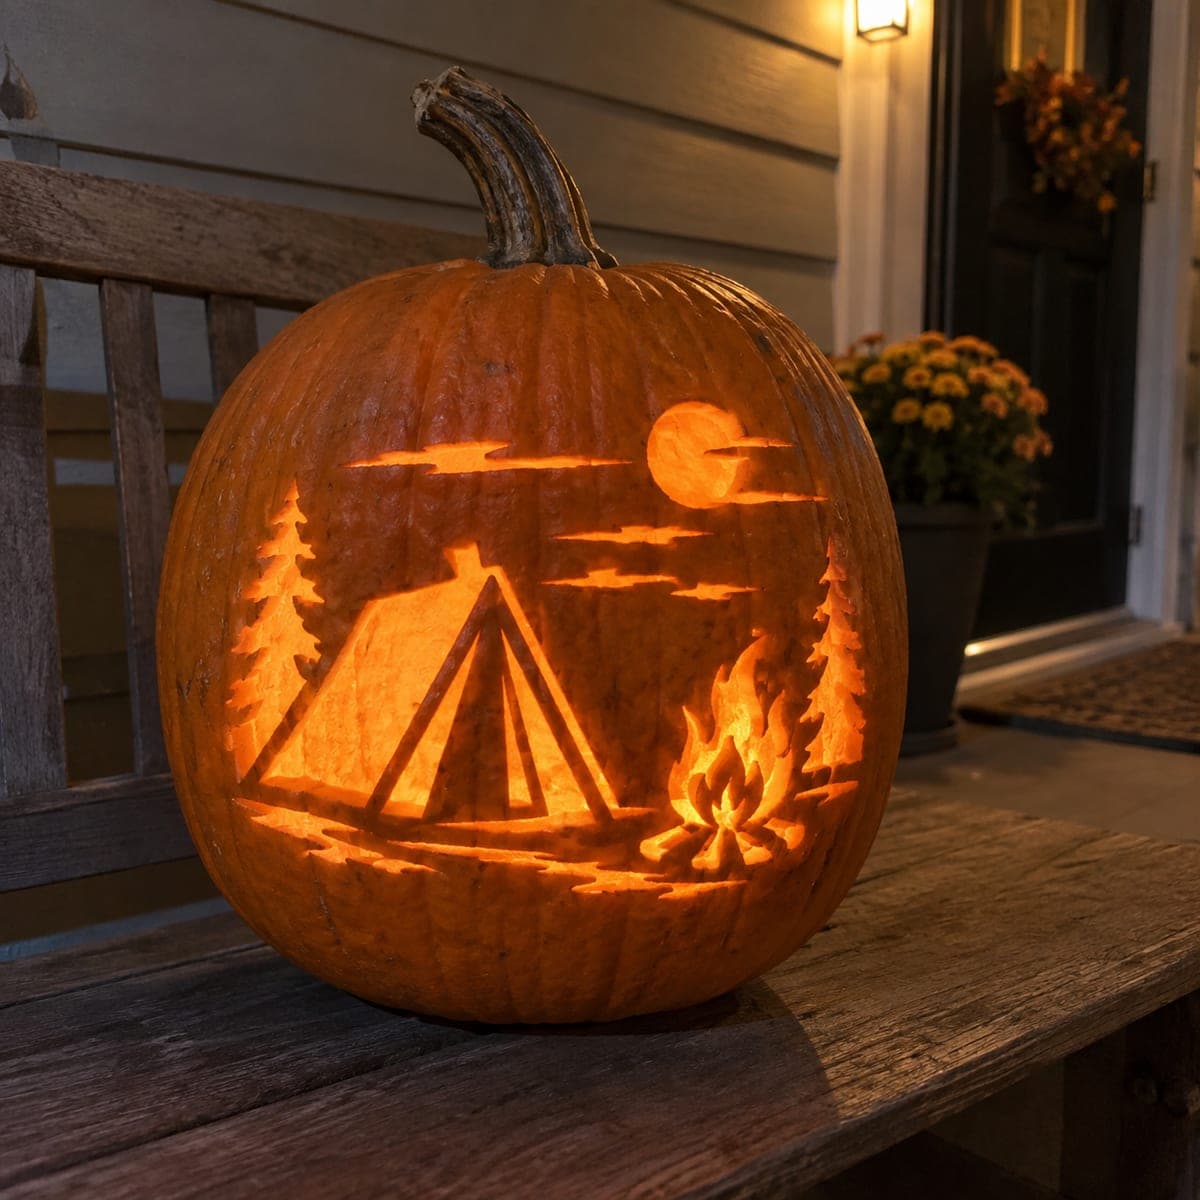
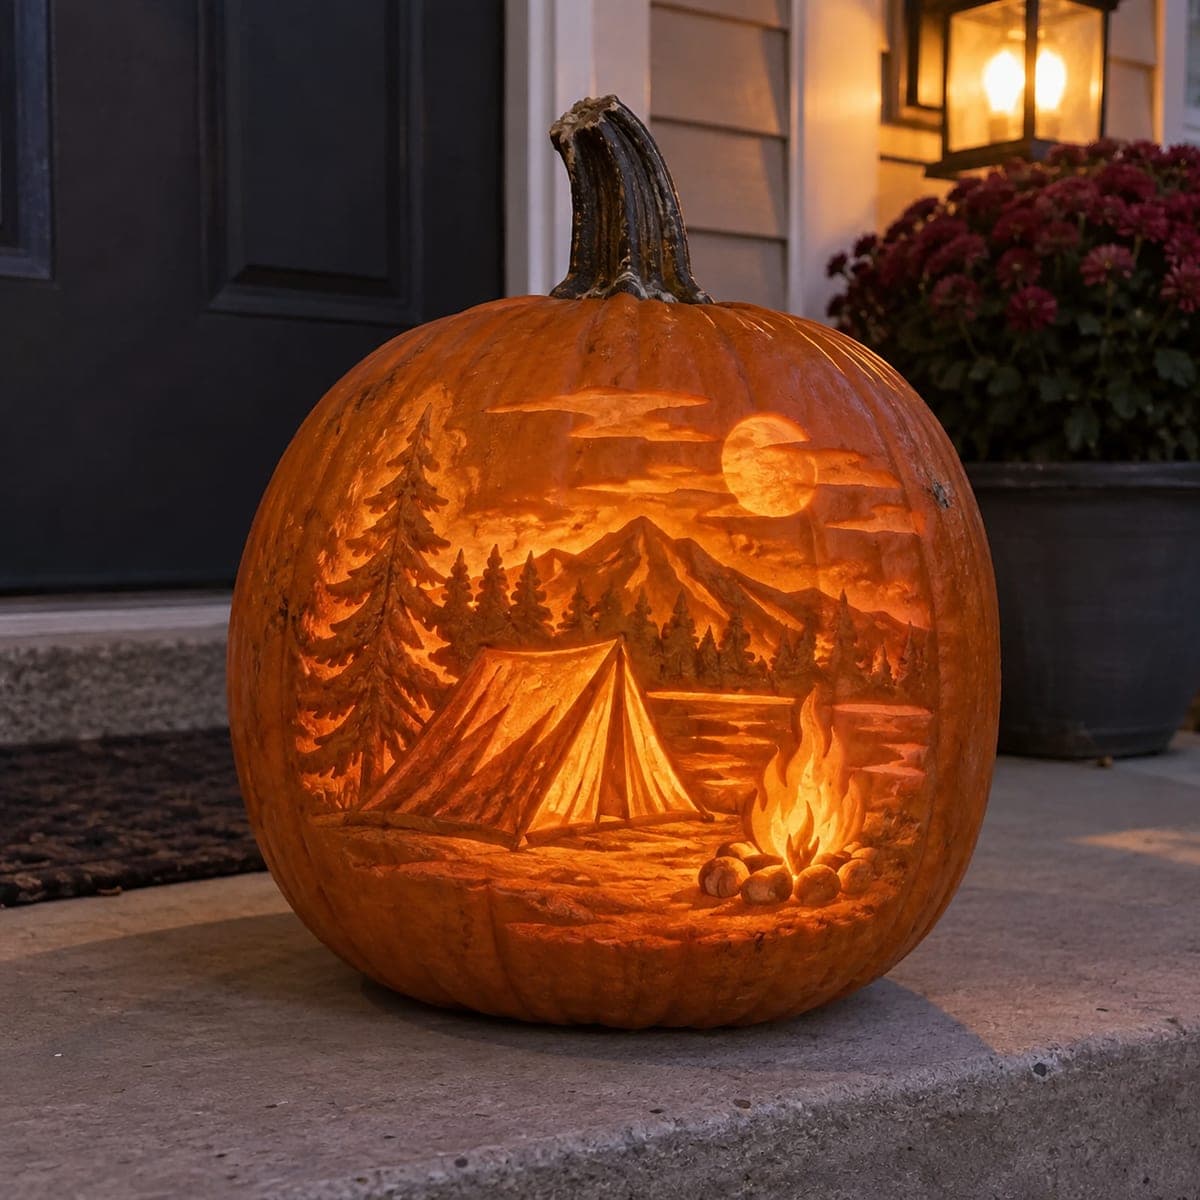
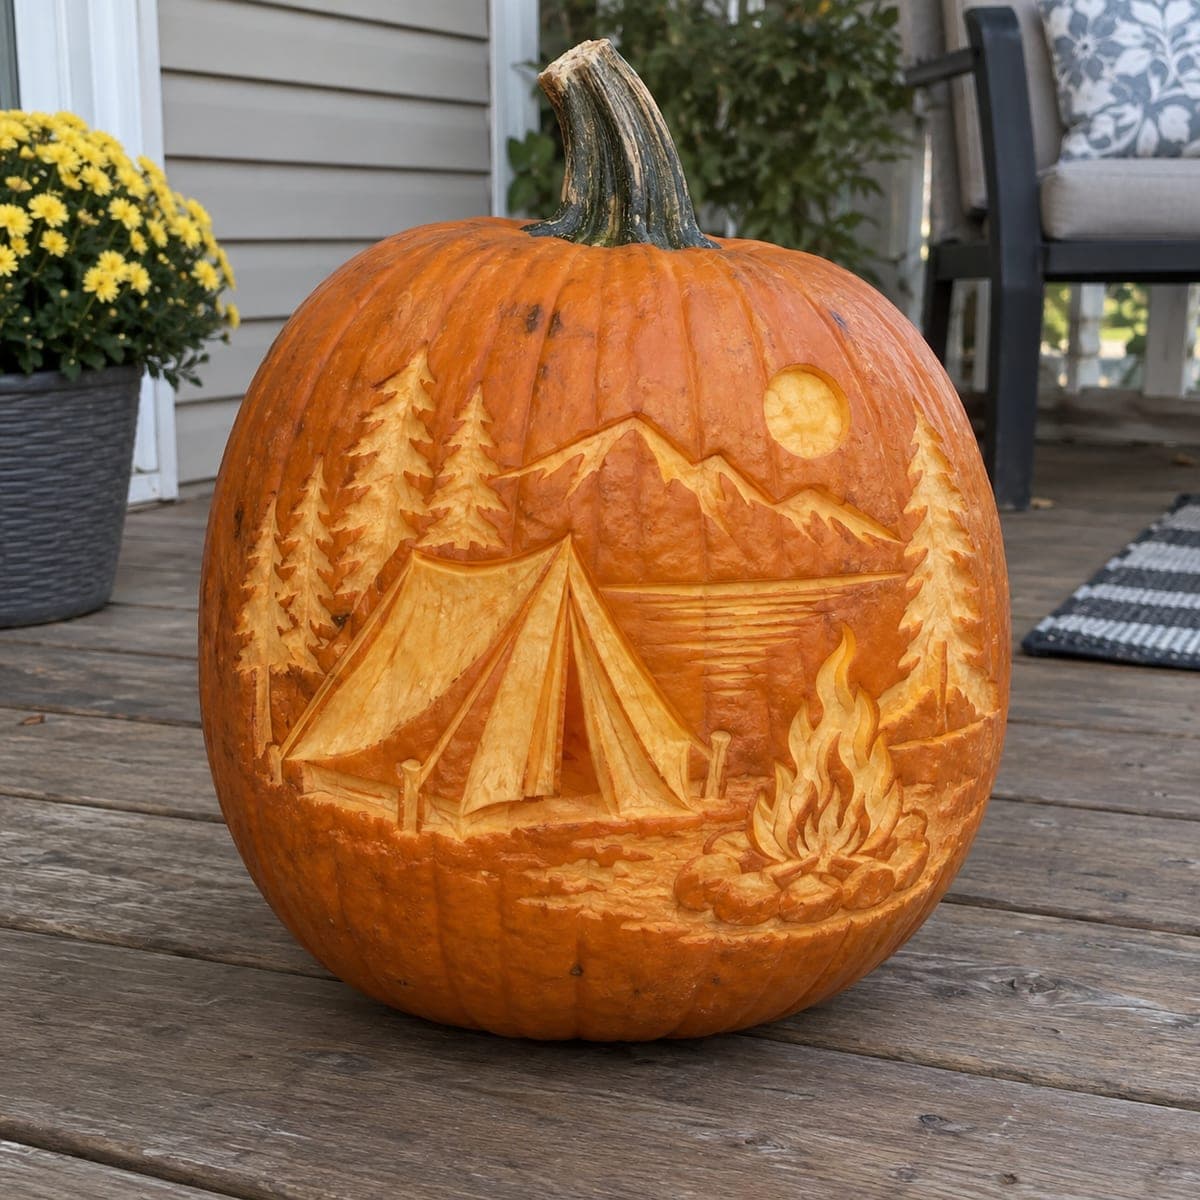
A cozy campsite spreads across this pumpkin in clean pictogram style: a peaked tent between two pine trees, a crackling campfire on stacked logs, and a full moon overhead. Each element is peeled flat to the same pale layer, so crisp outlines matter more than shading skill. Space the shapes with chalk before cutting, and use a small gouge for the tree branches. A great gift-style carving for the camping family on your block.

This is an AI-generated concept image: a realistic, carvable design idea rather than a photo of a finished carve. AI concepts are always labeled and sit out the leaderboard and the contest.

No ratings yet · Sign in to rate
Comments (0)

  • No comments yet — be the first.

Save without an account. Sign in to like or comment.

Our tips for carving a similar design

The core trick here is that every element sits on the same pale peeled layer, so the skin is removed to a shallow depth rather than cut all the way through. That means crisp, confident outlines do all the work, and you never have to blend gradients. Plan the layout first so the tent, fire, trees, and moon all read clearly from a few feet away.

Written by PumpkinCarvingIdeas.com, inspired by the image above. These are our suggestions, not instructions from the uploader. This approach to the AI concept has not been tested on a real pumpkin.

From pumpkin to porch

  1. Open the pumpkin and clean the wall

    Cut a lid from the bottom or the back so the front face stays smooth, and use an LED puck light rather than a candle. Scrape the inside wall behind your design down to about one inch thick with a sturdy scoop. A thinner wall peels evenly and glows better. Pat the front dry before you transfer anything.

  2. Lay out the scene with chalk

    Sketch the peaked tent in the center, a pine tree on each side, the campfire with stacked logs to the lower right, and a round full moon up high. Step back and check the spacing before you commit, since this pictogram style depends on even gaps. Keep the moon a clean circle by tracing around a small jar lid. Adjust with a damp cloth until the balance feels right.

  3. Score the outlines

    With a small detail knife, trace every chalk line to a shallow, even depth. Work slowly around the tent peak and the flame tips so the points stay sharp. These score lines become the crisp edges that define each shape, so take your time here more than anywhere else.

  4. Peel the shapes to one layer

    Using a ribbon or U gouge, remove only the orange skin inside each shape down to the pale flesh, keeping the depth consistent across the tent, moon, logs, and flames. Aim for one smooth level so light passes through evenly. Do not cut through the wall on these areas. A steady, shallow pass gives that uniform glow the design relies on.

  5. Detail the pine branches

    Switch to a small V gouge for the layered branches on both trees. Carve short angled strokes stepping down each side of the trunk so the trees read as evergreens. Leave narrow ridges of skin between branch rows so they stay distinct. Blow out crumbs and touch up any ragged edges.

  6. Light it and photograph

    Drop in the LED, set the pumpkin on a plain surface, and dim the room. Check that each element glows at the same brightness, and re-peel any spot that looks dull. Rub a little petroleum jelly on the cut edges to slow drying. Shoot your photo the same night for the freshest look.

Gather your supplies

Check things off as you get ready.

Work on a stable surface, keep your free hand out of the cutting path, and have an adult handle sharp tools.

Three levels of light

  • Leave intact

    The background field around the scene stays as untouched skin and reads dark.

  • Peel & shade

    The tent, campfire, logs, pine branches, and moon are peeled to one pale layer for an even mid glow.

  • Cut through

    No full cutouts are needed, though you could pierce the moon center for a brighter accent if you want.

Learn the carving basics

Before you start cutting

How do I keep all the shapes glowing at the same brightness?

Peel every element to the same shallow depth and keep your gouge angle steady. If one area looks dimmer once the light is in, go back and remove a touch more flesh until it matches. Consistent depth is what sells this etched look.

The tent peak and flame tips are sharp points. How do I stop them from tearing?

Score the outline of each point first with a fresh, thin blade before you gouge the interior. Peel toward the tip, not away from it, so you are not pulling flesh off the edge. Leaving a hair more depth at the very tip also keeps it from crumbling.

Since this is a peeled design, will it dry out faster?

Etched areas expose flesh and can dry within a day or two. Coat the peeled surfaces and cut edges with petroleum jelly, and store the pumpkin somewhere cool between showings. Carving the night before you want to display it gives the crispest result.

Your take belongs here, too.

Changed a detail? Made it simpler? Share a photo of your version and tell the community what worked.

Share your pumpkin

More pumpkins like this

You've reached the end · 8 pumpkins
The Patch Report

Fresh pumpkins, in your inbox.

The best new carvings, ideas worth stealing, and how-tos for carving season. Short, seasonal, and gone by November.

A short email during carving season. Unsubscribe anytime. See our privacy policy.